On Windows 11, by default, when you try to save a file, the application will offer a default location to store it, and this location is usually the main installation drive. The same is true for applications. If you install apps from the Microsoft Store, they will install in the primary storage.
If you have a computer with multiple drives or partitions, you can specify where files are saved and where apps are installed by default using the Settings app.
This guide will walk you through the steps to set a different location to save apps, documents, and other files on Windows 11.
How to change default save location on Windows 11
To set different drive locations to save contents and apps on Windows 11, use these steps:
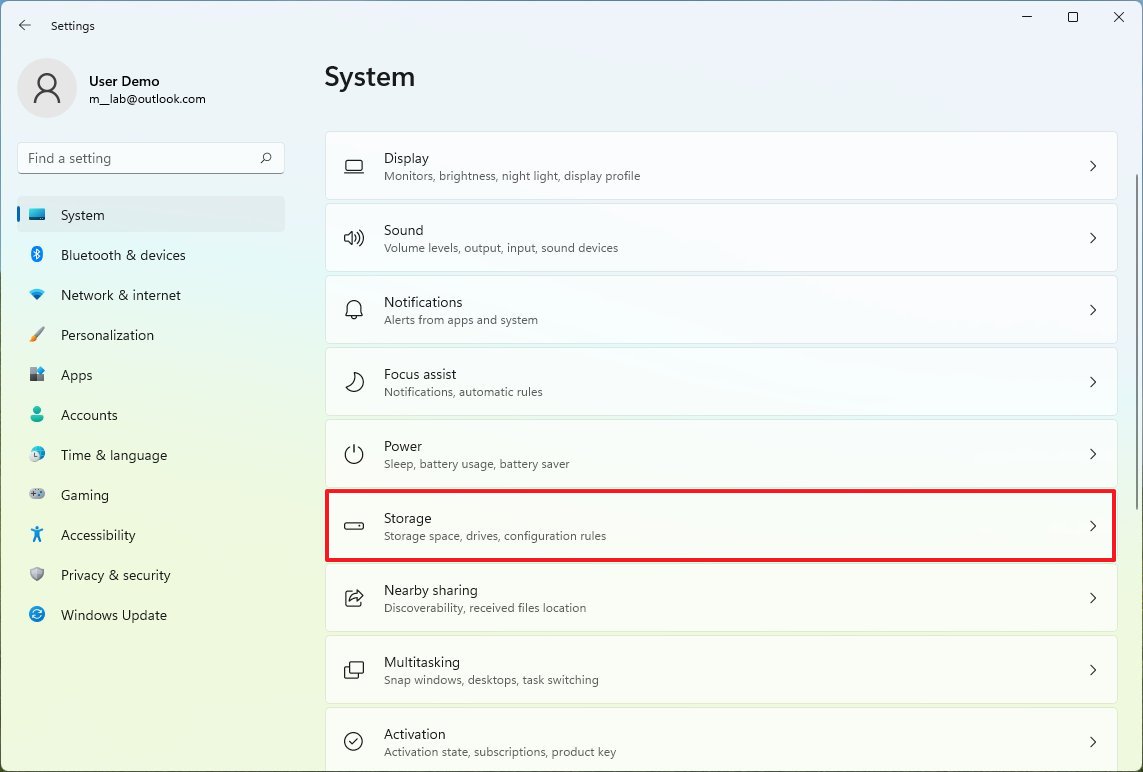
- Open Settings.
- Click on System.
- Click the Storage tab.

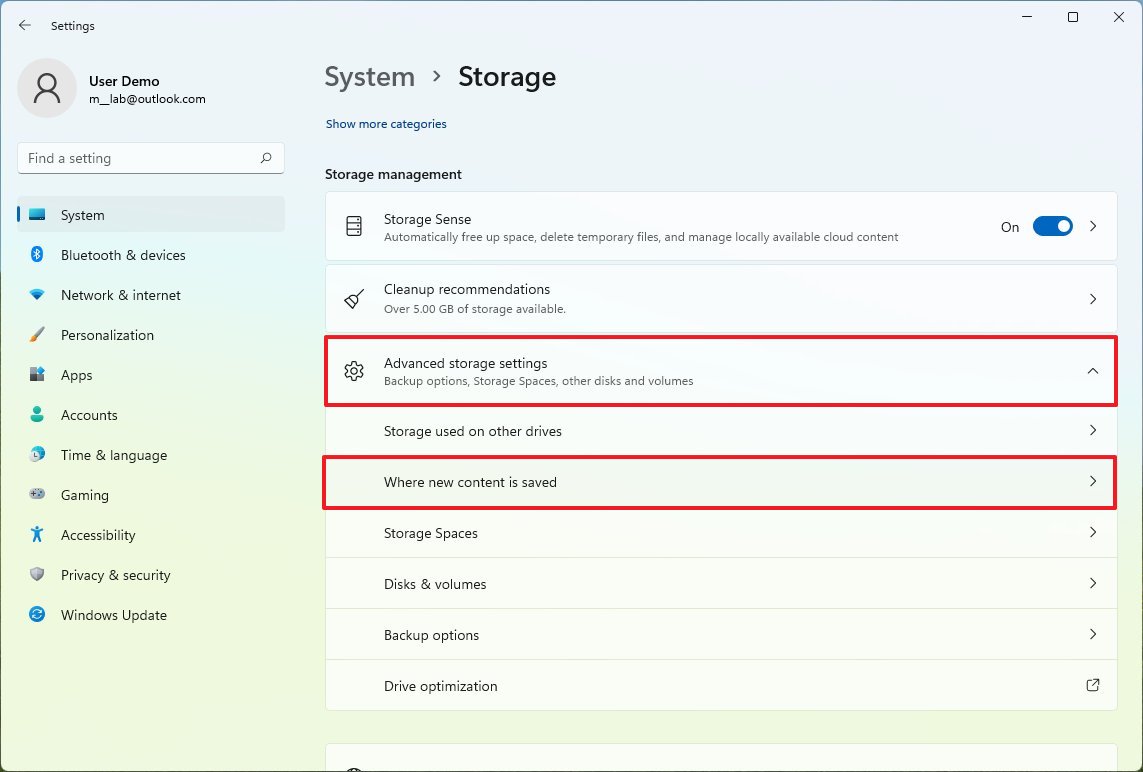
- Under the “Storage management” section, click on “Advanced storage settings.”
- Click the “Where new content is saved” setting.

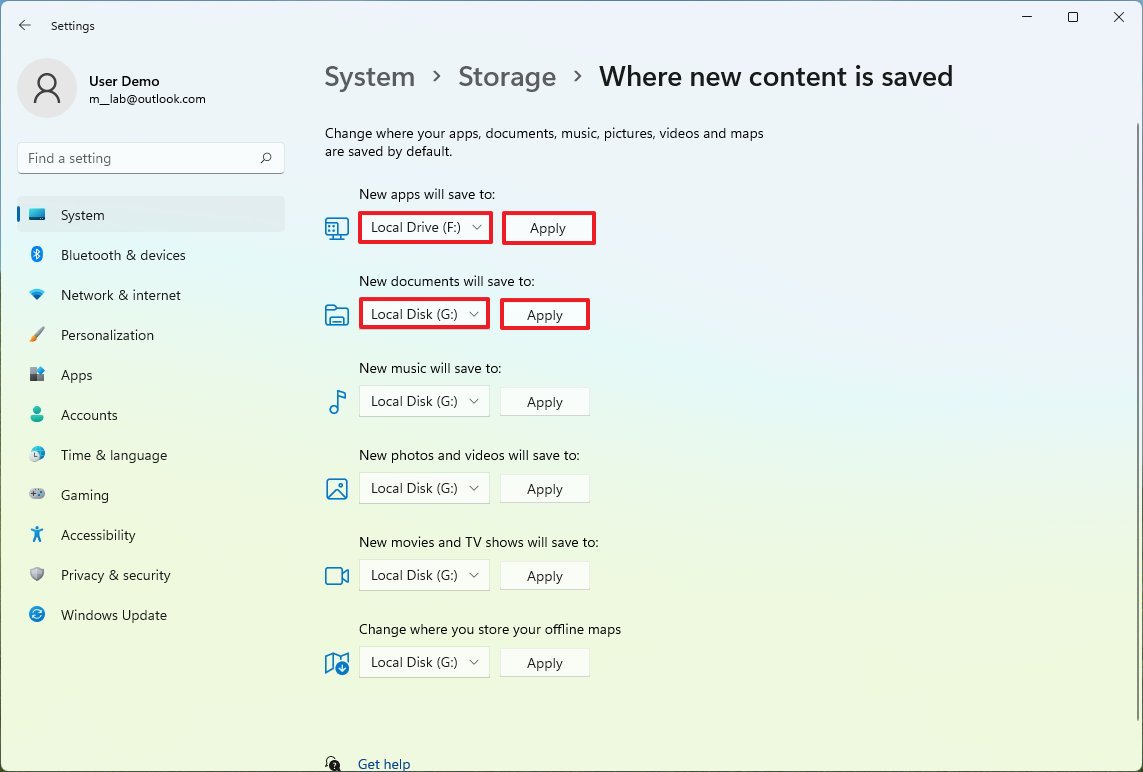
- Use the “New app will save to” drop-down menu and select the location where future apps will install automatically.
- Click the Apply button.
- Use the drop-down menu for each file type (documents, music, photos, movies, and maps) and select the new default save location.
- Click the Apply button for each setting.

Once you complete the steps, the next time you download an app from the Microsoft Store, it will install in the new drive location. Also, the next time you save a file, the new location will be shown as the new default path to store the content automatically.
More resources
For more helpful articles, coverage, and answers to common questions about Windows 10 and Windows 11, visit the following resources:


