

If your Apple ID email is out of date, the change is just as easy at is important to make.
Owning any Apple product at all means you almost definitely have an Apple ID. Whether it be the email attached to your Apple ID being a little outdated or security concerns, changing it is no problem.
Your Apple ID, soon to be rechristened as your Apple Account, is the gateway to the amazing cross-device continuity that Apple has to offer, so it can be very important that yours is up-to-date. As long as you own an Apple device that has internet access, it’s actually no issue at all to change your Apple ID. But, depending on your security settings, the process can take an extra hour.
How to change your Apple ID email
So long as you have Stolen Device Protection turned off, changing the email tied to your Apple ID is a simple as a quick visit to your iPhone or iPad‘s Settings app. You can also make changes on Apple’s website. Either way, the steps remain about the same, but it is important to know how to get to where you need to be in your iOS or iPadOS‘ Settings app.
Changing your Apple ID email in your Settings app only requires a few steps.
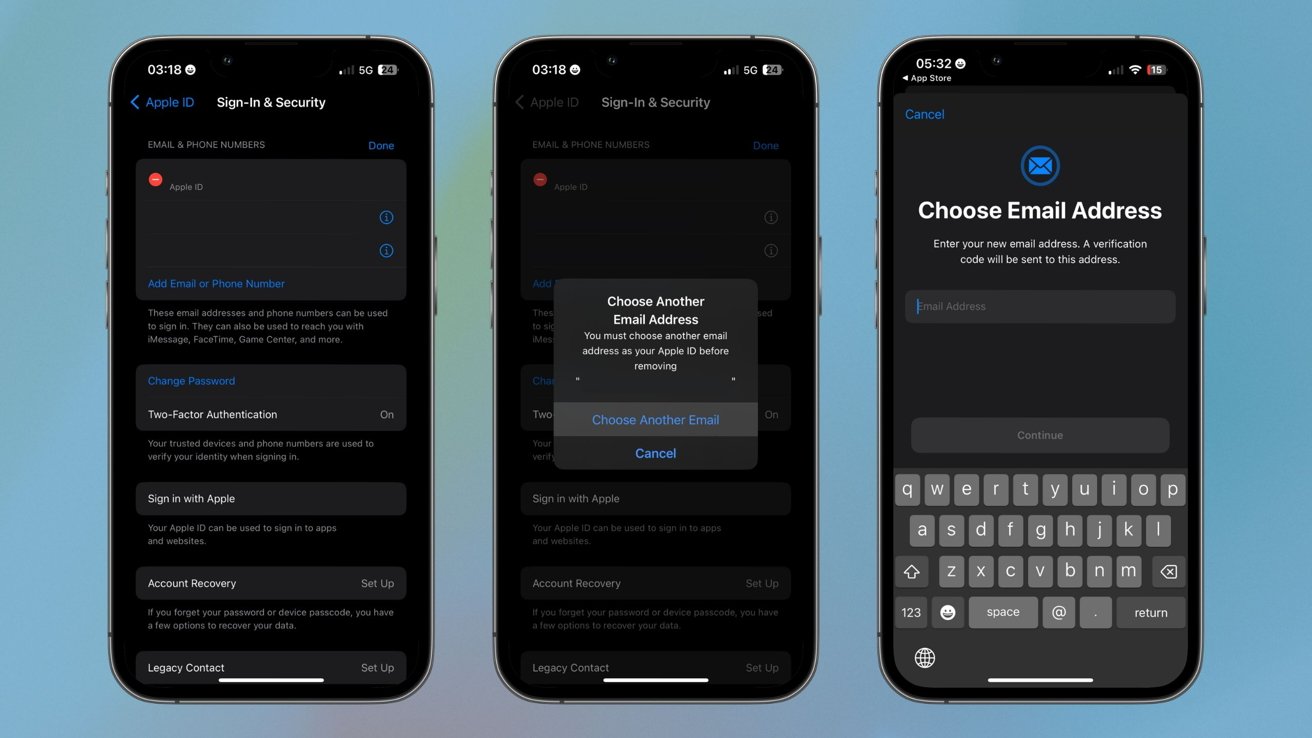
- Open the Settings app.
- Tap on your name.
- Tap on Sign-In & Security.
- Tap the Edit button next to Email & Phone Numbers.
- Delete the email labelled as your Apple ID.
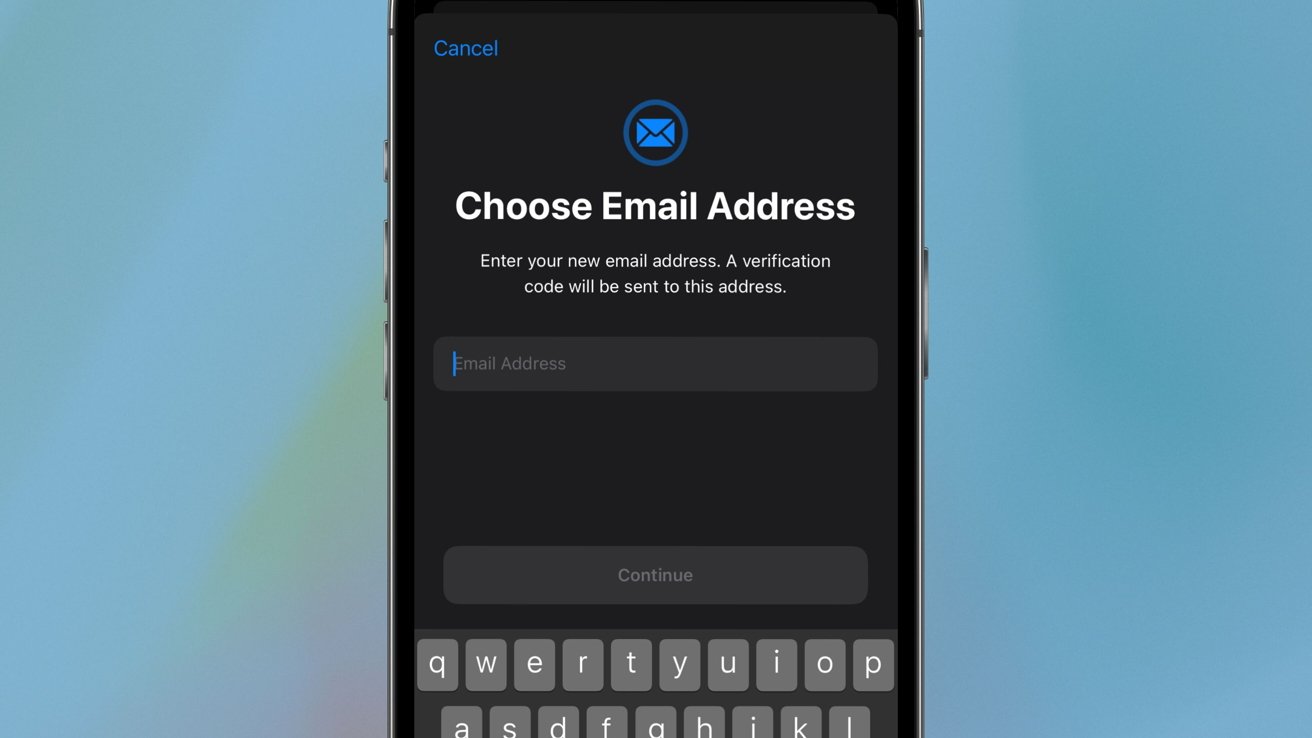
- Choose your new Apple ID email.
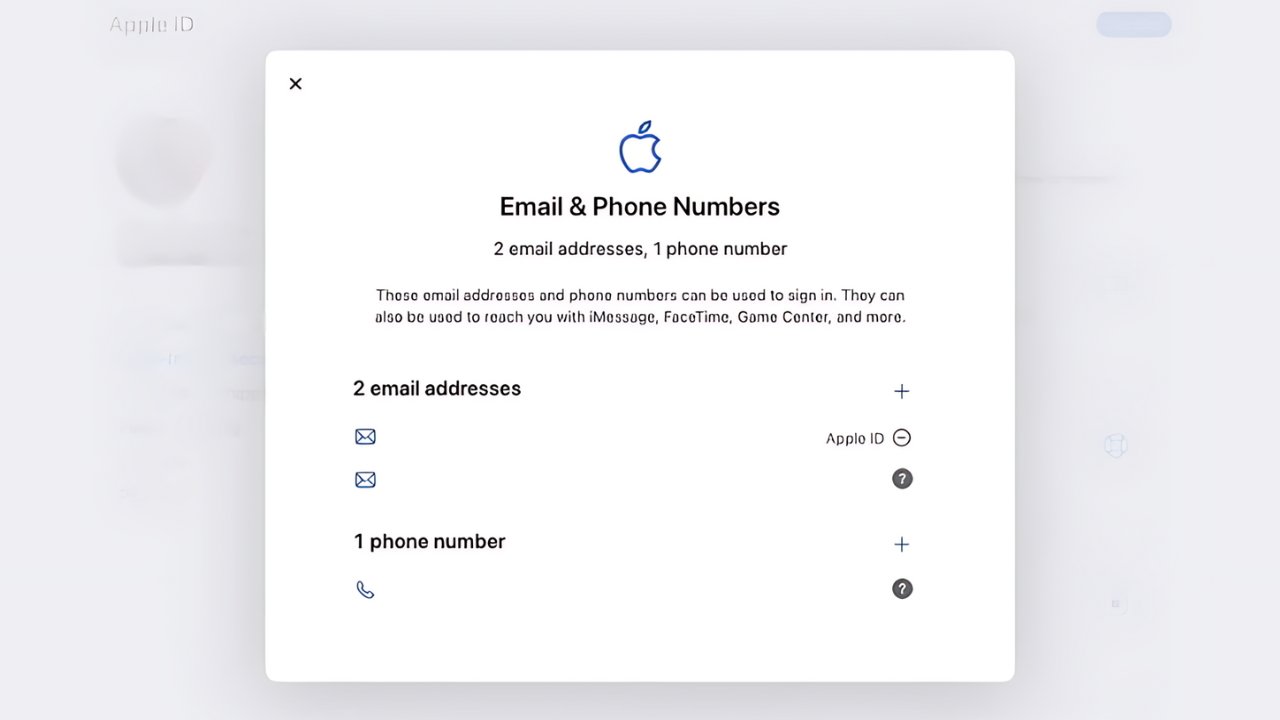
Changing your Apple ID on the web is an equally viable option.
After entering your new email, you will need to verify it. Verification is as easy as opening a link that Apple will send to your newly chosen email address. Just like that, you’ll have changed your Apple ID email. The process on Apple’s website will remain much the same. However, if you do try to change your Apple ID on the web, you may encounter an issue if you have Stolen Device Protection enabled.
How to change your Apple ID email with Stolen Device Protection enabled
Should you have Stolen Device Protection enabled, your process for changing your Apple ID email will differ ever so slightly. To begin with, you won’t be able to change your Apple ID email on the web. You’ll instead need to do it directly from the setting of one of your devices.
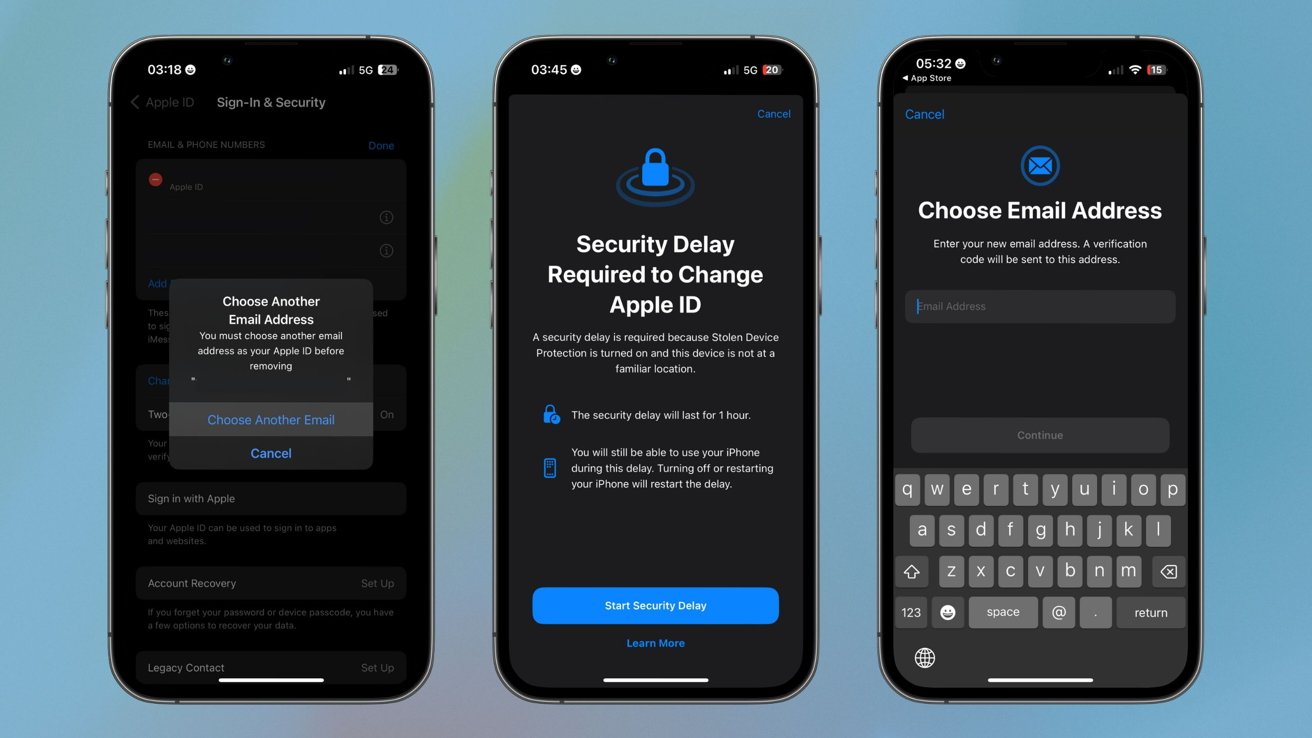
Stolen Device Protection adds a slight delay to the process.
The main difference will be a time sink at worst. Should you be away from a familiar place, or have Stolen Device Protection set to always require a security delay, you’re going to need to wait an hour to make the change. Making the change on your iPhone with Stolen Device Protection requires largely the same steps.
- Open the Settings app.
- Tap on your name.
- Tap on Sign-In & Security.
- Tap the Edit button next to Email & Phone Numbers.
- Delete the email labelled as your Apple ID.
- Start your security delay
Your iPhone will send you a push notification once the security delay has ended, but then you’ll only have a further hour in which to make the change . If you miss that hour window, you’ll have to start the security delay all over again.
Whether it be a necessity or a want, changing you Apple ID email isn’t difficult to do. Just be sure you’re ready to possibly wait an hour if you have Stolen Device Protection enabled.


