Razer Blade laptops bring luxury and high-end gaming power into one device, that’s clear. But, what might be clear, is how to ensure your gaming laptop is appropriately updated with the latest Razer software. Here’s how.
From the Razer Blade 17 (2022) to the range of other laptops and peripherals that the swanky gaming and lifestyle brand offers, it’s a company that makes some impressive products. Admittedly, not everyone is a fan of their integrated software. Nevertheless, it can be useful for customisation and tailoring your system to your performance needs.
What it can also do is ensure you’ve got the latest Razer software and apps. This is our straightforward guide on how to do just that, with some handy troubleshooting at the bottom too if you’ve got any further queries.
What you’ll need:
The Short Version
- Open System Tray
- Right-click on Razer Central
- Click Check for Updates
- Install updates or apps
-
Step
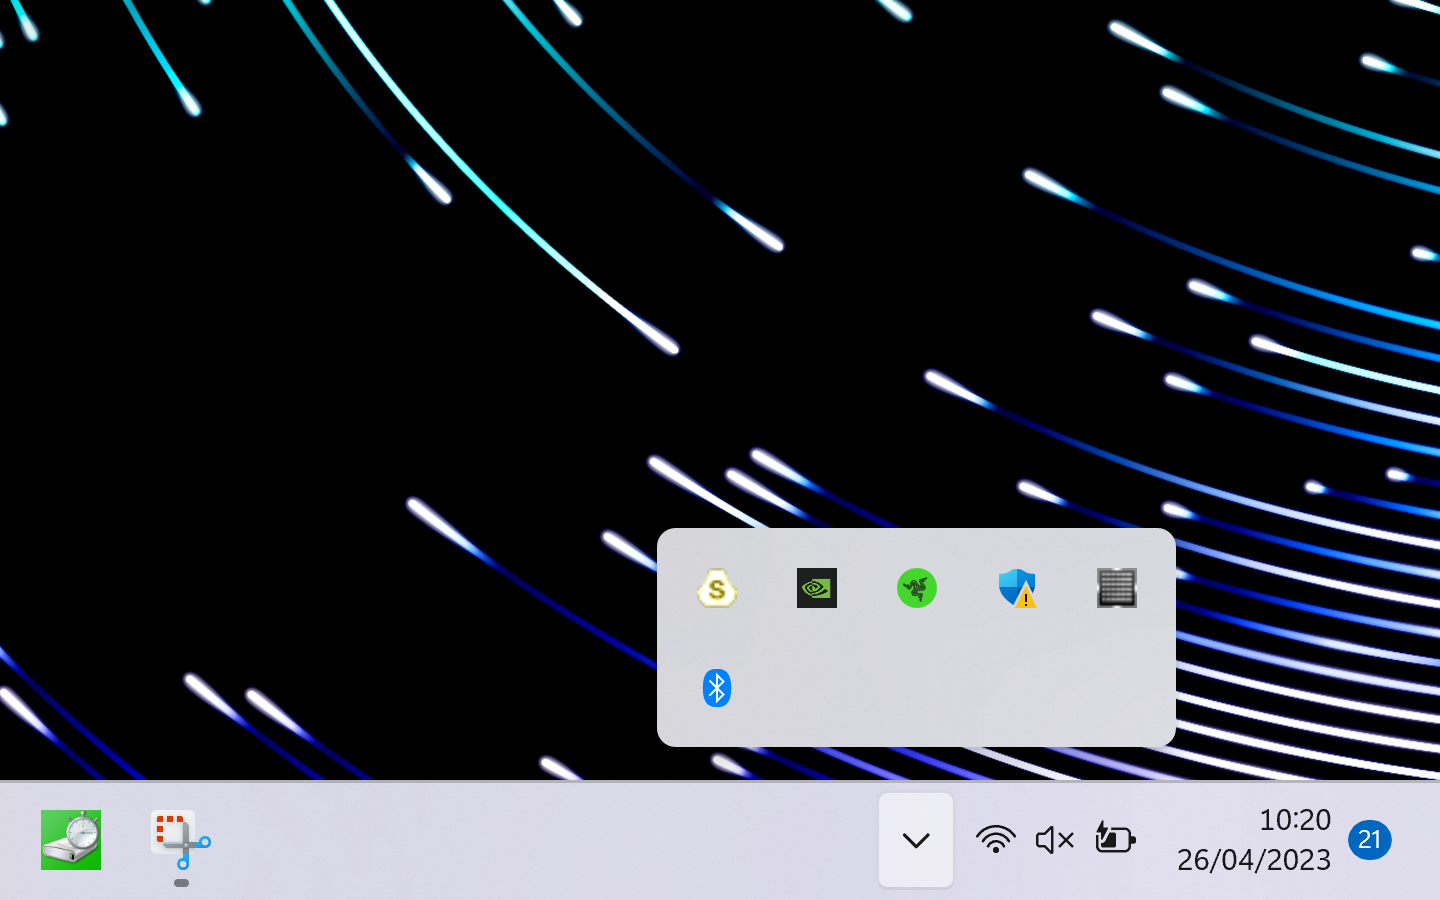
1Open System Tray
Click on the upward pointing arrow towards the bottom-right of your screen to open the System Tray
-
Step
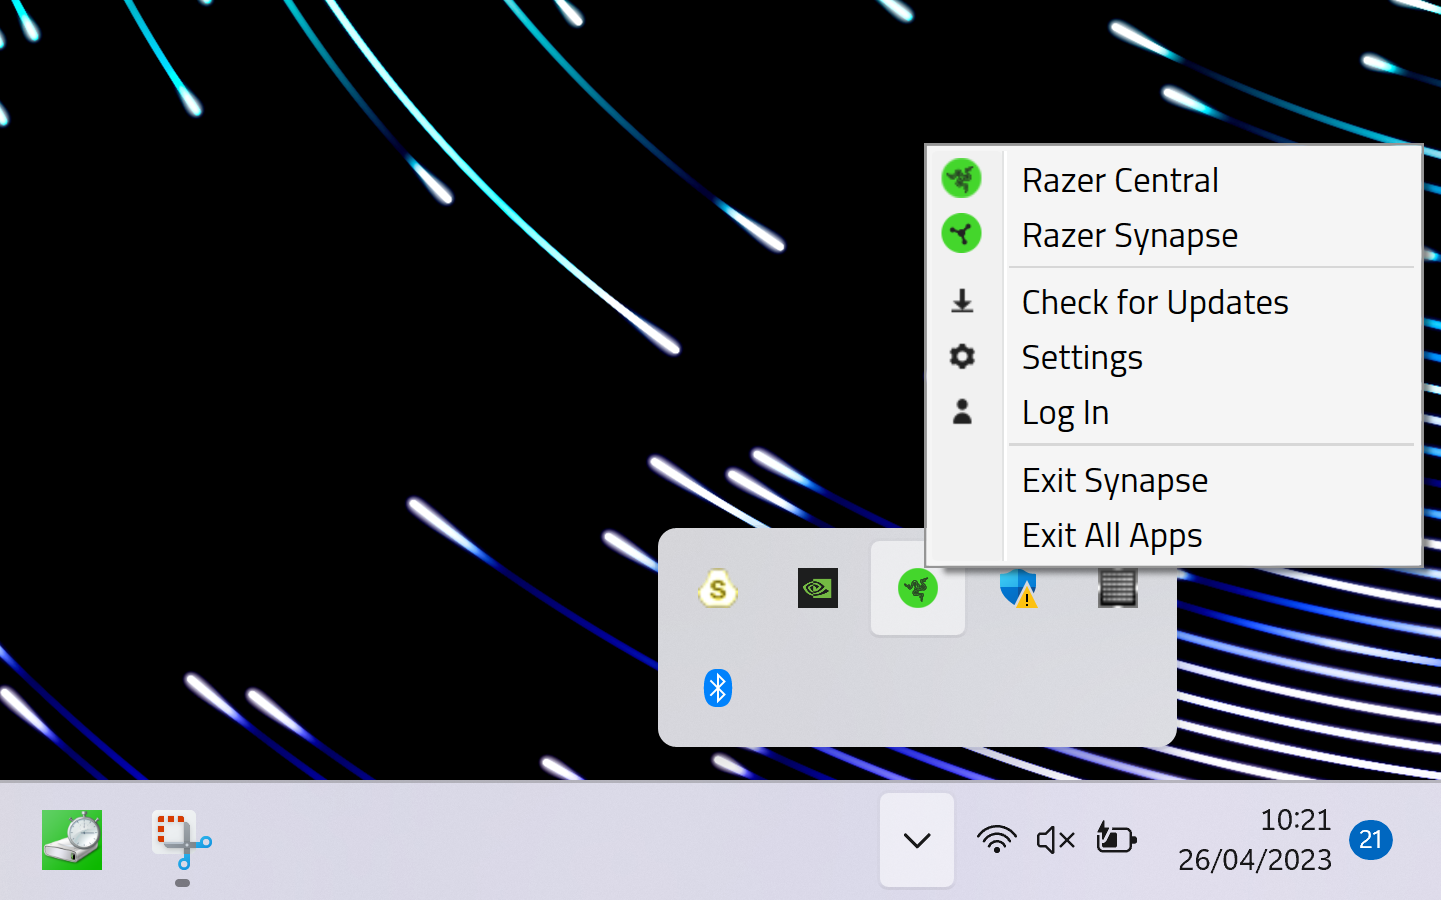
2Right-click Razer Central
In the System Tray, right-click the green logo for Razer Central
-
Step
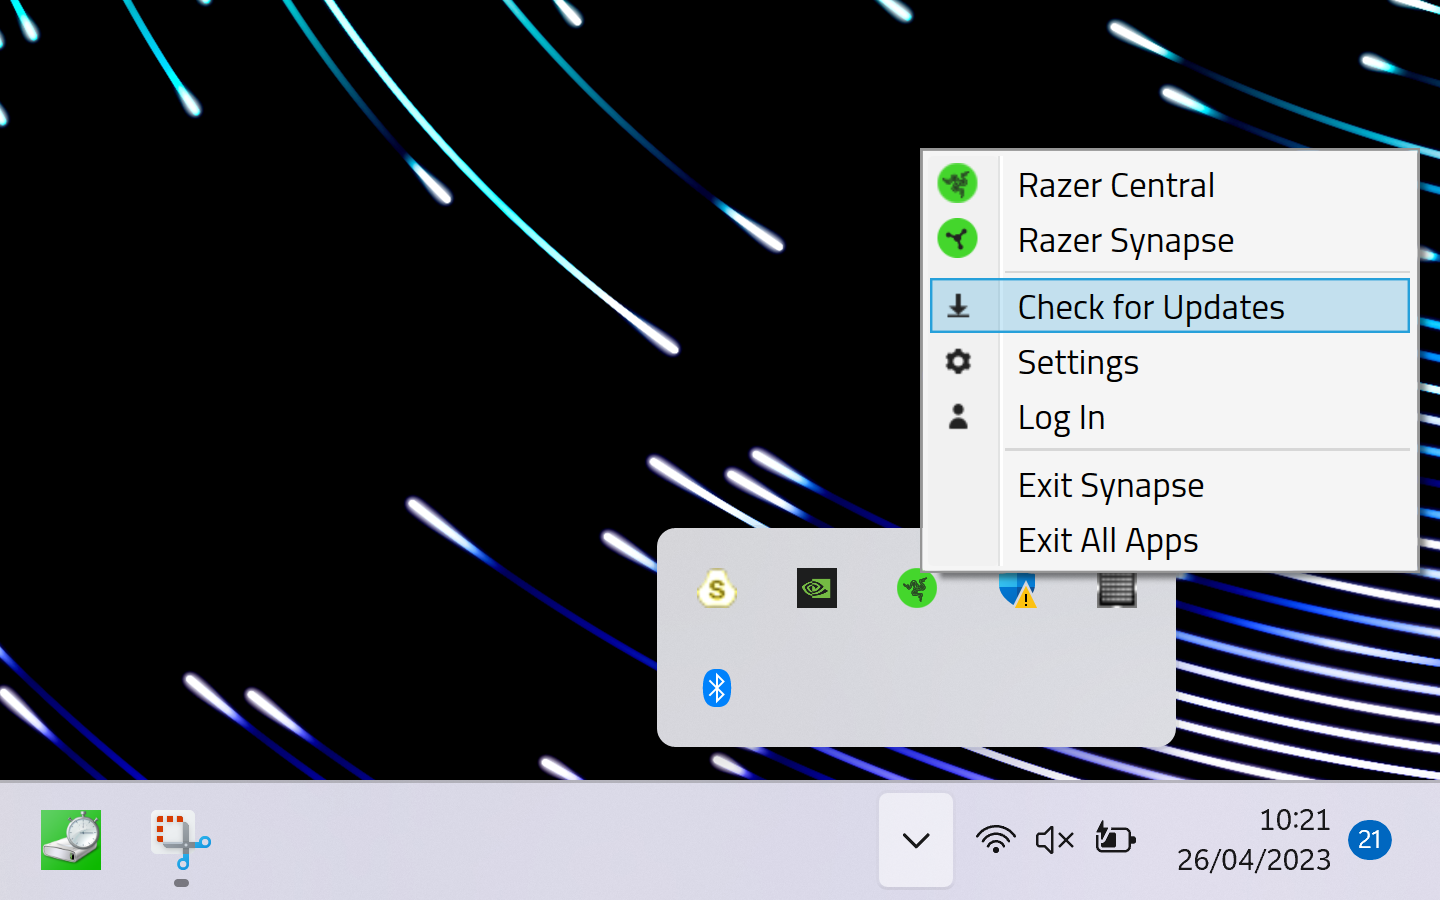
3Click Check for Updates
After right-clicking, select the Check for Updates option
-
Step
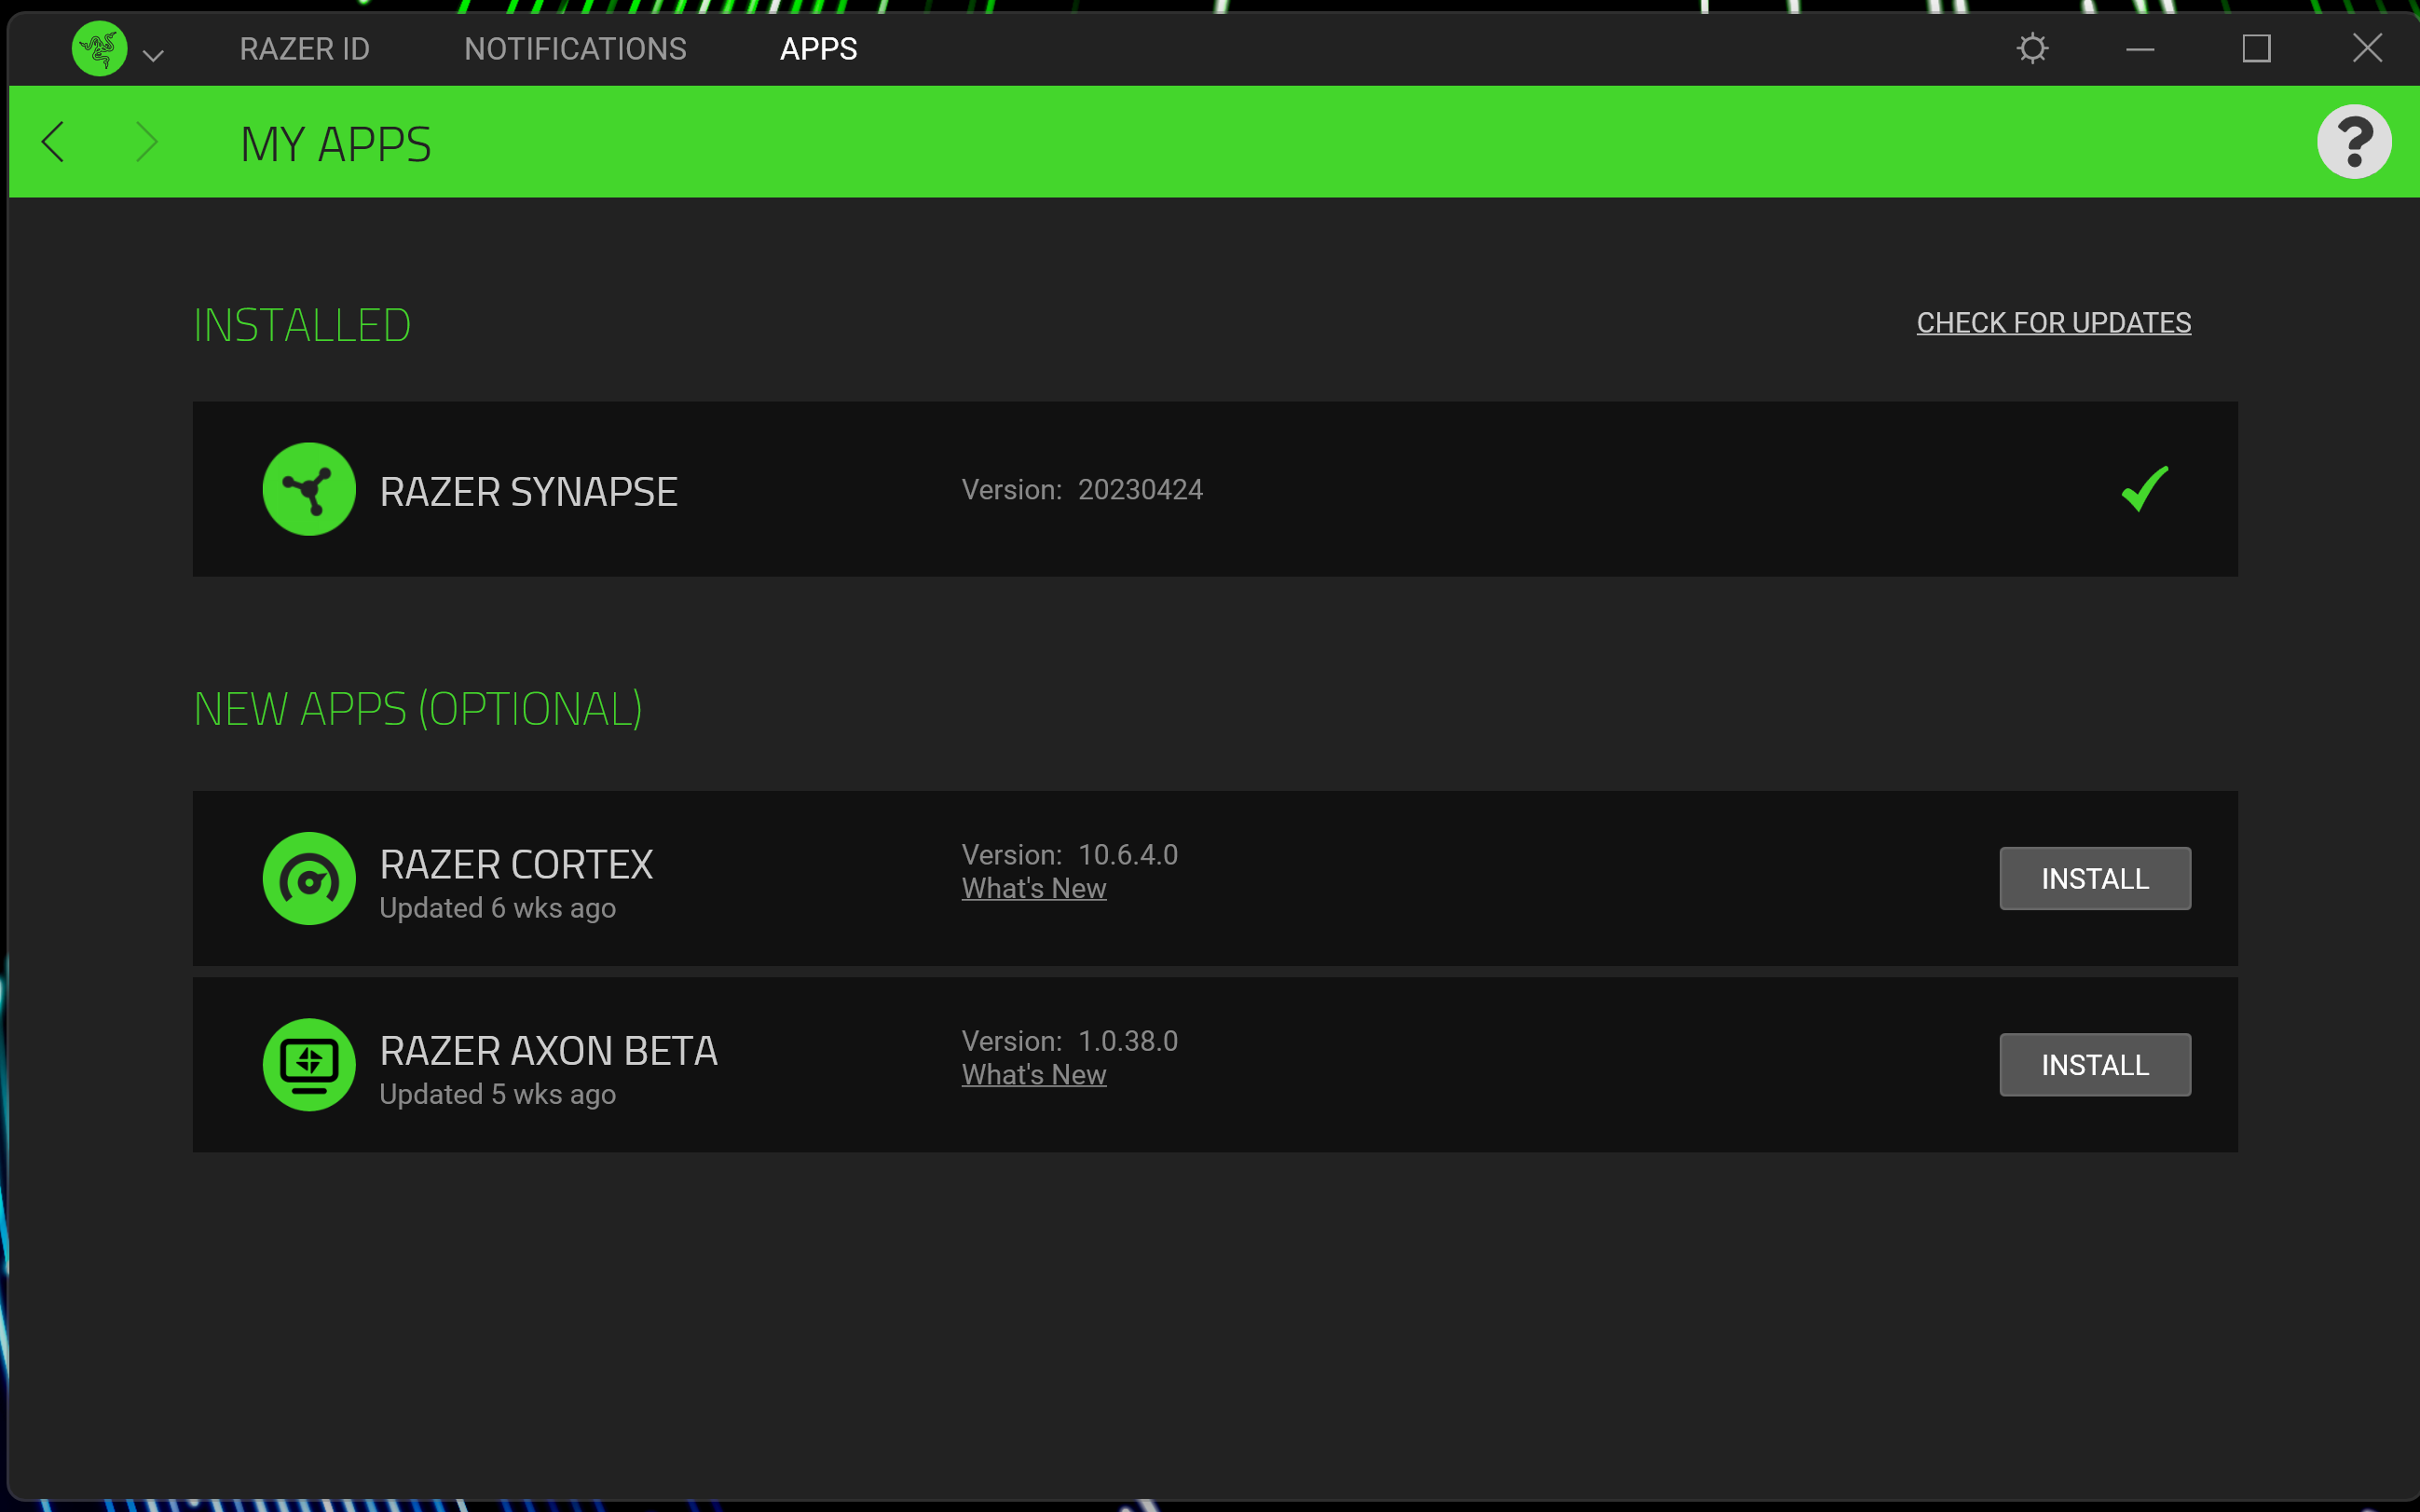
4Install updates or apps
You’ll now see any available Razer updates or apps for you to download
Troubleshooting
Open Settings and head to Windows Update to see if there are any updates available for your Razer Blade.
Open Start and search for Device Manager. Expand Display Adapters then right-click on your GPU and select Properties. Select Driver, now see your driver version and select Update Driver if you wish.


