If you have a Windows 11 laptop or desktop computer, understanding the system memory — or RAM (Random Access Memory) — specifications may come in handy to troubleshoot problems with technical support or confirm the changes after tweaking the settings in the Unified Extensible Firmware Interface (UEFI).
Also, if the device is due for an upgrade, understanding the RAM details can help determine the brand, speed, size, and other information you may need to get the right modules to improve system performance.
Whatever the reason it might be, you can use Command Prompt on Windows 11 to find out all the information quickly without using Task Manager or third-party tools.
In this Windows 11 guide, we will walk you through the steps to find out the specifications for the memory installed on your computer.
How to check RAM specs with Command Prompt on Windows 11
Using Command Prompt, you can determine many details about the system memory installed on the computer, including manufacturer, part and serial number, capacity information, speed, type, form factor, and more.
Although you can use Command Prompt to query many different details about the system memory, some information may not be available depending on the hardware.
Check manufacturer
To find out the memory manufacturer, use these steps:
- Open Start.
- Search for Command Prompt, right-click the top result, and select the Run as administrator option.
-
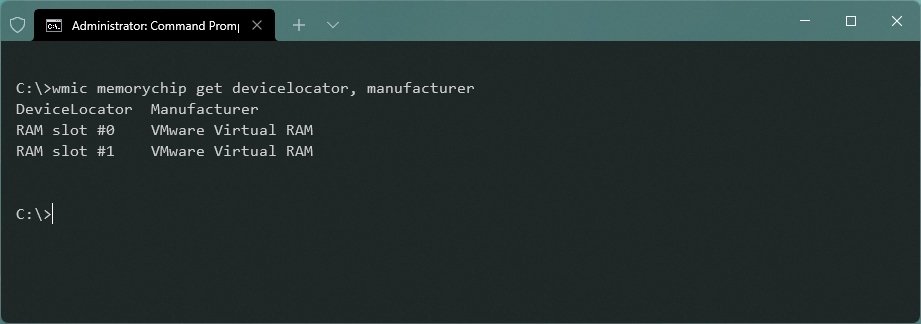
Type the following command to determine the memory manufacturer name and press Enter:
wmic memorychip get devicelocator, manufacturerSource: Windows Central
- Confirm the memory manufacturer name under the “Manufacturer” column.
Check part number
To determine the part number for each of the memory modules, use these steps:
- Open Start.
- Search for Command Prompt, right-click the top result, and select the Run as administrator option.
-
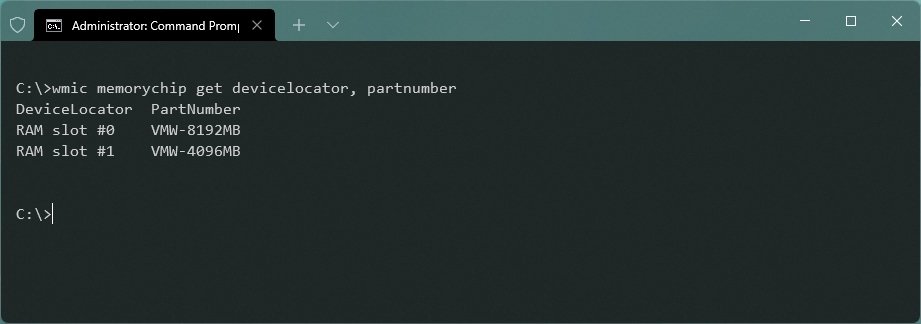
Type the following command to determine the memory part number and press Enter:
wmic memorychip get devicelocator, partnumberSource: Windows Central
- Confirm the product number under the “PartNumber” column.
Check serial number
- Open Start.
- Search for Command Prompt, right-click the top result, and select the Run as administrator option.
-
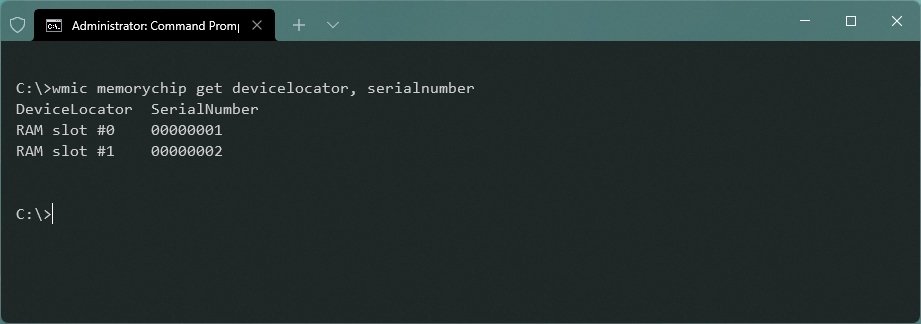
Type the following command to get the RAM stick’s serial number and press Enter:
wmic memorychip get devicelocator, serialnumberSource: Windows Central
- Confirm the product serial number under the “SerialNumber” column.
-
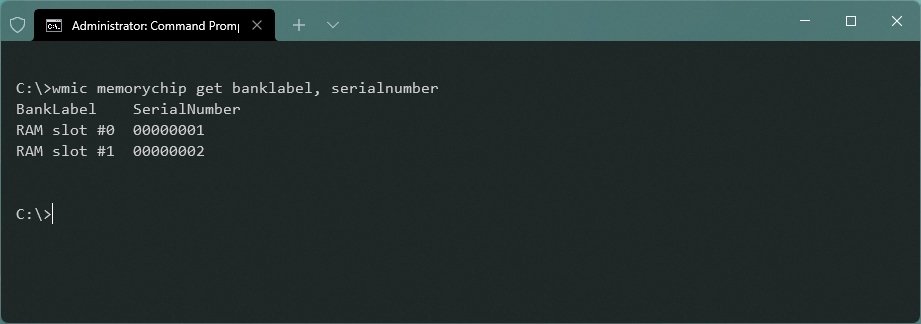
(Optional) Type the following command to find out the physical location of the stick on the motherboard and press Enter:
wmic memorychip get banklabel, serialnumberSource: Windows Central
Check capacity
On Windows 11, you can also use different commands to determine the total system capacity or capacity per module.
Determine capacity per module
To find out the amount of memory available in each stick, use these steps:
- Open Start.
- Search for Command Prompt, right-click the top result, and select the Run as administrator option.
-
Type the following command to determine each module capacity and press Enter:
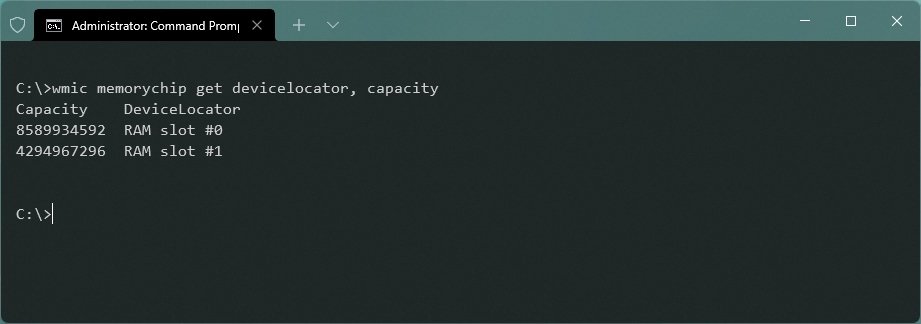
wmic memorychip get devicelocator, capacitySource: Windows Central
- Confirm the amount of RAM per module under the “Capacity” column.
Since the capacity is returned in bytes, you have to divide the number by 1,073,741,824 (1 gigabyte in bytes) to convert the information into gigabytes.
Determine capacity total
To determine the total amount of RAM installed on a Windows 11 device, use these steps:
- Open Start.
- Search for Command Prompt, right-click the top result, and select the Run as administrator option.
-
Type the following command to determine the total amount of RAM installed on the computer and press Enter:
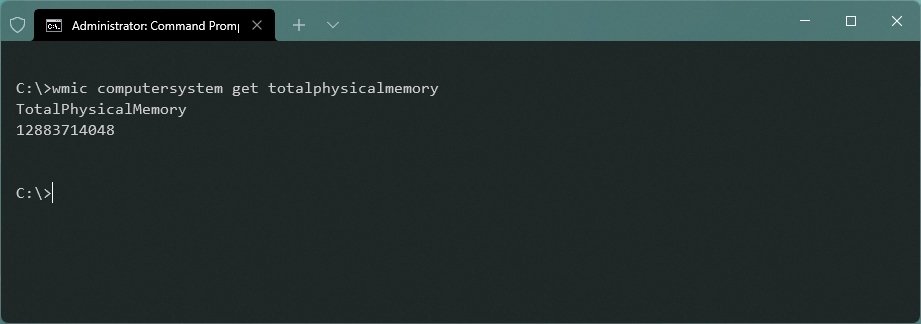
wmic computersystem get totalphysicalmemorySource: Windows Central
- Confirm the amount of RAM per module under the “Capacity” column.
To convert the information to gigabytes, you must divide the number by 1,073,741,824 (1 gigabyte in bytes).
Check speed
To find out the speed of the memory modules, use these steps:
- Open Start.
- Search for Command Prompt, right-click the top result, and select the Run as administrator option.
-
Type the following command to check the memory speed and press Enter:
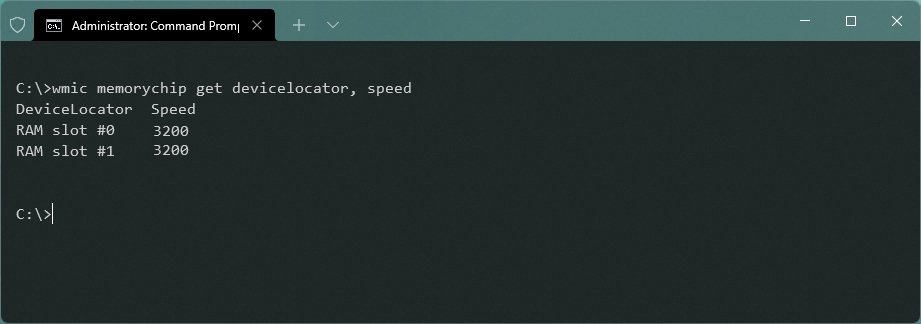
wmic memorychip get devicelocator, speedSource: Windows Central
- Confirm each of the memory module’s speed under the “Speed” column.
Check type
To determine memory type (such as DRAM, DDR4, RDRAM, etc.), use these steps:
- Open Start.
- Search for Command Prompt, right-click the top result, and select the Run as administrator option.
-
Type the following command to check the memory type and press Enter:
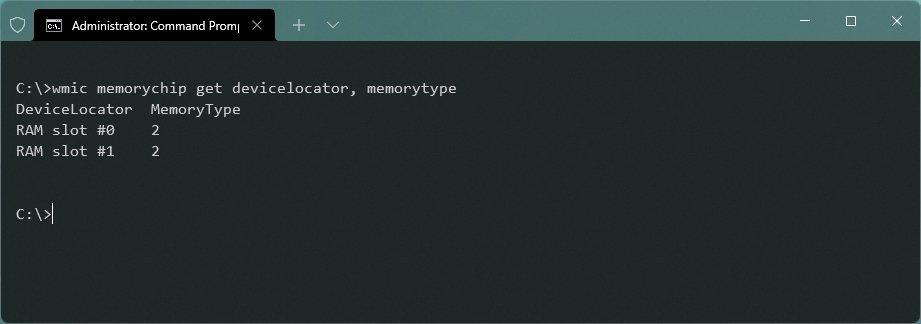
wmic memorychip get devicelocator, memorytypeSource: Windows Central
- Confirm memory type under the “MemoryType” column.
Supported memory types
Here’s the list with the memory types that the command can detect:
- 0: Unknown.
- 1: Other.
- 2: DRAM.
- 3: Synchronous DRAM.
- 4: Cache DRAM.
- 5: EDO.
- 6: EDRAM.
- 7: VRAM.
- 8: SRAM.
- 9: RAM.
- 10: ROM.
- 11: Flash.
- 12: EEPROM.
- 13: FEPROM.
- 14: EPROM.
- 15: CDRAM.
- 16: 3DRAM.
- 17: SDRAM.
- 18: SGRAM.
- 19: RDRAM.
- 20: DDR.
- 21: DDR2.
- 22: DDR2 FB-DIMM.
- 24: DDR3.
- 25: FBD2.
- 26: DRR4.
Check form factor
To determine the memory sticks form factor (such as DIMM, SODIMM, etc.) on Windows 11, use these steps:
- Open Start.
- Search for Command Prompt, right-click the top result, and select the Run as administrator option.
-
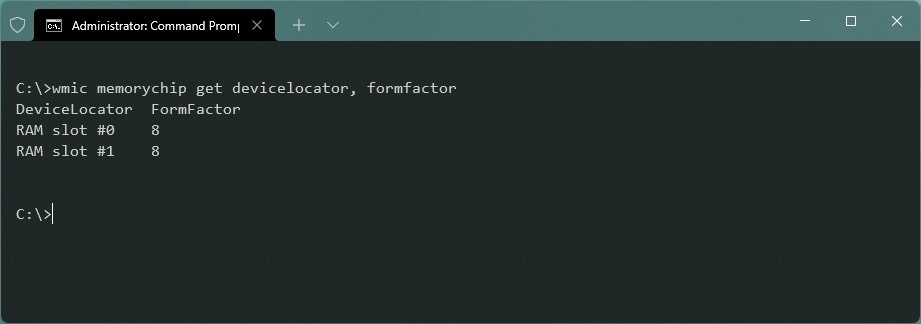
Type the following command to check the memory form factor and press Enter:
wmic memorychip get devicelocator, formfactorSource: Windows Central
- Confirm the memory form factor under the “FormFactor” column.
If the output is 8, the computer uses DIMM modules (usually available on desktops). Otherwise, if the command output the number 12, the device uses SODIMM modules (commonly used on laptops).
Supported form factor
Here’s a list with the form factors that the command can detect:
- 0: Unknown.
- 1: Other.
- 2: SIP.
- 3: DIP.
- 4: ZIP.
- 5: SOJ
- 6: Proprietary.
- 7: SIMM.
- 8: DIMM.
- 9: TSOP.
- 10: PGA.
- 11: RIMM.
- 12: SODIMM.
- 13: SRIMM.
- 14: SMD.
- 15: SSMP.
- 16: QFP.
- 17: TQFP.
- 18: SOIC.
- 19: LCC.
- 20: PLCC.
- 21: BGA.
- 22: FPBGA.
- 23: LGA.
- 24: FB-DIMM.
Check full specs
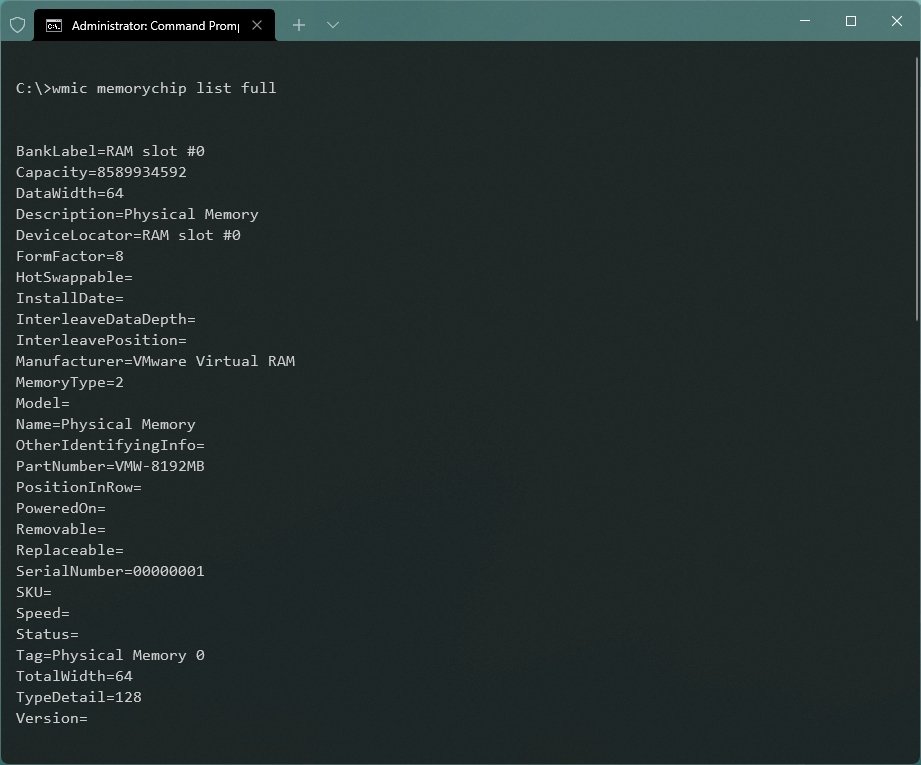
You can use the previous command to find specific information about the memory modules individually. However, you can also query all the memory specs with a single command on Windows 11.
To view all the memory details, then use these steps:
- Open Start.
- Type Command Prompt, right-click the top result, and select the Run as administrator option.
-
Type the following command to view all the memory details and press Enter:
wmic memorychip list fullSource: Windows Central
- Confirm the specs for each module installed on the device.
-
(Optional) Type the following command to view only the specific details and press Enter:
wmic memorychip get devicelocator, manufacturer, partnumber, serialnumber, capacity, speed, memorytype, formfactorSource: Windows Central
- Confirm the memory details.
Once you complete the steps, you will have a full overview of the memory specifications.
More Windows resources
For more helpful articles, coverage, and answers to common questions about Windows 10 and Windows 11, visit the following resources:


