Over time, system files, temporary data, and other digital clutter can build up on your Mac, eating away at your storage and potentially slowing things down. Cleaning up these files requires a careful touch if you want to avoid problems. Here’s how.
Why Cleaning Matters
Macs have long been characterized by their stability, but a cluttered hard drive can lead to performance hiccups, wasted space, and general loss of workflow zen. From temporary files in /tmp to unnecessary duplicates, each bit of digital debris adds up over time and across hardware upgrades.
Cleaning your Mac isn’t just about reclaiming storage, it’s about optimizing your workflow and ensuring your Mac operates at peak efficiency. A sluggish Mac can disrupt productivity, whether you’re working or simply daily driving through your normal uses.
Before starting, always run a Time Machine backup. The nature of Time Machine is to automatically create snapshots of your Mac at defined intervals. Connect your Time Machine drive (or remote volume) and allow it to finish before you start cleaning out your system. Do so by either clicking the Time Machine menu bar icon or right-clicking on your connected backup volume and selecting “Back Up Now.”
Employing any secondary backup method is something I personally advise as well. This ensures that even if you accidentally delete something critical, you’ll have a safety net. Backing up doesn’t just save your files—it saves your peace of mind. There are some Time Machine alternatives you might want to look into.
With that taken care of, you’re ready to start the cleanup process.
Clean Out Your Temporary Files
The /tmp folder is a catch-all for temporary files created by your system and apps. These files are typically cleared during a reboot, but if you rarely restart your Mac, the folder can balloon in size. Applications like video editors and web browsers often create temporary files during use, contributing to this buildup. To clean it manually, open Terminal and type:
sudo rm -rf /tmp/*
This command removes everything in /tmp. Proceed cautiously—don’t use sudo commands lightly, as they bypass many of macOS’s built-in safeguards. Regular reboots can help prevent /tmp from becoming bloated, too.
We all get used to just using sleep, but any computer system does will with a true, blue restart when it occurs to you to do so.
Delete .DS_Store Files
.DS_Store files are macOS’s way of storing folder metadata like icon positions and view preferences. While they’re tiny, they can accumulate in surprising places, especially if you use external drives or share files frequently.
For example, if you’re working with a shared drive across multiple systems, .DS_Store files can clutter the experience for users on non-Mac systems. To remove them, open Terminal and run:
find ~/ -name ".DS_Store" -delete
This command finds and deletes all .DS_Store files within your home directory.
While these files are generally safe to delete, be mindful that doing so might reset some folder-specific preferences, such as custom icon arrangements or view modes. If you rely on these settings, consider targeting specific folders rather than applying this command globally.
Manage Log Files
Log files can offer valuable insights into your Mac’s operations, such as error reports or system events, but they also pile up over time. A common culprit is /var/log, which houses logs like install.log that can grow to tens of megabytes or more. Over time, these files can occupy significant space, especially on Macs with smaller SSDs.
Most of these logs can be safely deleted, but it’s best to check their contents first to avoid losing useful information. For example, if you’re troubleshooting a recurring system issue, those logs might contain critical clues.
To clear logs, open Terminal and run:
sudo rm -rf /var/log
Restart your Mac afterward to let the system regenerate any necessary logs. If you’re concerned about specific logs, consider using macOS’s Console app to review them before deletion. Regular log maintenance ensures you’re not unnecessarily hoarding files while preserving essential diagnostics.
Understand “System Data”
The “System Data” section in System Settings > Storage can be a black hole of mystery. This category includes everything from caches to local app support files. It can grow silently over time, especially if you install and uninstall apps frequently.
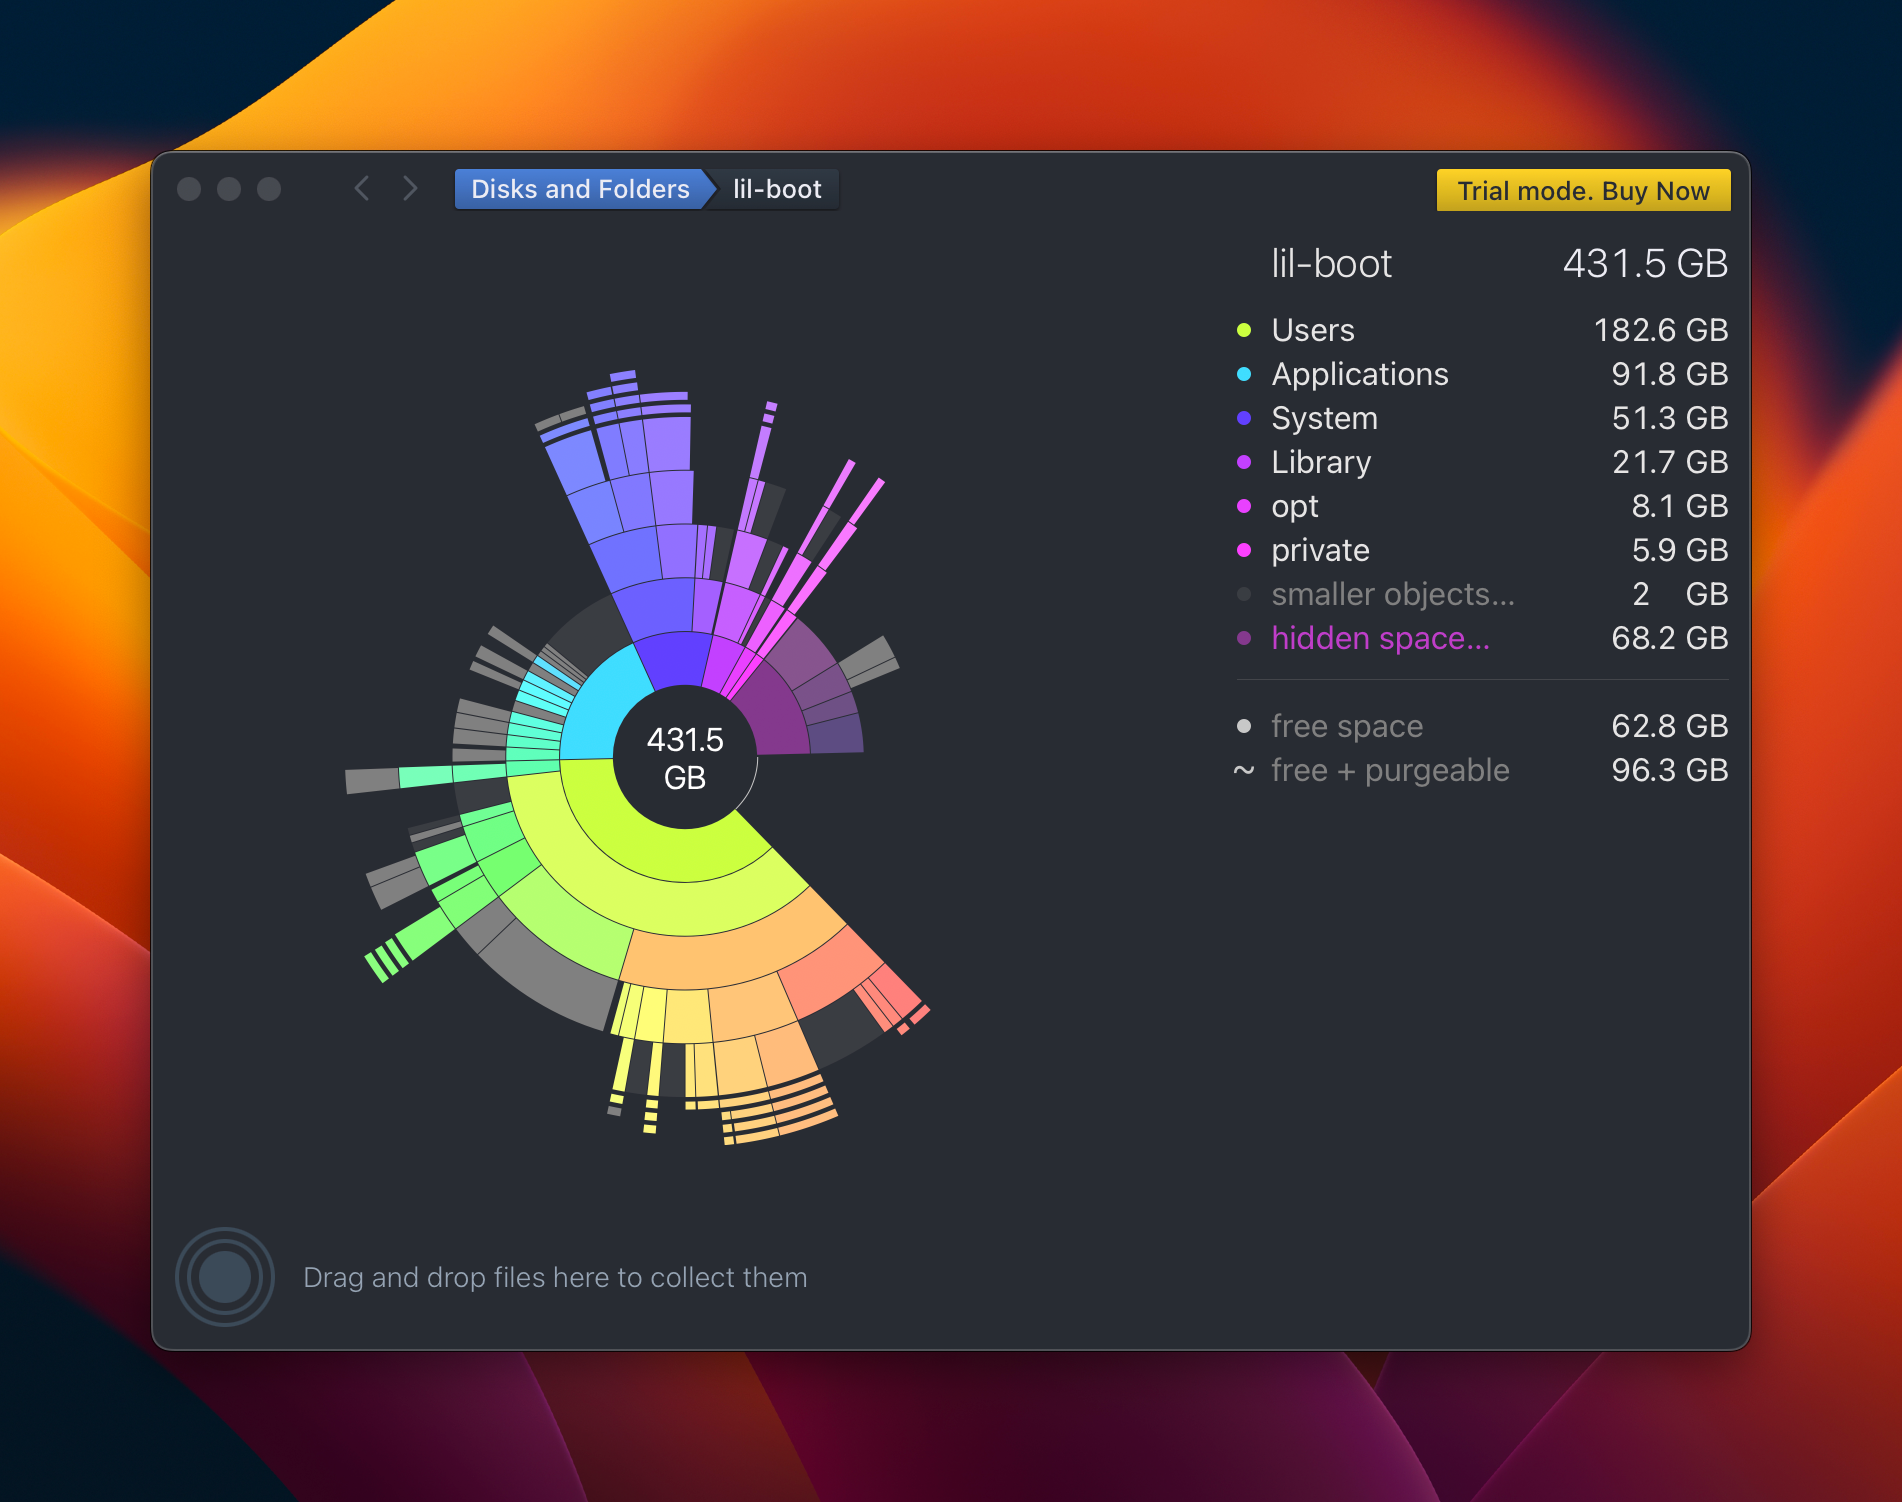
Tools like DaisyDisk can help you dig deeper, showing you exactly what’s taking up space. I particularly enjoy the visual pop that DaisyDisk employs in the way it visualizes your disk usage, shown below.
While DaisyDisk isn’t free, its one-time fee of $9.99 may be worth it for pinpointing storage hogs, especially for those managing large libraries of photos, videos, or other media. You can give it a trial spin and decide for yourself if it’s worth your investment as a long-term storage analysis tool to have on-hand.
If you’re looking for a free alternative, macOS’s built-in storage management tool (System Settings > Storage > Manage) offers a decent overview, though it’s less detailed. This tool provides actionable suggestions, like offloading unused apps or reviewing large files. While not as comprehensive, it’s an excellent starting point for most users.
Deal with Duplicate Files
Duplicate files are another sneaky way storage gets eaten up. They often result from accidentally saving multiple copies of the same document, photo, or video. Over time, these duplicates can take up significant space, especially if you work with large files.
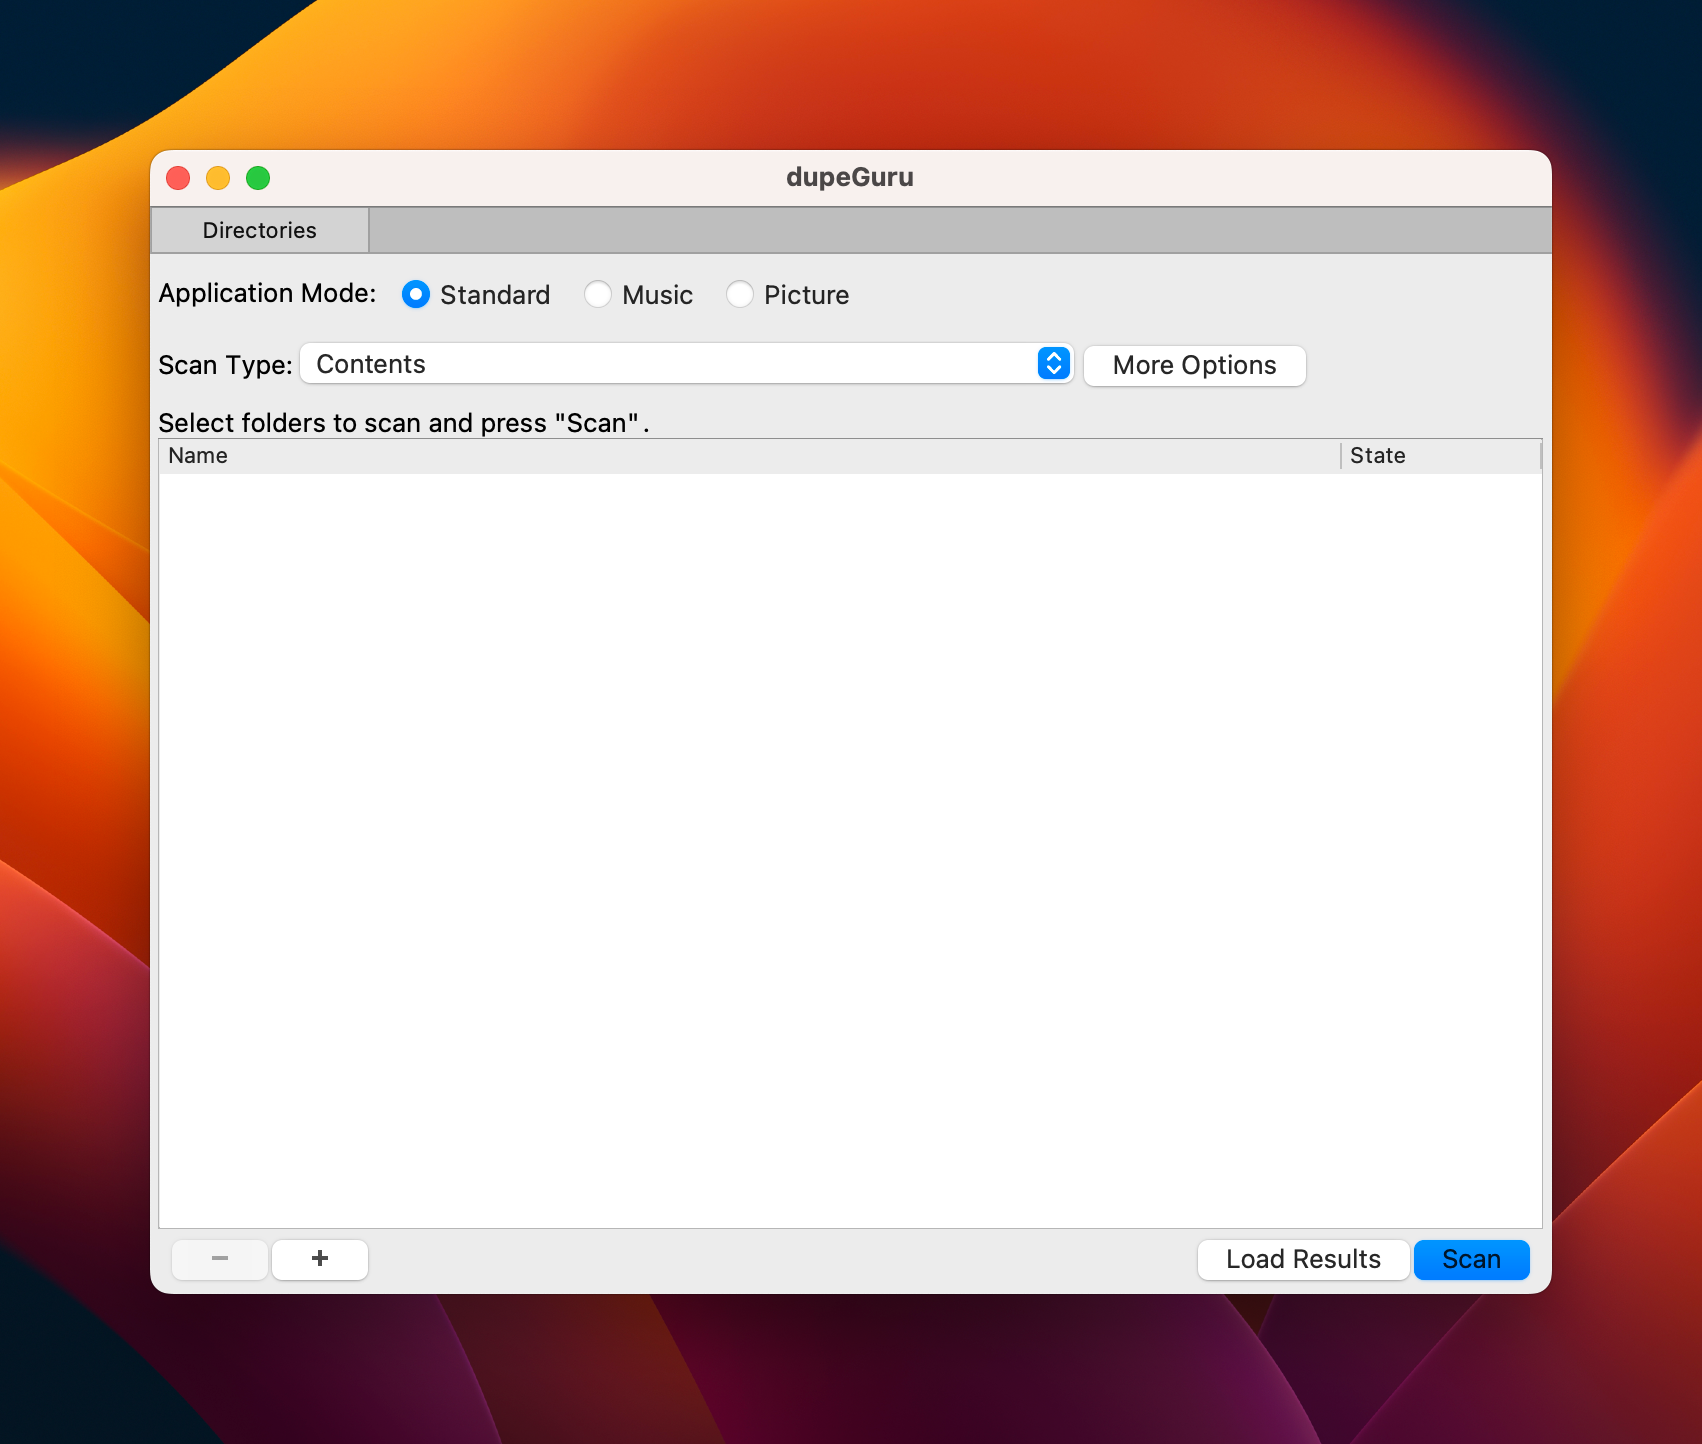
Free apps like dupeGuru are excellent for scanning your Mac and identifying duplicates. These tools are especially handy if you’ve been moving files between devices or drives without much organization. Before deleting anything, take the time to review the results. Similar file names can be deceptive, and you don’t want to accidentally delete an important variation.
Even better yet, dupeGuru is cross-platform, running not only on macOS but also Windows and Ubuntu right out of the box.
Tidy Up Local iMessage Data
iMessage can take up a surprising amount of space, especially if you frequently share photos, videos, or other large files. Depending on your setting, attachments sent and received through Messages are stored locally, and over years, they can add up to gigabytes of data.
You can delete specific conversations by selecting them in Messages and choosing “Delete,” but this won’t always clear the associated data in iCloud. To avoid accidentally nuking your iCloud backups, disable Messages syncing in System Settings > Apple ID > iCloud > Messages before clearing out your local data.
Once done, revisit your settings to re-enable syncing and ensure your important conversations are backed up. I always like to have my iCloud settings and at least one physical device configured to keep messages forever.
Optimize iCloud Storage
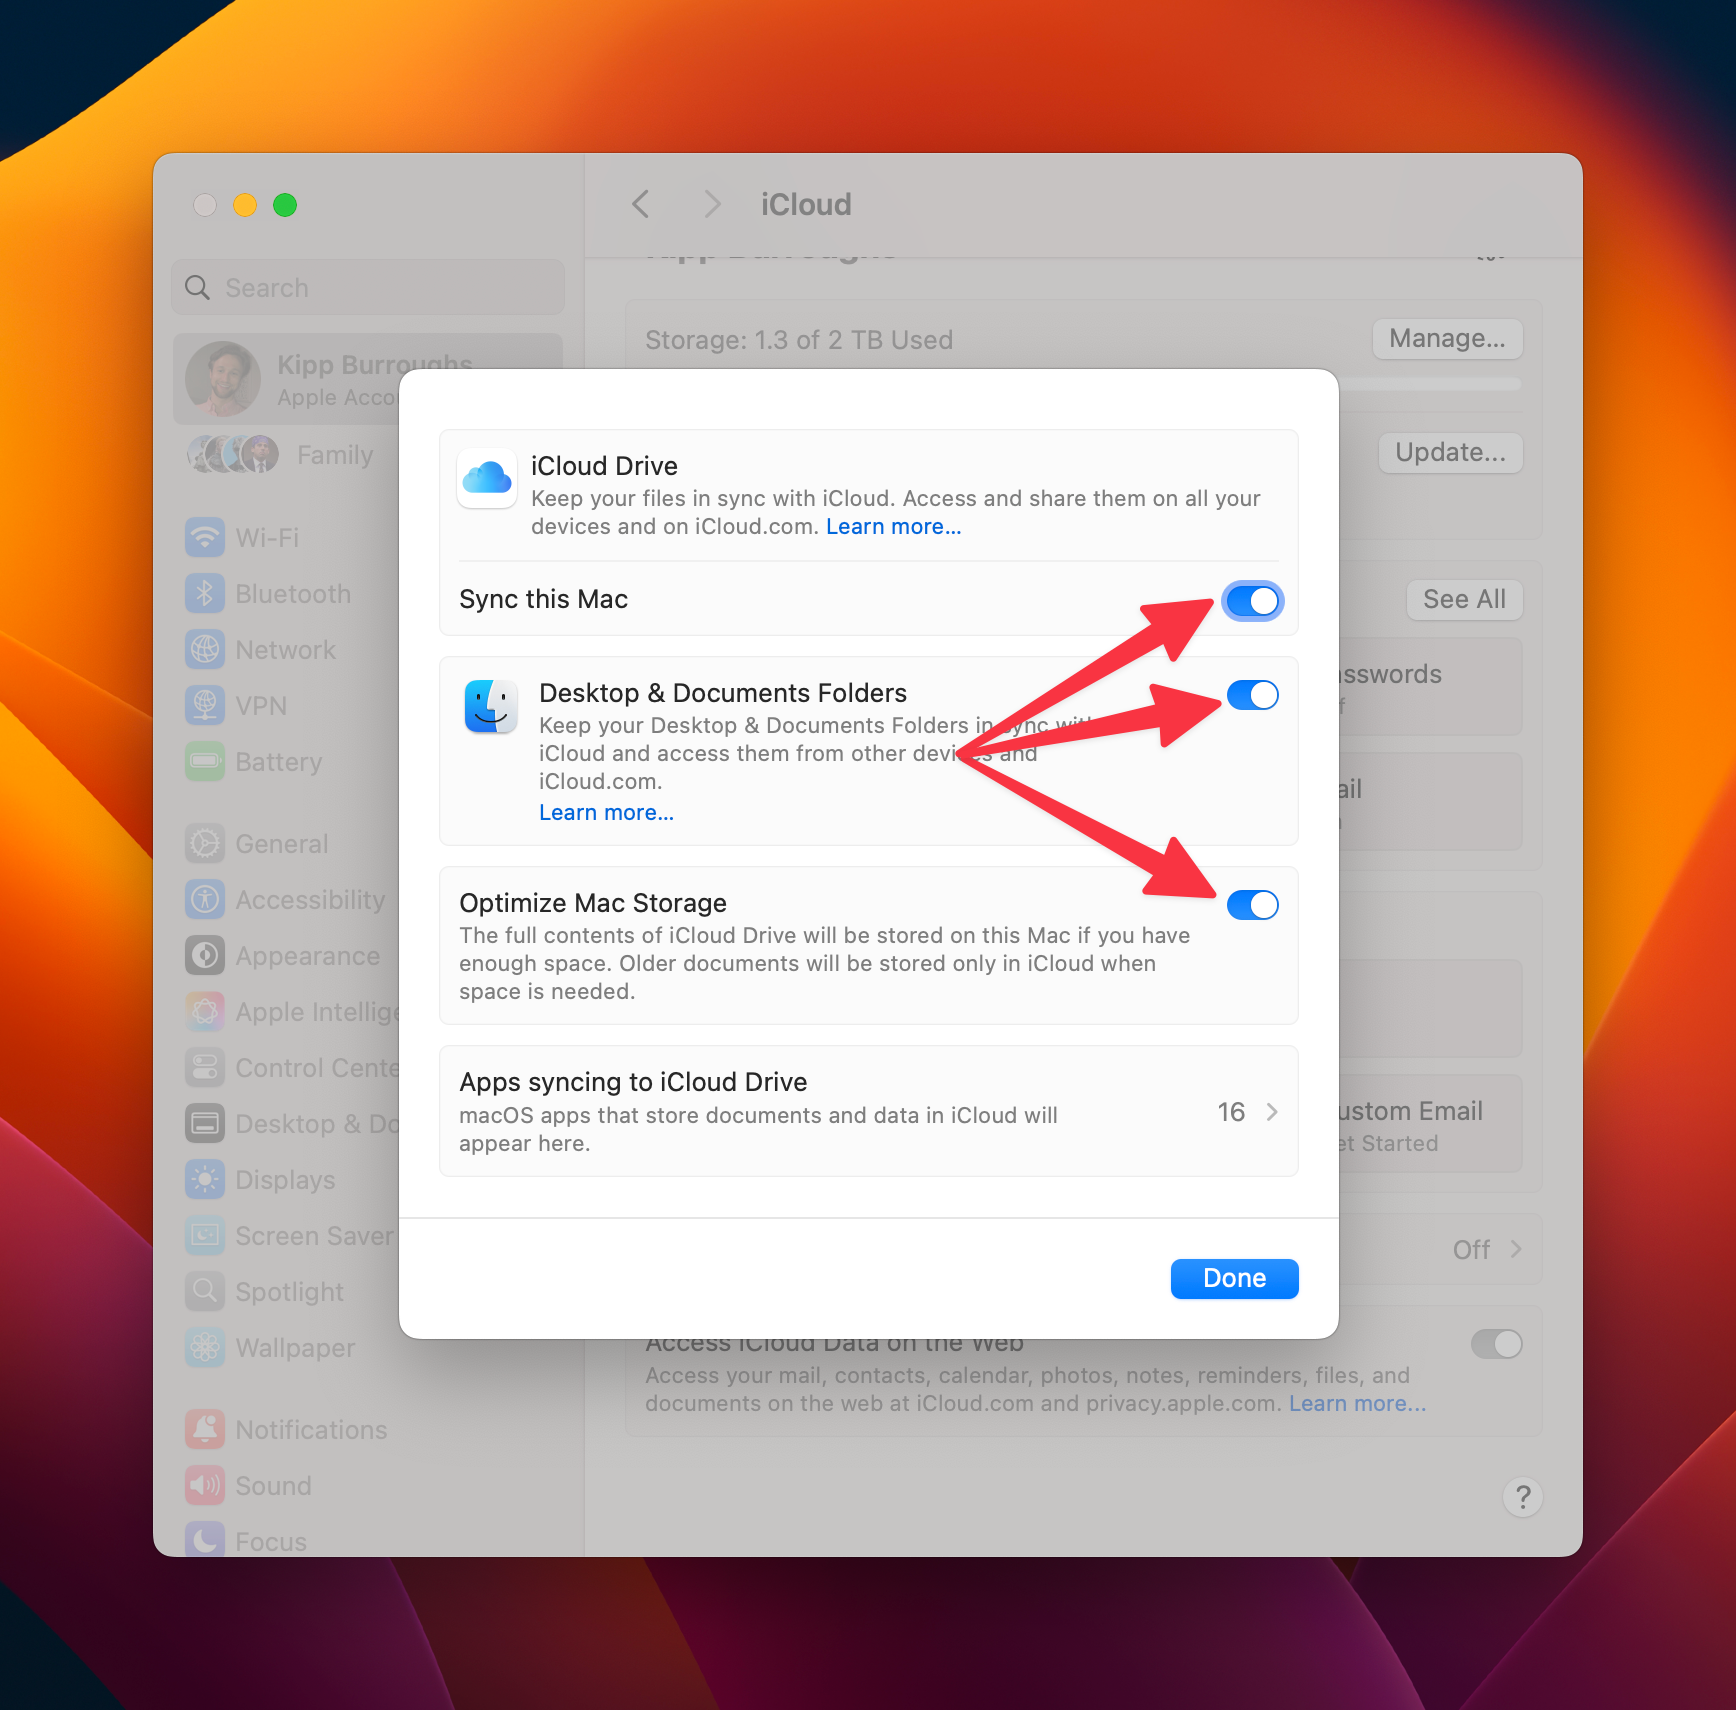
Enabling iCloud syncing for your Desktop and Documents folders can free up local storage while keeping files accessible across devices. To enable this, go to System Settings > Apple ID > iCloud > Drive, and check the boxes for Desktop & Documents Folders.
Also, activate “Optimize Mac Storage” as well. This feature automatically removes older, less-used files from your local disk while keeping them accessible in iCloud. Be mindful of apps that need local access to files, such as video editors or music production software. You can right-click on any file and use the “Keep Downloaded” option to prevent macOS from deleting it.
If you’re working with large libraries, you might need to manually ensure specific folders remain local. For example, pinning frequently accessed project folders can save time and prevent headaches. Using iCloud Drive in this way will require that you have iCloud storage available.
Manage Shared and Other Users
Over time, the “Shared” and “Other Users” sections on your Mac can become cluttered with files from guest accounts, shared drives, or old profiles. These areas often go unnoticed, but they can house gigabytes of unnecessary data.
Check these areas by navigating to the Users & Groups section of System Settings. Delete unnecessary accounts or files to reclaim space, but ensure you’re not deleting active or shared data. If you’re unsure, consider archiving old profiles onto an external drive before deletion.
Address Music and Streaming Cache Files
Spotify and Apple Music both create local caches for faster playback. For Spotify, navigate to Spotify > Settings > Storage, and clear the cache from there. For Apple Music, you may need to manually delete downloaded tracks via the Music app. If you frequently use these services, consider monitoring their cache sizes periodically.
Cleaning up your Mac’s system files doesn’t have to be daunting. With a little care and attention, you can reclaim valuable storage space and keep your machine running smoothly. Remember, always back up your data before making any changes, and take the time to review what you’re deleting.
By following these tips, you can avoid paying for a “cleaner” app for your Mac.


