

If your PDF is too large to be sent via email, or you simply want to reduce your file’s size, it’s easy to compress PDF files on Windows 11. You have both desktop apps and online tools to do that.
Use a Free, No-Frills App to Compress Your PDF
The easiest way to compress a PDF on Windows 11 is to use a free app called Free PDF Compressor. This app offers a no-frills, easy way to reduce your PDF’s size.
To use it, launch the Free PDF Compressor site and download and install the app on your PC. Open the app, click “Browse” in the PDF File section, and select your PDF.

In the Output File section, click “Save As” and choose where you want to save the resulting PDF.
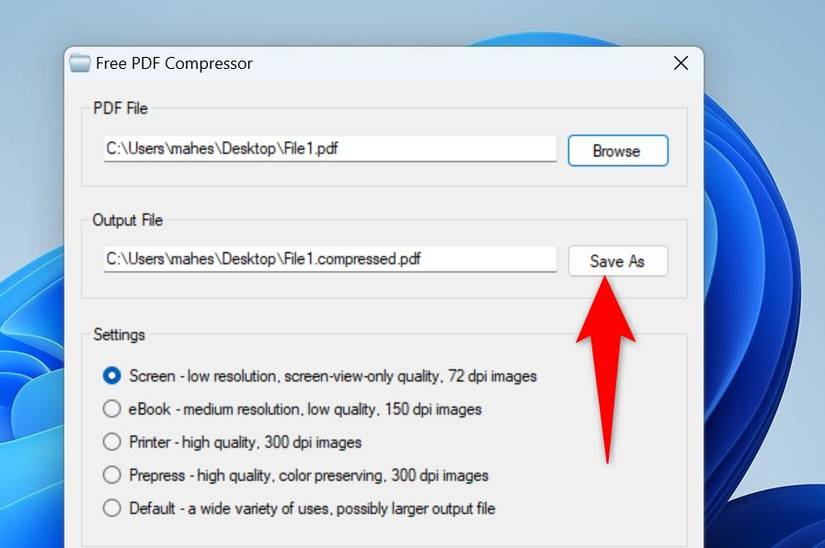
In the Settings section, choose how you want the app to compress your PDF. The available options are Screen, eBook, Printer, Prepress, and Default. Each option is self-explanatory and offers a unique file size. If you use an option and it doesn’t meet your expectations, you can re-compress your PDF using another option again.
To begin compressing your file, click “Compress.”

The app will save the resulting file in the chosen folder.
Use Microsoft Word to Compress (Some) PDFs
Microsoft Word is meant to create Word documents, but you can use it to open, edit, and even compress PDF files. Word might make changes to your PDF’s layout, so this method is ideal if your PDF is not heavily formatted.
To use it, launch Word, choose Open > Browse, and select your PDF. Word will display a prompt saying there might be changes to your PDF’s layout. You’ll have to accept this prompt to continue; select “OK” to accept the prompt.

When the PDF is open, in Word’s top-left corner, click “File.” From the left sidebar, choose More > Export. On the right, select Create PDF/XPS Document > Create PDF/XPS.

On the Publish as PDF or XPS window, at the bottom, enable “Minimum Size (Publishing Online).” This is the option that compresses your file. Then, choose a folder to save your file in. Click the “File Name” field and type a name for your file. Then, select “Publish.”

Word has saved the compressed PDF in your chosen folder.

If you only have one or a few PDFs to compress and you don’t want to install or use a desktop app, utilize one of the many web-based apps. These tools operate from your web browser and let you reduce your PDF’s file size. Some of these tools are Smallpdf, iLovePDF, and PDF Compressor.
For privacy reasons, I don’t recommend using these web-based tools for any PDFs containing sensitive data. In that case, use one of the other offline methods.
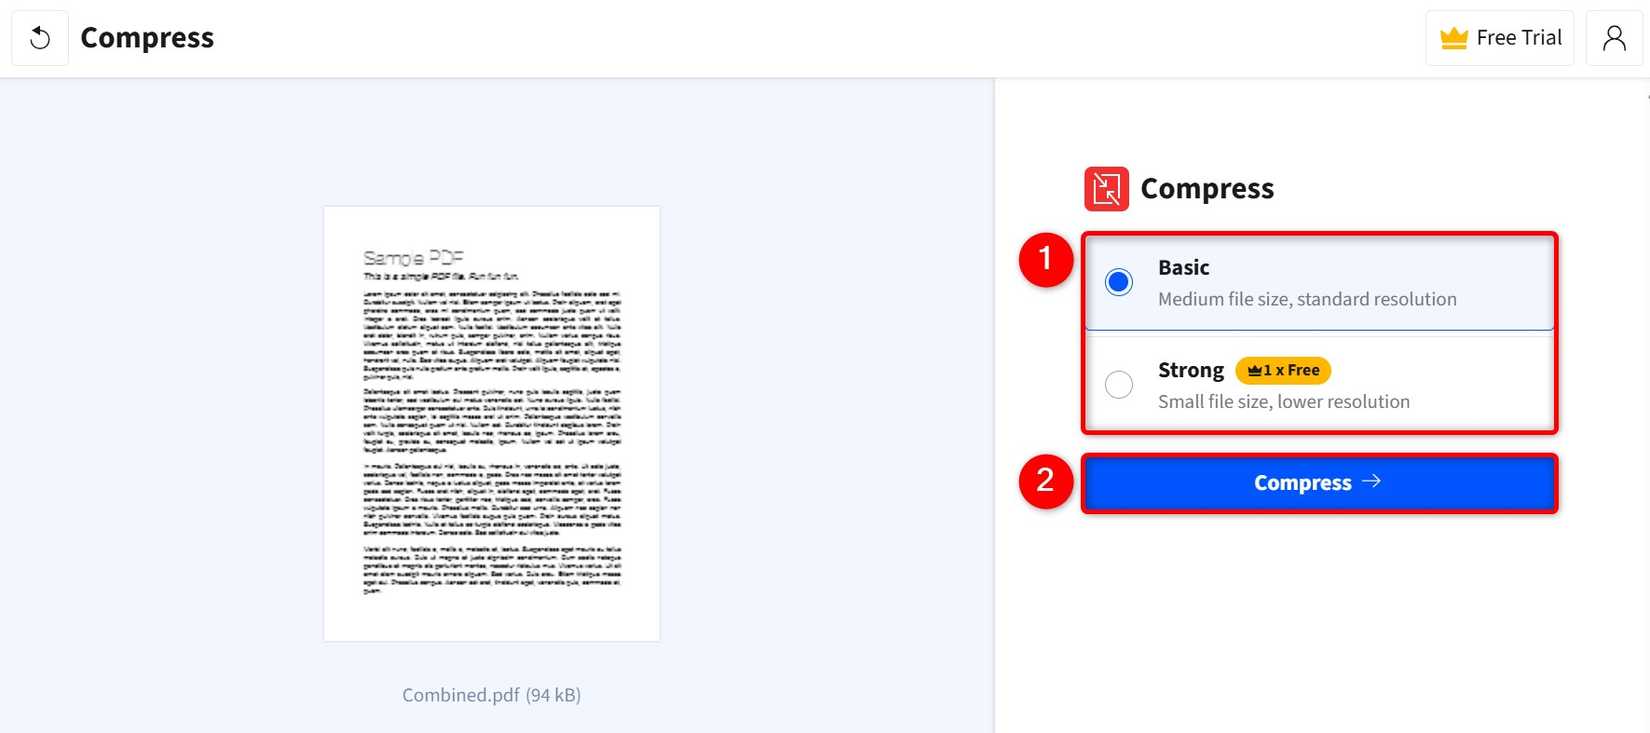
To use Smallpdf, for example, launch its site, click “Choose Files,” and select the PDF you want to compress. You can also drag and drop your file onto the site to upload it.

After the PDF is uploaded, on the right, click “Basic” or “Strong.” Basic offers medium file size with standard resolution, whereas Strong offers better compression but comes with lower resolution. With its free plan, Smallpdf lets you use Strong only once, unfortunately.
After choosing an option, click “Compress.”
When the site has compressed your PDF, in the right sidebar, click “Download” to save the PDF to your PC. To upload the file directly to Google Drive or Dropbox, click the down-arrow icon next to Download and choose the appropriate option.
After you’ve downloaded the file, remove the file from the site’s servers. Do that by clicking the trash can icon and then choosing “Delete” in the open prompt.

Make a Compressed Archive From Your PDF With 7-Zip
7-Zip is an archiving tool. It doesn’t directly compress your PDF file, but you can make an archive from your PDF, and that archive will be compressed. You can use this method to compress multiple PDFs as well.
To use it, launch the 7-Zip site and download and install the app on your PC. Then, restart your Windows 11 computer.
Launch File Explorer (press Windows+E), find your PDF, right-click it, and choose Show More Options > 7-Zip > Add to Archive.

On the Add to Archive window, click the “Compression Level” drop-down menu and choose “9 – Ultra.” This applies as much compression as possible. Optionally, configure other options like the archive format using the “Archive Format” drop-down menu. Then, at the bottom, choose “OK.”
I recommend selecting “zip” from the “Archive Format” drop-down menu, as this format is supported on many devices.

The app has created an archive that’s compressed and contains your PDF.

Related
How to Enable and Use File Compression on NTFS Drives in Windows 11
Store more files on your system.
Compress Multiple PDF Files at Once Using a Free App
If you want to compress multiple PDF files, use an app that offers bulk compression. One such app is PDF24 Creator, which allows you to work with your PDFs using various options, including bulk-processing your files.
To use it, launch the PDF24 Creator site and download and install the app on your PC. Launch the app and select “Compress PDF.”

Click “Choose Files” and select all your PDFs. If your files are in different folders, click “Add Files” (the plus sign) to add files from different folders.

Optionally, configure the “DPI” (Dots Per Inch) and “Image Quality” options. These options affect the quality of your PDF. If the resulting file is of lower quality than expected, re-compress the file by increasing the values of these fields.
Then, choose “Compress” to begin compressing your files.

When the app has compressed your files, click “Save.” On the Browse for Folder window, select the folder in which you want to save the compressed PDFs. To create a new folder, choose “Make Folder.” Then, select “OK.”

PDF24 Creator has saved the compressed PDFs in your selected folder.
And that’s how you use various free tools to reduce the size of PDF documents on Windows 11. Other methods you can use include NTFS compression and splitting large files into multiple smaller files.


