

When it comes to cross-platform files, two of the most widely used image formats you’ll see are PDFs and JPGs. The Portable Document Format (PDF) was launched by Adobe back in 1992, while the Joint Photographic Experts Group (JPG) was unveiled the same year, and was developed by its titular organization, in collaboration with IBM, Mitsubishi, AT&T, and Canon.
Both of these files are easy to share with other users, and can be understood by just about every PC and mobile device. But in the event that you need to convert a PDF to a JPG, you’ll be glad to learn that doing so is quite easy, and there are multiple ways to perform the transformation.
screenshot / Digital Trends
Use a conversion site
The best part of using an online tool is that it can be used from any computer or mobile device anywhere globally (and it won’t take up space on your computer). The only downside is that they tend to be a little limited in the amount of data you can convert at one time, making them difficult to use for larger PDF files. However, it’s incredibly straightforward.
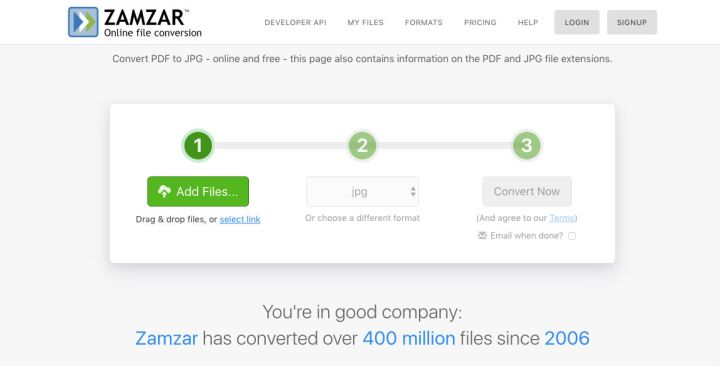
There are all sorts of different conversion websites on the internet, but we like Zamzar’s trusty conversion tool, which has a clean interface and avoids annoying ads.
Step 1: Navigate to Zamzar’s PDF to JPG conversion tool in your web browser and follow the on-screen instructions. Zamzar includes descriptions of all file formats if you aren’t quite sure if JPG is what you need or if you’d prefer a different format.
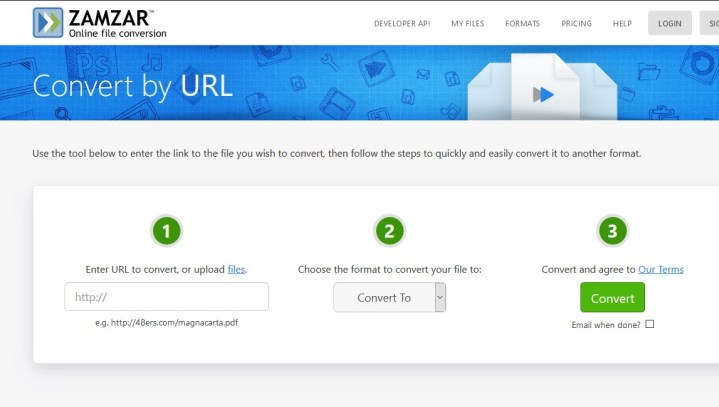
Step 2: You can drag and drop files to upload them to the site’s converter instantly. There are also two other easy ways to upload your files. First, you can select the green Add Files… button. This will open a file search window so that you can select your file from your computer. Second, you can choose the Select Link option underneath the Add Files… button. This will take you to another page in which you can upload your file by entering a URL.
screenshot / Digital Trends
Step 3: For the second step, you can pick what format you want the file converted to. Select the drop-down menu under the second green checkmark and look for the JPG option under image formats. To make it easier on you, the link we included up top will automatically set the format to JPG, but if you start at Zamzar’s home page, you will need to complete this step, too.

screenshot / Digital Trends
Step 4: The final Zamzar button is Convert Now. However, before you select this, take a look below to see the Email When Done? option. If you prefer to get your JPG by email, then check this box, which will pop up an email form right below. Fill this out, and then choose Convert Now to begin.

screenshot / Digital Trends
Step 5: When you’re ready to finish, click the Convert Now button to begin the conversion process. It will take several seconds to a few minutes to convert your file (Zamzar promises faster conversions if you create an account with them, but this is absolutely unnecessary for most projects). When everything is done, select Download to download the file to your local hard drive. Select Convert More Files to continue with other PDFs. Zamzar will hold files for 24 hours, after which they are securely disposed of, usually within seven days.
Zamzar can convert pretty much anything to PDFs, so if you want to convert your files to other formats that your project might require, you can. Just pick your choice from the drop-down menu we mentioned in step 3.

screenshot / Digital Trends
screenshot / Digital Trends
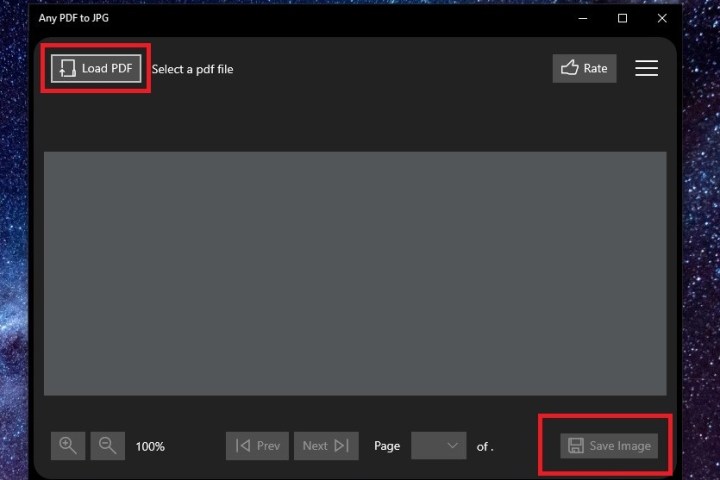
Windows alternative: Any PDF to JPG
If you’d rather have a dedicated desktop app for converting PDFs to JPG files, look no further than Any PDF to JPG. It’s free and easy to use. Just download the app from the Microsoft Store.
When you’ve finished downloading and installing, you can open the app. Select the Load PDF button on the top left. This will open your PDF file, and you can then click on the Save Image button to start converting. The next screen will let you pick your output folder and page ranges. Then, you can select the drop-down menu to choose JPG as your format. Afterward, select Continue.
When it’s finished converting, you will be able to view your JPG’s saved location. Simply click on Open Folder to do so.
macOS alternative: PDF Preview
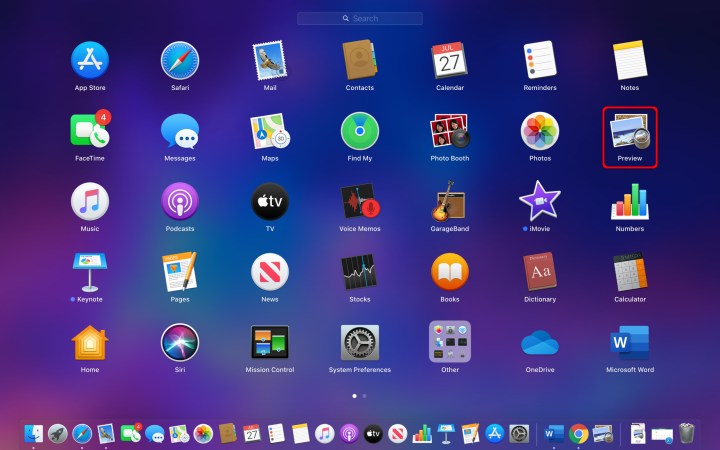
macOS is probably the easiest and most direct choice for converting PDFs natively out of all the available platforms. You don’t need to download any extra tools to get the job done. Here’s what to do.
Step 1: PDF files should open in Preview mode by default. If you changed your default action for PDFs, you could adjust your default action for that file type by right-clicking the file or opening it manually.
If you choose to use the manual method, locate the PDF file using Finder and right-click to open in Preview mode. You can also open Preview from the launcher icon, located in your Dock at the bottom of the screen.
screenshot / Digital Trends
Step 2: Once you’ve opened your file in Preview, you are ready to export. Click the File option in the menu bar, then click Export.

screenshot / Digital Trends
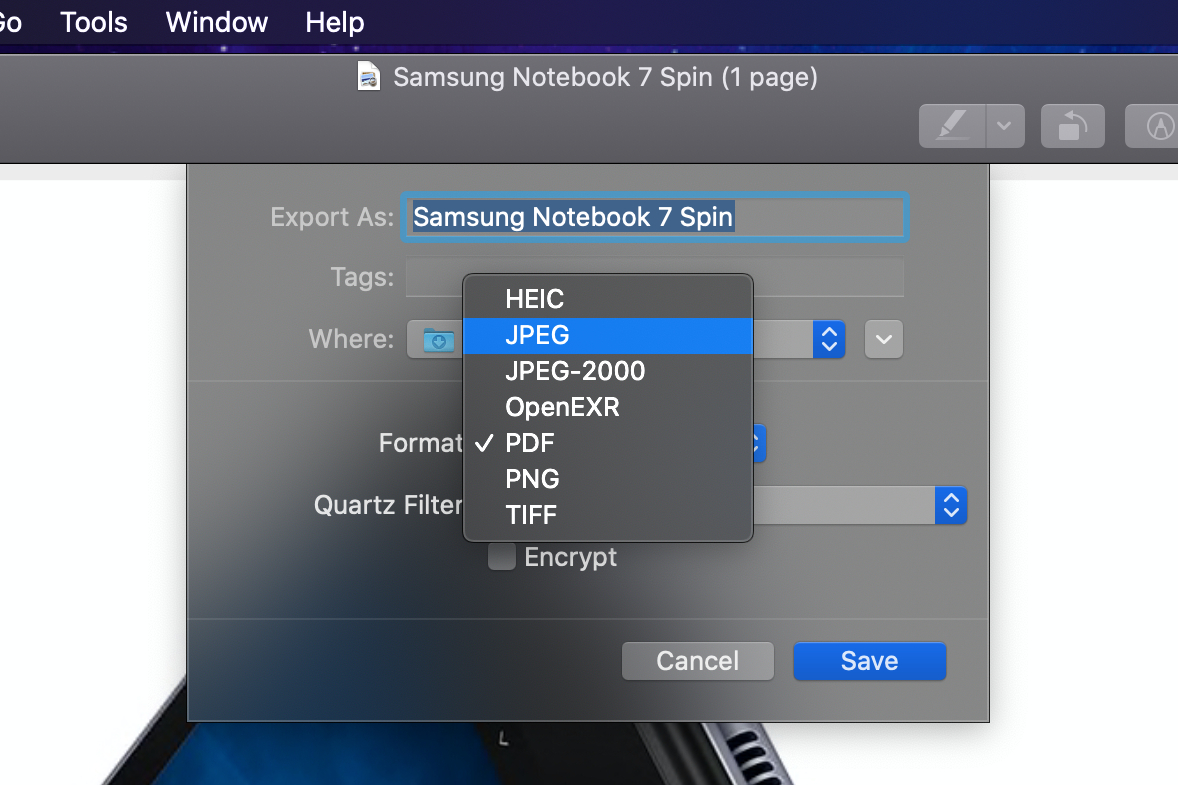
Step 3: To select an export type, such as JPG, click the Blue Arrows next to Format. Additionally, the slider next to Quality will adjust the output from Least to Best, and the text field next to Resolution can make the image smaller or bigger. Finally, change the file name and save the location as needed.
To complete the process, click the Save button.
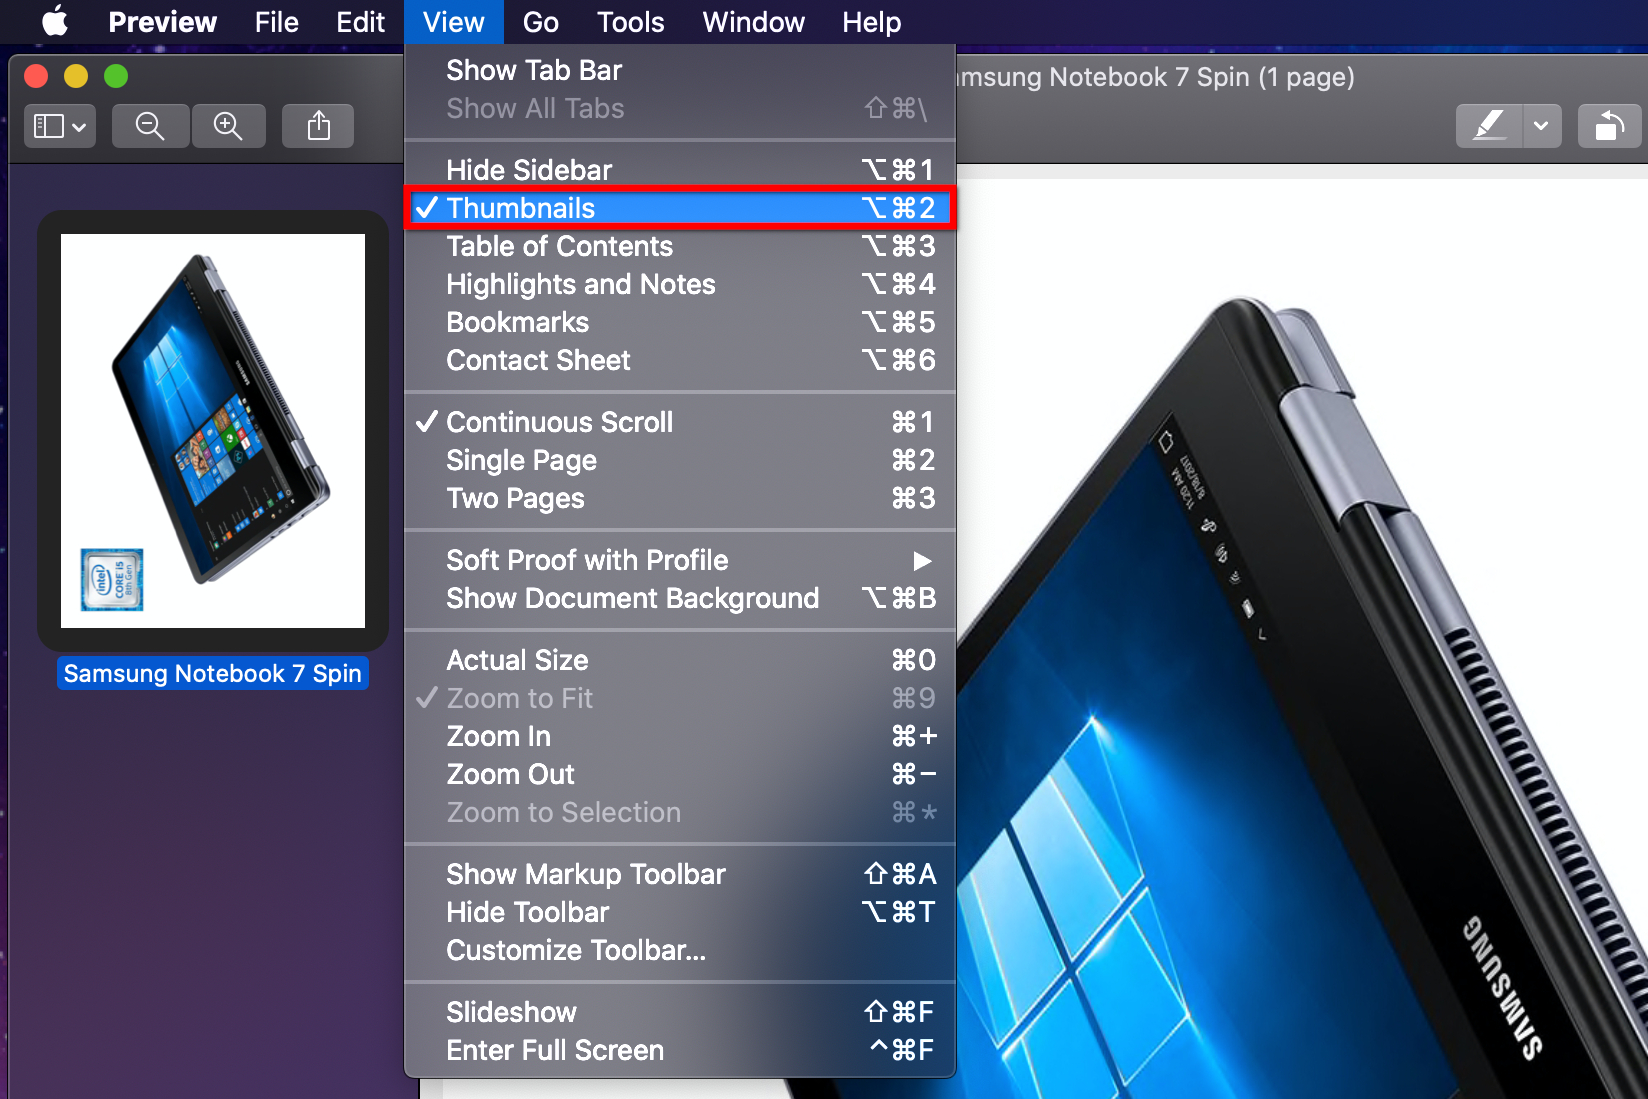
If you only want to save part of the PDF, click View on the menu bar. Turn on Thumbnails to allow you to select particular pages via the Thumbnail sidebar. Also, if you want to modify images and text in PDF files, take a look at our guide of the best PDF editors. It will help you choose the right editor for your needs.
Which is better: PDF or JPG?
Generally speaking, the PDF format is better than JPG for a few reasons. For starters, PDFs compress images in a way that doesn’t affect the quality of your original file. Whenever you save a JPG, you lose a little bit of digital info with each new save, thanks to something called lossy compression (which is also how JPG files manage to be so small).
Then there’s the ease of editing that comes with a PDF. This is because PDFs are saved in a way that lets certain programs access the individual layers of your PDF file. JPG images save as one static layer.
What other image files can a PDF be converted to?
There are many different types of image files, and you’ll be able to convert your PDF to most of them. Options include TIFF, PNG, GIF, PSD, RAW, and several others.
What’s the difference between JPG and JPEG?
The name. Both the JPG and JPEG, named for the Joint Photographic Experts Group, developed both of these image file standards. In terms of compression and overall size, they’re exactly the same. Originally, the extension went by JPG because old PC filing systems were limited to three characters. Once that character count went up, the “E” for Experts was added in.
Editors’ Recommendations

