Quick Links
Key Takeaways
- The HEIC image format offers smaller file sizes at great quality but can cause issues with some apps due to the lack of universal support.
- Quickly convert HEIC to JPEG on Mac by dragging images from the Photos app to the desktop or using Quick Actions.
- For older Macs, create a Quick Action through Automator to convert HEIC files to JPEG easily.
Apple started using the HEIC image format with iOS 11. It’s preferred over the JPEG format because of its smaller file sizes, but it can cause problems for some apps. Here’s how to easily convert HEIC files to JPEG.
What Is HEIC?
HEIC is a high-quality, low-file-size format used by the iPhone camera. While you can set your iPhone to shoot in JPEG instead, in many cases, it doesn’t really matter what format you use.
However, when you start sharing images or saving them to your Mac for future use, you might want them in a more common format. And though HEIC is becoming more and more prevalent, it doesn’t have anywhere near the universal support and compatibility that you get from the JPEG format.
Fortunately, it’s easy to convert them.
The Quick Way to Convert HEIC to JPEG
The ability to convert HEIC images to JPEGs is built into the latest versions of macOS.
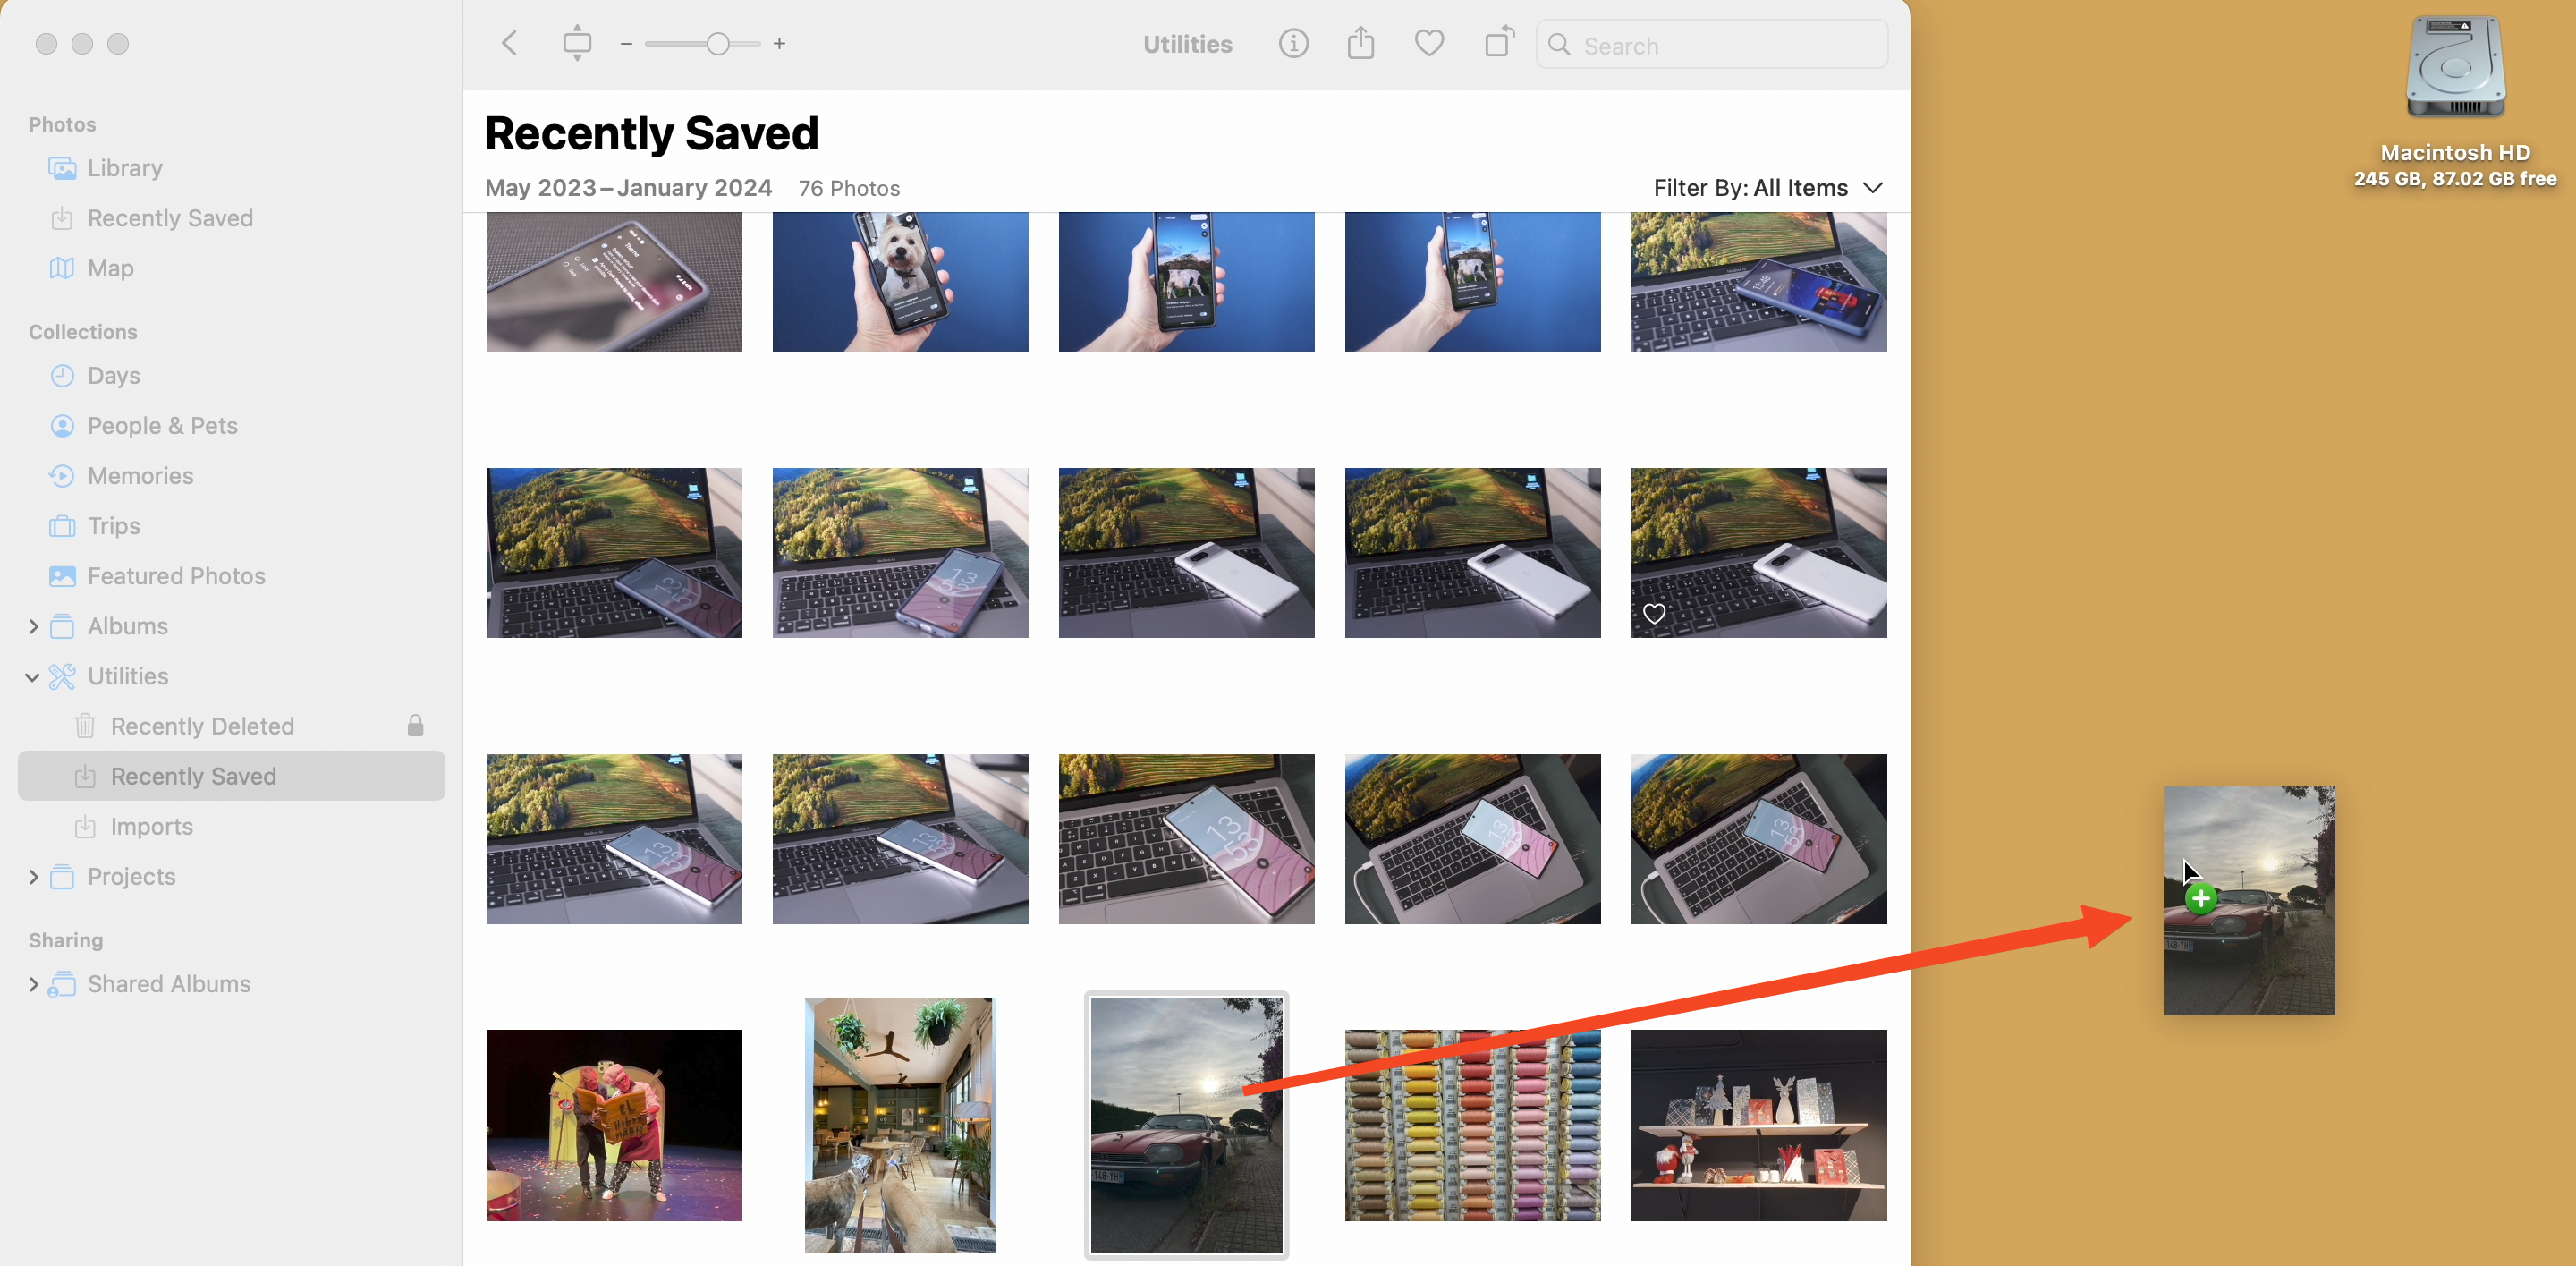
If your images are in the Photos app on your Mac, whether you sync them with iCloud or import them manually from your iPhone, then the process could not be simpler. Just find the images in Photos and drag them onto your desktop.
This will create copies of the photos in the JPEG format. If you want those JPEGs in your library, you can drag them straight back into the Photos window.
If the HEIC images aren’t in Photos, or if you want a few options for controlling how they’re converted, there’s a second option.
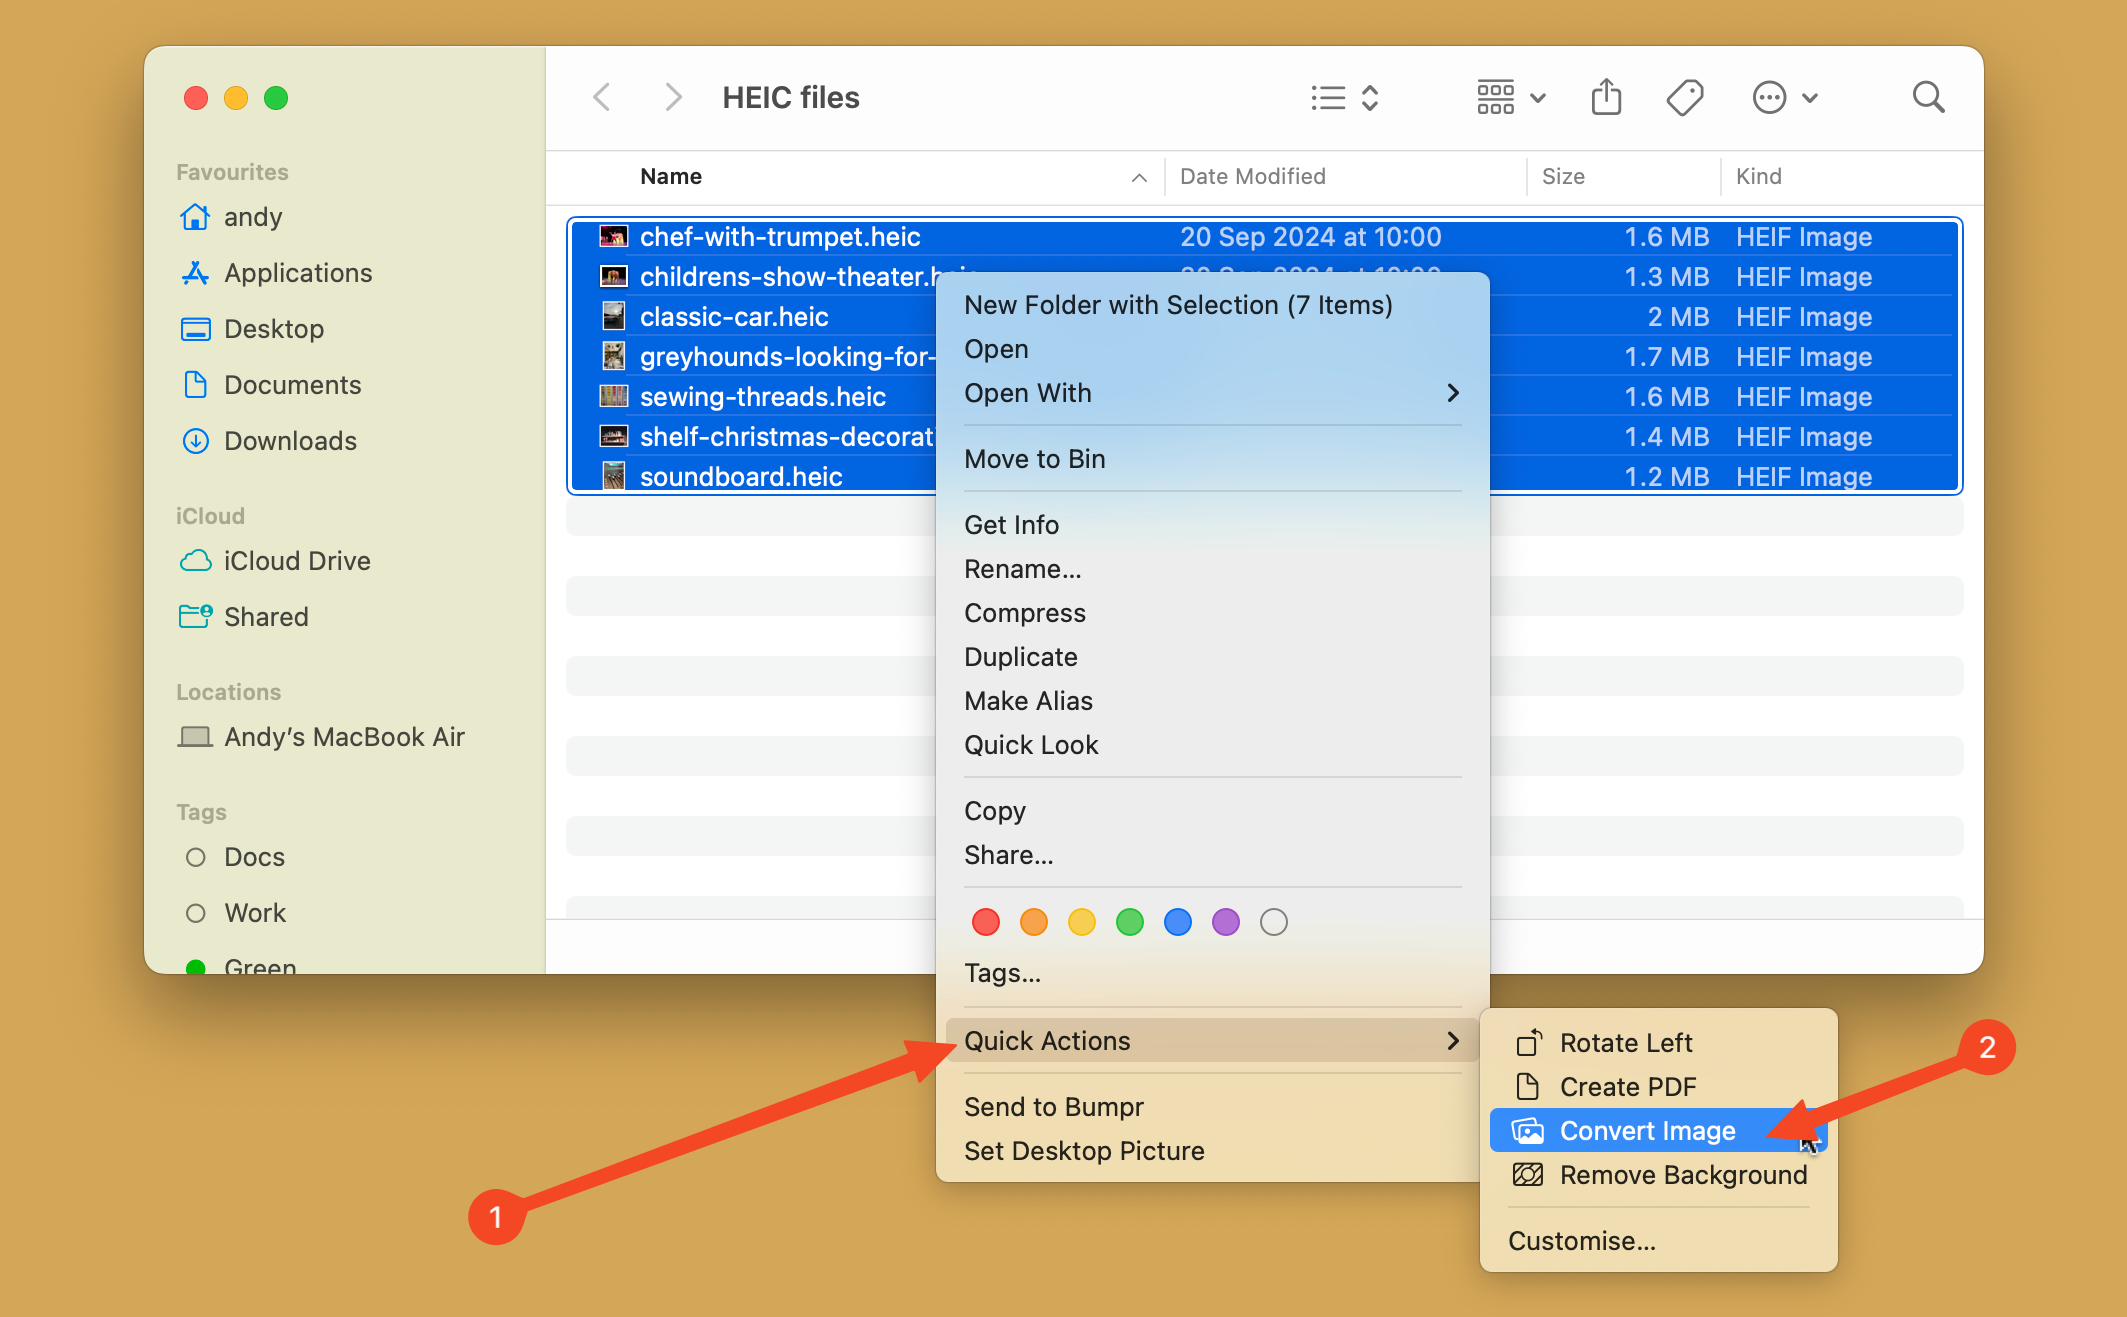
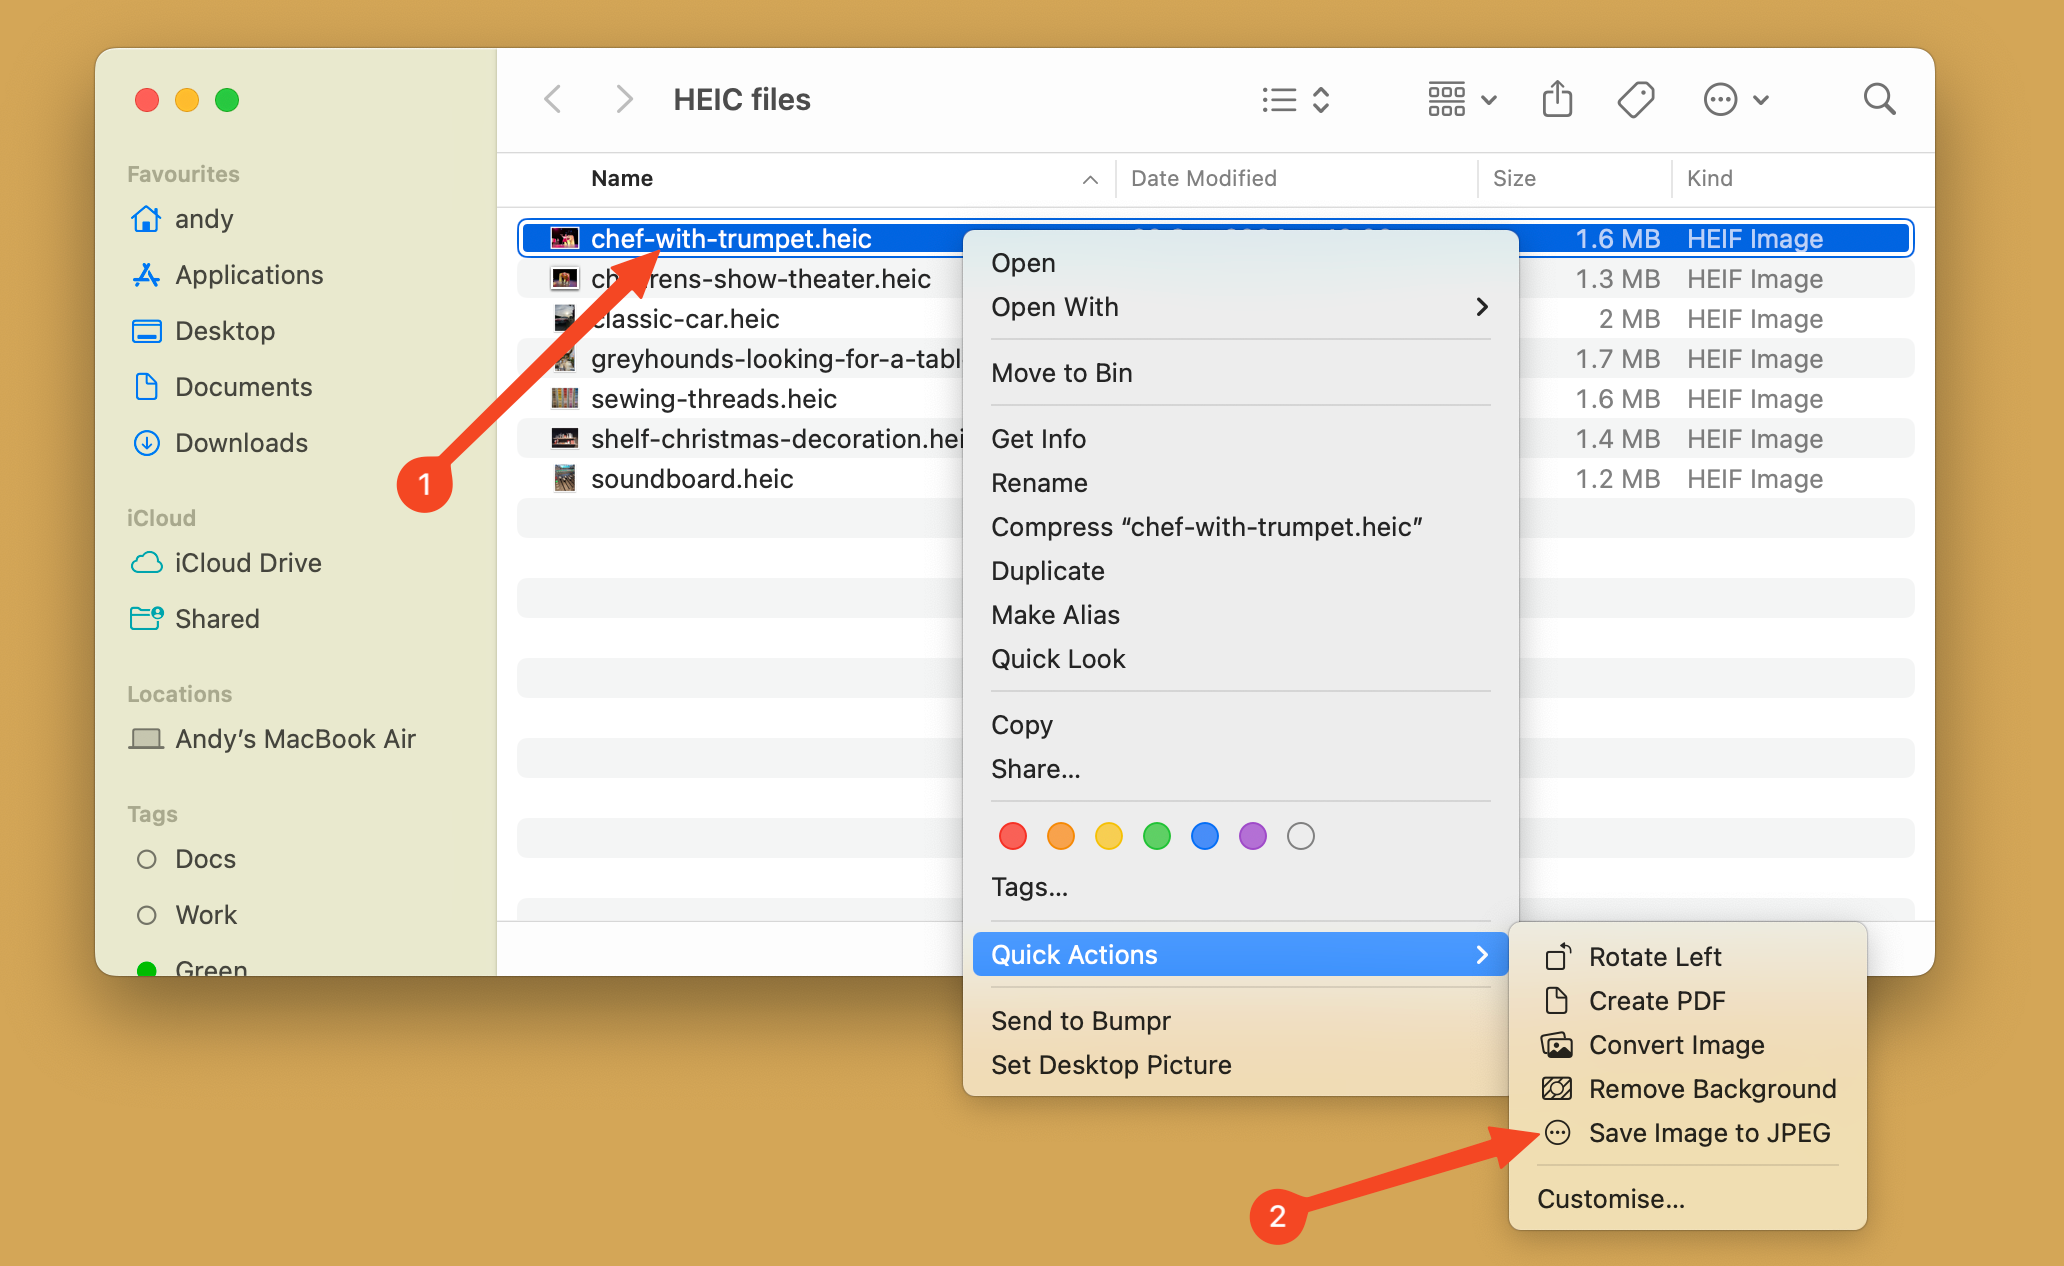
Select the HEIC files, right-click on them, and go to Quick Actions > Convert Image.
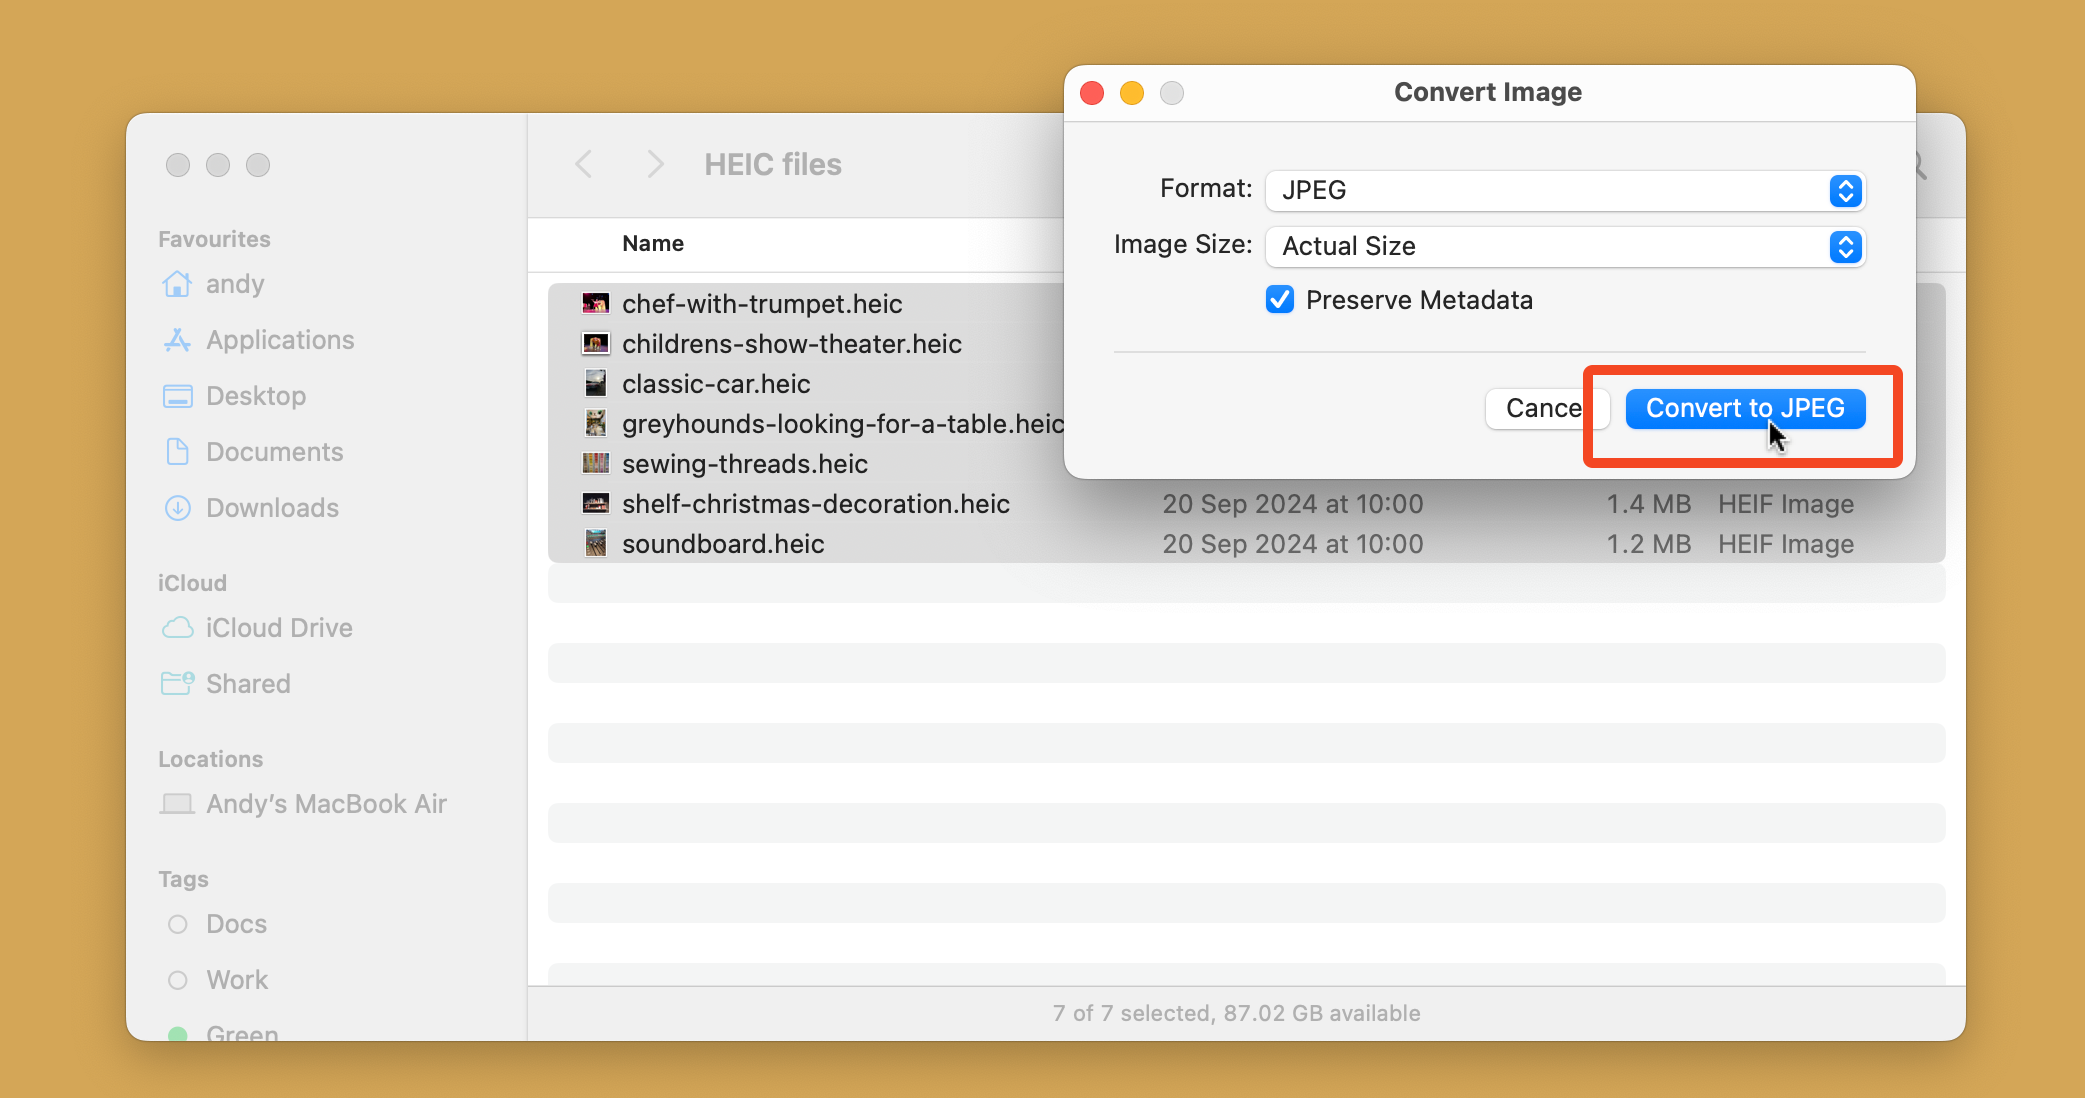
In the dialog box that opens, choose the format from either JPEG or PNG. You can also set the size. In most cases, you’d want to keep it as “Actual Size,” but if you select “Large,” “Medium,” or “Small,” the longest edge will be reduced to 1280, 640, or 320 pixels, respectively.
In most cases, you will want to leave Preserve Metadata selected as well. Now click the “Convert to JPEG” button and the new images will be saved in the same folder as the originals.
You can also convert JPEG and PNG images to HEIC in the same way. You need to select “HEIF” as the format in the dialog box (
HEIF and HEIC are the same thing
).
For Older Macs: Create a Quick Action
If you’re running an older version of macOS that doesn’t do the automatic conversion or have the right-click option, you can create your own Quick Action to replicate the process through Automator.
Set Up the Quick Action
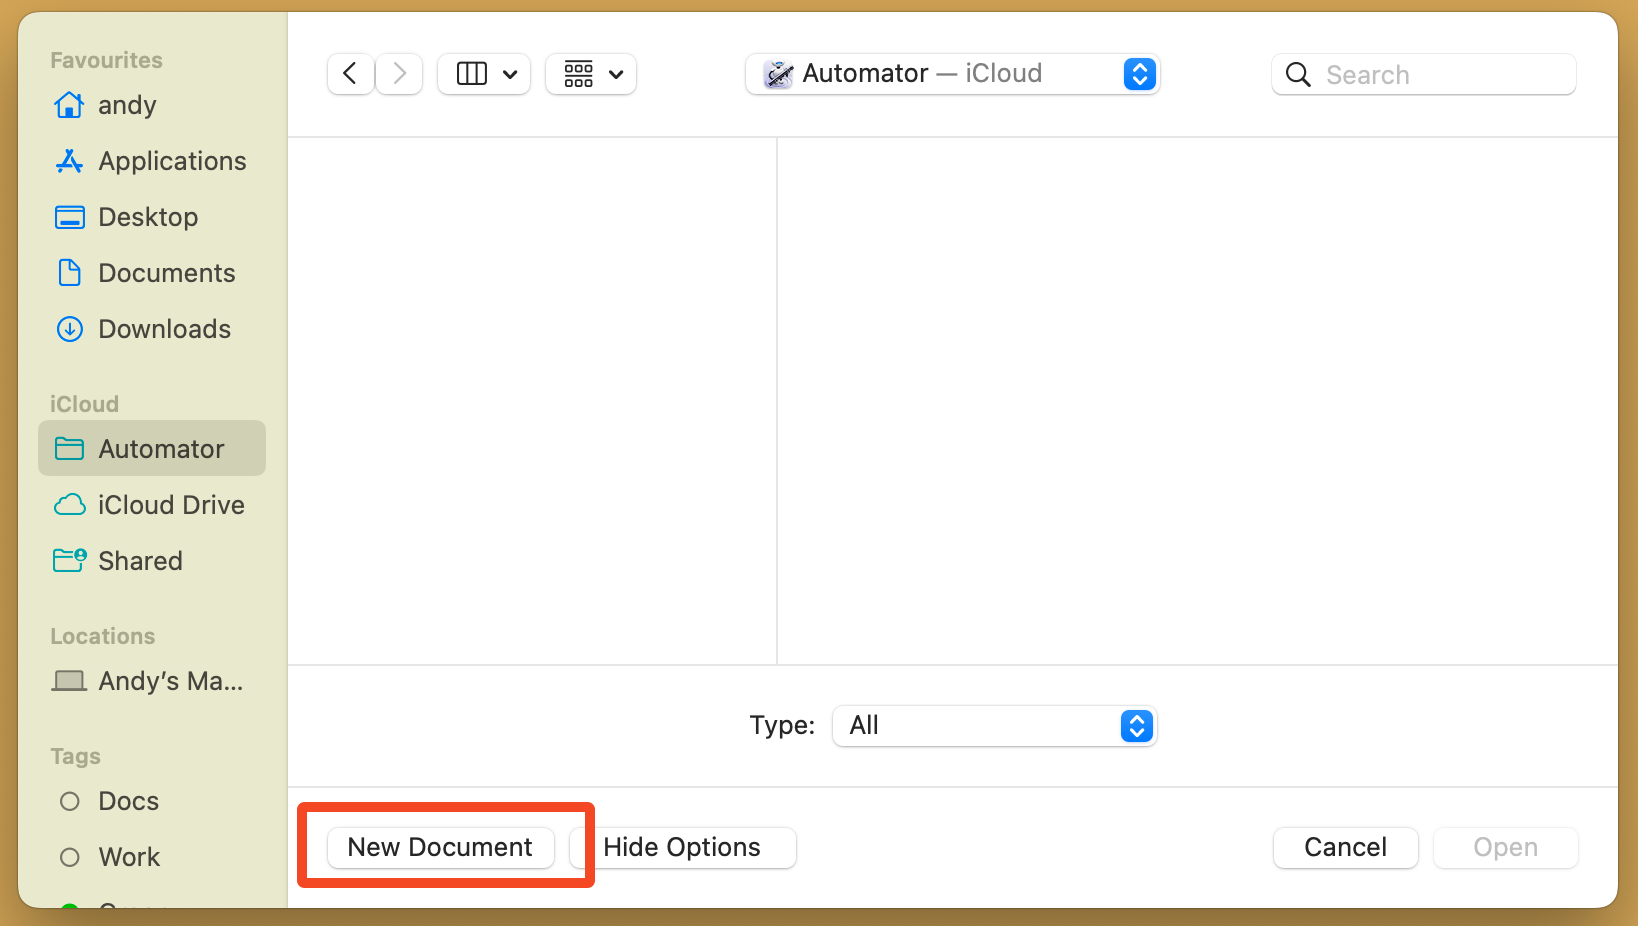
Launch Automator on your Mac—it’s in your Applications folder, or you can use Spotlight to search for it—and then click “New Document.”
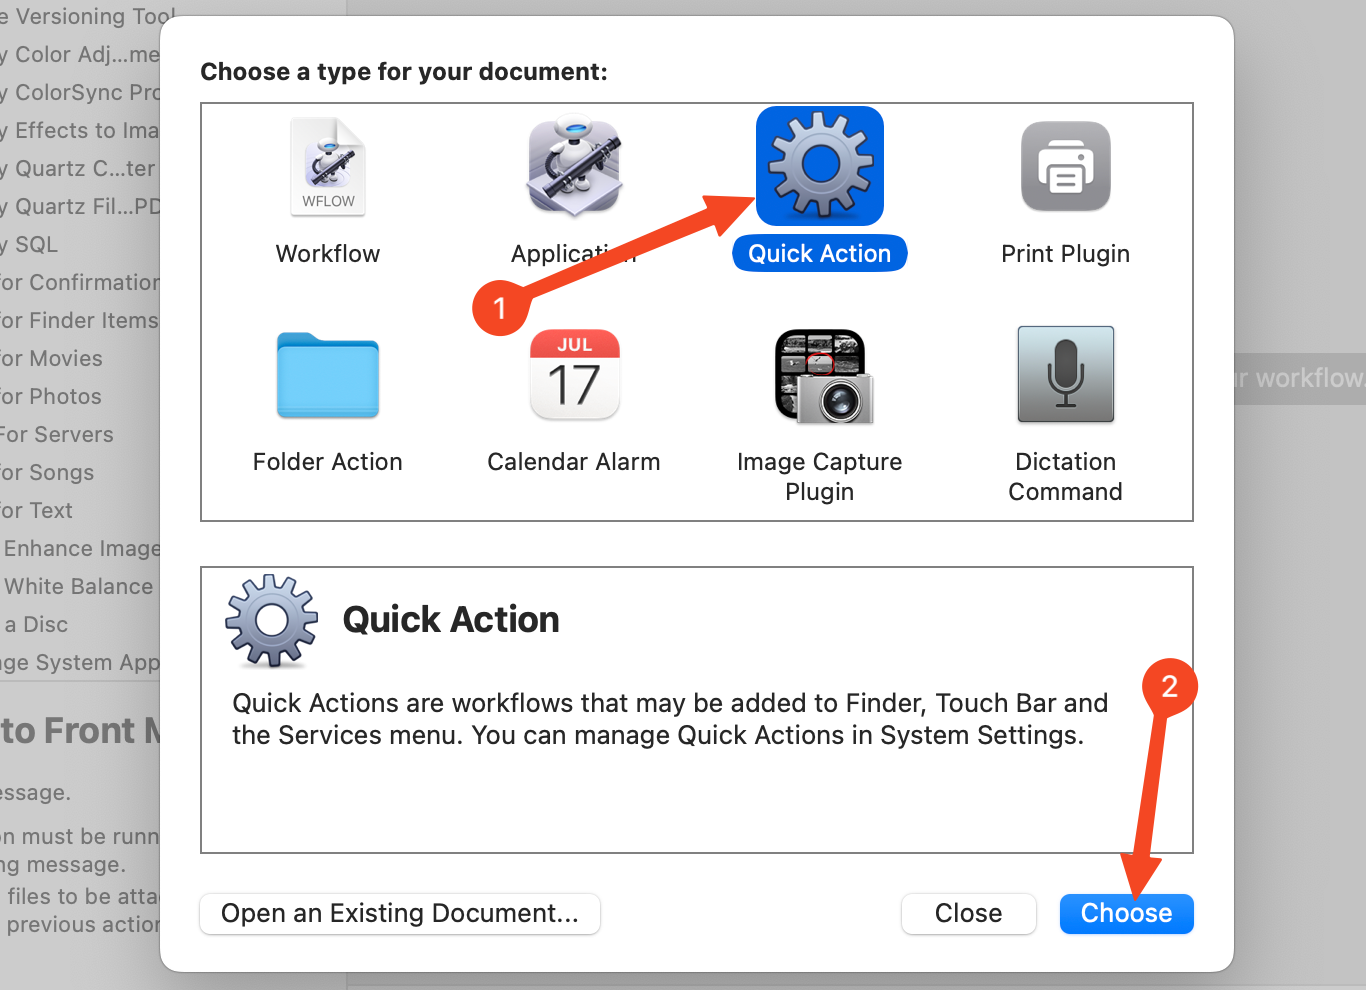
Next, from the list of templates, click “Quick Action,” followed by “Choose.”
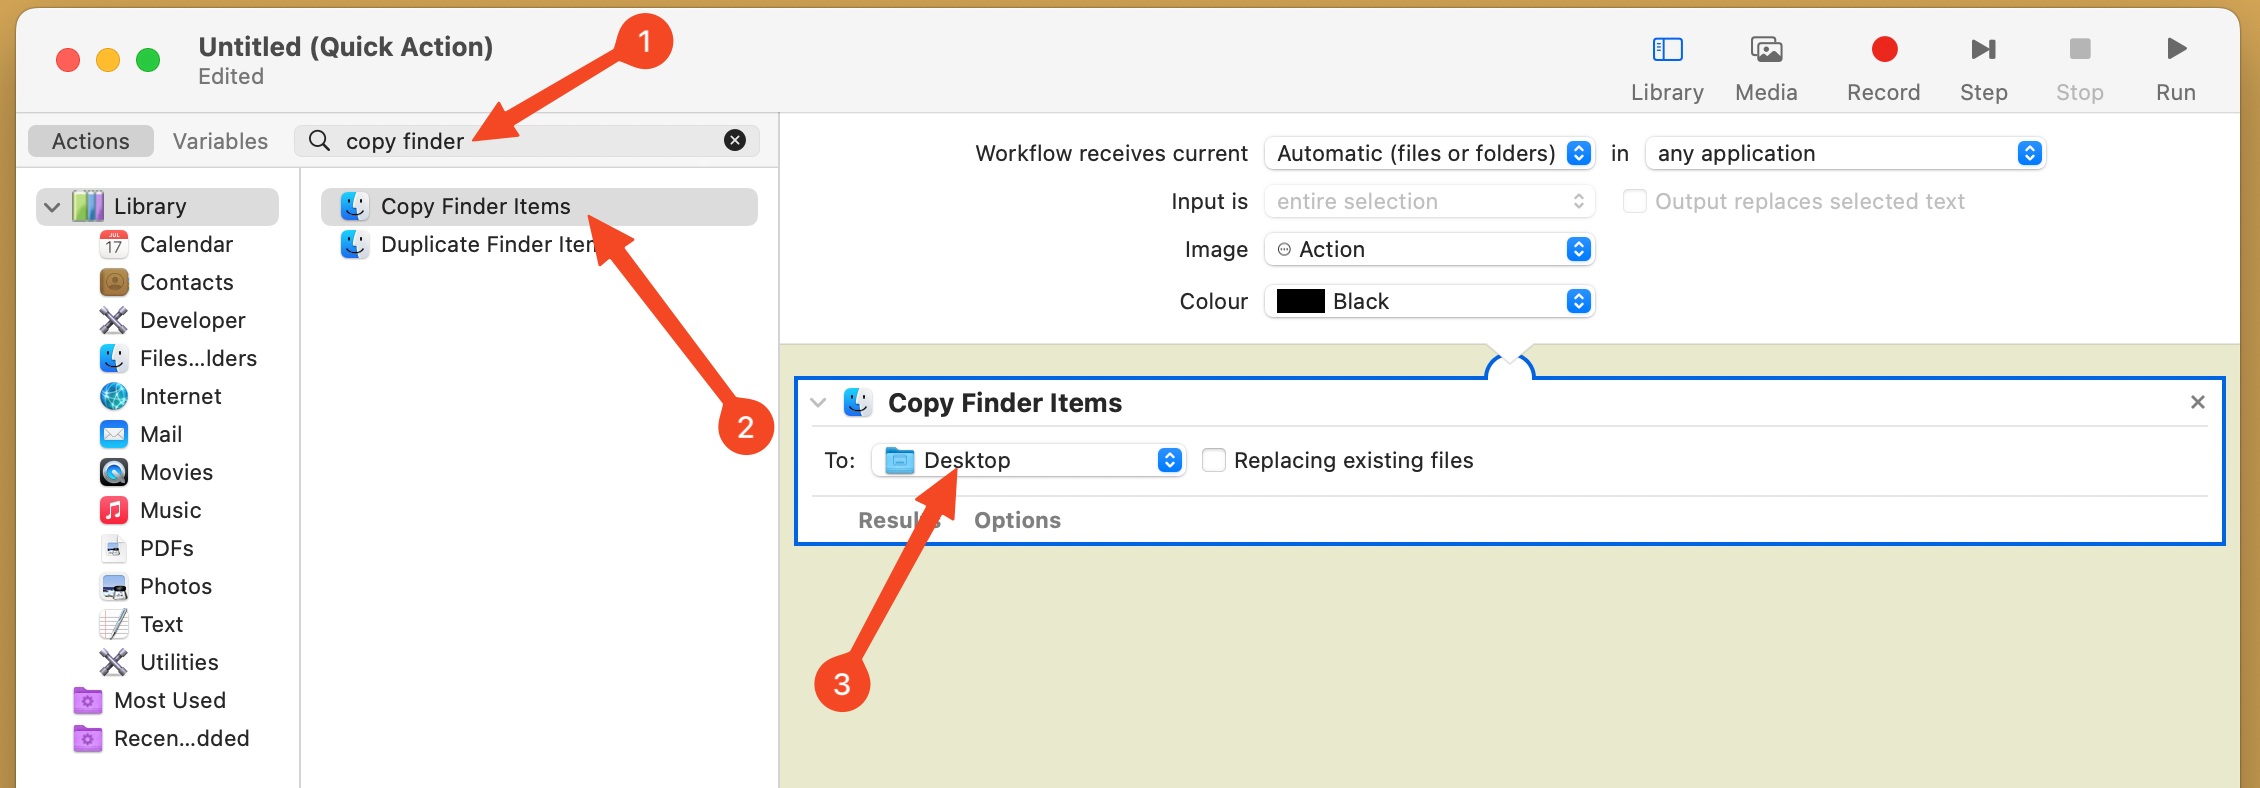
Over on the left side of the screen, type “copy finder” into the search box and then drag “Copy Finder Items” to the right-hand side of the screen. Here, you can then select the folder to which you want to save the converted images.
If you want to convert the HEIC image without creating a copy, just omit the “Copy Finder Items” step. Automator will then convert the original HEIC file to JPEG in the same folder.
If you want to keep your original HEIC files, be sure to use “Copy Finder Items” and not skip this part of the process.
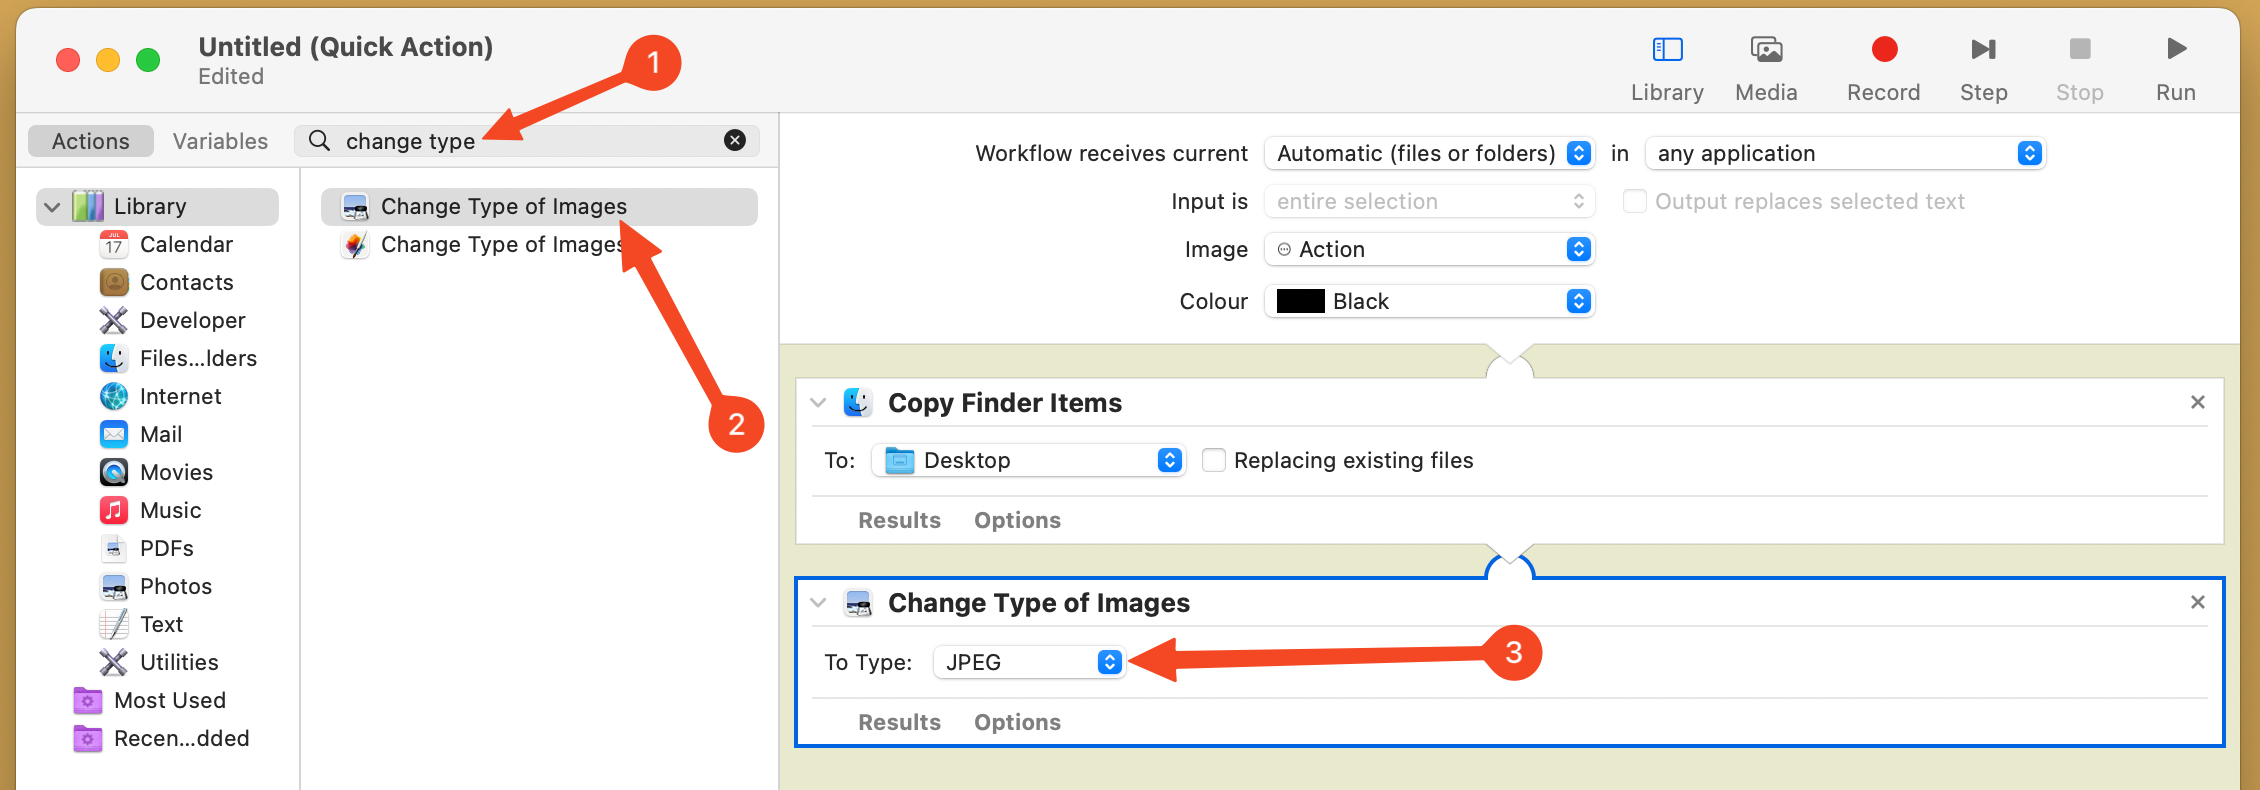
Back on the left side of the screen, type “change type” into the search box and then drag “Change Type of Images” to the right-hand side of the screen. There is a drop-down here, too. Change that to “JPEG.”
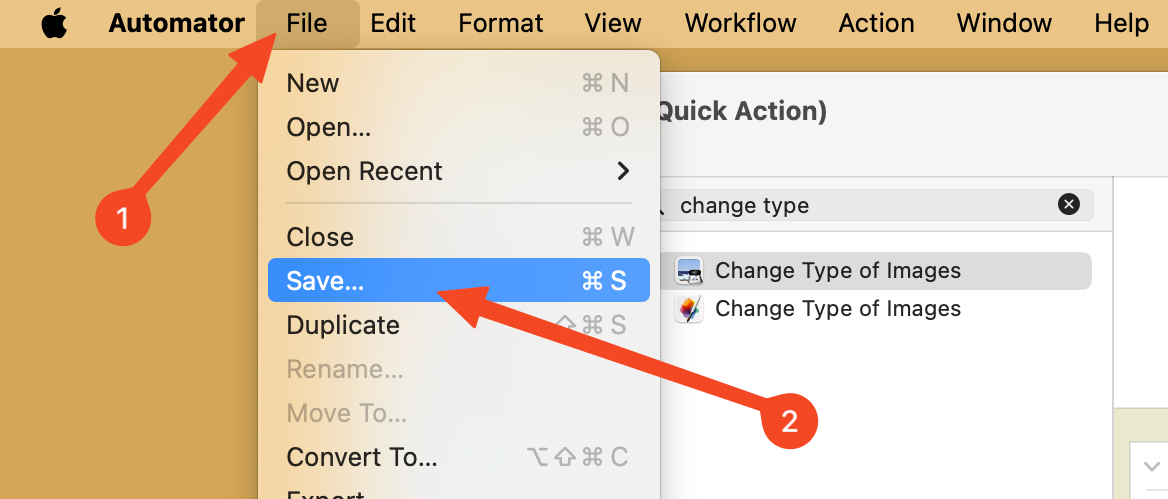
In the menu bar, click File > Save and then enter a name for your quick action.
Finally, click “Save” to complete the process.
Use the Quick Action to convert HEIC images to JPEG
To use your new Quick Action, right-click any HEIC file—or indeed, any image file—and then select the Quick Action that you created earlier. You’ll find the newly converted JPEG in the folder that you designated earlier.
You can also select a group of images and convert them all at once the same way.
Although HEIC images are becoming more common thanks to the iPhone, they still don’t have the universal support that the JPEG format has. Fortunately, macOS makes it as easy as possible to convert your photos, so you should never have any problems with compatibility.
Have a Windows computer? The process of opening and converting HEIC images to JPEG is almost as easy.


