

When you take a photo with an iPhone or iPad, the default format that the images saves in is Apple’s HEIC. This has been the norm for several years now, and even though more and more devices are beginning to support this file type, you may need to convert some of your images into a more compatible extension, like a JPEG.
Fortunately, there’s a couple of simple ways for you to convert image formats for Mac, and we’re going to teach you each and every method.
What is HEIC?
HEIC stands for High-Efficiency Image Codec, and as mentioned, it’s used by Apple for storing photos and accompanying data on your device. It became the “new” file type introduced with iOS 11 because of its smaller file size in comparison to JPEG.
You may also hear about HEIF, which is High-Efficiency Image Format and also used by Apple. In a nutshell, HEIC is what’s used to store HEIF photos and data. So, you may hear the terms used interchangeably.
How to convert HEIC to JPEG on Mac using Preview
Preview is the default app on MacOS for viewing images, unless you change it of course. The app gives you a simple way to open an HEIC photo and convert it to JPEG.
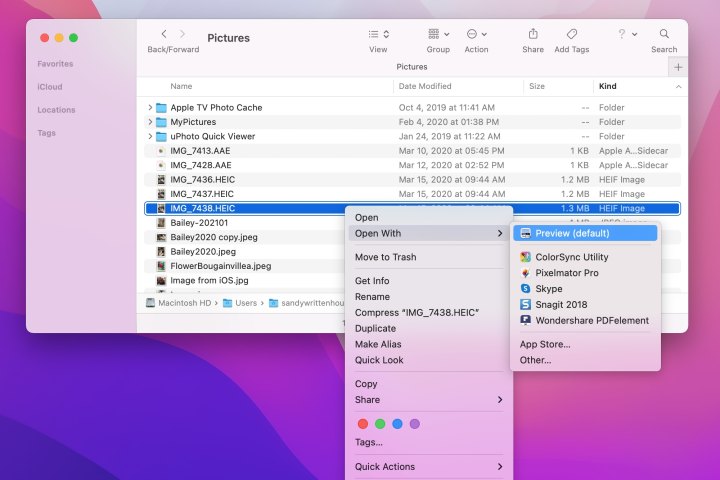
Step 1: If Preview is still your default image app, simply double-click the HEIC image and it will open in Preview. If you’ve changed your default app, you can open the image in Preview by right-clicking, moving to Open With, and selecting Preview.
Digital Trends
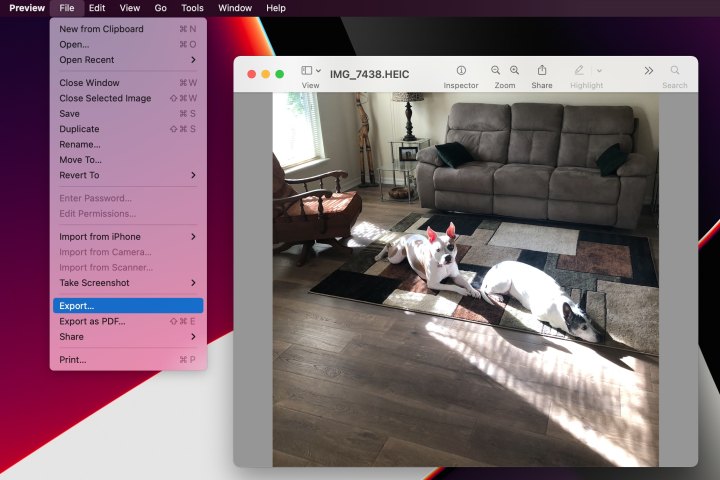
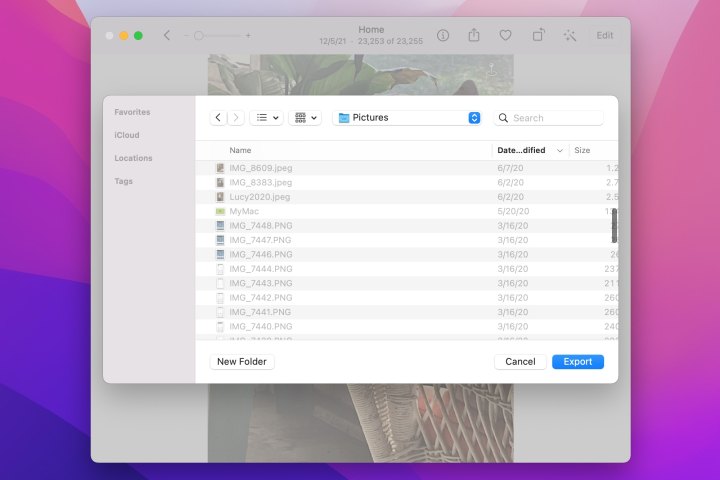
Step 2: Select File > Export from the menu bar in Preview.
Digital Trends
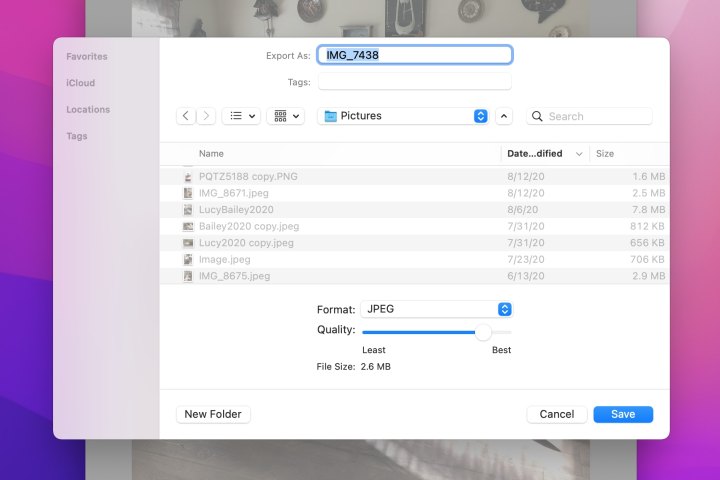
Step 3: In the pop-up window, rename your file and add a tag if you wish. Then, choose a location to save the converted image.
Step 4: Next to Format, select JPEG.
Step 5: Optionally, you can use the Quality slider to adjust the quality from Least to Best. As you move the slider, you’ll see the File Size Adjust as well.
Step 6: Click Save.
That’s all there is to it! You’ve just converted the HEIC photo to a JPEG.
Digital Trends
How to convert HEIC to JPEG on Mac using Photos
If you use iCloud and sync photos on your Mac with your iPhone or iPad, then using the Photos app is a convenient way to convert an HEIC image.
Step 1: Open Photos on your Mac and select the image.
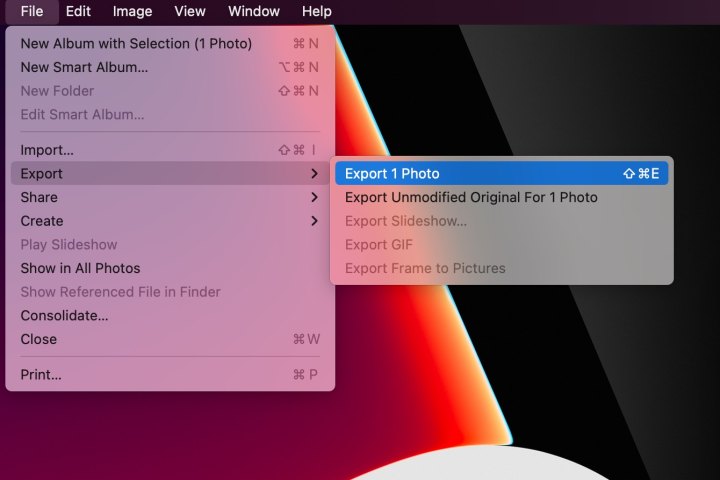
Step 2: Select File > Export from the menu bar in Photos. Pick Export 1 Photo from the pop-out menu.
Digital Trends
Step 3: In the window, next to Photo Kind, select JPEG.
Step 4: You can adjust the remaining settings before converting the file if you like. These include JPEG Quality, Size, Info, and File Naming options.
Step 5: Click Export.

Digital Trends
Step 6: Choose a location to save the converted image in the subsequent window and click Export.
Just like that, you’ve converted your HEIC to JPEG using Photos on Mac.
Digital Trends
What other image formats can you choose for export in Preview and Photos?
The Preview and Photos apps can do more than just convert an HEIC image to JPEG. In Preview, you can export an image in several different formats, including JPEG, JPEG-2000, OpenEXR, PDF, PNG, and TIFF.
Using the Photos app, you’ll be able to export an HEIC as a JPEG, PNG, or TIFF file.
What other methods can you use to convert HEIC to JPEG?
If you need to convert several HEIC images to JPEG at the same time, you can easily do so in MacOS. First, select all the images that need converting and right-click. Then, hover over Quick Actions in the dropdown, and click Convert Image. Select JPEG as your format, and that’s all there is to it.
You can also export multiple HEIC images to JPEG in both the Previews and Photos apps.
If you want to use one of your HEIC photos in an application or on a device that doesn’t support that file type, it’s easy to convert HEIC to JPEG right on your Mac. With this file format in mind, check out how to share photos directly from iPhone to Android as well.
Editors’ Recommendations

