Android Studio’s Emulator is a versatile tool that lets you create virtual devices to simulate real Android phones and tablets. Whether you’re testing apps, exploring features, or debugging, it offers a powerful way to work with Android environments directly from your computer.
What Is a Virtual Device?
A virtual device is a digital replica of a physical Android device that runs on your computer. It mimics the hardware and software of real devices, allowing you to interact with various configurations, screen sizes, and Android versions. Virtual devices are essential for testing, exploring, and experimenting with Android apps without needing physical devices.
By simulating real-world conditions, such as running apps, location changes, or different network speeds, virtual devices help you experience and interact with Android environments in a controlled, customisable way. Virtual devices offer a flexible and convenient solution for testing apps, learning about Android, and exploring different device setups.
How To Install Android Studio
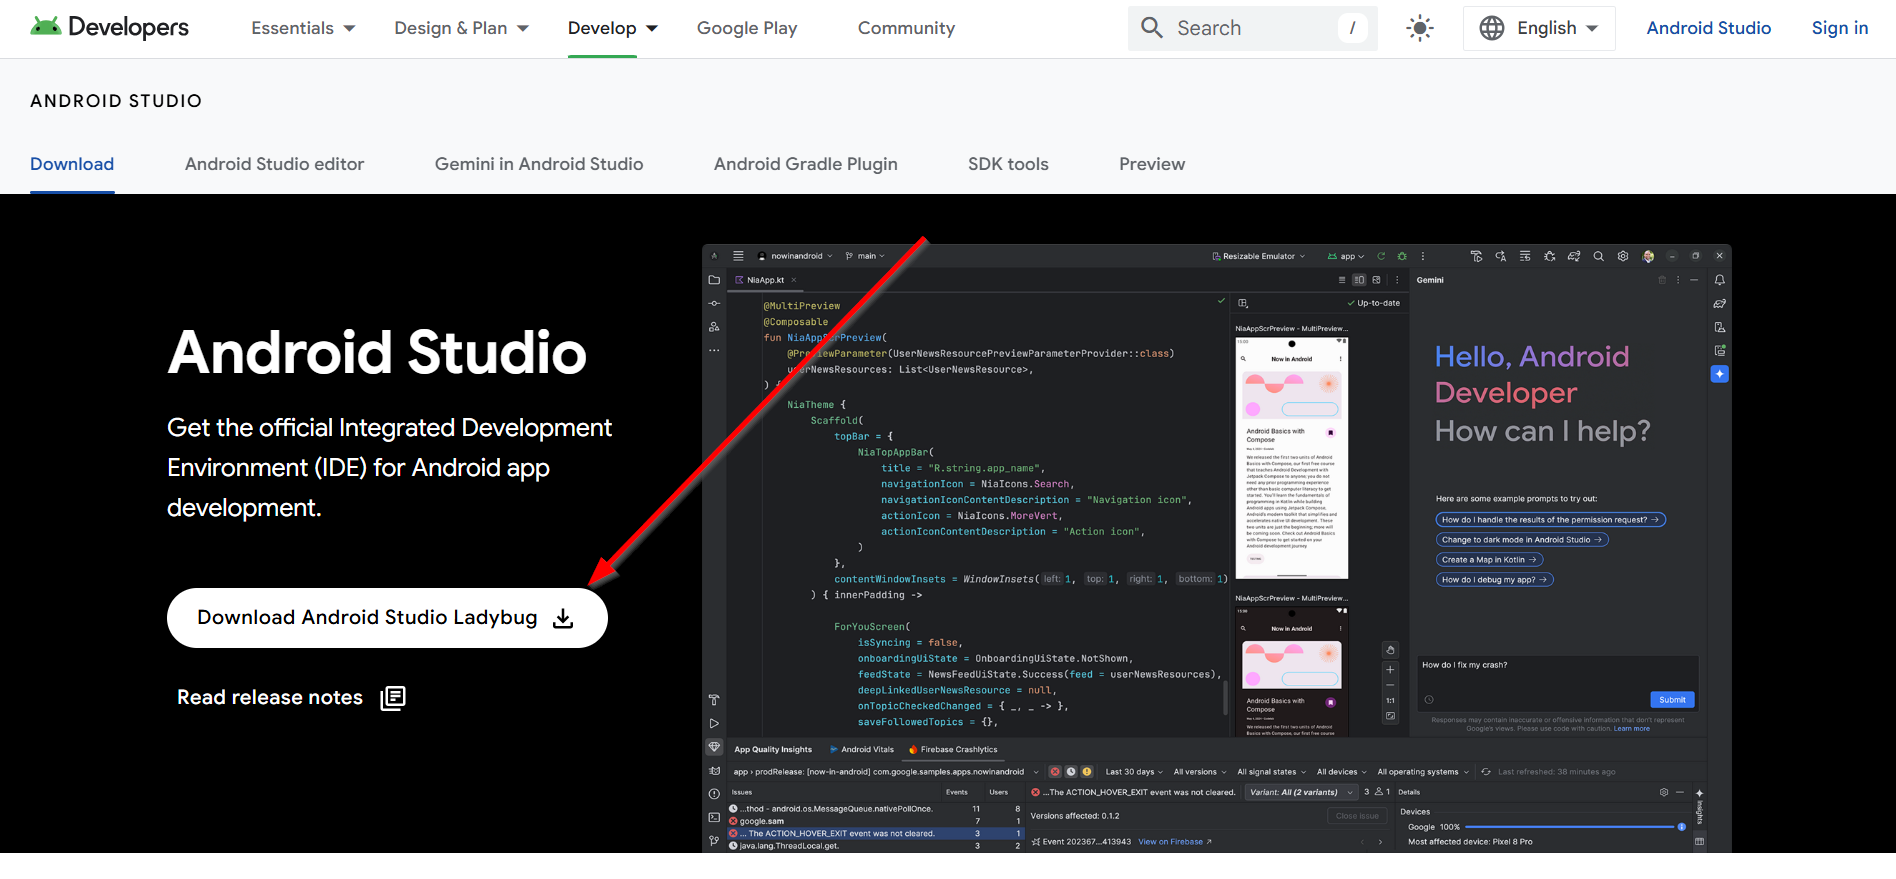
To get started with creating a virtual device, visit the Android Studio website and click download.
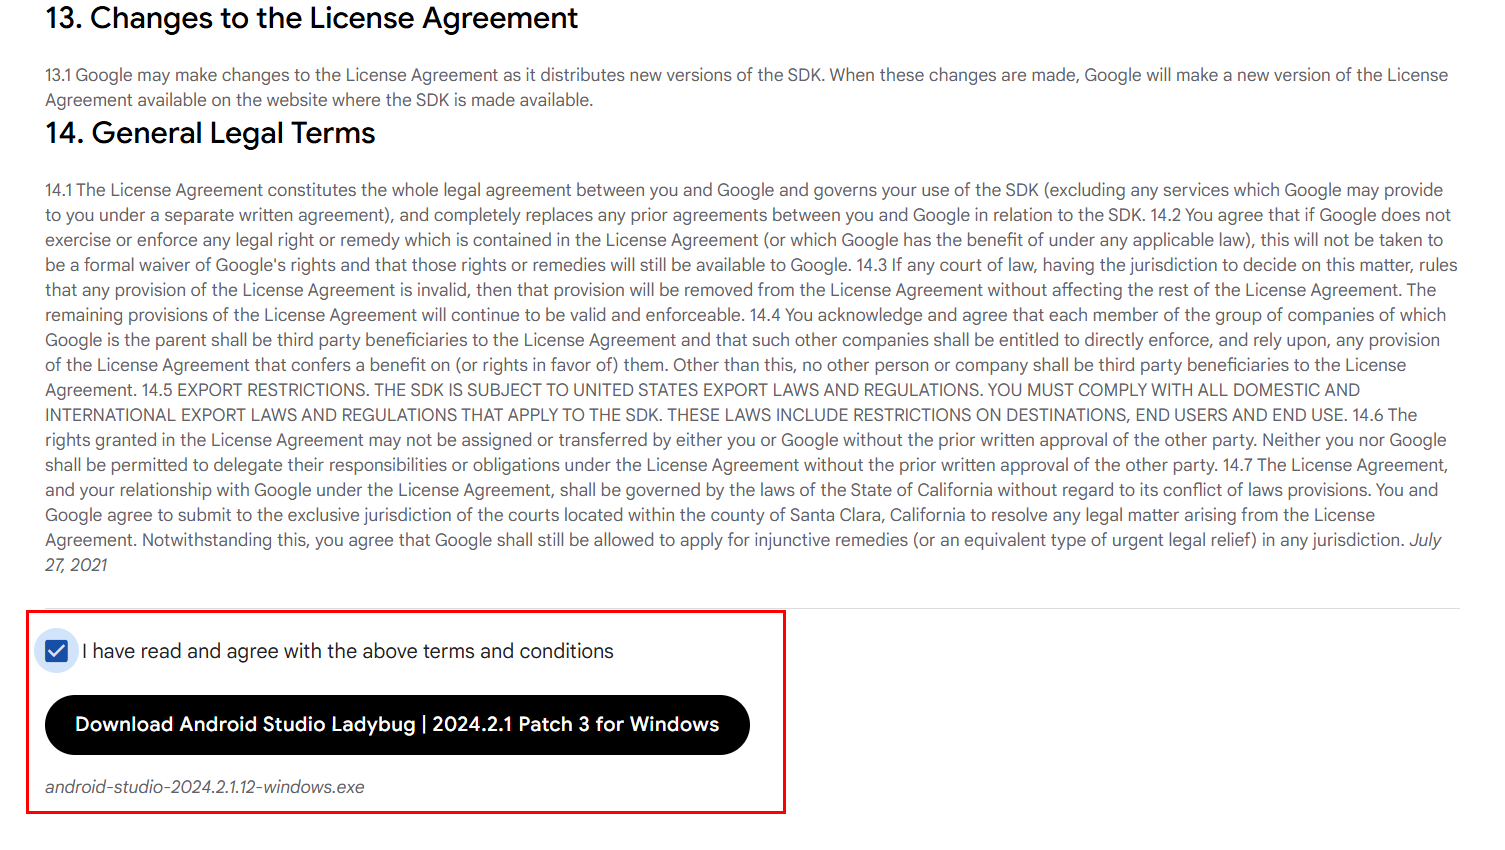
A menu would pop up for you to accept the terms and conditions before downloading the latest version of the software.
Once you’ve accepted the terms, proceed with downloading and installing Android Studio on your computer.
During the installation process, Android Studio will automatically install the Android Virtual Device (AVD) components. The AVD is crucial for simulating Android devices on your computer, allowing you to create virtual devices with various screen sizes, Android versions, and settings. This tool is essential for testing apps and exploring Android environments without the need for physical devices.
Once the installation is complete, Android Studio will be ready to use, and you can start setting up and using virtual devices in the Emulator.
How to Set Up a Virtual Device in Android Studio Emulator
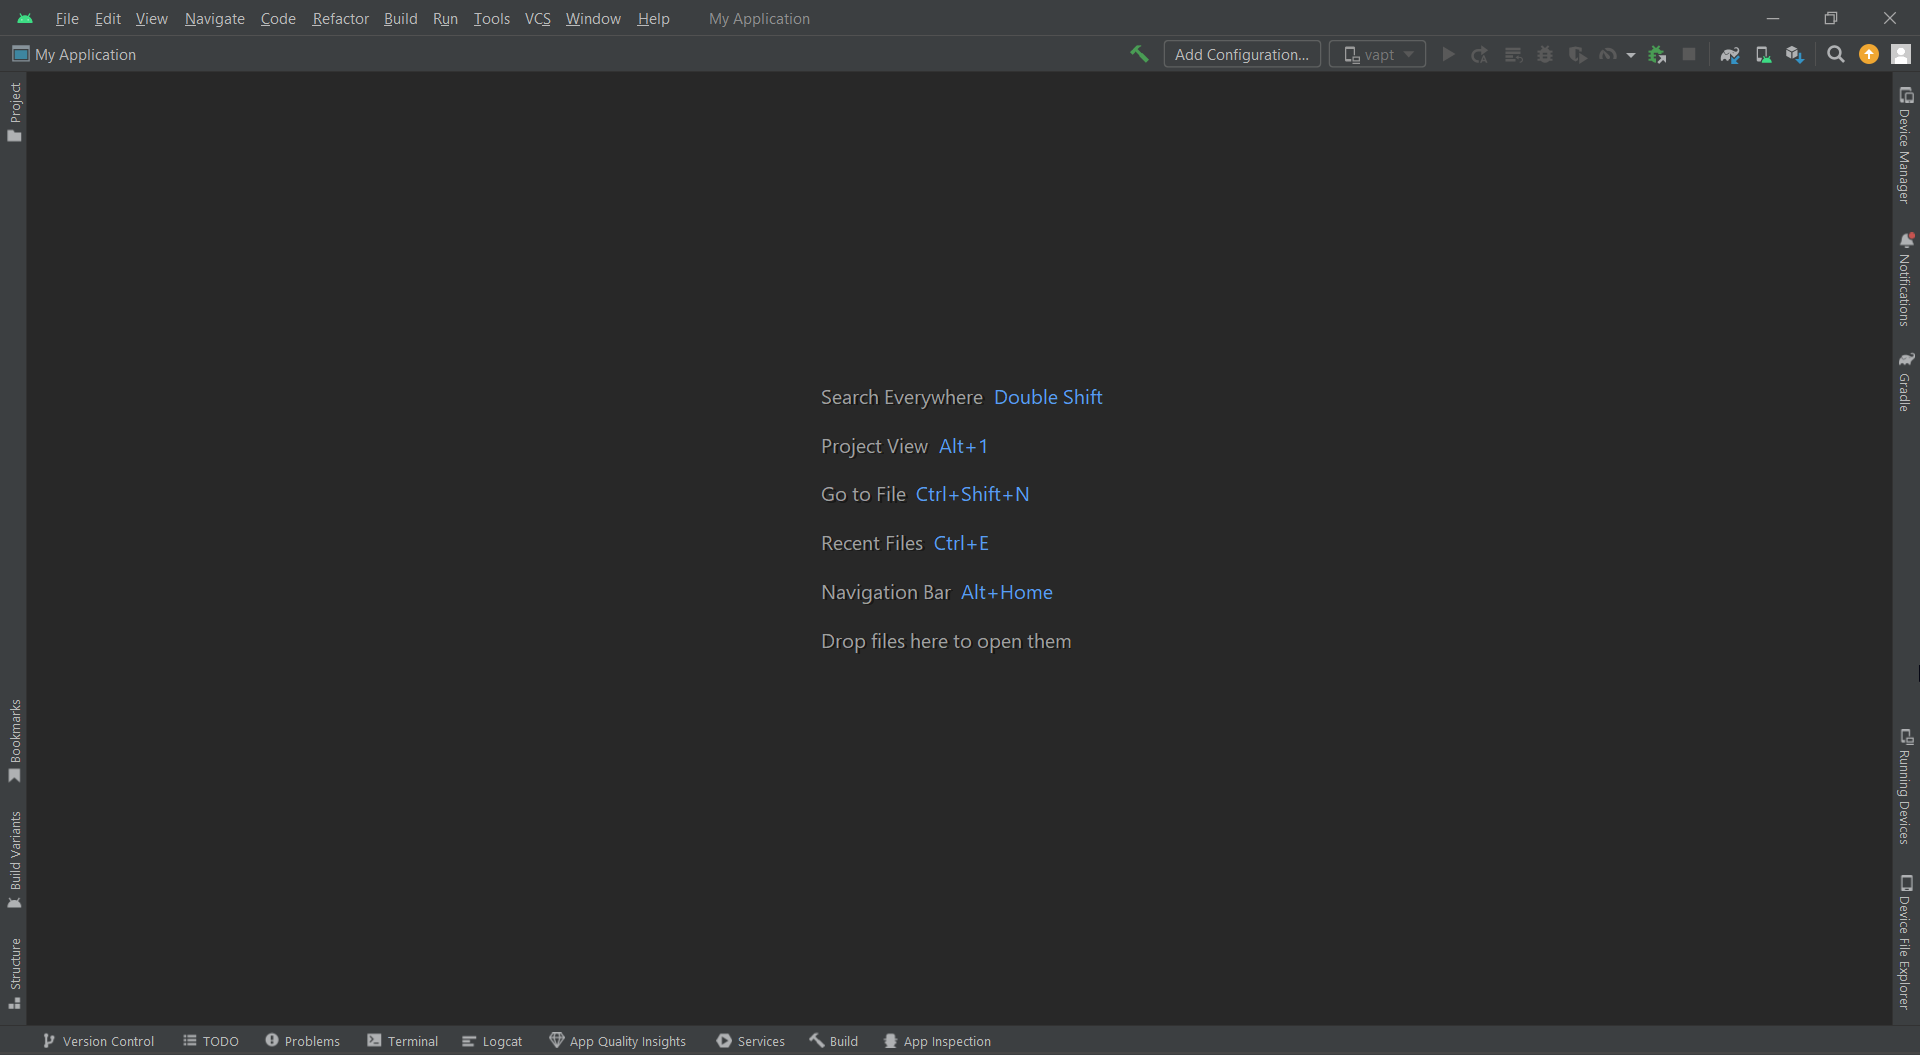
To set up a virtual device in Android Studio, begin by launching the application.
Once it opens, you’ll see the main interface.
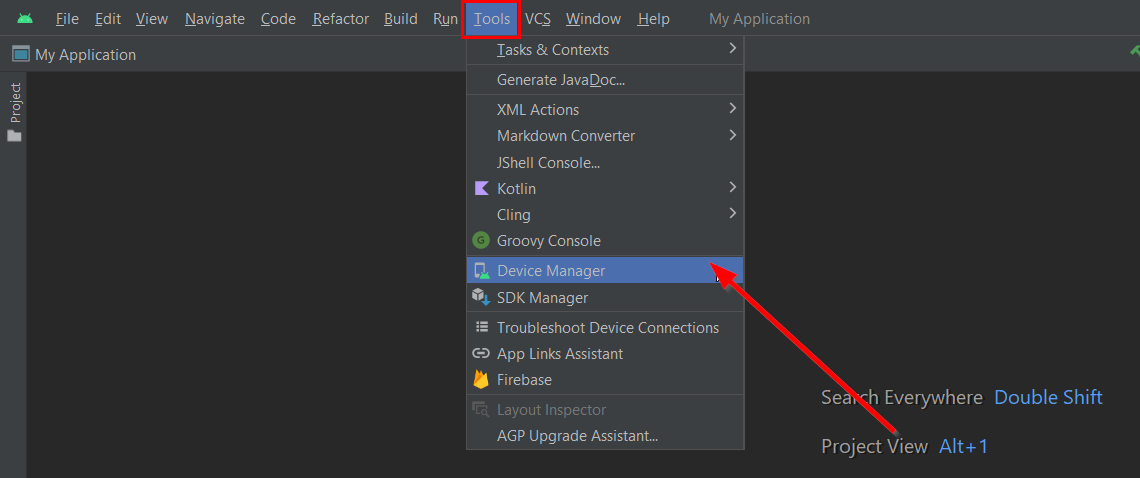
From here, go to the Tools menu at the top left and select Device Manager.
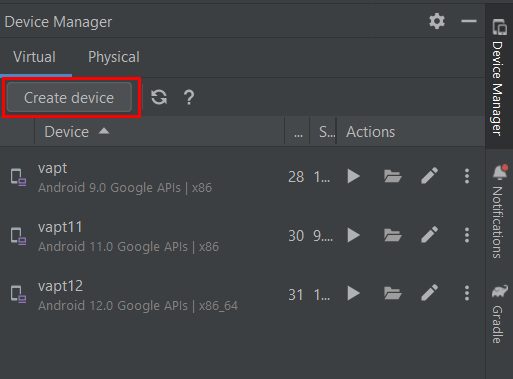
This will open a panel on the side of your screen. If you’ve already created virtual devices in the past, you’ll see a list of those devices displayed. For a new device, click on the Create Device button.
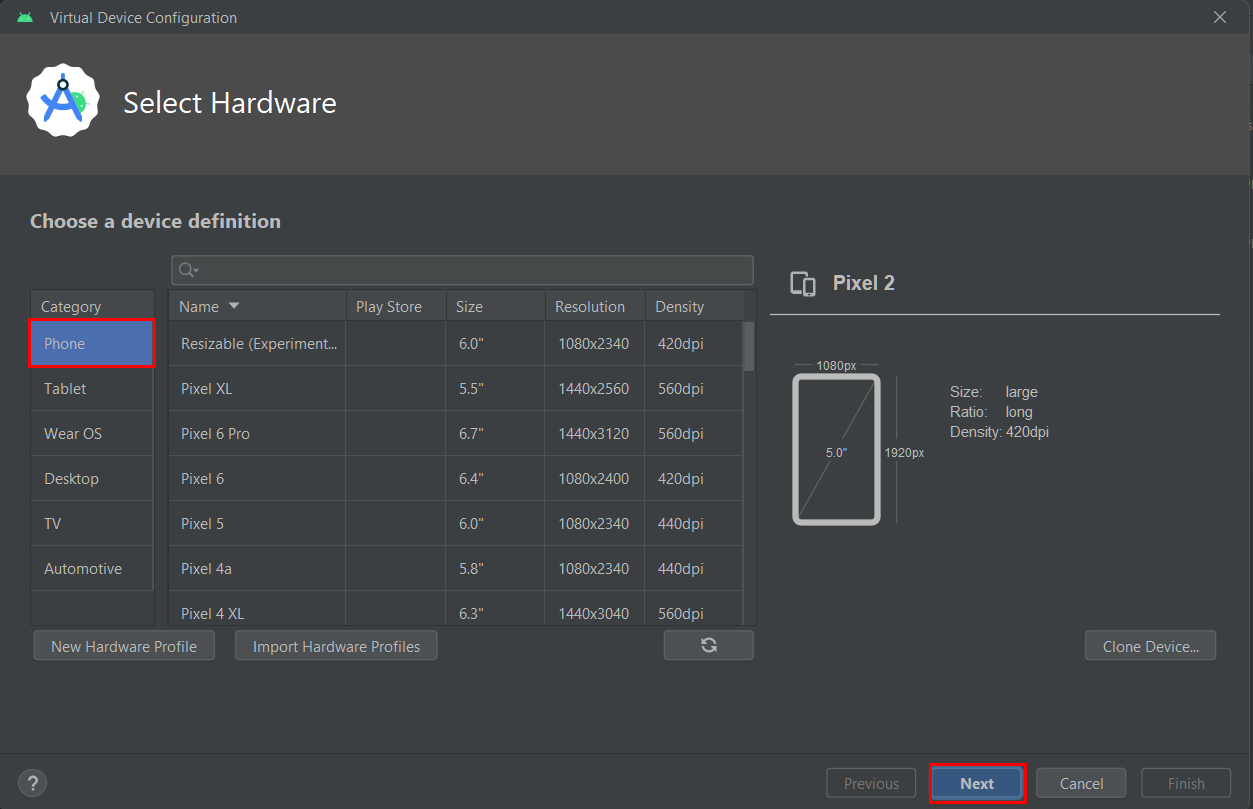
This will open a new window called Virtual Device Configuration. This is where you’ll start customizing your virtual device, starting by selecting the hardware.
In the Select Hardware section, you’ll notice different categories such as phones, tablets, Wear OS, desktop, TV, and automotive. Since we’re focusing on creating a virtual phone device, select the Phone category. Android Studio offers a variety of phone models, including popular brands like Pixel and Nexus, alongside other options. For each model, details such as screen size, resolution, and density are displayed, helping you choose the one that matches your requirements.
Once you’ve decided on a phone model, click Next to proceed.
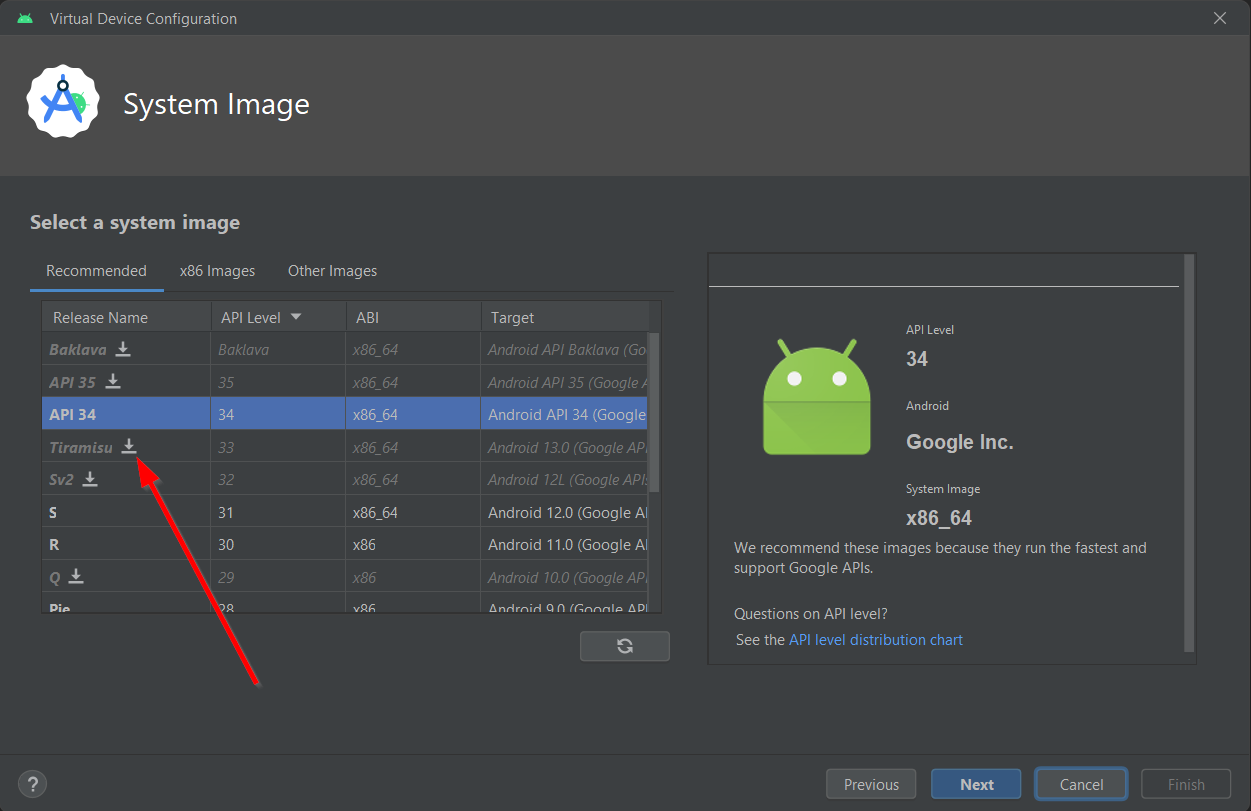
The next step takes you to the System Image page. Here, you’ll select the version of Android that your virtual device will use. The options include Android versions like S, R, and others, categorized by their respective API levels, such as API 34 and API 35. Before you can select a system image, it needs to be downloaded. To do this, click the download icon next to your preferred Android version.
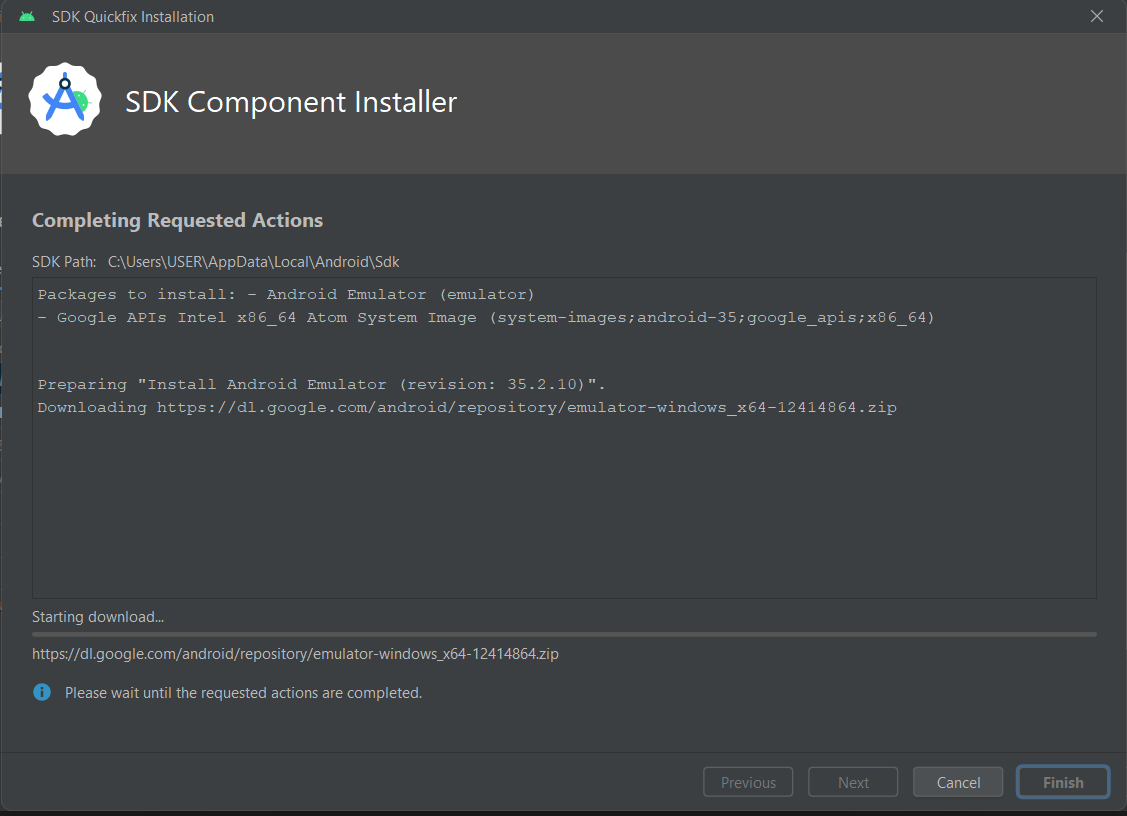
A pop-up window titled “SDK Component Installer” will appear, which manages the download and installation of the necessary dependencies.
Once the process is complete, you can select the downloaded system image and move forward by clicking Next.
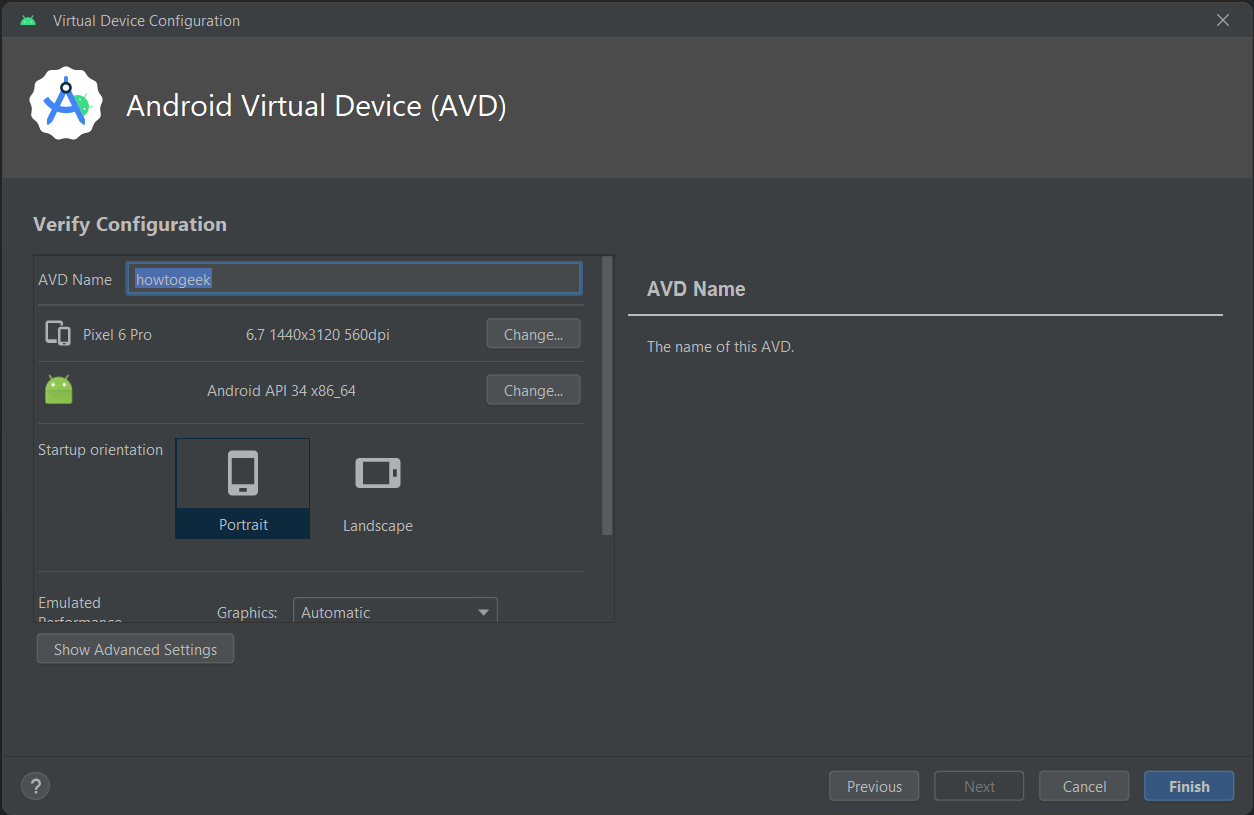
At the final stage of the setup process, you’ll have the opportunity to customize your virtual device further.
You can rename the AVD to anything you like, making it easier to identify later. Additional settings are available, such as changing the phone type, updating the system image, or setting the startup orientation to portrait or landscape mode. After making your adjustments, click Finish. A pop-up will appear briefly, indicating that the virtual device is being created.
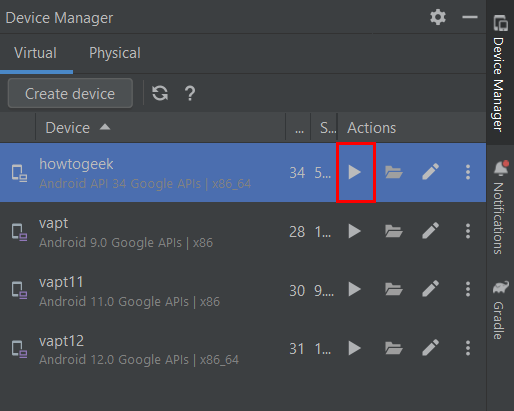
When the process is done, the new virtual device will appear in the Device Manager tab.
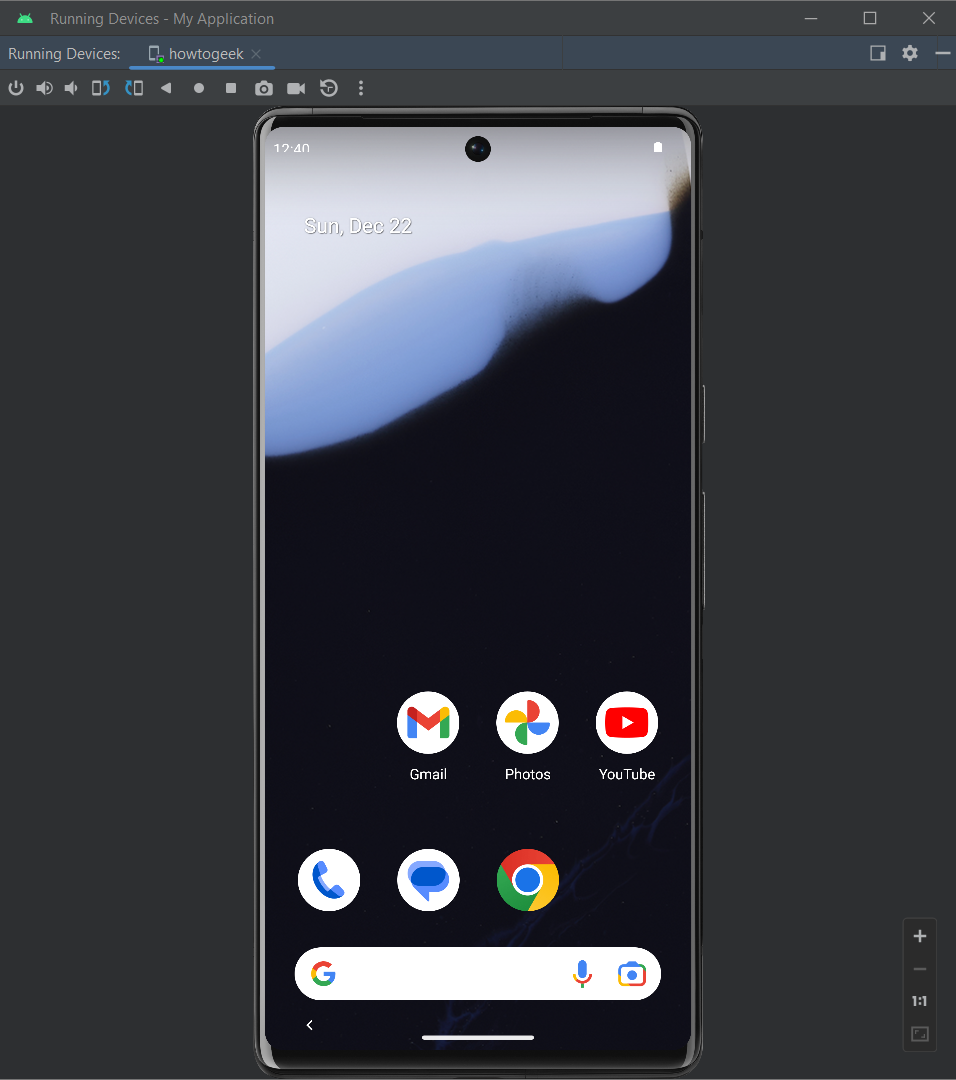
To launch it, simply click the play icon next to the device. The Emulator will start, and your virtual device will load, giving you access to a fully functional Android environment that’s ready for testing or exploration.
Once your virtual device is up and running, you can explore a range of functionalities just as you would on a physical Android device. Browsing the web, testing apps, downloading files, and tweaking device settings are all within reach, offering a safe space to try out new features or troubleshoot issues without affecting an actual device.
The virtual environment also allows you to simulate various network conditions, experiment with GPS functionality, and observe how apps behave across different Android versions. This makes the virtual device a valuable and flexible tool for exploration and testing.
To take things a step further, ADB (Android Debug Bridge) provides advanced capabilities to interact with your virtual device directly from your computer. With ADB, you can install and uninstall apps, capture screenshots, transfer files, and access detailed system logs—all through a command-line interface.
Using ADB commands, you can automate repetitive tasks, debug efficiently, and control your device at a granular level. By mastering these commands, you unlock deeper control and functionality, enhancing the versatility of your virtual device setup and opening doors to even greater possibilities within the Android ecosystem.
Exploring Android Studio
Android Studio is more than just a platform for creating virtual devices; it’s a comprehensive toolkit for exploring the Android ecosystem. From app development to performance testing and debugging, it offers a range of features designed to enhance productivity and creativity.
The virtual device you’ve just set up is one of many ways Android Studio enables you to engage with Android’s capabilities. Whether you’re experimenting with app behavior, running simulations, or simply learning how Android works, this tool opens doors to endless possibilities. The journey doesn’t stop here—Android Studio has so much more to offer. And it is free.

