On Windows 11, you can still enable and configure the Screen Saver feature, not only to protect the screen from burn-ins but also to transform the display into a digital frame.
For example, you can configure the feature to display a collection of personal images, or in the case you’re a gamer, you can show screenshots of your favorite games that you may have taken during gameplay.
In this how-to guide, I will outline the steps to enable and configure the legacy Screen Saver feature to show a custom collection of images on the display after a time of inactivity.
Create custom screensaver from image collection on Windows 11
To create a screensaver from custom images on Windows 11, use these steps:
- Open Settings.
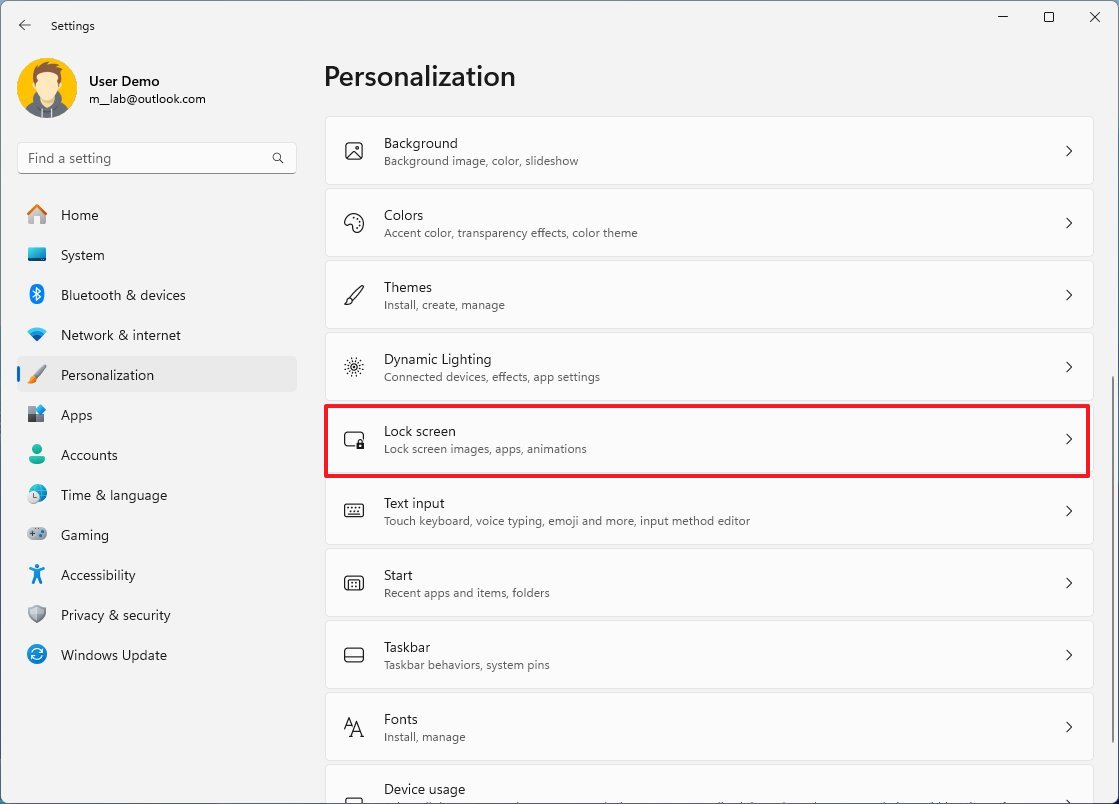
- Click on Personalization.
- Click the Lock screen page on the right side.
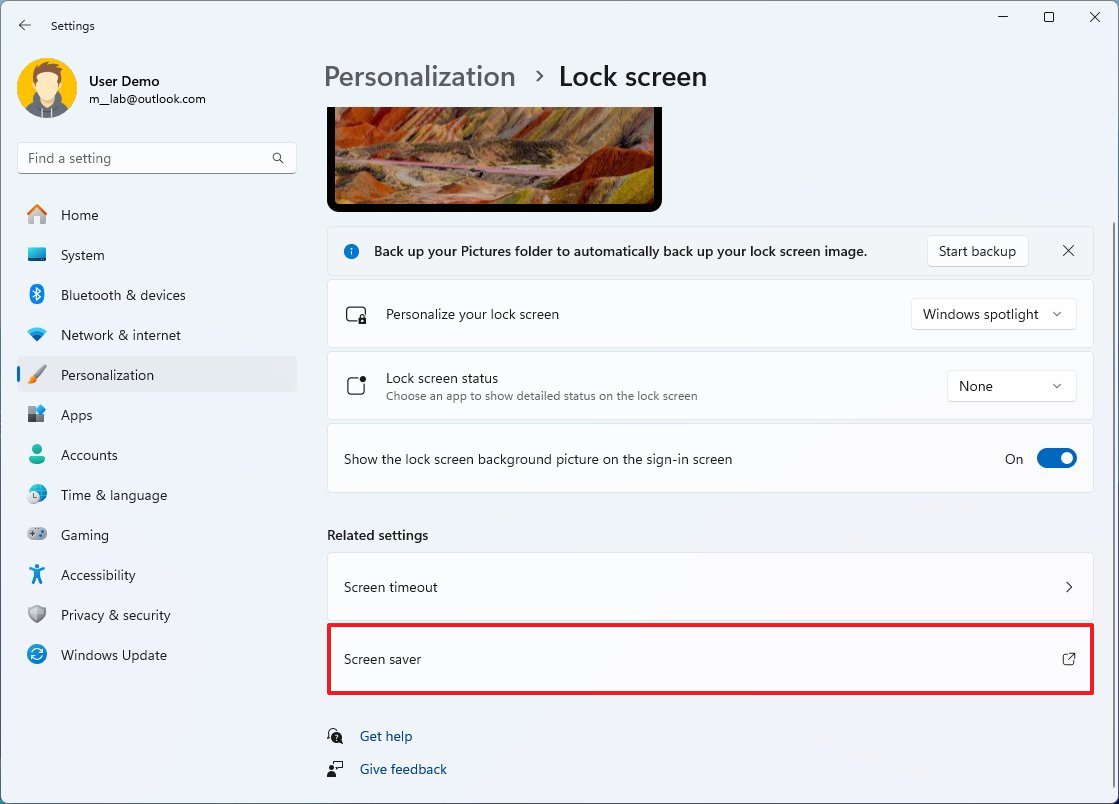
- Click the Screen saver option under the “Related settings” section.
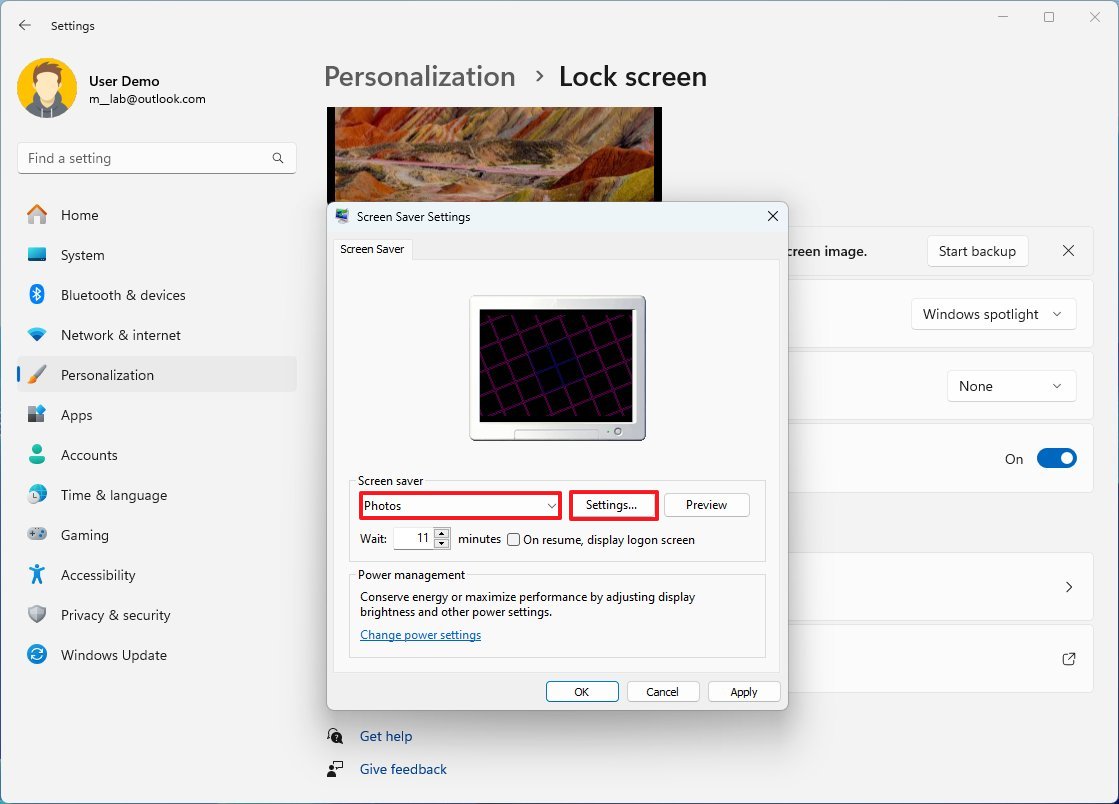
- Select the Photos option from the “Screen saver” drop-down menu.
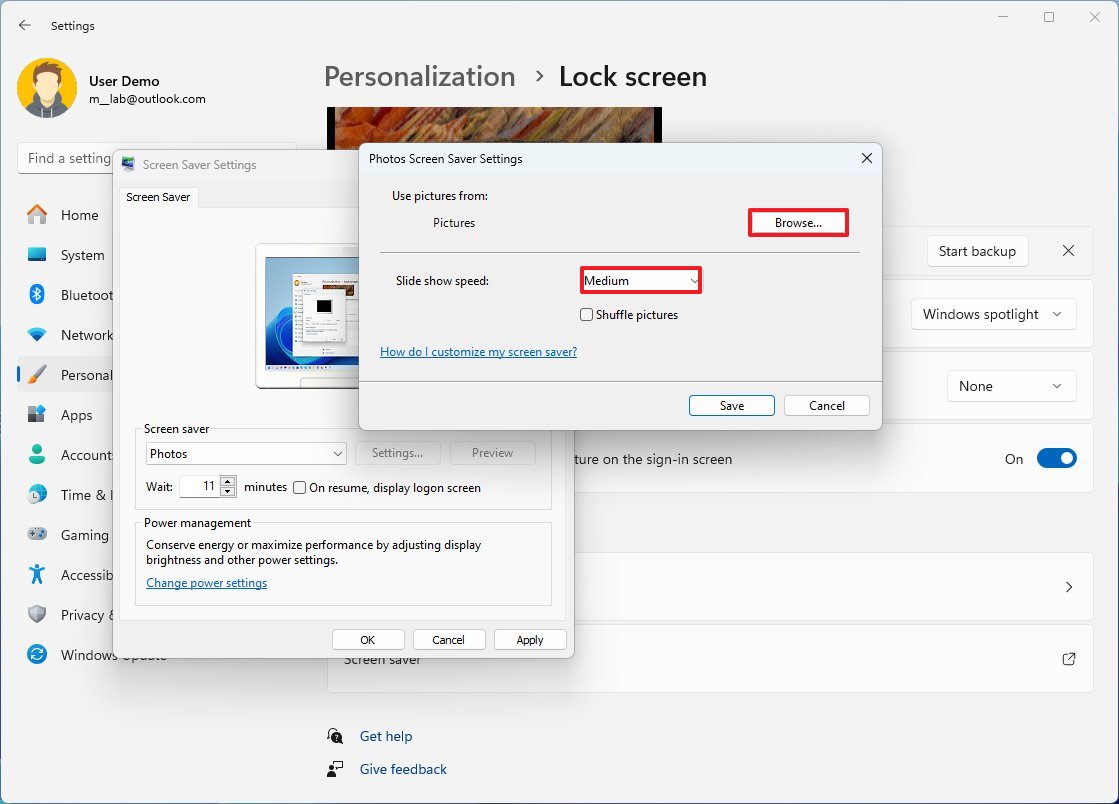
- Choose the speed of the slide.
- (Optional) Check the Shuffle pictures option.
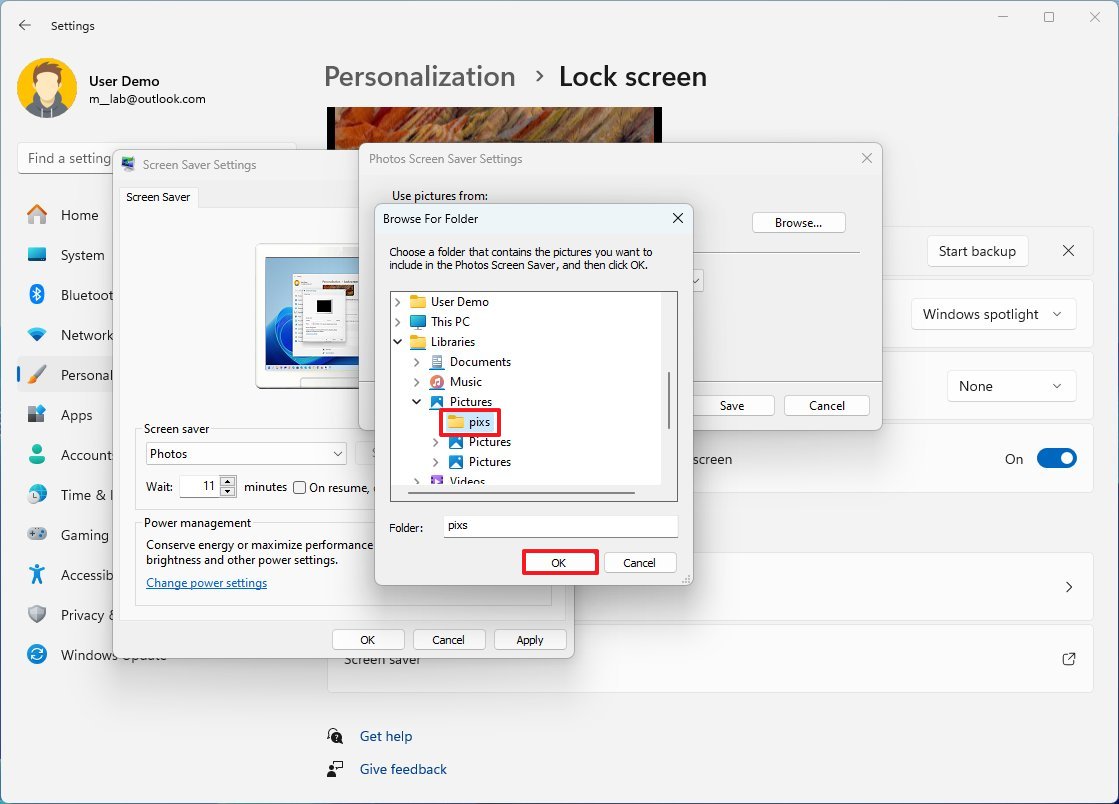
- Click the Pictures button.
- Click the Browse button.
- Select the folder with the photos or screenshots.
- Click the OK button.
- Click the Save button.
- Select when the screen saver should be after inactivity with the “Wait” setting.
- Click the Apply button.
- Click the OK button.
Once you complete the steps, the screensaver with your images will appear after the specified time of inactivity.
If you want to show gameplay screenshots, you can use the Game Bar experience (Windows key + G) to take screenshots with the Capture feature. Or you can use the Snipping Tool (Windows key + Shift + S) to take screenshots of anything on the screen with the “Full screen” option.
You can use these instructions to take screenshots on Windows 11.
More resources
For more helpful articles, coverage, and answers to common questions about Windows 10 and Windows 11, visit the following resources:


