

Apple Wallet has added a feature that allows users to add an ID card to the account, which can be used to verify the user’s identity or license instead of carrying a physical card.
Currently, only Arizona in the United States supports ID with Apple Wallet, but the support will soon be available in other states, including Colorado, Connecticut, Georgia, Hawaii, Iowa, Kentucky, Maryland, Mississippi, Ohio, Oklahoma, Puerto Rico, and Utah.
In this step-by-step guide, we will show you how to quickly and easily add a driver’s license or a state ID to your Apple Wallet on the Apple iPhone.
How to easily add a Driver’s License to Apple Wallet
Step 1: Open the Wallet application on your Apple iPhone.
Step 2: When the app opens, tap on the “+” icon at the top-right corner.
Step 3: Select “Driver’s License or State ID” from the list of available options.
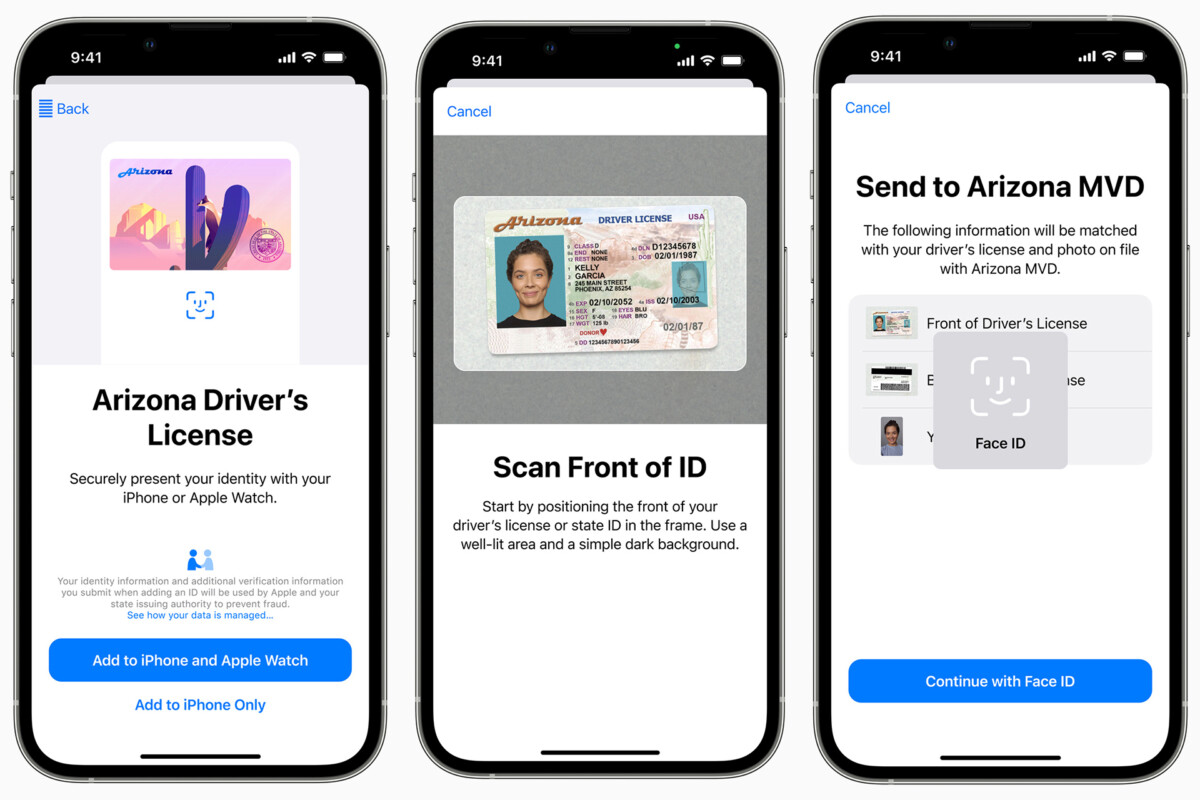
Step 4: Scan the ID card when promoted and hit the “Continue” button.
Step 5: After that, follow the on-screen instructions to verify your identity and then tap the “Continue” button.
Step 6: Tap the “Continue” button again, read the terms and conditions, and agree to them.
That’s it. Once you have followed the above-mentioned step-by-step guide, the process of adding a driver’s license or a state-issued ID card is completed from your end. The information that you added will be sent to the state’s DMV or MVD for verification purposes, and once it’s confirmed, it will be available in the Apple Wallet.


