Adaptive Audio is a game-changing feature of the AirPods Pro available with the release of iOS 17. But how do you use it?
Replacing the default Transparency mode, Adaptive Audio looks to blend ANC and transparency mode into one. It’ll filter in environmental noise so you stay aware of your surroundings, just like transparency mode would, but with one difference: it’ll automatically enable and disable ANC in loud environments as needed.
That means no more toggling between ANC and Transparency mode as you get on and off loud public transport, for example.
It’s a really cool feature that can totally change how you use your AirPods Pro, though at this point, we should probably mention that it’s exclusive to the newer AirPods Pro (second-gen) with OG AirPods Pro and even AirPods Max owners missing out on the new functionality.
That out of the way, here’s how you can enable Adaptive Audio on your second-gen AirPods Pro.
What you’ll need:
- An iPhone running iOS 17
- AirPods Pro (2nd-gen)
The Short Version
- Make sure your AirPods Pro are connected to your iPhone.
- Swipe down on the top right of the screen to access the Control Centre.
- Tap and hold the volume slider.
- Tap Noise Control.
- Tap Adaptive Audio to toggle it on.
-
Step
1Make sure your AirPods Pro are connected to your iPhone
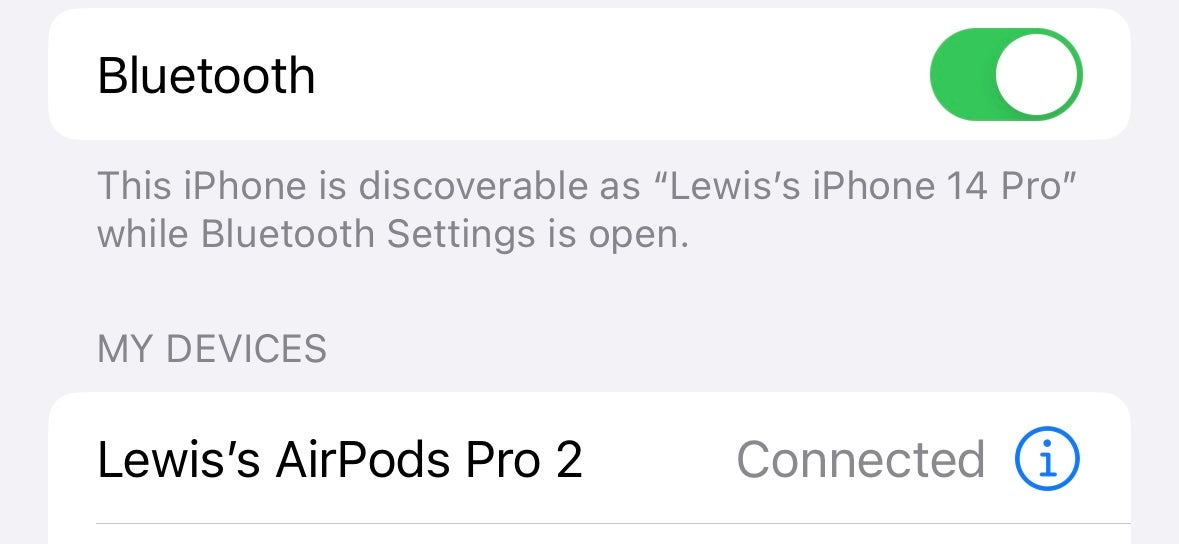
The first step is to make sure your AirPods are connected to your iPhone. Head to the Bluetooth section of the Settings app to verify this.
-
Step
2Swipe down on the top-right to access the Control Centre
Next, we need to access the Control Centre. This can be accessed pretty much anywhere within iOS by swiping down on the top-right of the display.
-
Step
3Tap and hold the volume slider
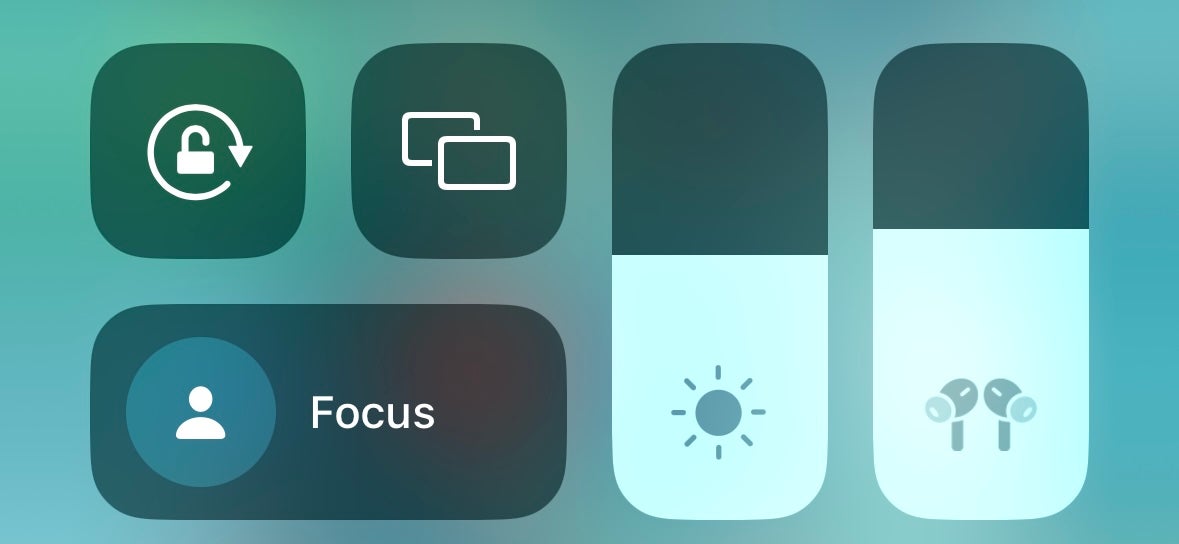
Within the Control Centre, you should see a volume slider next to a display brightness slider. But rather than swiping it to change volume, you’re going to tap and hold the volume slider to access the AirPod sound settings menu.
-
Step
4Tap Noise Control
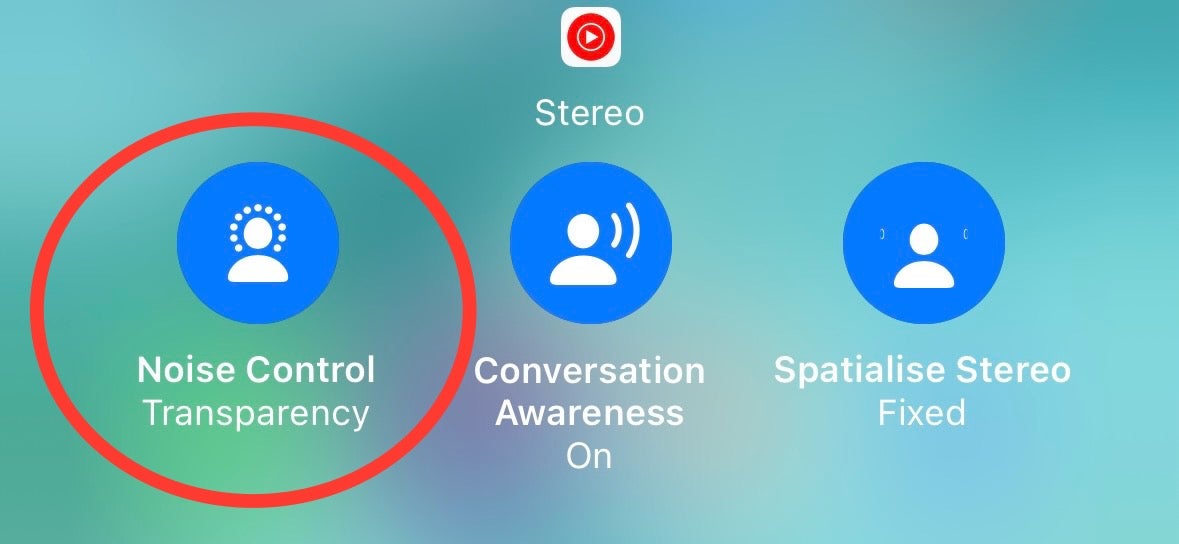
Beneath the main volume slider, you should see three options – Noise Control, Conversation Awareness and Spatialise Audio. Tap Noise Control.
-
Step
5Tap Adaptive Audio to toggle it on
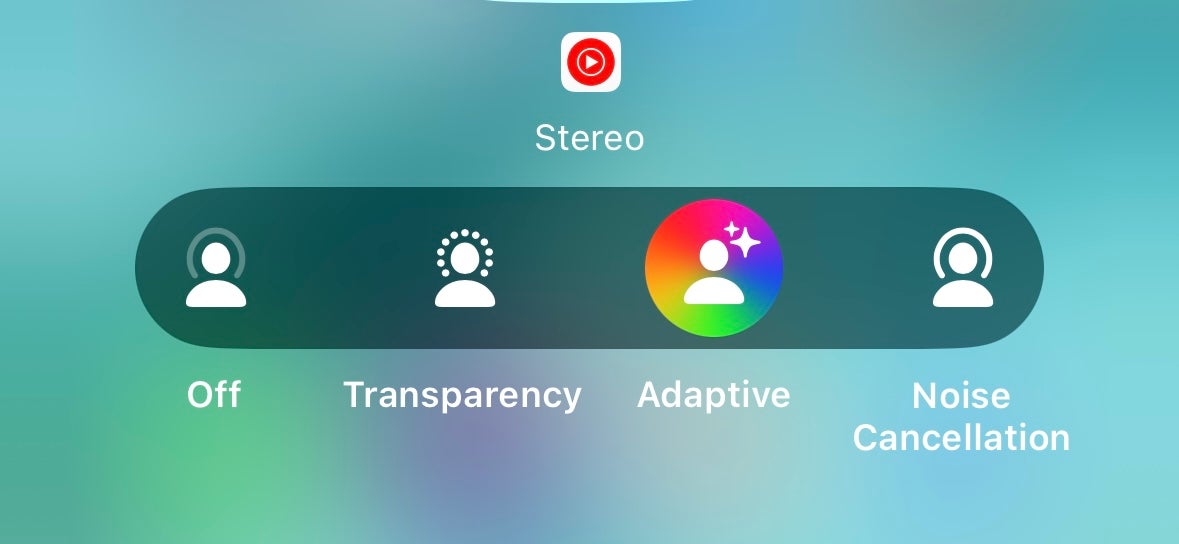
To enable Adaptive Audio, simply tap the Adaptive Audio icon. If the icon is vibrant and colourful, Adaptive Audio is enabled.
Once enabled in the Control Centre, you can simply squeeze your AirPod to switch between ANC and Adaptive Audio, replacing the previously available Transparency mode.
Troubleshooting
Once enabled, you can switch between Adaptive Audio and ANC by squeezing the stem of your AirPods Pro when worn – the same action that’d previously switch between ANC and Transparency mode.
This is likely because your AirPods Pro firmware isn’t up to date. There’s no easy way to force the update, unfortunately, but making sure your AirPods Pro are in their case and close to your iPhone should do the trick.


