If you want to free up storage space without deleting files, enabling NTFS (New Technology File System) compression is a good idea. I’ll show you how this works and how to enable it for your files or drives on Windows 11.
What Is NTFS File Compression?
NTFS compression is a feature that compresses (reduces the size of) your files. It uses certain algorithms to make your files smaller without affecting their data. Unlike other methods, this method doesn’t make an archive or anything from your files; your files remain as they are.
This compression method only works on the drives formatted in the NTFS file system. It doesn’t work for the drives that use the FAT32 or exFAT file system.
You can format your drive in the NTFS format to make it compatible with this feature. If you want to change your drive to use NTFS without deleting any data, open Windows Search (press Windows+S), type Command Prompt, select “Run as Administrator,” and choose “Yes” in the prompt. Then, run the following command replacing “X” with the letter of your drive.
convert X: /fs:ntfs
When Should You Use NTFS Compression?
You should use NTFS compression for files that can be efficiently compressed, such as text files, documents, databases, and so on. You should also only use it for infrequently accessed files, as if you access a file often, the system needs to decompress it before you can view it.
You should not use this compression for media or system files, as this can affect your system performance. This is because the files need to be decompressed each time you view them.
Compress an Individual File or Folder
To enable NTFS compression for a single file or folder, you have both graphical and command-line options, as explained below.
Using File Explorer
File Explorer offers the easiest graphical way to turn on NTFS compression for your files and folders. To use it, launch a File Explorer window (press Windows+E) and find the file or folder you want to compress.
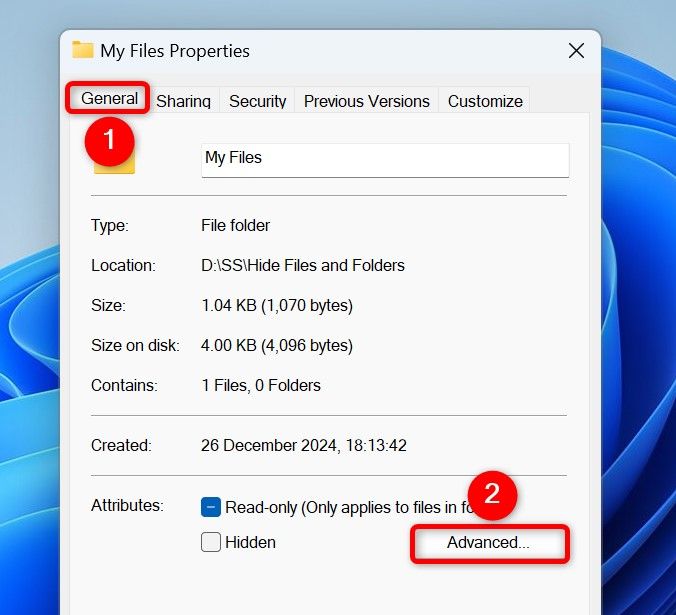
Right-click that file or folder and choose “Properties.” Access the “General” tab. In the Attributes section, click the “Advanced” button.
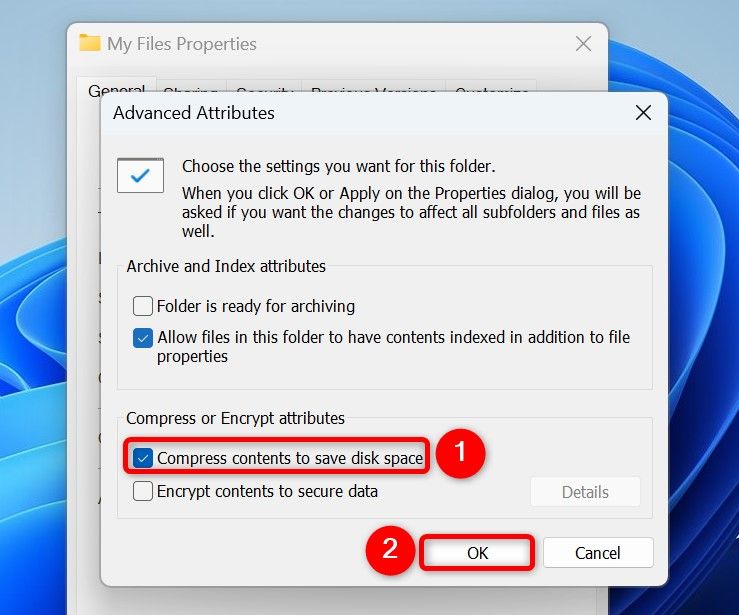
On the Advanced Attributes window, enable “Compress Contents to Save Disk Space.” Then, click “OK.”
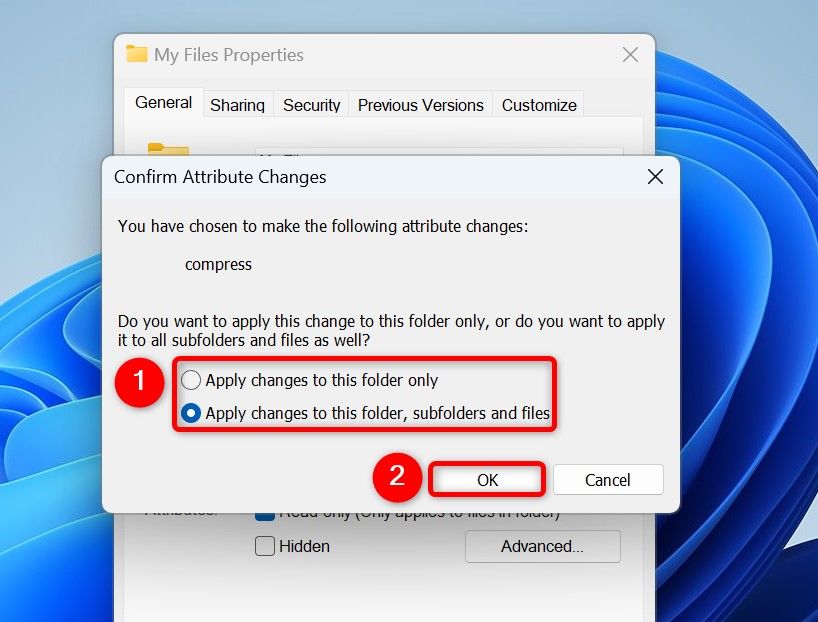
On the Properties window, click “Apply” followed by “OK.” If you’re compressing a folder (not a file), you’ll see a prompt with two options:
- Apply Changes to This Folder Only: Choose this option to only compress the selected folder and not its subfolders and their files.
- Apply Changes to This Folder, Subfolders and Files: Select this option to apply compression to all the subfolders and their files as well.
Then, choose “OK.”
Once your files and folders are compressed, you’ll see a blue icon on them.
To disable compression in the future, right-click your file or folder and choose “Properties.” Open the “General” tab, click the “Advanced” button, turn off “Compress Contents to Save Disk Space,” choose “OK,” and select “Apply” followed by “OK.”
From Command Prompt
If you like running commands, use a command in Command Prompt to turn on NTFS compression for your files or folders. To do it, open Windows Search (press Windows+S), type Command Prompt, and select “Run as Administrator.” Choose “Yes” in the User Account Control prompt.
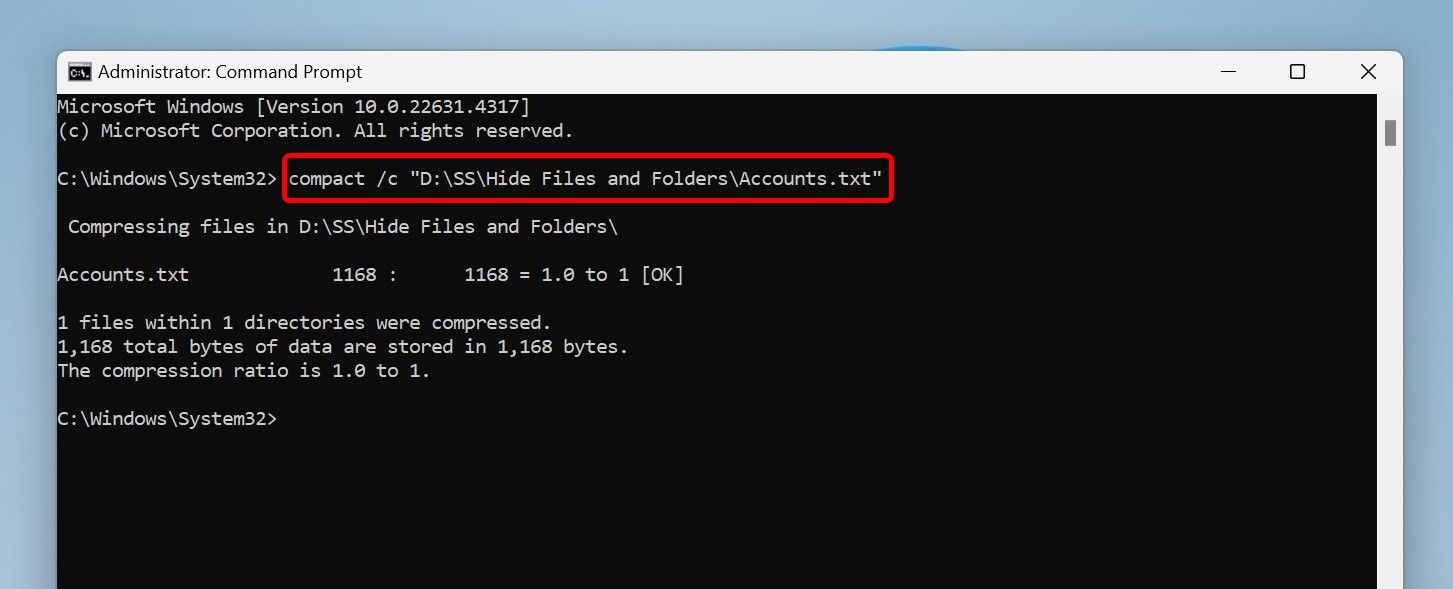
On the Command Prompt window, type the following command. Replace “PATH” with the full path to the file or the folder you want to compress. Then, press Enter.
Whether your file or folder path has spaces or not, keep the path enclosed in double quotes to avoid running into any issues. The command below already uses double quotes for paths.
compact /c "PATH"
The “c” parameter in this command tells the command to compress the specified file or folder.
In the future, you can decompress your file or folder using the following command. Replace “PATH” with the full path to the file or the folder you want to decompress.
compact /u "PATH"
Enable Compression for an Entire Drive
You can compress an entire drive (including all its folders and files) using NTFS compression. You can use File Explorer or Command Prompt to do that, as shown below.
Using File Explorer
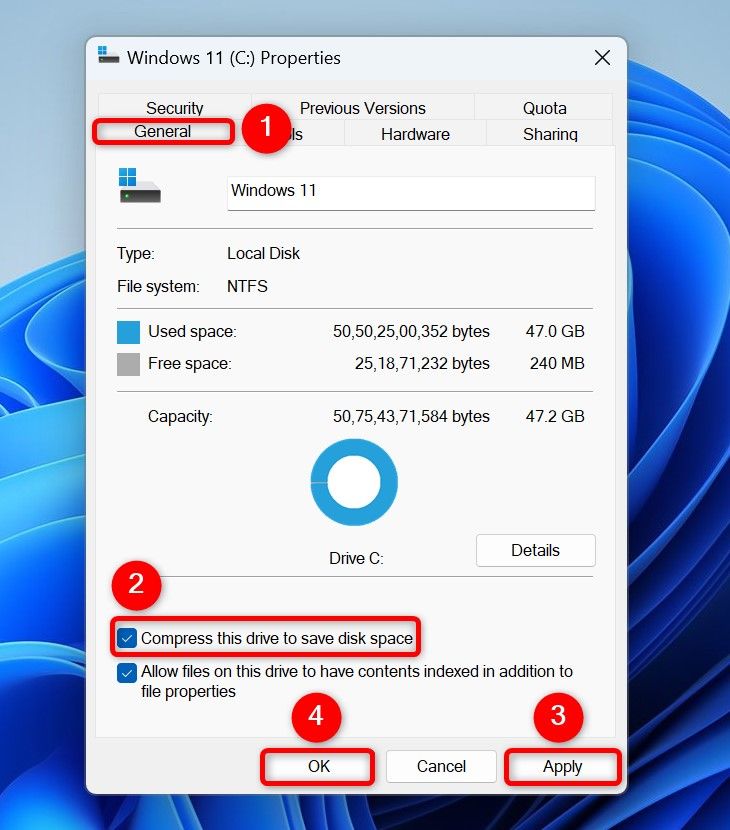
Open File Explorer (press Windows+E), right-click the drive you want to compress, and select “Properties.” Open the “General” tab and turn on “Compress This Drive to Save Disk Space.” Then, choose “Apply” followed by “OK.”
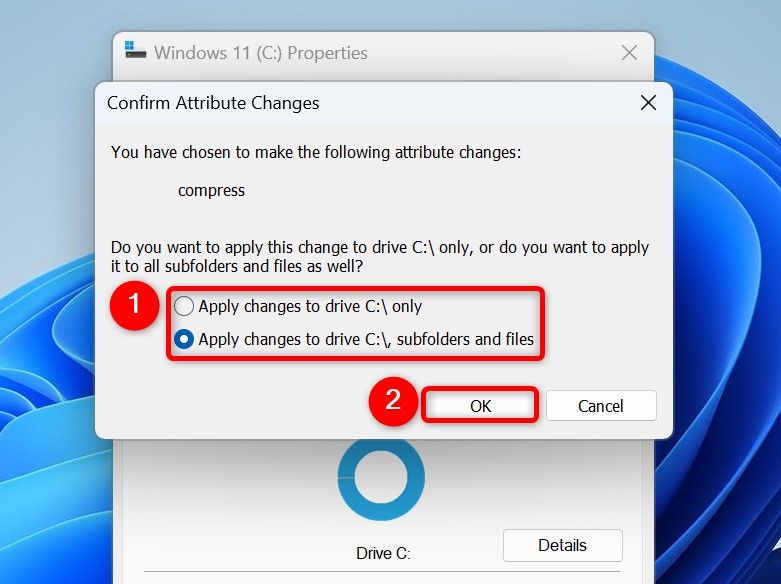
In the prompt that opens, choose “Apply Changes to Drive X:\, Subfolders and Files” to enable compression for all the subfolders and files on the drive. Or, choose the “Apply Changes to Drive X:\” option. (X is your drive’s letter.)
Then, click “OK.”
To turn off compression in the future, right-click the compressed drive and choose “Properties.” Access the “General” tab and disable “Compress This Drive to Save Disk Space.” Then, choose “Apply” followed by “OK.”
From Command Prompt
Launch Windows Search (press Windows+S), type Command Prompt, and select “Run as Administrator.” In the User Account Control prompt, select “Yes.”
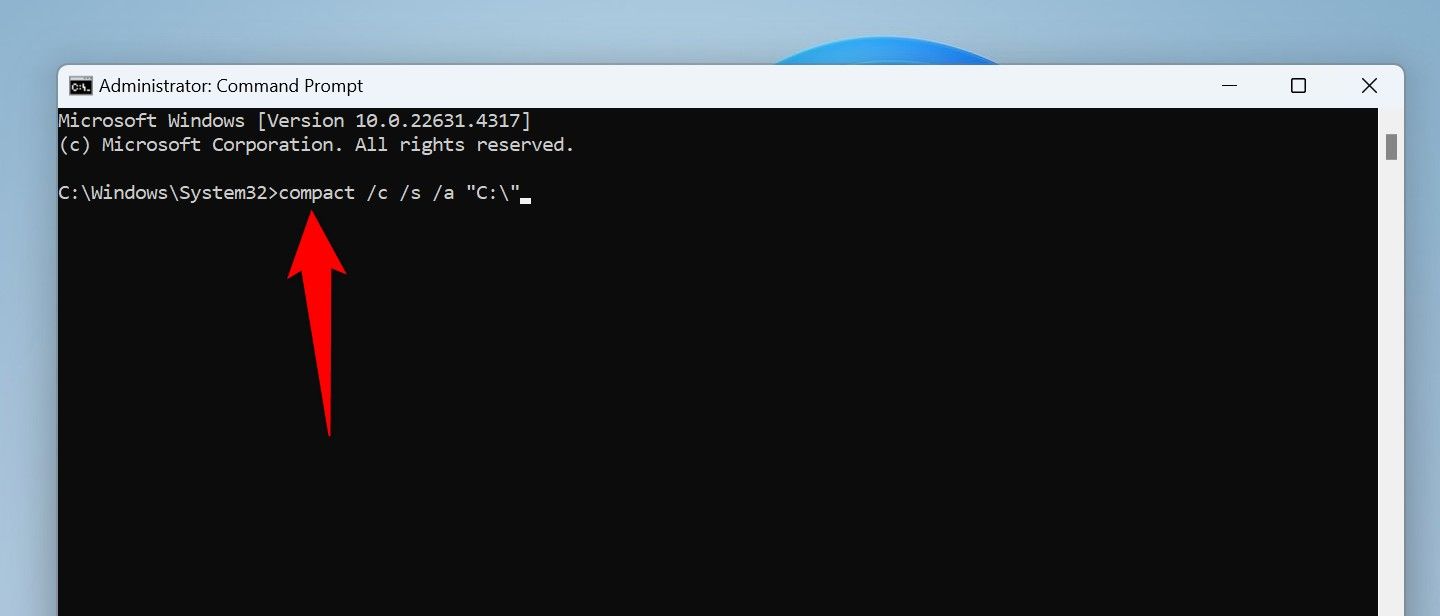
In Command Prompt, type the following command. Replace “X” with the letter of the drive you want to compress. Then, press Enter. This command compresses all the subfolders and files on the drive.
compact /c /s /a "X:\"
The “c” parameter tells the command to compress the specified drive. The “s” parameter ensures that all the subdirectories are included. The “a” parameter makes sure the hidden and system files are included as well.
In the future, you can decompress the drive by running the following command. Make sure to replace “X” with your drive’s letter.
compact /u /s "X:\"
The “u” parameter tells the command to decompress the specified drive. The “s” parameter ensures all the subdirectories are decompressed as well.
And that’s how you compress files and folders to save on storage space on your Windows 11 PC. To make even more room for new files, you can follow other ways to free up disk space on your PC.


