The Meta Quest 3 headset is a huge upgrade on its predecessor, the Quest 2, with a new design, a much more powerful processor and upgraded lenses – but this all has a knock-on effect on battery life.
While Meta claims that the Quest 3 can last the same 2-3 hours as the Quest 2, that is a bit of a stretch. Well, in our experience, anyway, with our reviewer noting usage closer to the 2-hour mark than 3 in much of the testing period.
Sure, that can be extended by buying Meta’s (fairly pricy) Elite head strap with an additional battery built-in, or you can go down the budget route and connect the headset to a power bank that sits in your pocket – but there’s also a third option available, and it doesn’t require any kind of new hardware.
It’s a new feature of the Quest 3 called Battery Saver mode, and it should help extend your headset battery life by dialling back on the processing power and resolution of the headset. It won’t deliver the best VR experience possible, then, but if you’re a hardcore VR gamer or a VR content creator who simply needs more time in headset, it’s a great option.
Here’s how to enable Battery Saver Mode on the Meta Quest 3.
What you’ll need:
- A Meta Quest 3 VR headset
- Quest software v59 or later
The Short Version
- Put your Meta Quest 3 headset on.
- Select the Quick Settings icon in the toolbar.
- Select the Settings icon.
- Select System Settings.
- Select Power.
- Toggle on Battery Saver mode.
-
Step
1The first step is to don your Meta Quest 3 headset. Yep, this has to be done in VR, rather than via the accompanying Meta Quest app.
-
Step
2From the main VR interface, select the Quick Settings shortcut in the toolbar. This is the shortcut to the far left of the toolbar with the time and icons for battery and Wi-Fi.
-
Step
3Select Settings
From the Quick Settings menu, select the Settings icon in the top-right.
-
Step
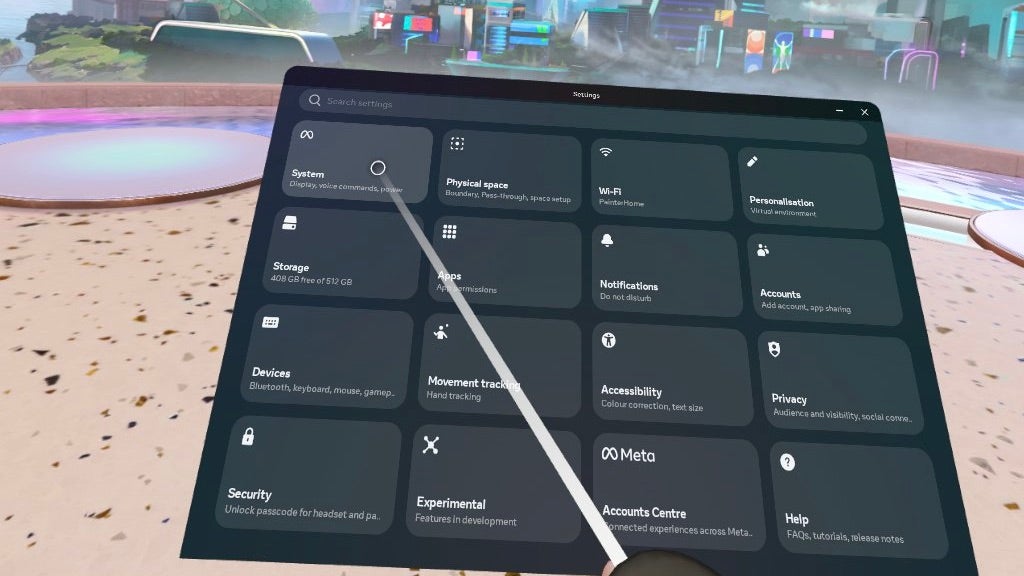
4Select System Settings
From the main Settings menu, select System Settings to delve into the headset’s settings. It’s the category in the top-left corner.
-
Step
5Select Power
From the range of System Settings available in the left-hand menu, select Power.
-
Step
6Toggle on Battery Saver mode
From the Power menu, it’s a simple case of toggling on the Battery Saver mode.
As mentioned earlier, this will extend your headset’s battery life by reducing the total power and resolution to extend the headset’s use beyond the standard 2-3 hours, though how much largely depends on what you’re doing in VR. MR titles tend to drain the battery a little faster than VR titles, but again, it largely depends on the app in question.
Troubleshooting
Ensure you’re running the latest version of the Quest software – the functionality was introduced in v59, released in late October 2023.


