On Windows 11, “Fast Startup” is a feature that speeds up the startup process. The feature has been available in previous versions of Windows, and it combines the hibernation and shutdown power techniques to boot a device faster than the traditional process.
If you want to understand how the fast startup feature works, you first need to understand hibernation. On Windows 11, when you enable “Hibernate,” the system saves the current session loaded into memory to the hard drive, allowing you to pick up where you left off quickly, even in the event of power loss. The same idea is how “Fast Startup” works, but instead of saving everything loaded into memory, Windows 11 first signs off any account and then saves the memory’s content onto the hard drive. As a result of this technique, the system can start more quickly since many services and applications are simply restored from the last session.
Usually, the quicker mode to start a computer comes enabled by default on every installation. However, if you notice boot problems, you may need to disable (and re-enable) the feature to troubleshoot the issues, and depending on the scenario, you may even need to disable fast startup altogether.
This guide will walk you through the steps to enable (or disable) fast startup on Windows 11.
How to enable fast startup on Windows 11
To enable fast startup on Windows 11, use these steps:
- Open Control Panel.
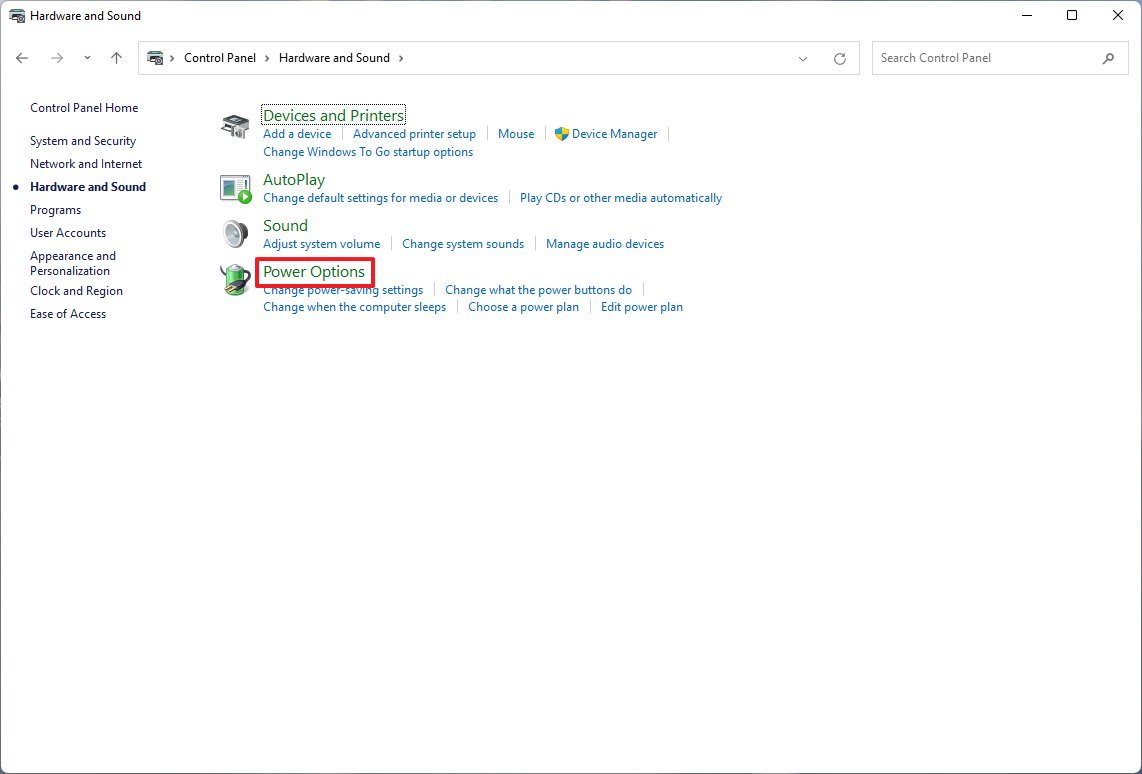
- Click on Hardware and Sound.
- Click on Power Options.
- Click the “Choose what the power button does” option.
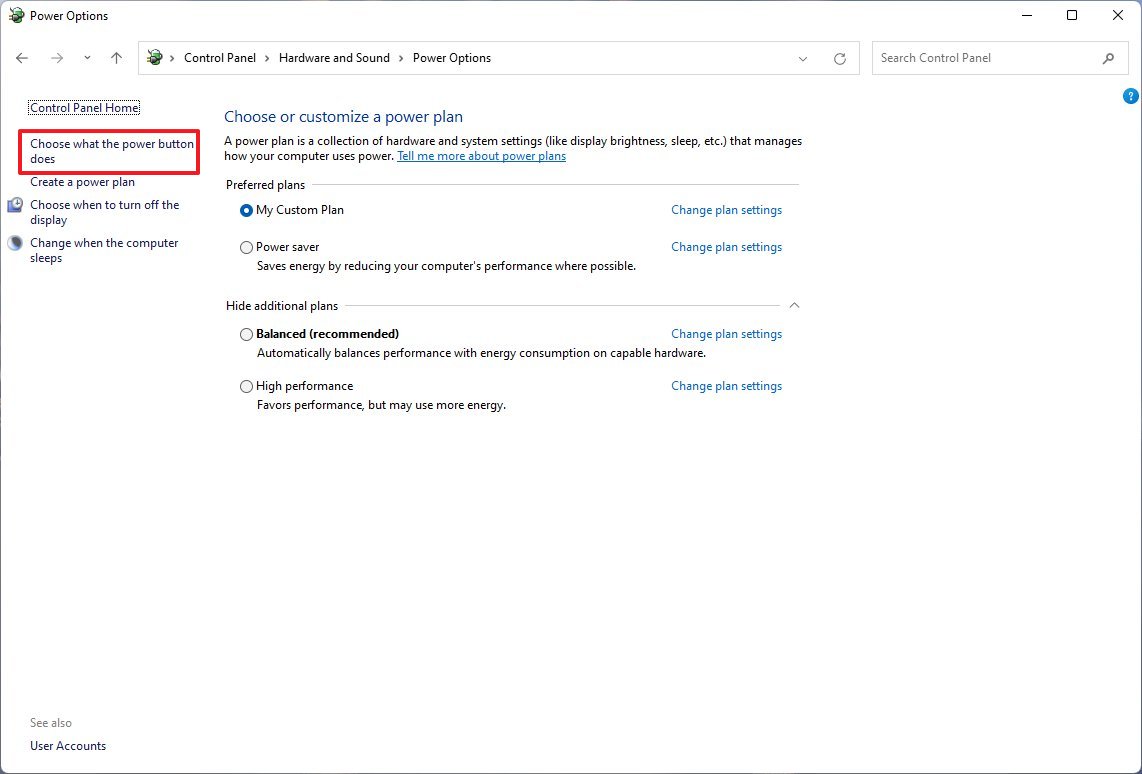
- Click the “Change settings that are currently unavailable” option.
- Under the “Shutdown settings” section, check the “Turn on fast startup” option.
- Click the Save changes button.
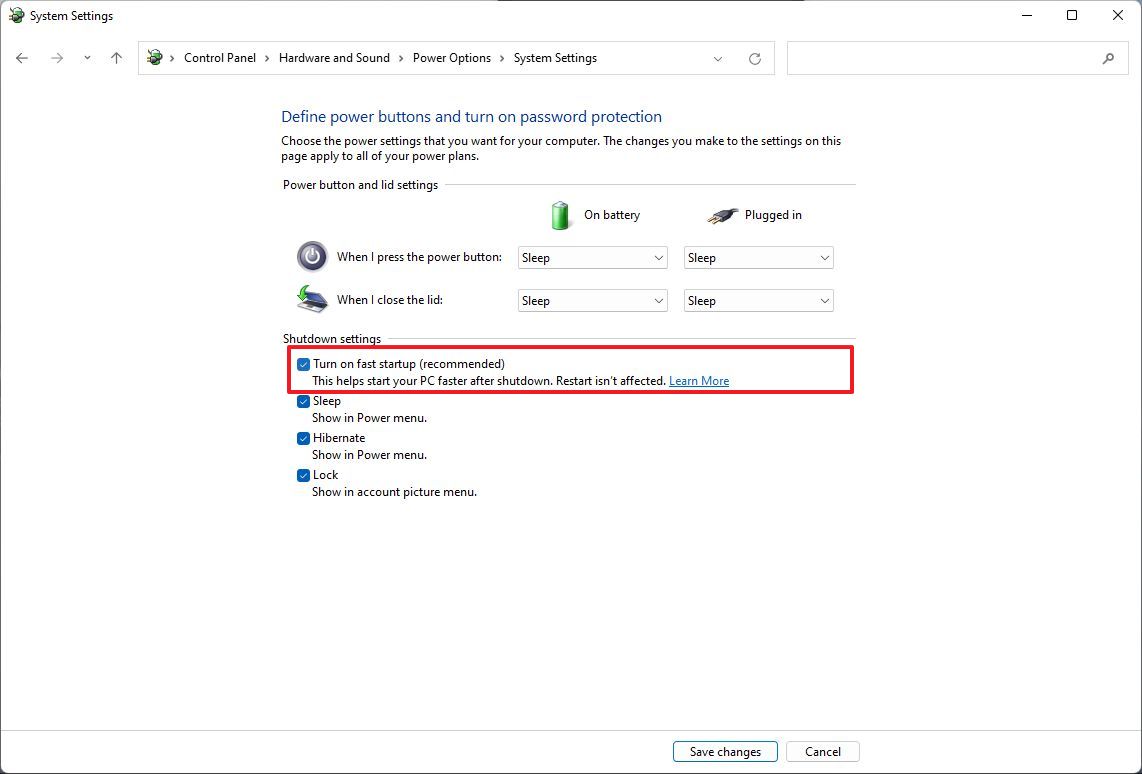
Once you complete the steps, the device should start faster during the boot.
Fix fast startup option missing
If the option to enable fast startup is missing in Control Panel, it’s likely because hibernation is disabled. You can enable “Hibernate” with these steps:
- Open Start.
- Search for Command Prompt.
- Right-click the top result and select the Run as administrator option.
- Type the following command to view the power states supported on your computer and press Enter: powercfg /availablesleepstates
- Confirm that “Fast Startup” is listed in the output.
- Quick note: If the option is still missing, the computer may not support the Advanced Configuration and Power Interface (ACPI) state of “S4”.
- Type the following command to enable hibernation, which makes fast startup available in Control Panel, and press Enter: powercfg /hibernate on
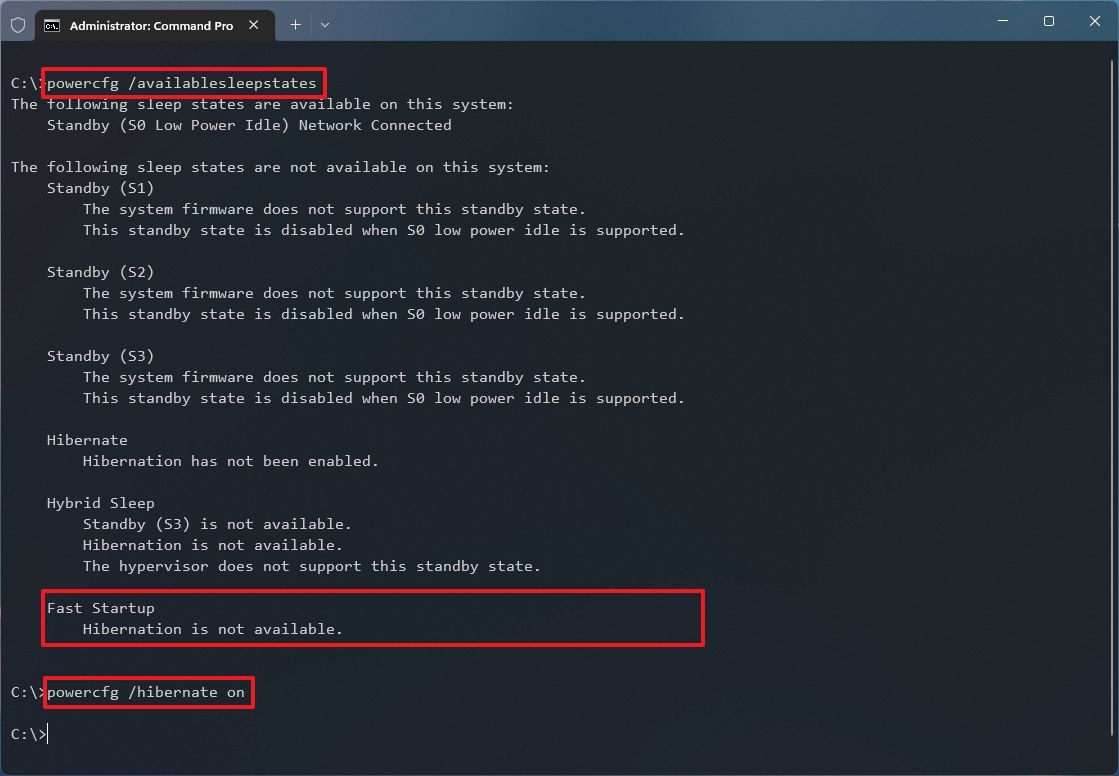
After you complete the steps, the fast startup option will be available in the Power Options settings.
How to disable fast startup on Windows 11
On Windows 11, the fast startup feature helps to speed up the boot process, but it doesn’t mean that every system needs it since sometimes, depending on the hardware configuration, the feature may cause problems.
For instance, the fast startup feature shouldn’t be enabled on devices with limited storage, and it can be the root of many boot problems. Furthermore, if you have a dual-boot setup with a secondary partition, files you try to save from another version of Windows or another operating system won’t commit to the drive, causing data loss because the fast startup feature will try to protect the original file structure from being modified.
To disable fast startup on Windows 11, use these steps:
- Open Control Panel.
- Click on Hardware and Sound.
- Click on Power Options.

- Click the “Choose what the power button does” option.

- Click the “Change settings that are currently unavailable” option.
- Under the “Shutdown settings” section, check the “Turn on fast startup” option.
- Click the Save changes button.
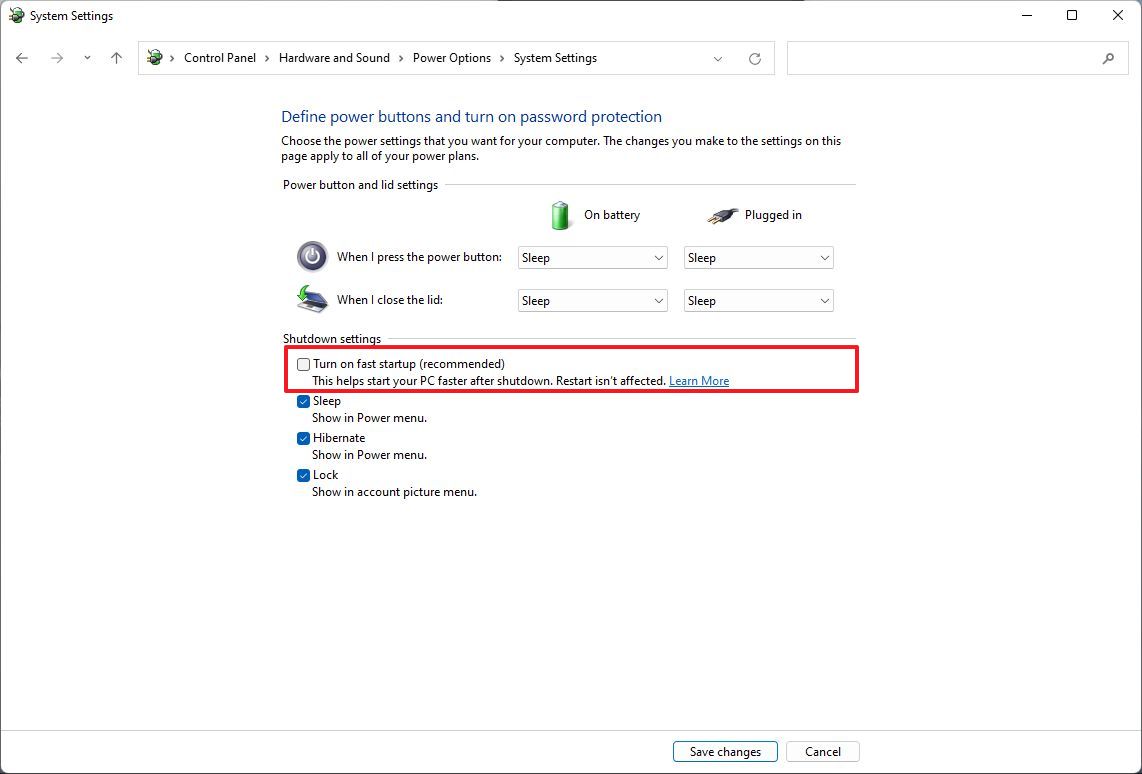
Once you complete the steps, the fast startup feature will no longer be available. Although it will cause a boot delay, it’ll prevent many problems, depending on the situation.
More resources
For more helpful articles, coverage, and answers to common questions about Windows 10 and Windows 11, visit the following resources:


