

Increasing Lenovo Legion Go or Legion Go S VRAM (video random-access memory) gives you more control over your handheld and can even be an easy way to make more graphically intensive games run more smoothly.
The thing is, unlike ASUS ROG Ally, Lenovo’s gaming handhelds don’t let me adjust VRAM from the main handheld software, Legion Space. As such, I had to pop into my device’s BIOS to change VRAM settings.
The process is pretty simple, but not necessarily intuitive. Here’s how to enter BIOS on Legion Go and Legion Go S to change VRAM and get your games running more smoothly.
How to enter BIOS and change VRAM on Legion Go and Legion Go S
Out of the box, your Legion Go or Legion Go S will have its Video VRAM, or simply VRAM, set to Auto. But you can adjust it to a specific setting if desired. Here’s how.
- Completely power off your Legion Go handheld.
- Hold Up Volume + Power for a few seconds to make the device enter BIOS.
- Using your finger, tap BIOS Setup in the small box. The buttons and joysticks won’t respond.
- Next, tap More Settings. in the lower right corner of the screen.
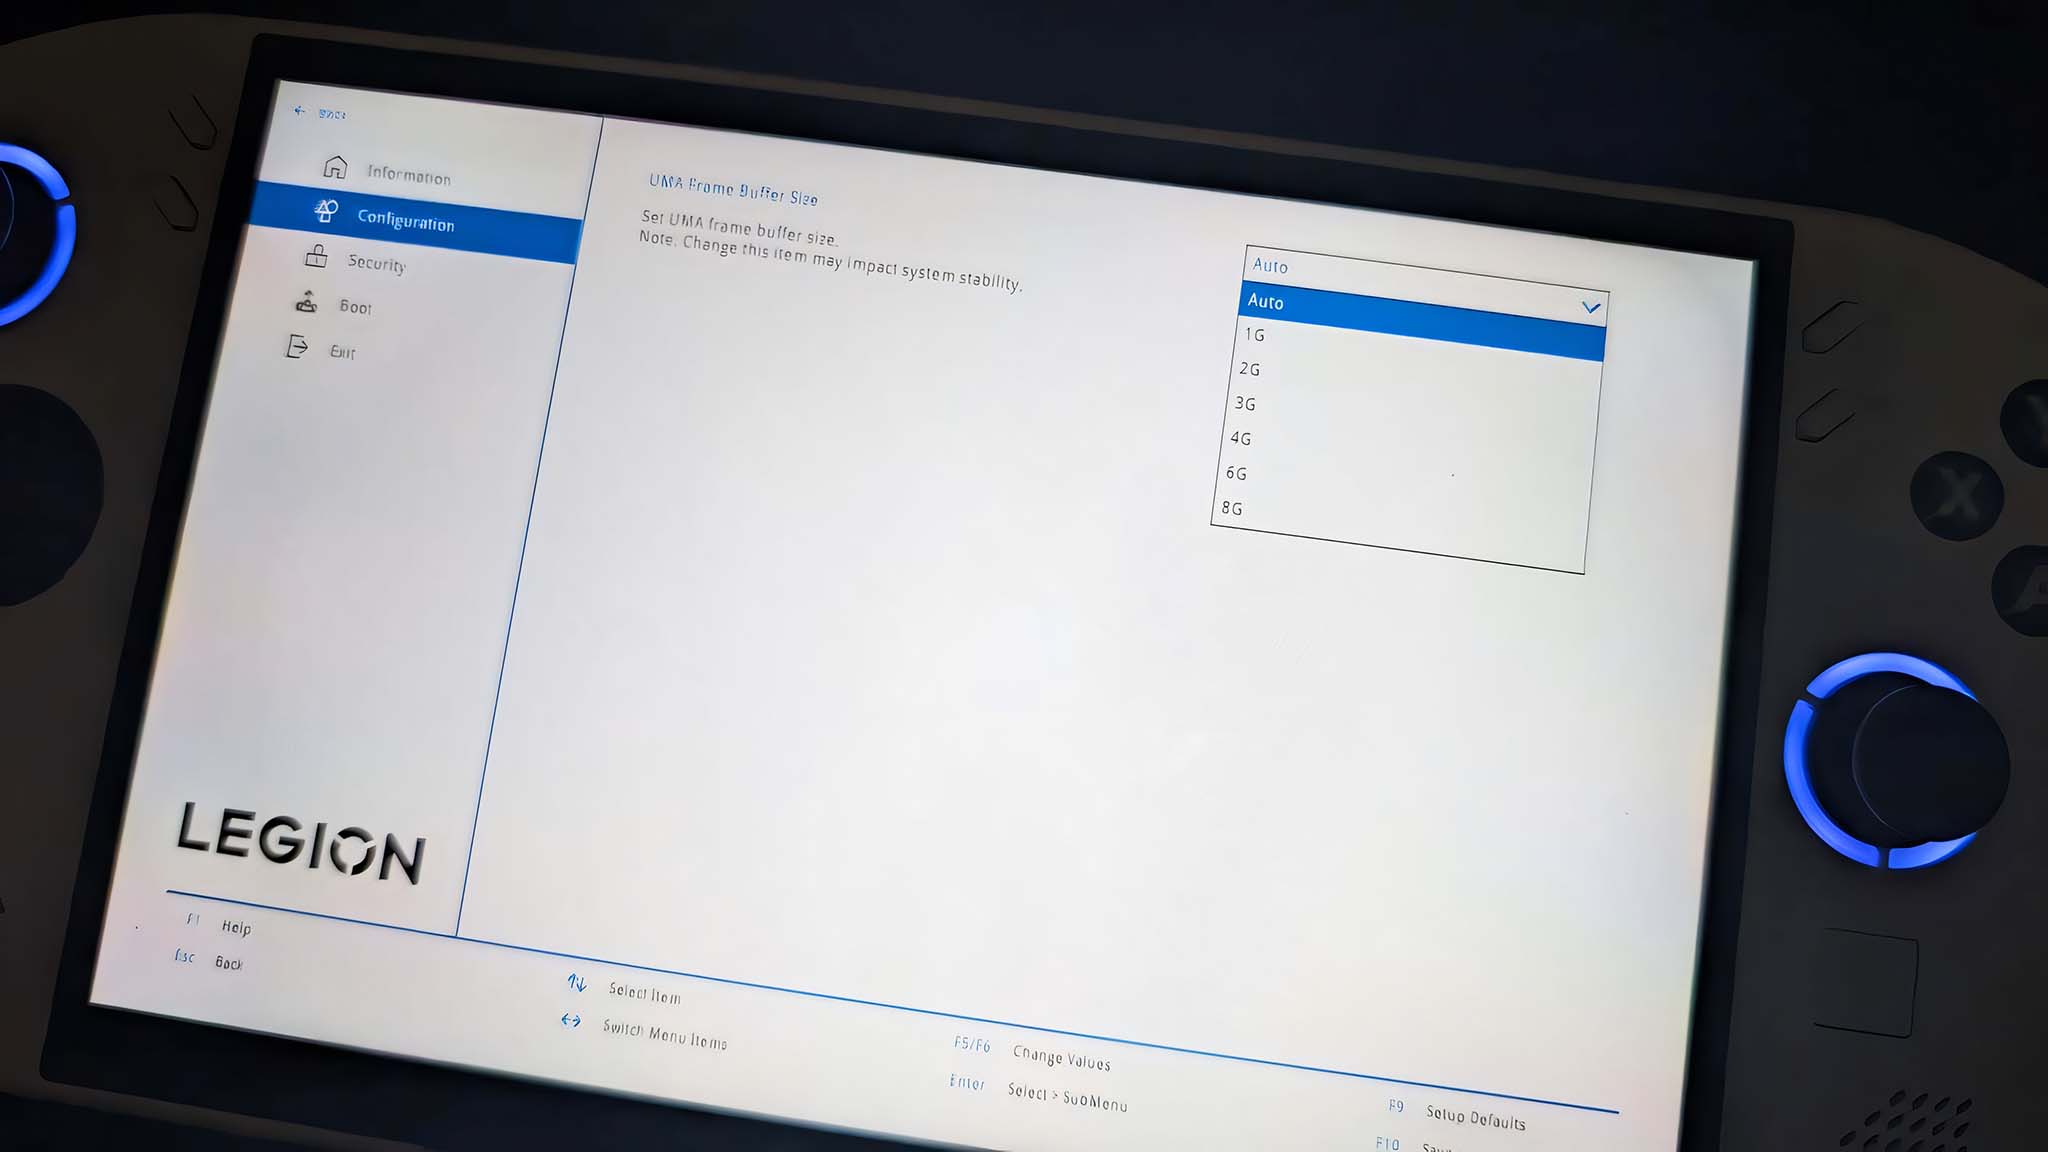
- In the left-side menu, select Configuration.
- Double tap Display Settings.
- To the right of where it reads “UMA Frame Buffer Size,” tap the dropdown and change it to 6G. You can also do 8G, but the device will consumer more power at this setting.
- If you want to make any other changes to the system, do so now.
- When you’re done, tap Exit in the left menu.
- Then, tap Exit Saving Changes at the top.
- Finally, select Yes.
After doing all of that, your Legion Go handheld will restart with the new VRAM setting in place.
Now, all you have to do is run a game and see how much more smoothly your device handles it.
As I said previously, I typically like to put my handhelds at 6G for more graphically intensive games. This typically provides a balance of giving the Legion Go enough power to play games efficiently without consuming as much power as 8G does.
But if your handheld is still struggling at 6G, you might want to up VRAM to 8G and then play with your handheld plugged in or in a docking station.
Legion Go and Legion Go S VRAM FAQ

What is VRAM?
Dedicated Video Memory, also known as VRAM (video random-access memory) refers to RAM connected to your GPU (graphics processing unit) that stores graphics information (think pixels, textures, resolution, lighting, positional info, etc.) with the purpose of displaying it on a screen.
The close connection VRAM has with the GPU allows data to transfer faster than if it were separate, which is important for gaming.
Why is higher VRAM better for gaming?
Increasing VRAM on a gaming device makes it possible for the GPU to store and access graphics data faster.
As such, increasing VRAM can allow a device to offer smoother graphics rendering for higher texture resolution as well as reduce stuttering and delays when applying graphical effects.
Because of this, some games — especially more graphically intensive ones — require more VRAM to run efficiently.
How much VRAM does Legion Go and Legion Go S have?
Both the Legion Go and white Legion Go S offer up to 8GB VRAM.
What VRAM setting is the default on Legion Go handhelds?
By default, the Legion Go and Legion Go S have VRAM set to Auto.
What should I set Legion Go VRAM to?
Typically, 6G is the best VRAM setting when playing more graphically demanding games on Legion Go and Legion Go S, but games with 2D and pixel graphics can often run well between 2G and 4G.
Sometimes, putting the Legion Go up to 8G might be best, but this is a less efficient setting that usually doesn’t offer that much of a performance increase from the 6G setting. Still, that will all depend on the game you’re playing.
Can I change Legion Go VRAM in Legion Space?
No. VRAM adjustment is not currently something you can change in Legion Space.
How do I enable more VRAM?
You need to go into the Legion Go or Legion Go S BIOS to alter VRAM.
How to up VRAM on Legion Go?
To up VRAM on Legion Go, you’ll first need to turn the device off completely. Then hold down the volume up button and the power button until the device enters the BIOS.
After that, select BIOS Setup > More Settings > Configuration > Display Settings and change the dropdown from Auto to whatever you want.
From here, select Exit > Exit Saving Changes > Yes.
The system will restart at the VRAM setting you selected.


