

This approach involves sealing the gaps around your window frame (or, more technically, the jamb and casing) with caulk, and then using weatherstripping to cover any gaps around the window itself (if you need to).
“The typical window assembly in an American home isn’t completely airtight,” Hatherly said. Air can leak through the gaps between the window and its frame, and even the larger window assembly, and then into your living space.
In Wirecutter’s broader guide to weatherization, senior staff writer Tim Heffernan says that before his building’s windows were recaulked, a few years ago, “the window in my bedroom was so bad that the breeze coming through could practically snuff a candle on windy days.”
When you caulk the seams—where the window jamb meets the casing, and the casing meets the wall—you stop that air from leaking into your living space.
There should already be some sealant around the edges of your window, but it may have dried out and cracked over time. If a spot looks like it needs fresh caulk, lick your finger and hold it near the gap on a cold day. If you can feel a breeze, it needs to be re-sealed.
If you’ve ever caulked a bathtub, you know what to expect. If it’s your first time caulking, there are loads of great how-to videos covering the basics and best practices. The Funny Carpenter has the best one that I’ve seen. Ask This Old House also has a good overview on window assemblies and where to caulk them.

This inexpensive waterproof sealant is great for filling indoor gaps around windows.
For the cleanest results, cut the caulking tube at an angle and start with a small bead. Hatherly noted that gaps larger than ¼ inch should be filled with low-expansion foam rather than caulk.

Any caulking gun with a padded handle, an on-board piercing rod, and a dripless trigger will do the trick. And this one comes with a few extra caulking accessories.
Don’t buy the cheapest caulking gun at the hardware store, either. The consensus among the experienced caulkers on our staff is that it’s worth paying a few dollars more for a model with an onboard piercing rod and a padded—or at least contoured—no-drip trigger.

This inexpensive tool can help you work faster and achieve consistent, smooth results.
Pros generally don’t use caulking multi-tools, but they can come in handy. The corner-shaped scraper on the one that I own is much faster at digging out old caulk than other tools I’ve tried. I’m also cursed with clumsy hands that just can’t quite get the hang of finish work, and I consistently get better results with my tool’s silicone spreader than with my own finger.
If there are any obvious gaps around the window itself, you can fill or cover those with weatherstripping.
Top pick
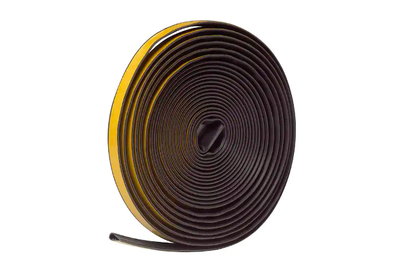
This tape seals gaps around doors and windows between 0.125 and 0.25 inches wide, and it comes with a 10-year warranty.
In our weatherizing guide, Tim says he recommends this Frost King silicone strip because “its hollow teardrop profile lets it compress and expand as needed.” But if you have other weatherstripping lying around—maybe from a window AC installation—that can work, too.


