On Windows 11, the firewall, also known as Microsoft Defender Firewall, is a built-in security feature designed to protect your computer from unauthorized access over the internet or network. It acts as a barrier, monitoring incoming and outgoing network traffic and blocking potentially harmful connections.
This security feature is available through the Windows Security app, providing a user-friendly interface for managing settings and monitoring activity. For example, you can configure the firewall to allow or block specific apps from accessing the network, ensuring granular control over your system’s security. The firewall also offers different settings for different network types, allowing you to customize your computer’s security based on the network environment and more.
In this how-to guide, I’ll outline the steps to get started managing the default firewall settings on Windows 11.
How to manage the built-in firewall on Windows 11
On Windows 11, the Microsoft Defender Firewall comes enabled by default, and you can turn it off or on as needed, allow or block apps, customize notifications, and if you make a mistake, the system provides an option to restore the default settings.
Check firewall protection
To check whether the firewall is on or off on your computer, use these steps:
- Open Start.
- Search for Windows Security and click the top result to open the app.
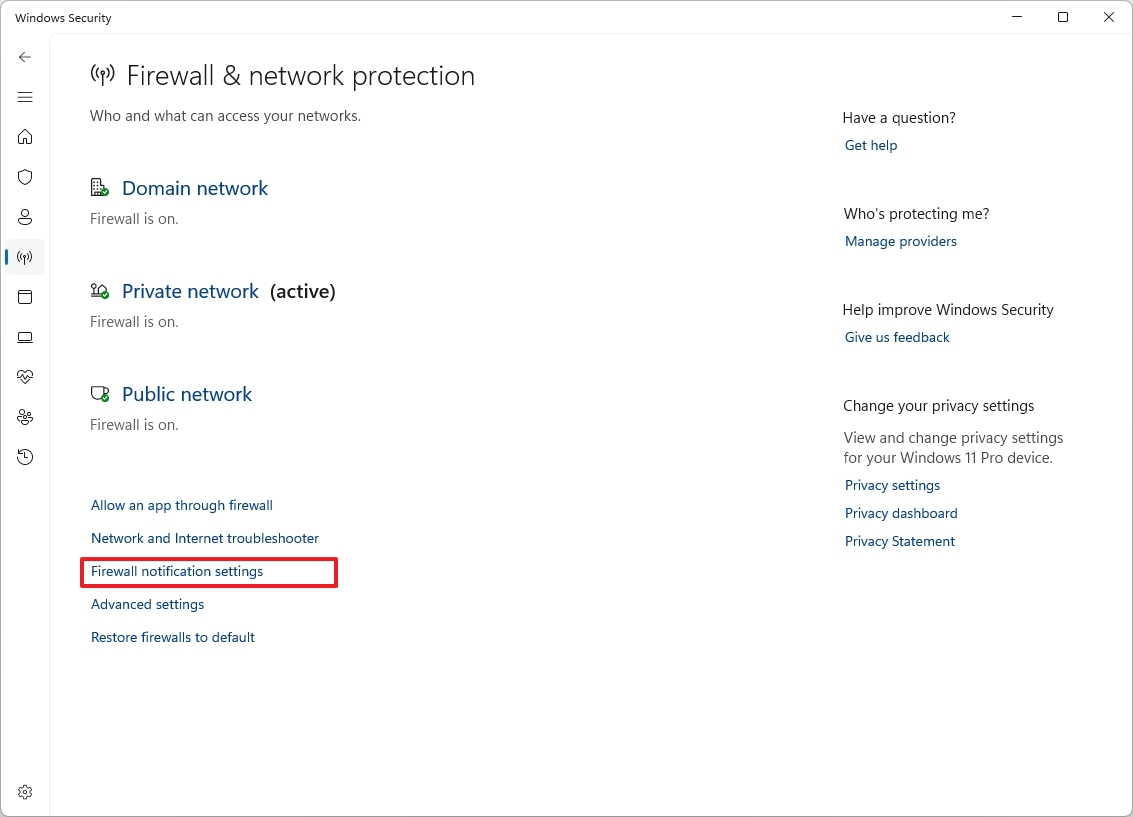
- Click on Firewall & network protection.
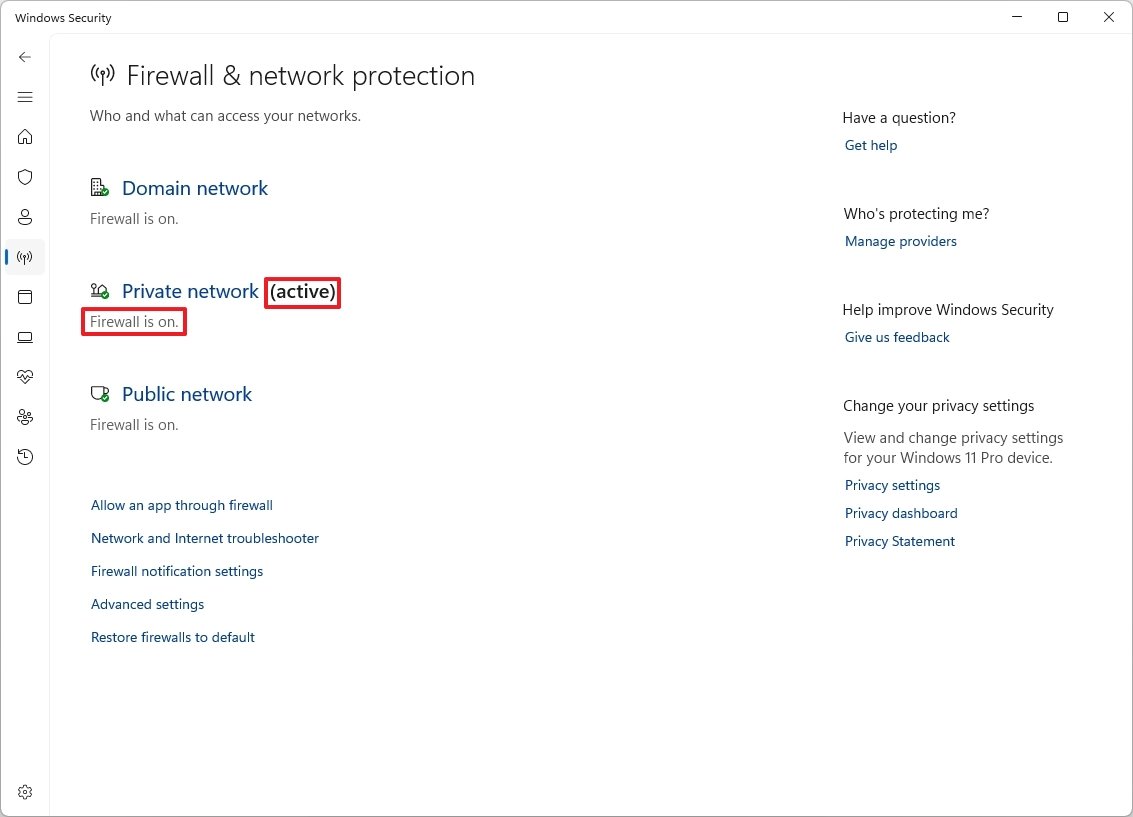
- Confirm the feature reads “Firewall is on” for Domain, Private, and Public networks.
- Quick note: The networks set as “active” indicate the type of network the firewall is protecting.
The page also includes options to adjust firewall settings to allow apps through the firewall and advanced settings. However, these settings are links to change configurations from the Control Panel.
Enable or disable firewall
To enable or disable the Defender Firewall on Windows 11, use these steps:
- Open Start.
- Search for Windows Security and click the top result to open the app.
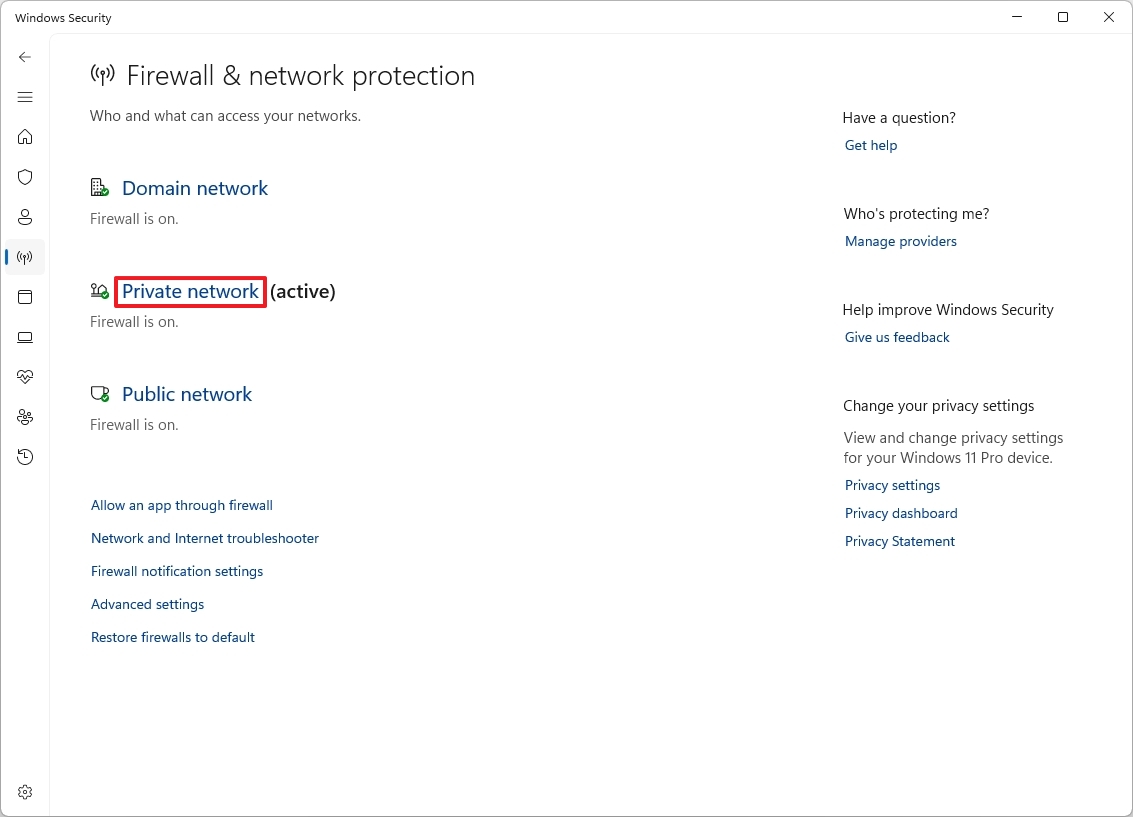
- Click the active firewall. For example, Private network.
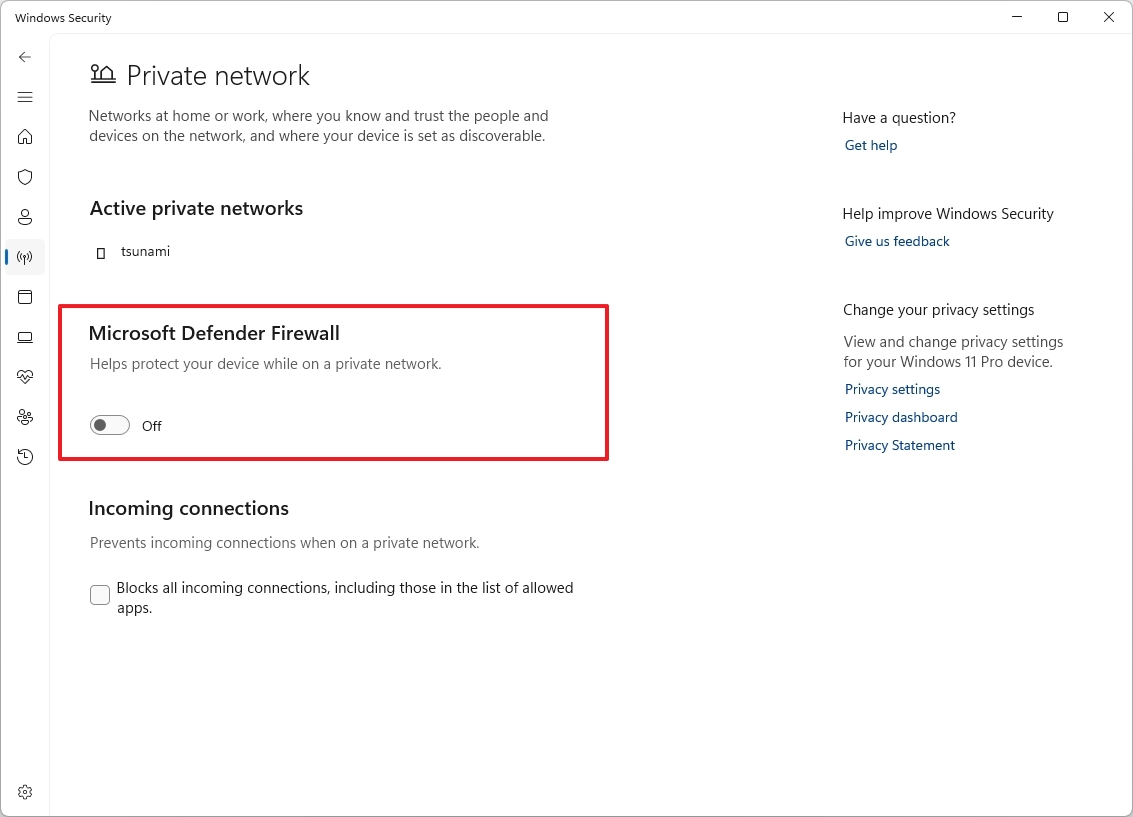
- Turn the “Microsoft Defender Firewall” toggle switch on or off to enable or disable the security feature.
- (Optional) Check the “Blocks all incoming connections, including those in the list of allowed apps” option to block incoming connections
- Quick note: This option has been designed to turn off the firewall for a specific network type temporarily. Usually, you would use this option to troubleshoot connectivity problems.
Once you complete the steps, the firewall will turn on or off according to your configuration.
Allow an app access through firewall
To allow a specific app through the firewall, use these steps:
- Open Start.
- Search for Windows Security and click the top result to open the app.
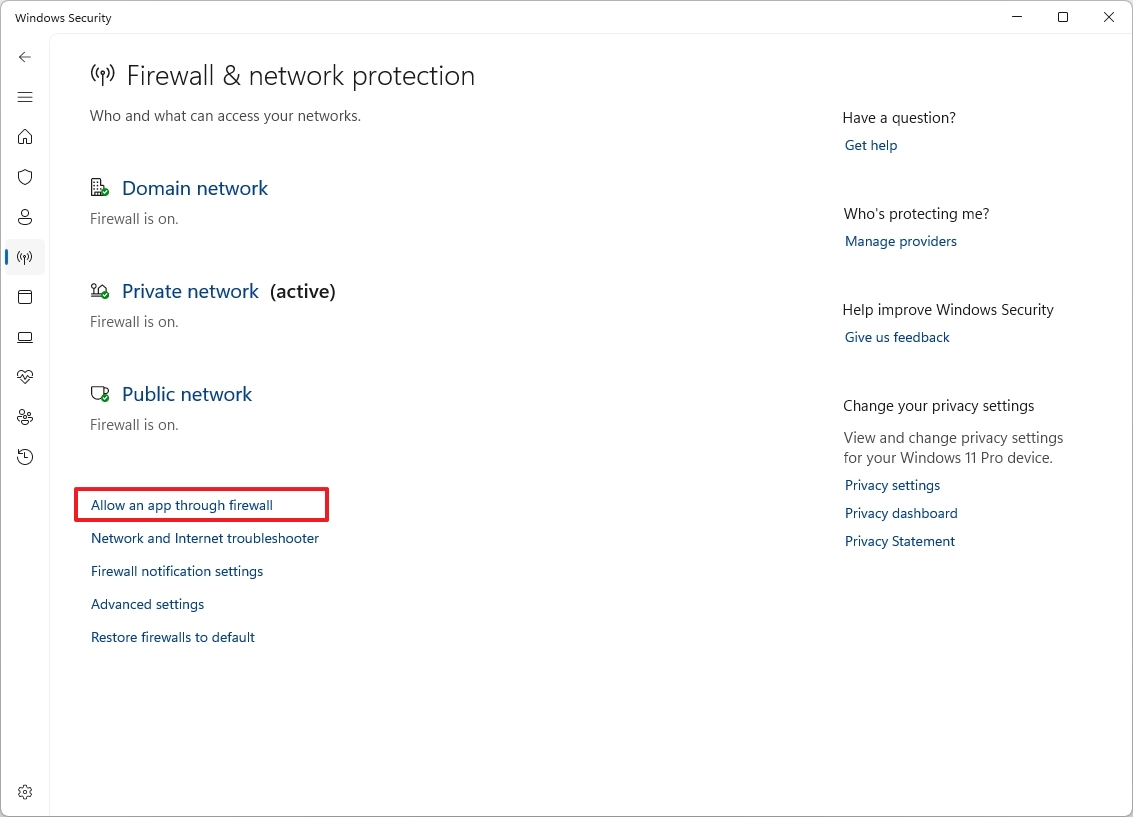
- Click the “Allow an app through firewall” option.
- Click the Change settings button.
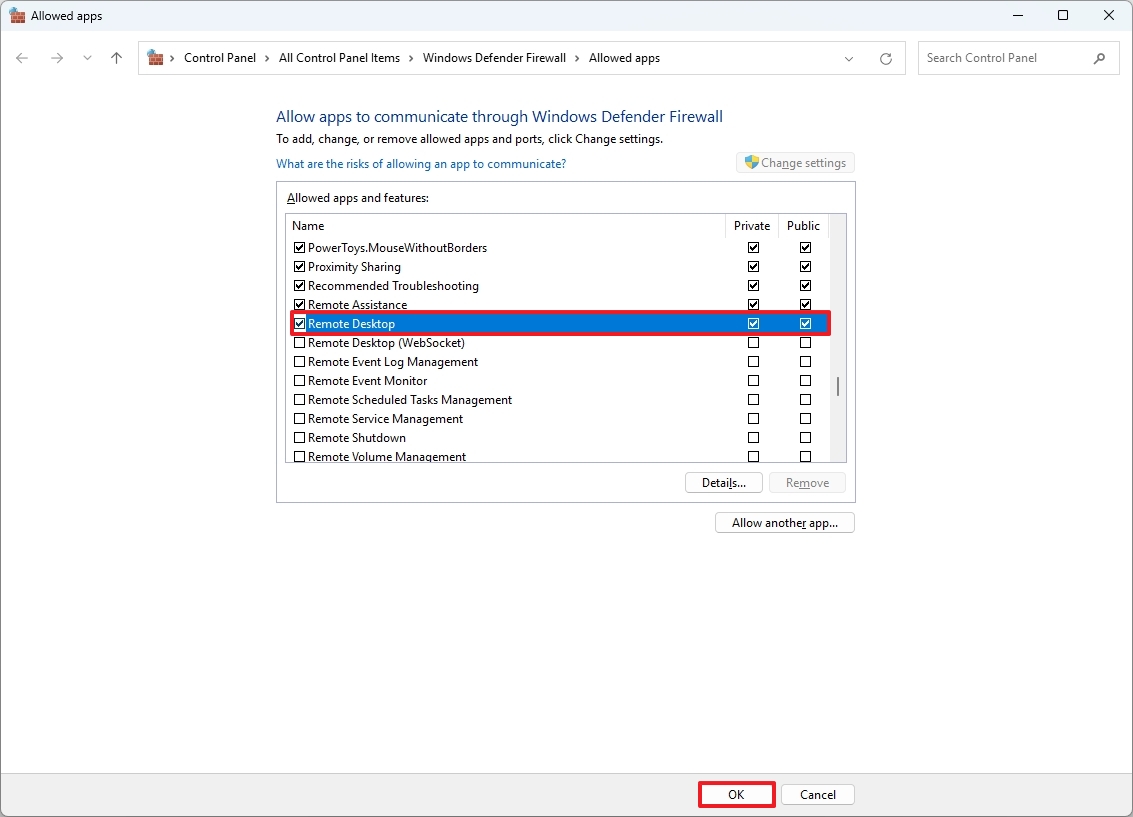
- (Option 1) Check the app or feature to allow through the firewall.
- Check the Private option.
- (Optional) Check the Public option if you will be connecting with the app or feature through a public network.
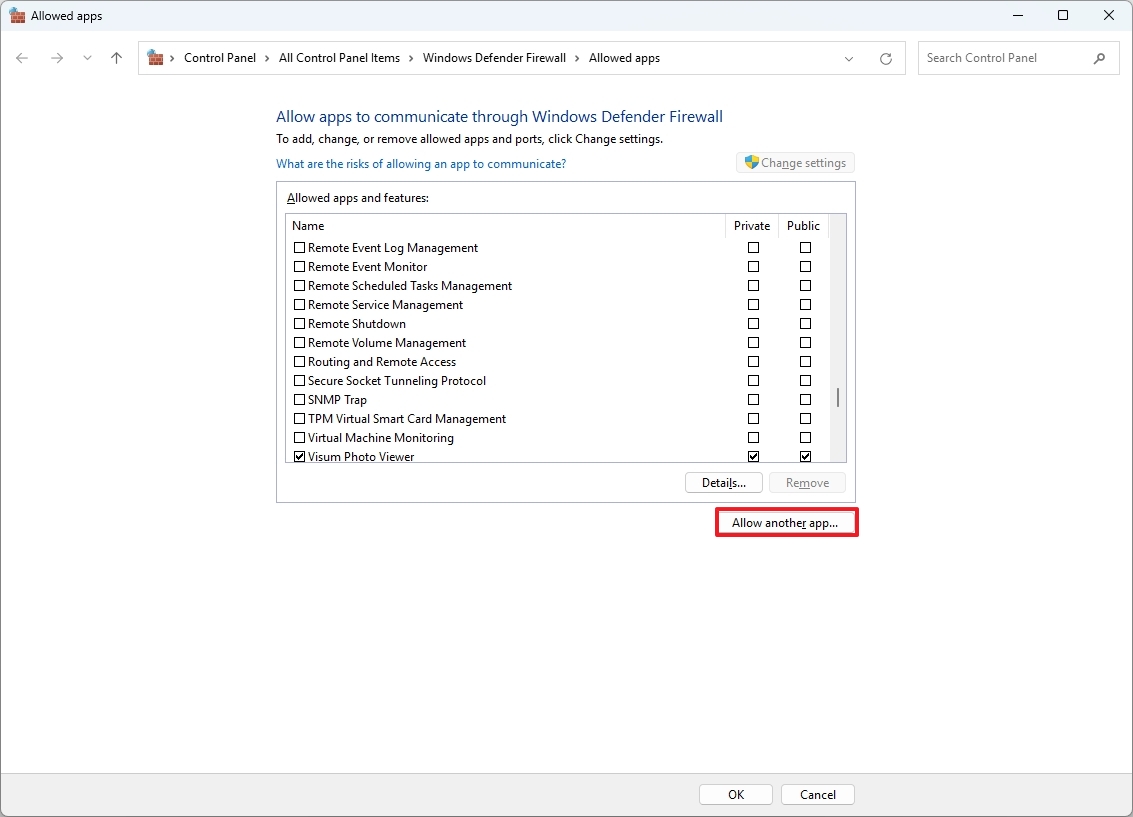
- (Option 1) Click the “Allow another app” button.
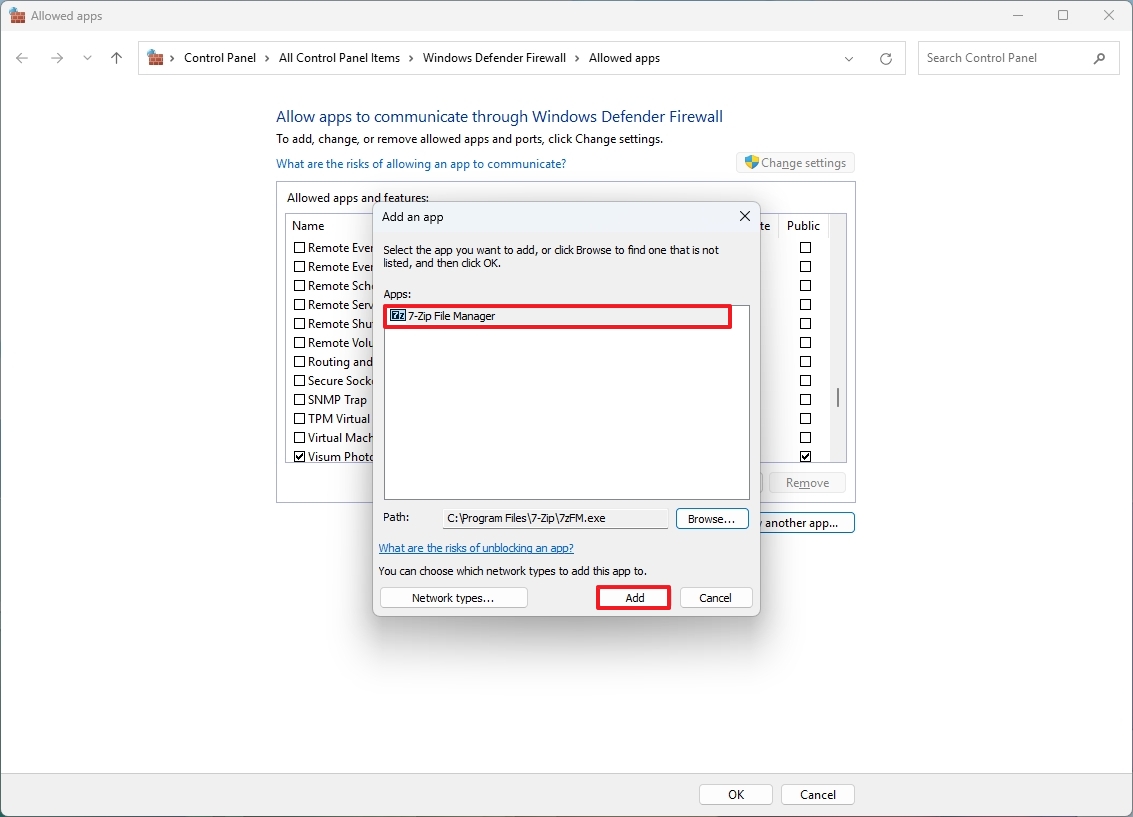
- Click the Browse button.
- Choose the app’s executable to allow through the firewall.
- Click the Open button.
- Click the Add button.
- Check the Private option.
- (Optional) Check the Public option if you will be connecting with the app or feature through a public network.
- Click the OK button.
After you complete the steps, the application will be allowed to send and receive traffic from the local network and internet.
Block an app access through firewall
To prevent an app from accessing the network or the internet, use these steps:
- Open Start.
- Search for Windows Security and click the top result to open the app.
- Click the “Allow an app through firewall” option.
- Click the Change settings button.
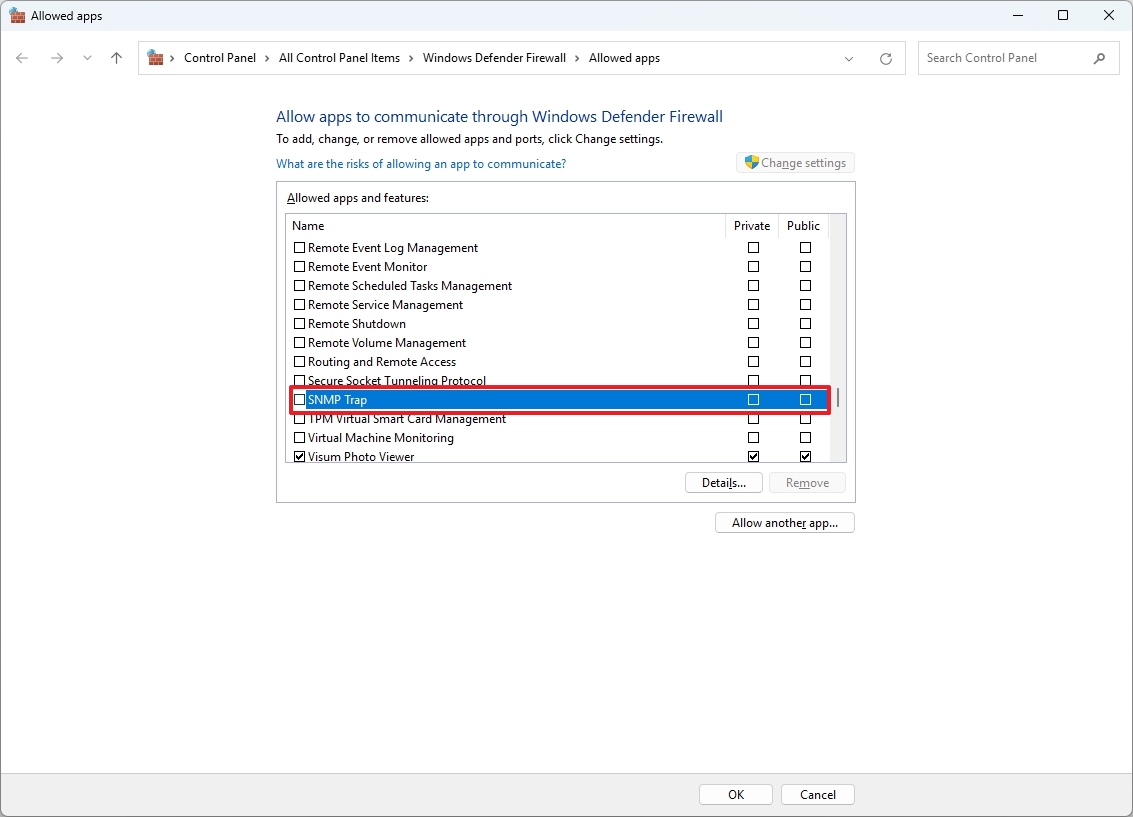
- Clear the check mark for the app to block, making sure that the Private and Public options are also unchecked.
- Click the OK button.
Once you complete the steps, the firewall will block the application through the firewall.
Customize firewall notifications
To customize the notifications for the Windows 11 firewall, use these steps:
- Open Start.
- Search for Windows Security and click the top result to open the app.
- Click the “Firewall notification settings” option.
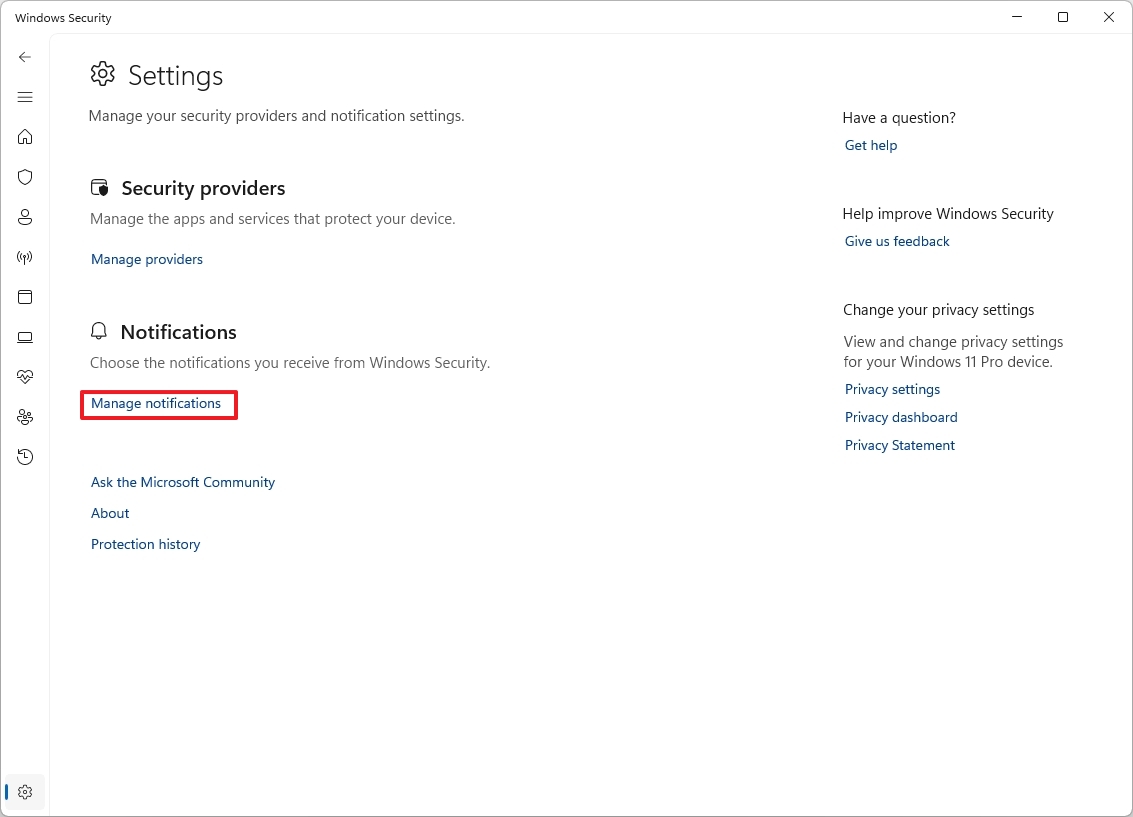
- Click the Manage notifications option for the “Notifications” setting.
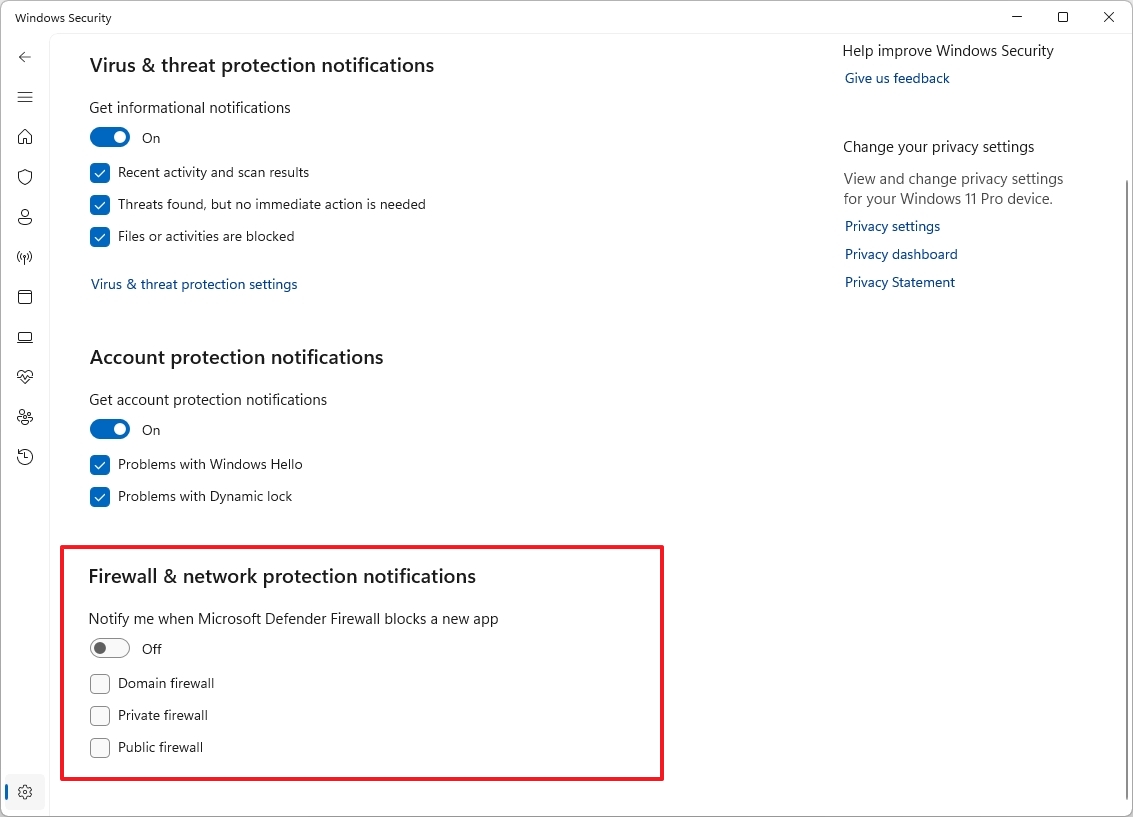
- (Option 1) Turn off the “Notify me when Microsoft Defender Firewall blocks a new app” toggle switch.
- (Option 2) Clear the type of notifications you want to turn off, including Domain, Private, and Public.
After you complete the steps, you will receive notifications according to your configuration.
Restore firewall default configuration
To restore the Microsoft Defender Antivirus feature default settings, use these steps:
- Open Start.
- Search for Windows Security and click the top result to open the app.
- Click the “Firewall notification settings” option.
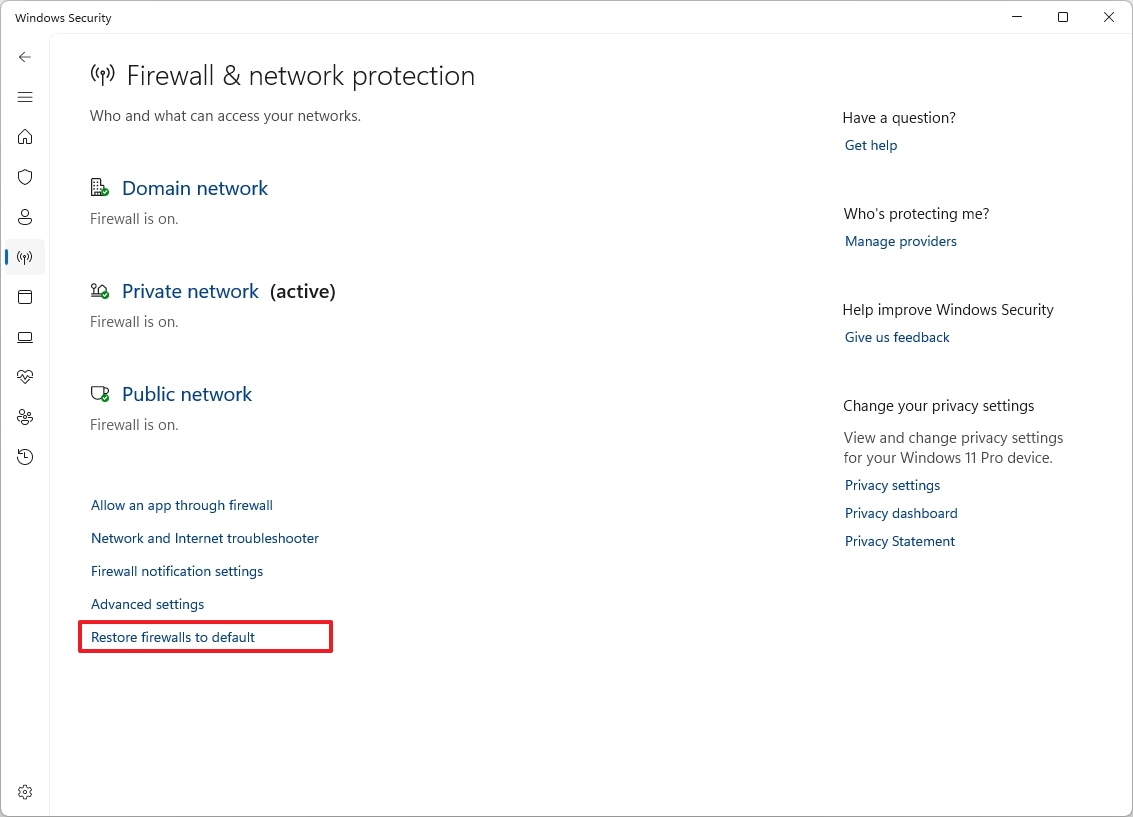
- Click the “Restore firewalls to default” option.
- Click the Restore defaults button.
Once you complete the steps, the security feature will reset the settings and apply the factory default configuration on Windows 11.
More resources
For more helpful articles, coverage, and answers to common questions about Windows 10 and Windows 11, visit the following resources:


