Summary
- A service like Cloudflare DDNS automatically updates your domain’s IP with your home’s IP.
- Nginx Proxy Manager routes traffic and provides SSL certificates through Let’s Encrypt and deploys in Docker.
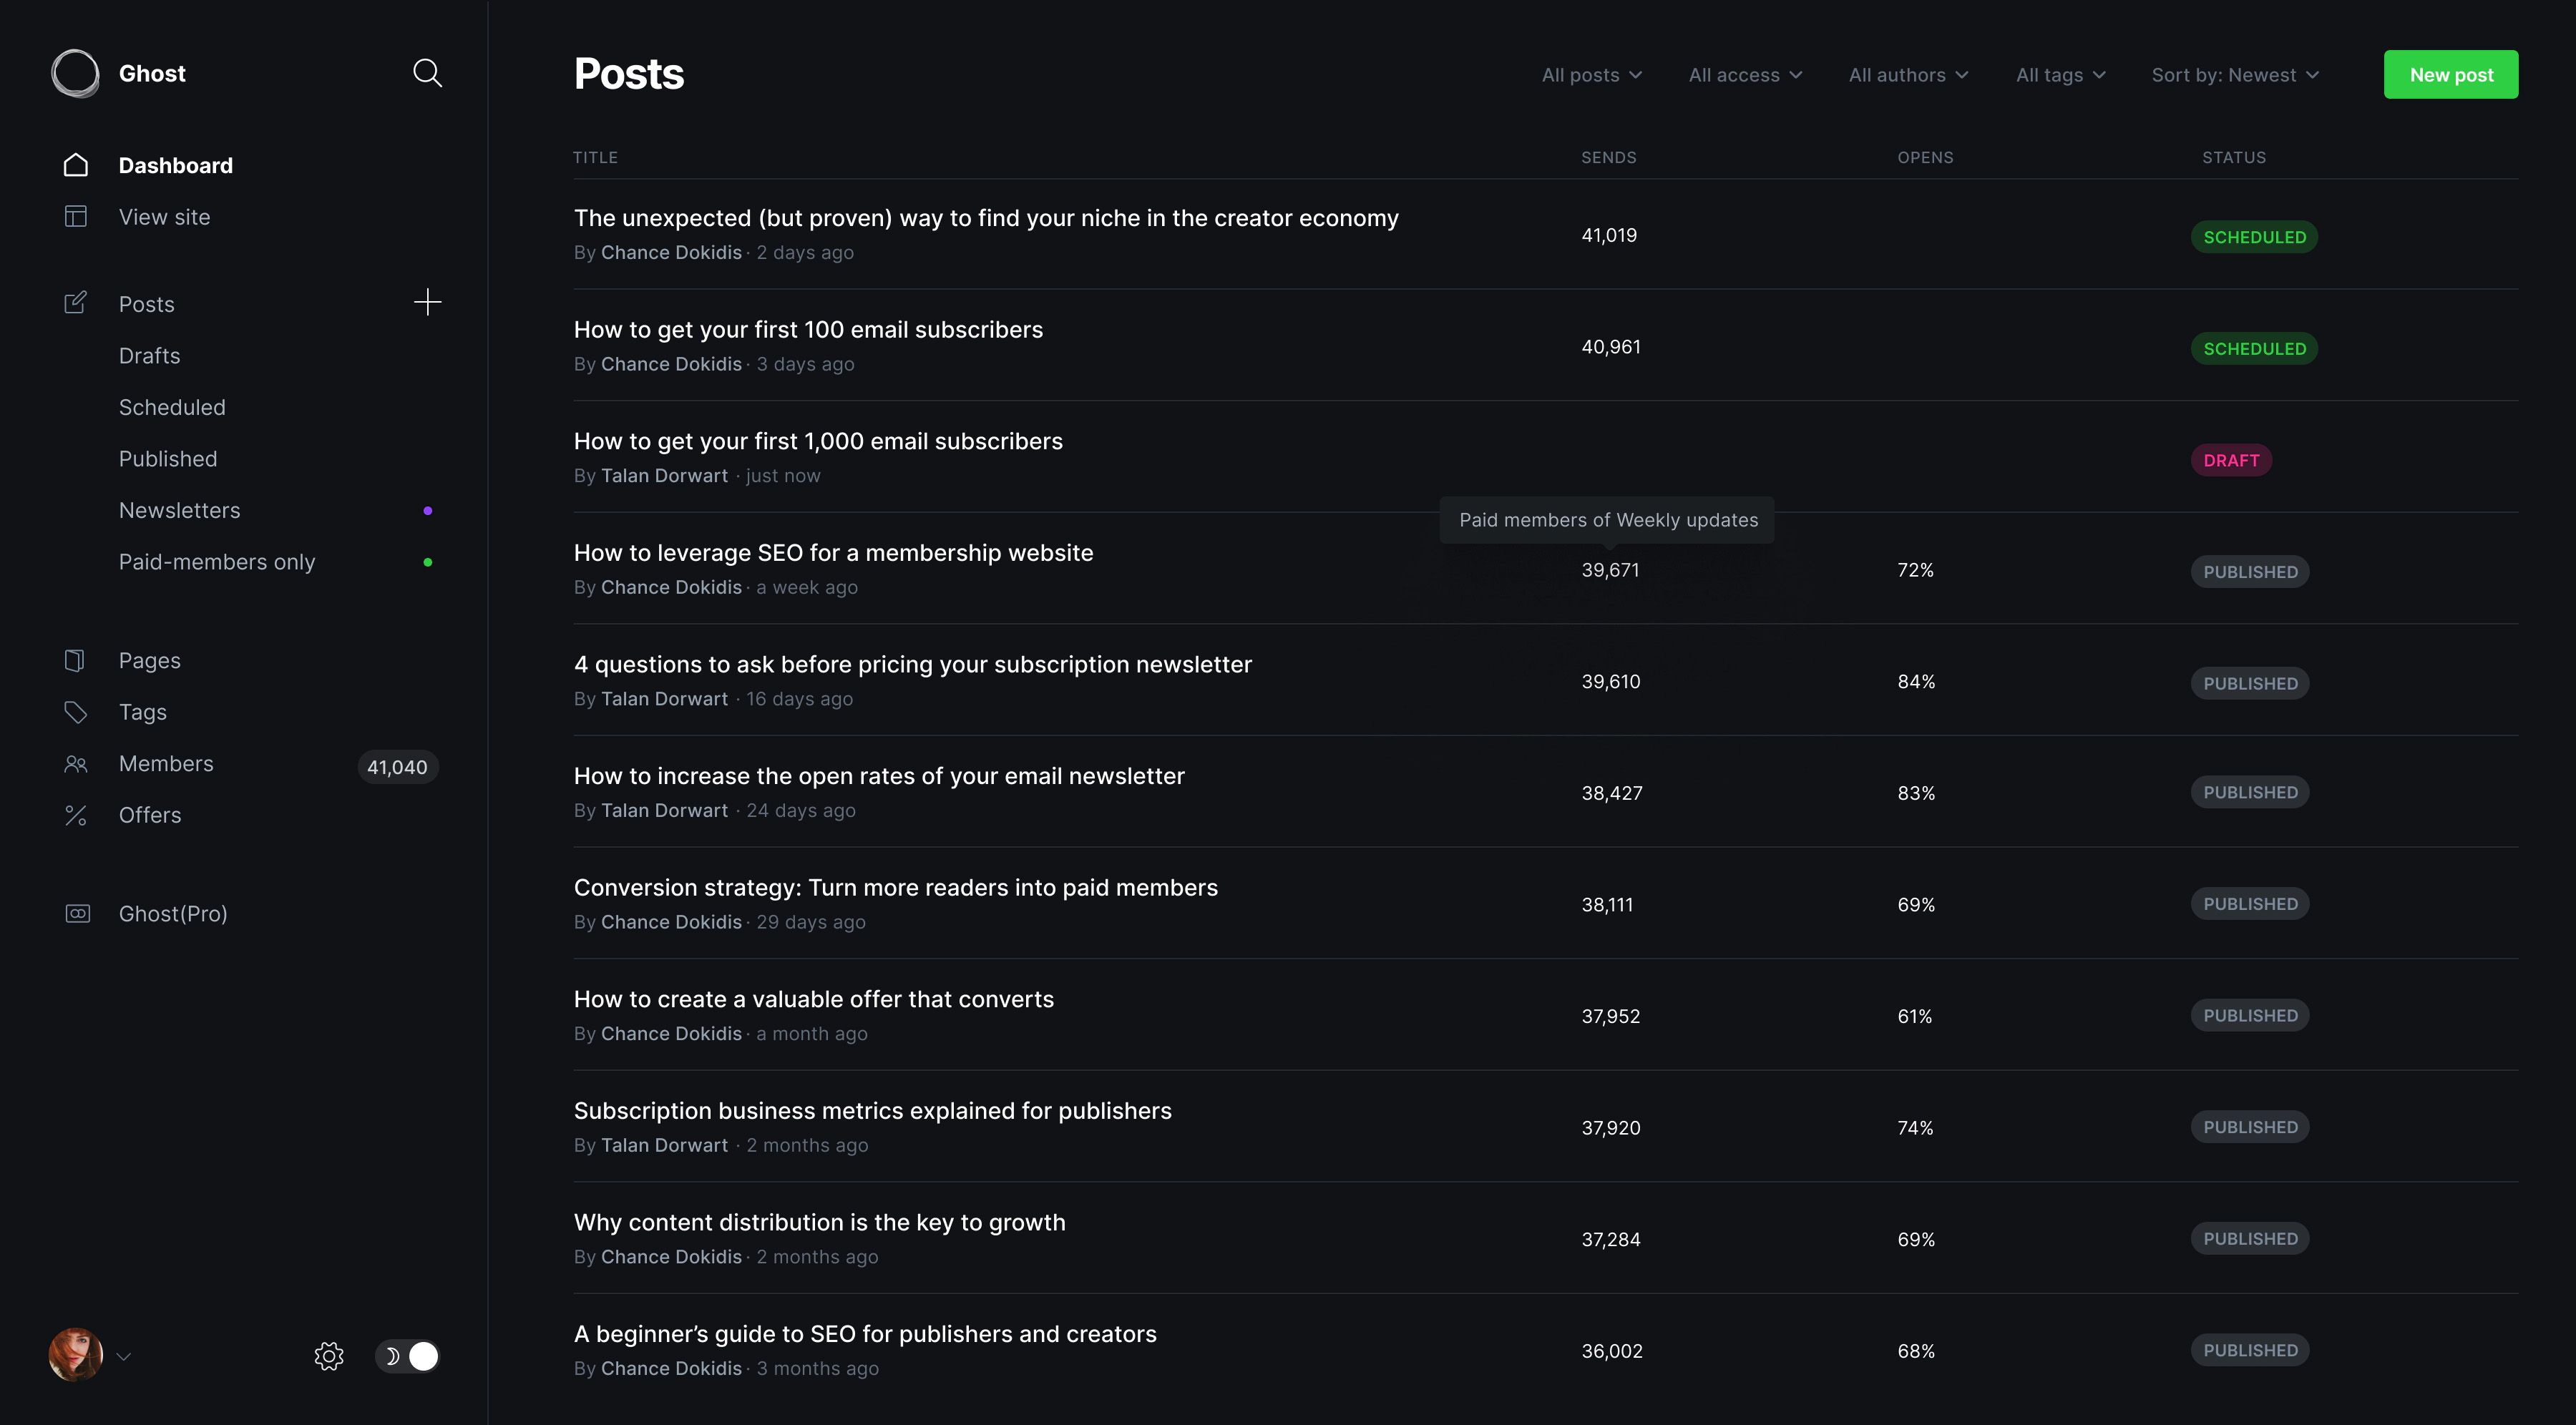
- Ghost is a user-friendly blogging platform with markdown and plugin support that is easy to deploy using Docker.
Have you wanted to run your own website, but hate the idea of paying hosting fees? That’s where I recently found myself, so here’s how I spun up a quick website using Docker, Nginx Proxy Manager, and Ghost.
What Do You Need to Run a Personal Website?
Running a personal website has a few prerequisites. By the time you’re up and running, you should have a domain name, a server to host your website on (which can even be an old laptop, NUC, or Raspberry Pi), Docker, and a few containers deployed.
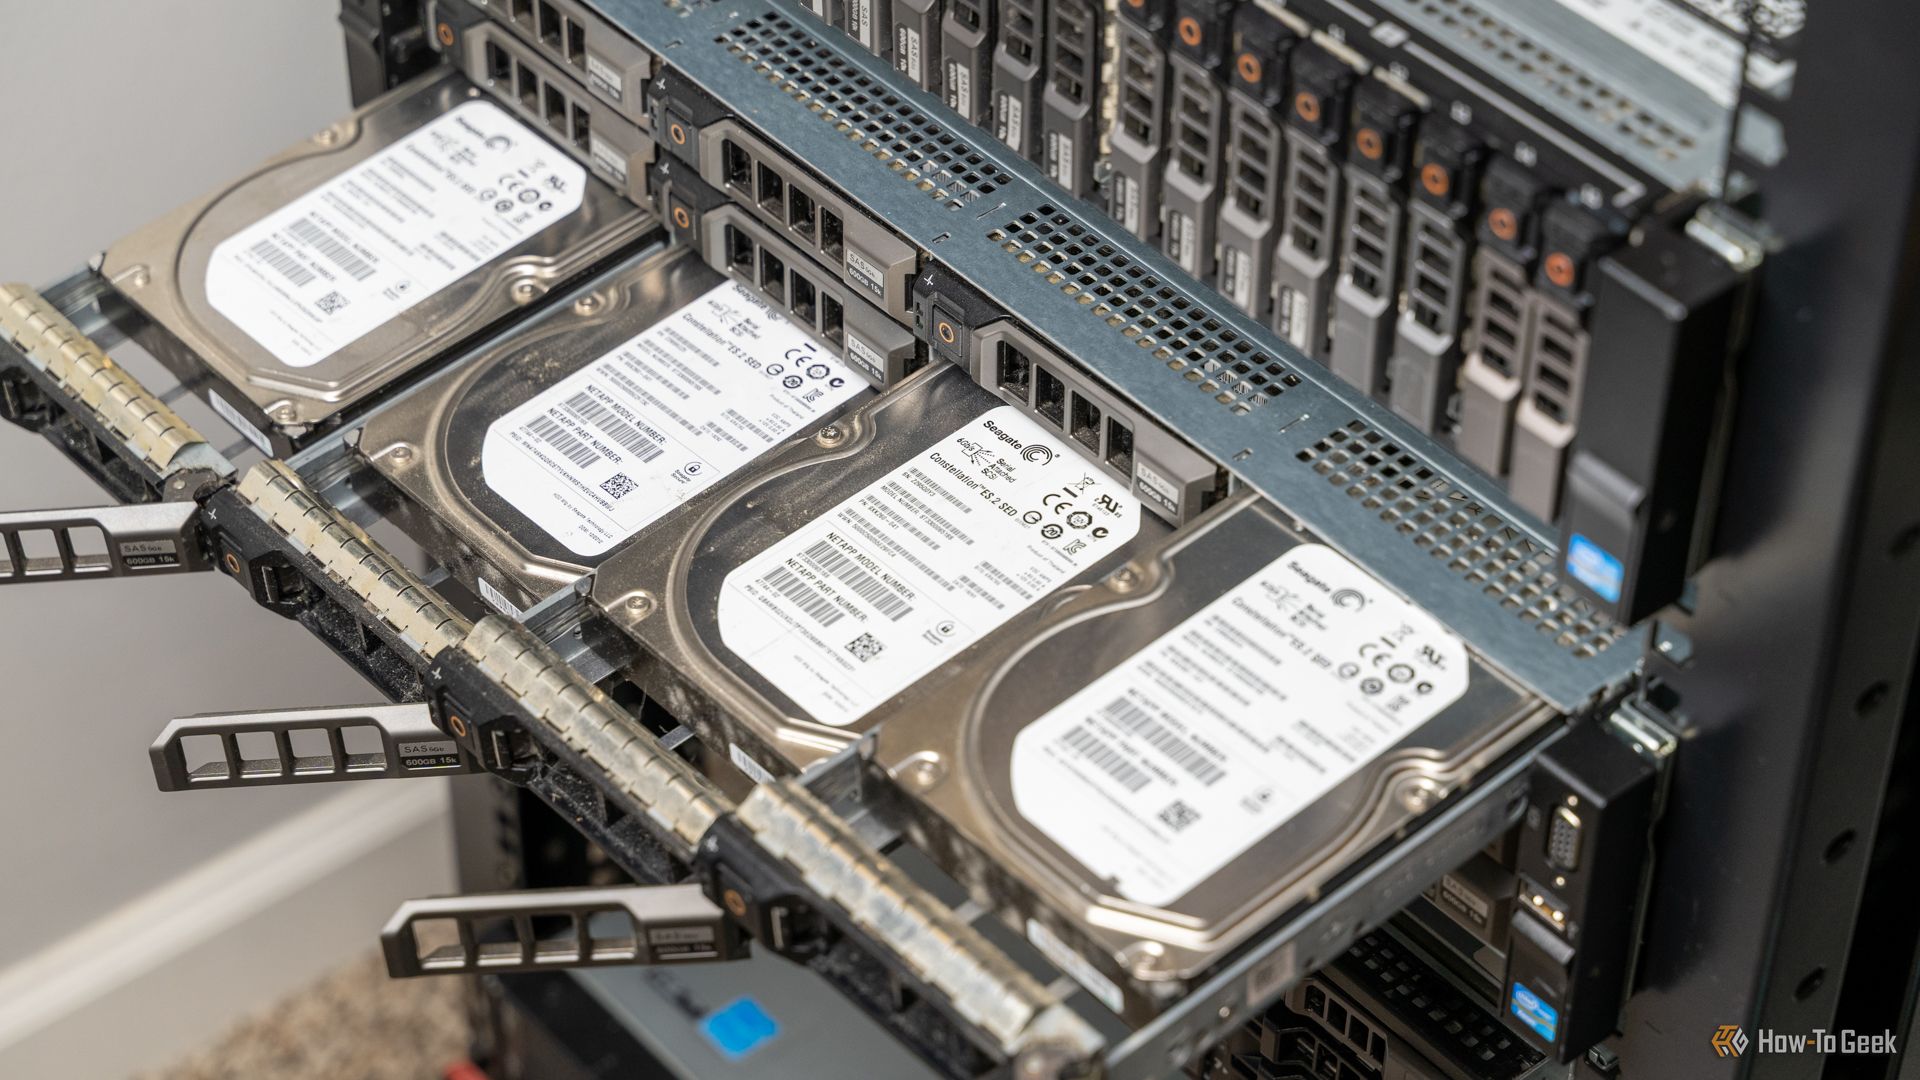
First up is the server to host your website on. It doesn’t have to be ultra-powerful, and it can even be a computer you have lying around at the house. A Raspberry Pi, NUC, old desktop, or even an old laptop could work great for this service. You just need something made within the last 15 years or so that can still run a modern operating system (idealy Linux, but Windows or macOS will work too).
Next is a domain name. You can buy your domain from anywhere, but I’d recommend finding one that supports DDNS natively, like Cloudflare. While you get a fixed IP when using a virtual private server (VPS) or other hosting platform, when hosting your website at home, there’s a good chance your IP will change over time. That’s where a DDNS (dynamic DNS) comes in. Essentially, as your IP at home changes, DDNS updates the A record of your domain to point to your new IP.
In addition to a domain and DDNS setup, you’ll also need Docker for the hosting method I’m going to recommend here. Docker is capable of running so much, but, for your website, we’ll need a DDNS container, Nginx Reverse Proxy, and, of course, your website itself.
Related
Docker for Beginners: Everything You Need to Know
Learn to use this incredibly popular development tool.
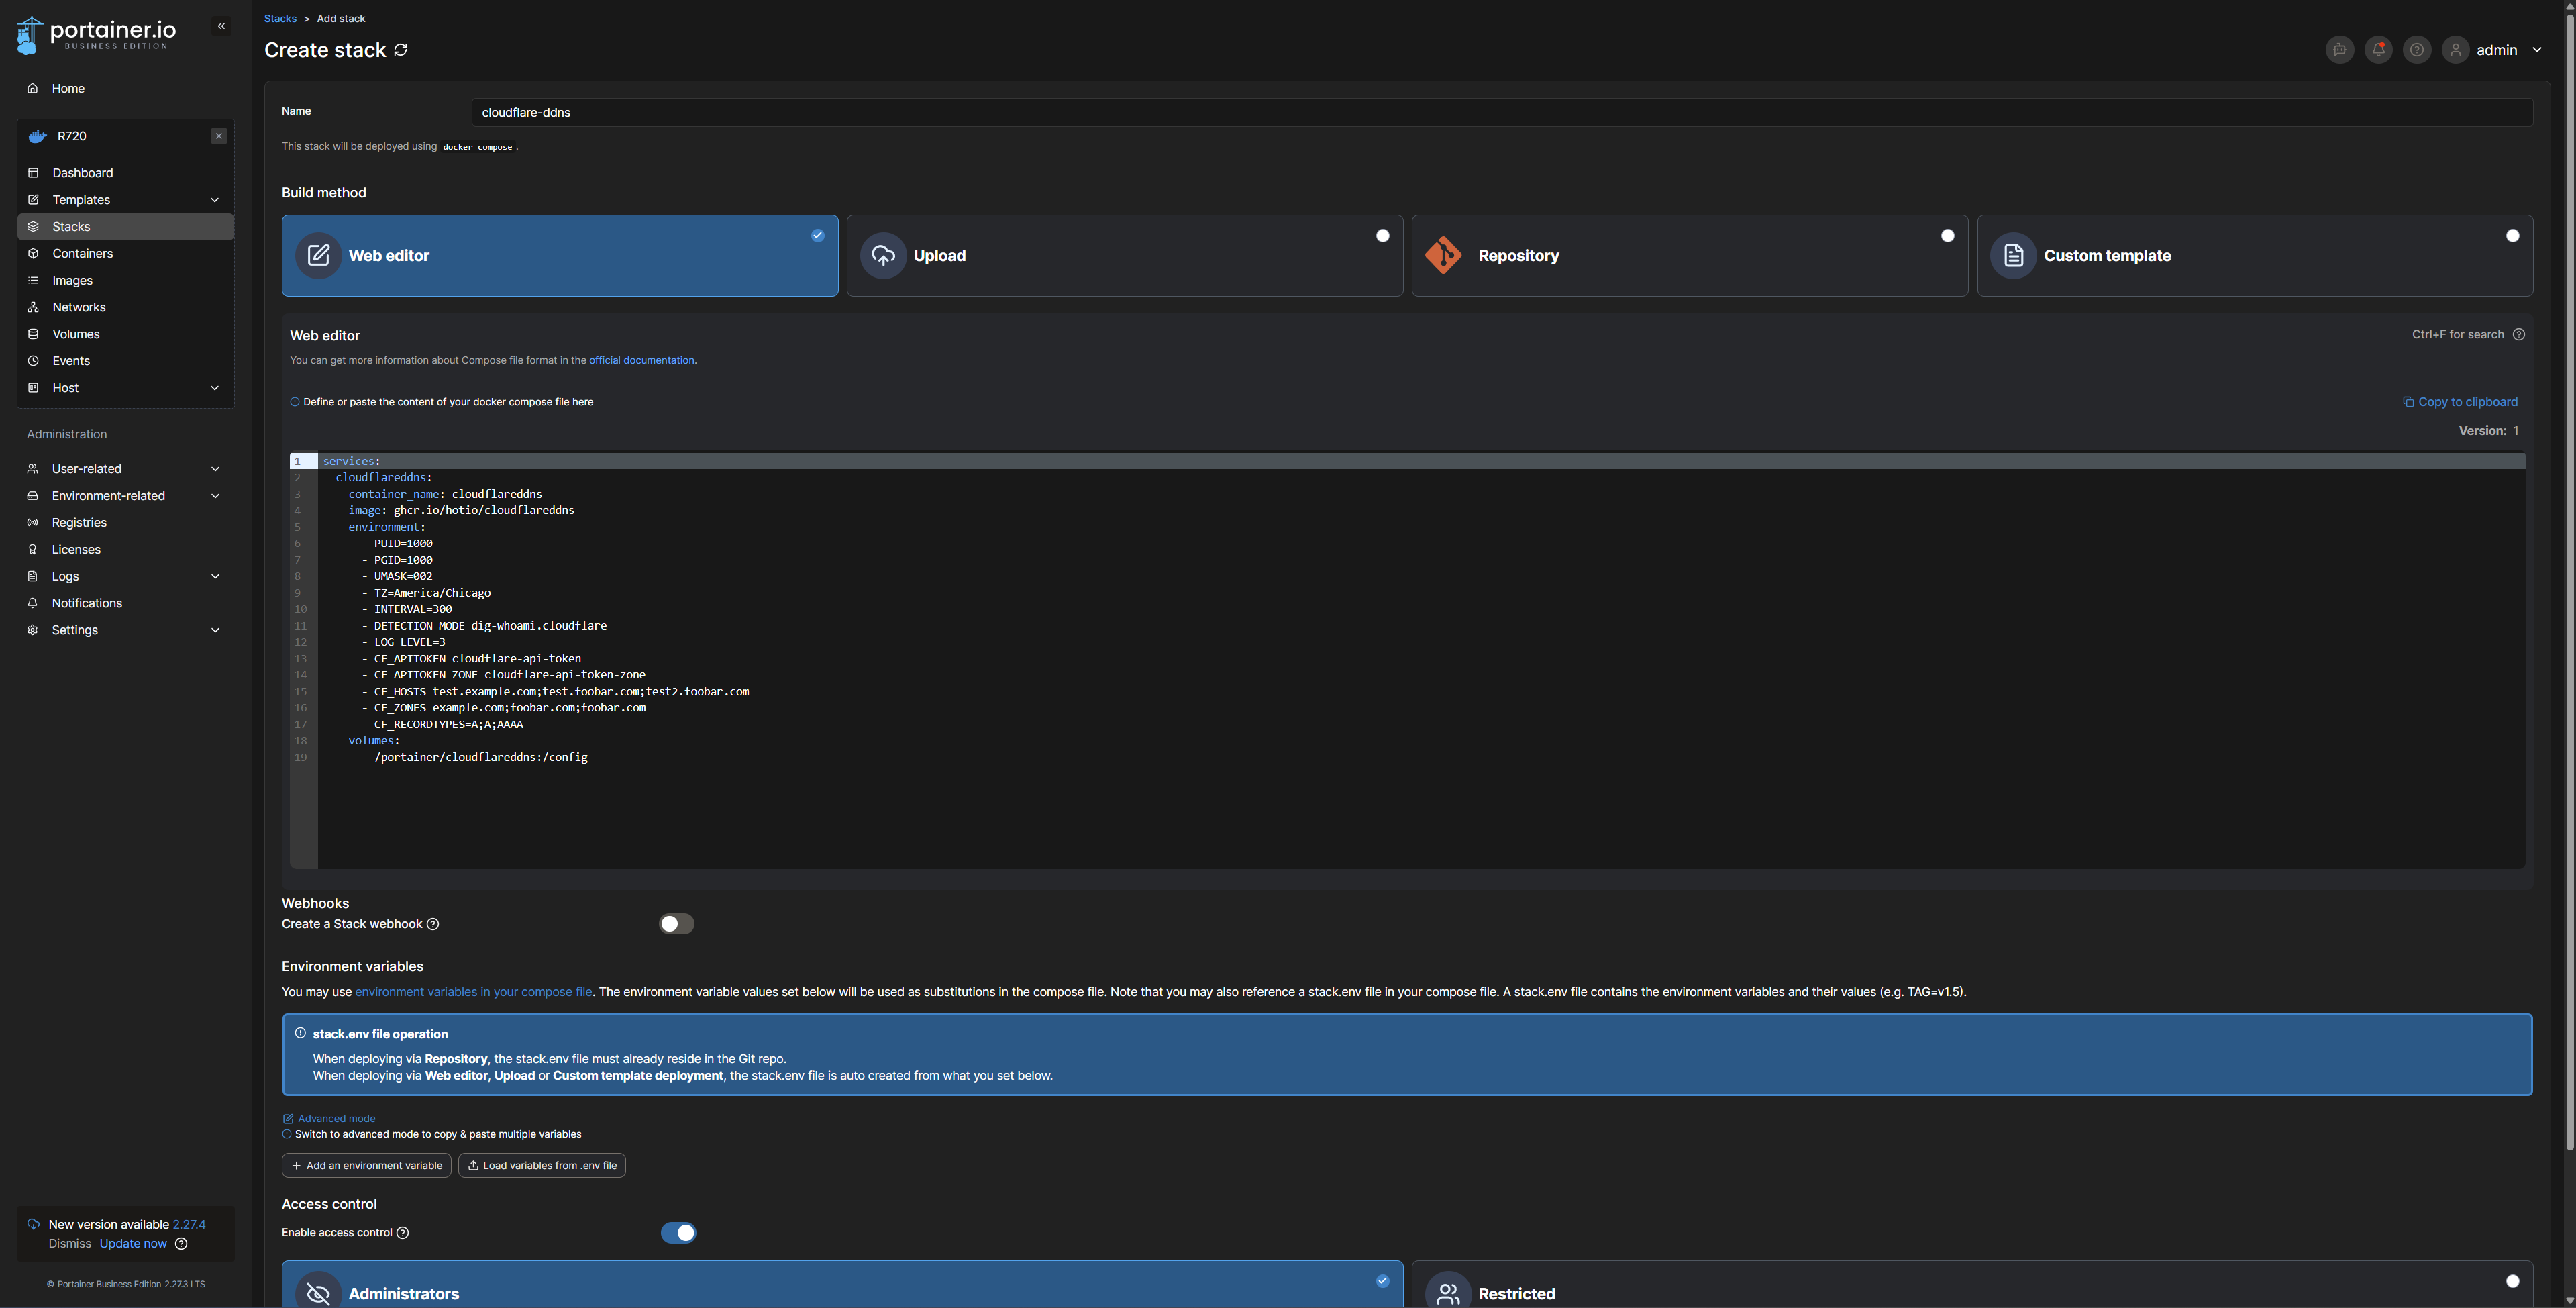
To configure the Cloudflare DDNS Docker container, you’ll need an API key for Cloudflare that can change the DNS records for the specific domain you’ll be using, the domain itself, and any subdomains you want to keep updated. All of this will be set by environmental flags in Docker, making it easy to change or add new subdomains and domains in the future.
To quickly get off the ground, you can visit a site like What’s My IP Address to find your public IP. Go ahead and input that IP into the A record of the domain you want to use for your website. Your DDNS will keep that updated should the domain change, but manually inputting it now will just help speed things up down the road.
Nginx Proxy Manager Handles Your Reverse Proxy Needs
The first Docker container to spin up after your DDNS will be Nginx Proxy Manager. With Nginx Proxy Manager, you’ll be able to route the incoming traffic to your website’s Docker container.

Related
What Is a Reverse Proxy, and How Does It Work?
Reverse proxies are a useful tool in any system administrator’s toolkit.
Nginx Proxy Manager is a reverse proxy. It takes incoming traffic on ports :80 and :443 (unsecured and SSL connections) and forwards them somewhere else on your network. You’ll need to configure your network’s firewall to forward the external 443 and 80 ports to whatever those ports are mapped to for your Nginx Proxy Manager install.
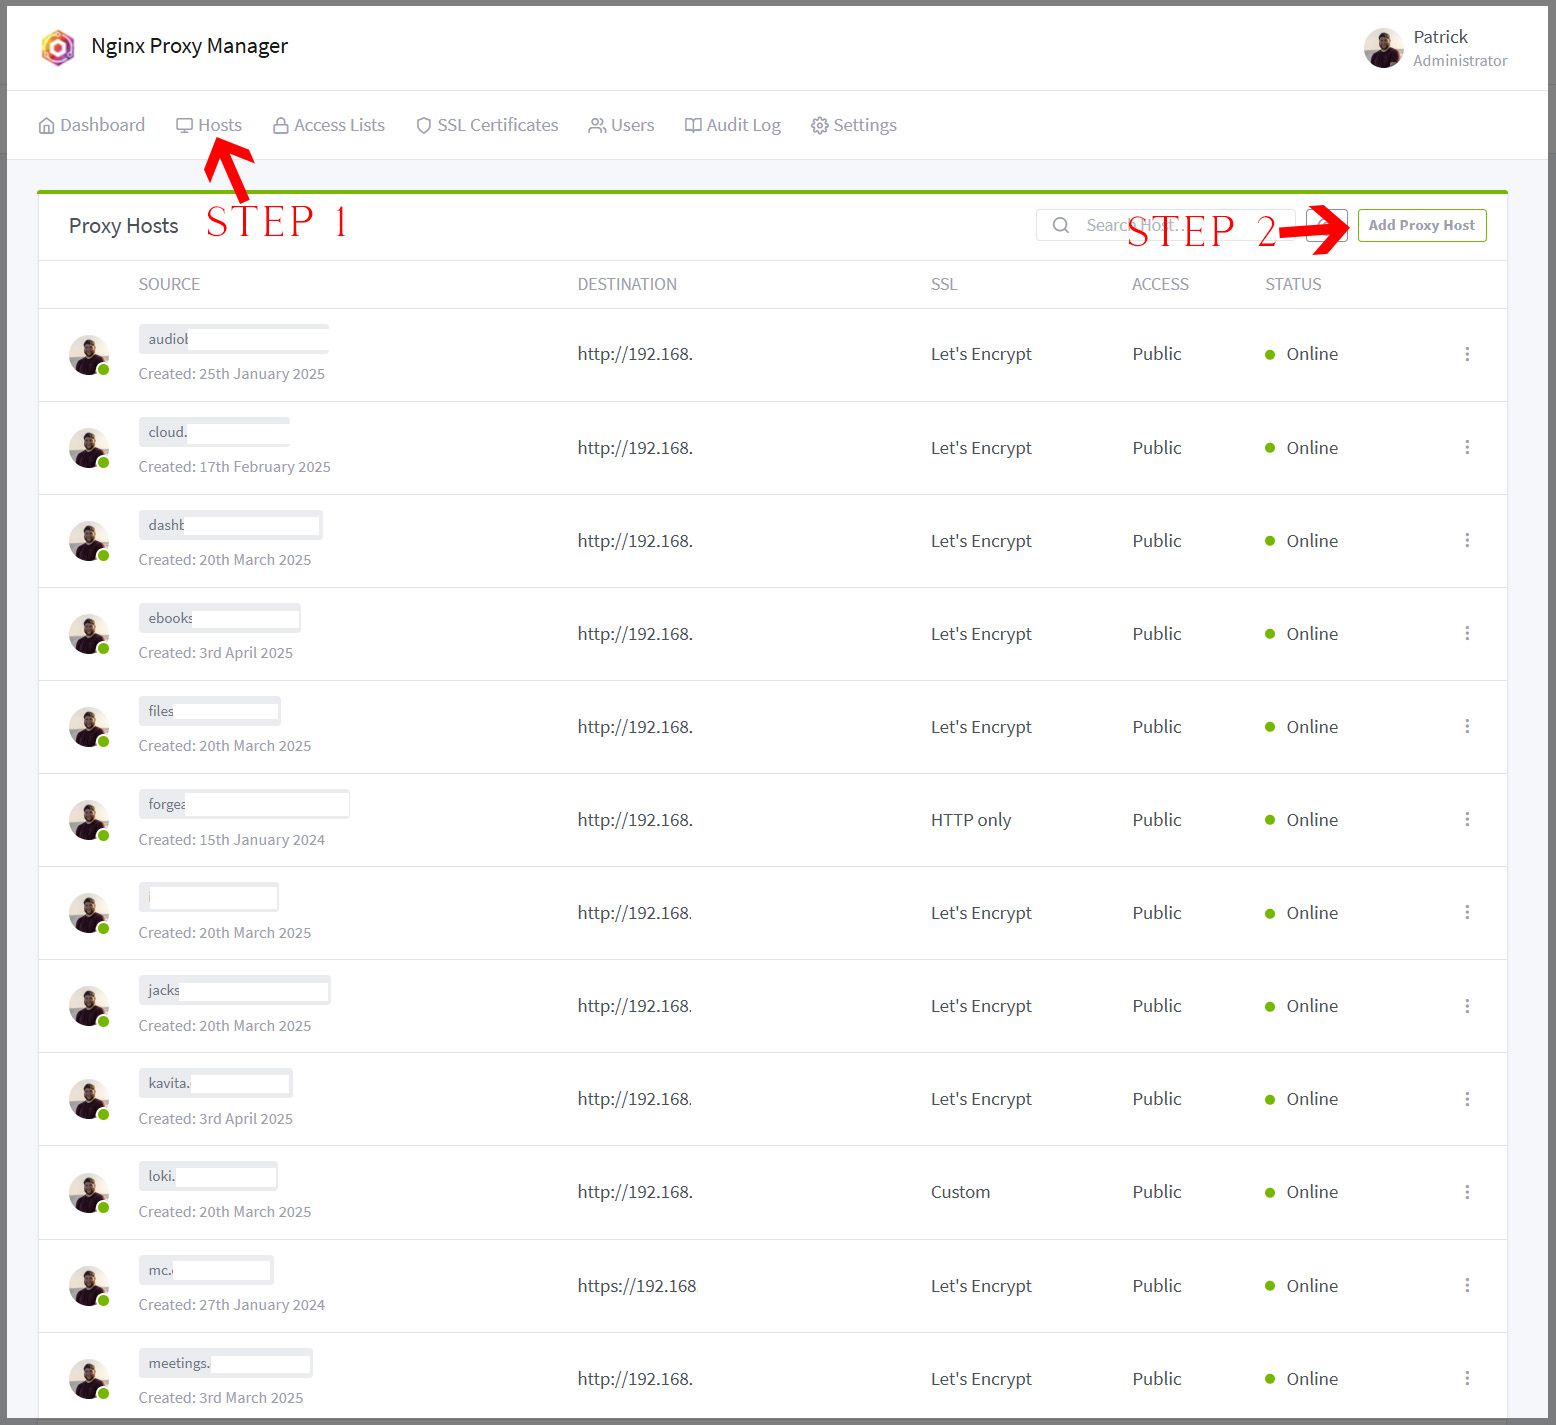
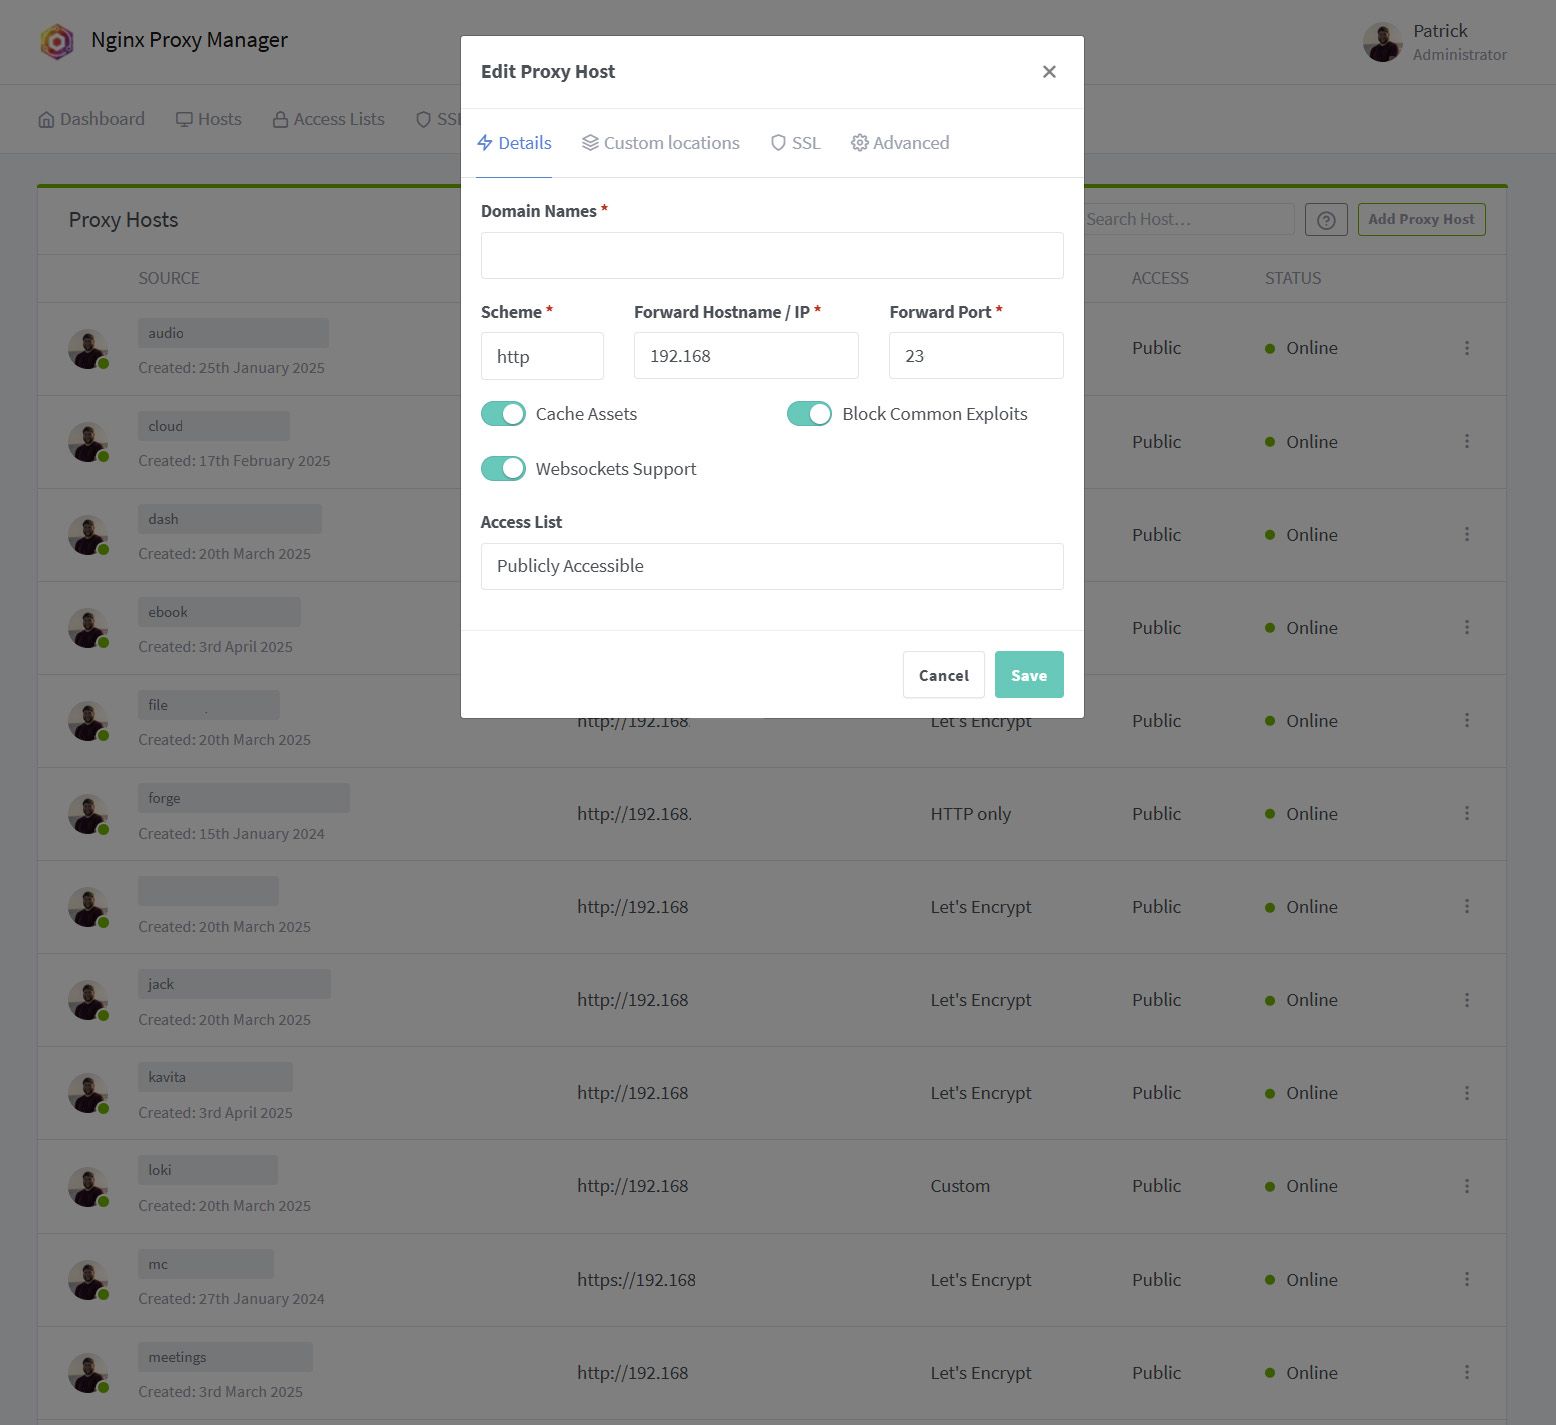
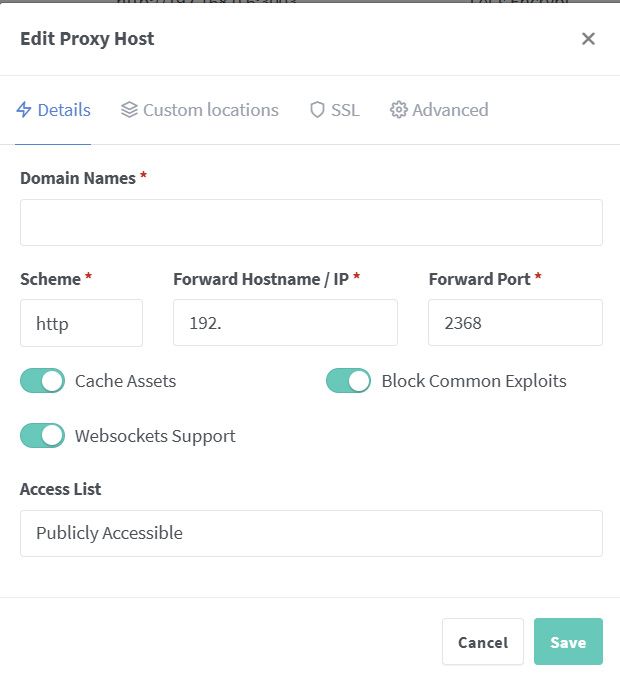
Once you have the Nginx Proxy Manager Docker container up and running with your ports forwarded, it’s time to get the routing set up. Start by navigating to hosts then click add new host. You’ll see a popup, and that’s where you’ll enter the information in for your website. Just type the domain, server IP, and the port that you’ll be running the site on. The port can be whatever you want, and is typically dictated by the software you run.
For instance, you could have blog.domain.com forward to 192.168.1.6:2368, which would be your server’s IP with the Ghost port on the end. Whenever someone visits blog.domain.com, it would then route to your public IP and then Nginx Proxy Manager would route it to the proper container.
Not only does Nginx Proxy Manager handle the routing, but it also takes care of SSL certificates through Let’s Encrypt. These free SSL certificates can give those browsing your blog peace of mind, adding an extra layer of security to the browsing session. The entire SSL process, start to finish, is seamless within Nginx Proxy Manager, too.
Once you’re able to set up one reverse proxy, then it’s pretty simple to set up as many as you want. I have over 30 reverse proxies on my own network, for services like Calibre Web, audiobookshelf, Tautulli, Minecraft servers, a Satisfactory server, an Ark Survival: Evolved server, and so much more.
Ghost Is a Simple Blogging Platform That’s Easy to Use
Now that you’ve got just about everything set up, it’s time to get Ghost installed.
You might have expected me to use WordPress, as it runs a majority of the internet. While WordPress is great, and I’ve used it for over 15 years, Ghost is what I’m running my own personal blog on this time around. It’s lightweight, easy-to-use, and, honestly, just simpler than WordPress.
Ghost is geared toward being a blog that can also have a newsletter component to it. Posts are written in markdown (my favorite way to write), and there are several plugins for some of the bigger services out there, like Instagram, Discord, MailChimp, YouTube, Patreon, and others.
To launch Ghost, you’ll need to do a few things. We’re going to start in Nginx Proxy Manager. Go ahead and create a new proxy host with your domain name in the first blank, leave the scheme as HTTP, input your Docker server’s IP next, and then the port 2368.
I typically check the toggles for cache assets, block common exploits, and websockets support. Skip over next to the SSL tab, skipping over the custom locations tab. Here, choose Request New SSL Certificate and agree to the terms, then input your email. Click save, and your reverse proxy is set up.
Now, head back to your Docker host. I personally use Portainer as a web GUI for Docker, but since it’s all done through Docker Compose, the setup files are identical either way.
If you want to use the same Docker Compose file that I use for my Ghost blog, then check out my homelab GitHub repo. Be sure to change out the domain with your own domain, and change the MySQL password for something more secure too.
Once you deploy the Docker Compose file, then your Ghost blog should be up and running at your new domain!
Your Website Is Live! Now What?
If all was done right, and you have the port forwarding settings configured properly on your router, then you should be able to navigate to your domain name that you set up and access the Ghost instance externally.
Now that your website is life, what’s next? Well, you’ll want to start with configuring the Ghost blog. There are many YouTube videos and other articles that walk you through step-by-step what to do there. I’ve not even fully figured out all the configuration options yet.
At this point, your website is live on the internet and anyone can access it. You might want to put a landing page up while you’re working on it, or just simply leave it be while it’s under construction. Start publishing blog posts, sending email newsletters, and enjoy hosting your own personal website on hardware at your house, free of hosting fees!
Starting a full-blown blog might not be exactly what you’re after. If that’s you, then microblogging might be just what you’re looking for. It’s slightly different from traditional blogging, and is much easier to set up since it’s typically done on social media, meaning there are no databases to configure, DDNS or reverse proxies to set up, and it’s often free!


