Valve’s Steam Deck handheld automatically adjusts its minimum VRAM allocation in its native Linux-based OS, but you can manually set a value between 256MB to 4GB (of the 8GB available to its GPU) to help with gaming performance when using Windows 11 and even boost specific games in SteamOS. Here’s how to increase the UMA Frame Buffer Size on your Steam Deck and experiment with games in each operating system.
How to adjust ‘UMA Frame Buffer Size’ on Steam Deck
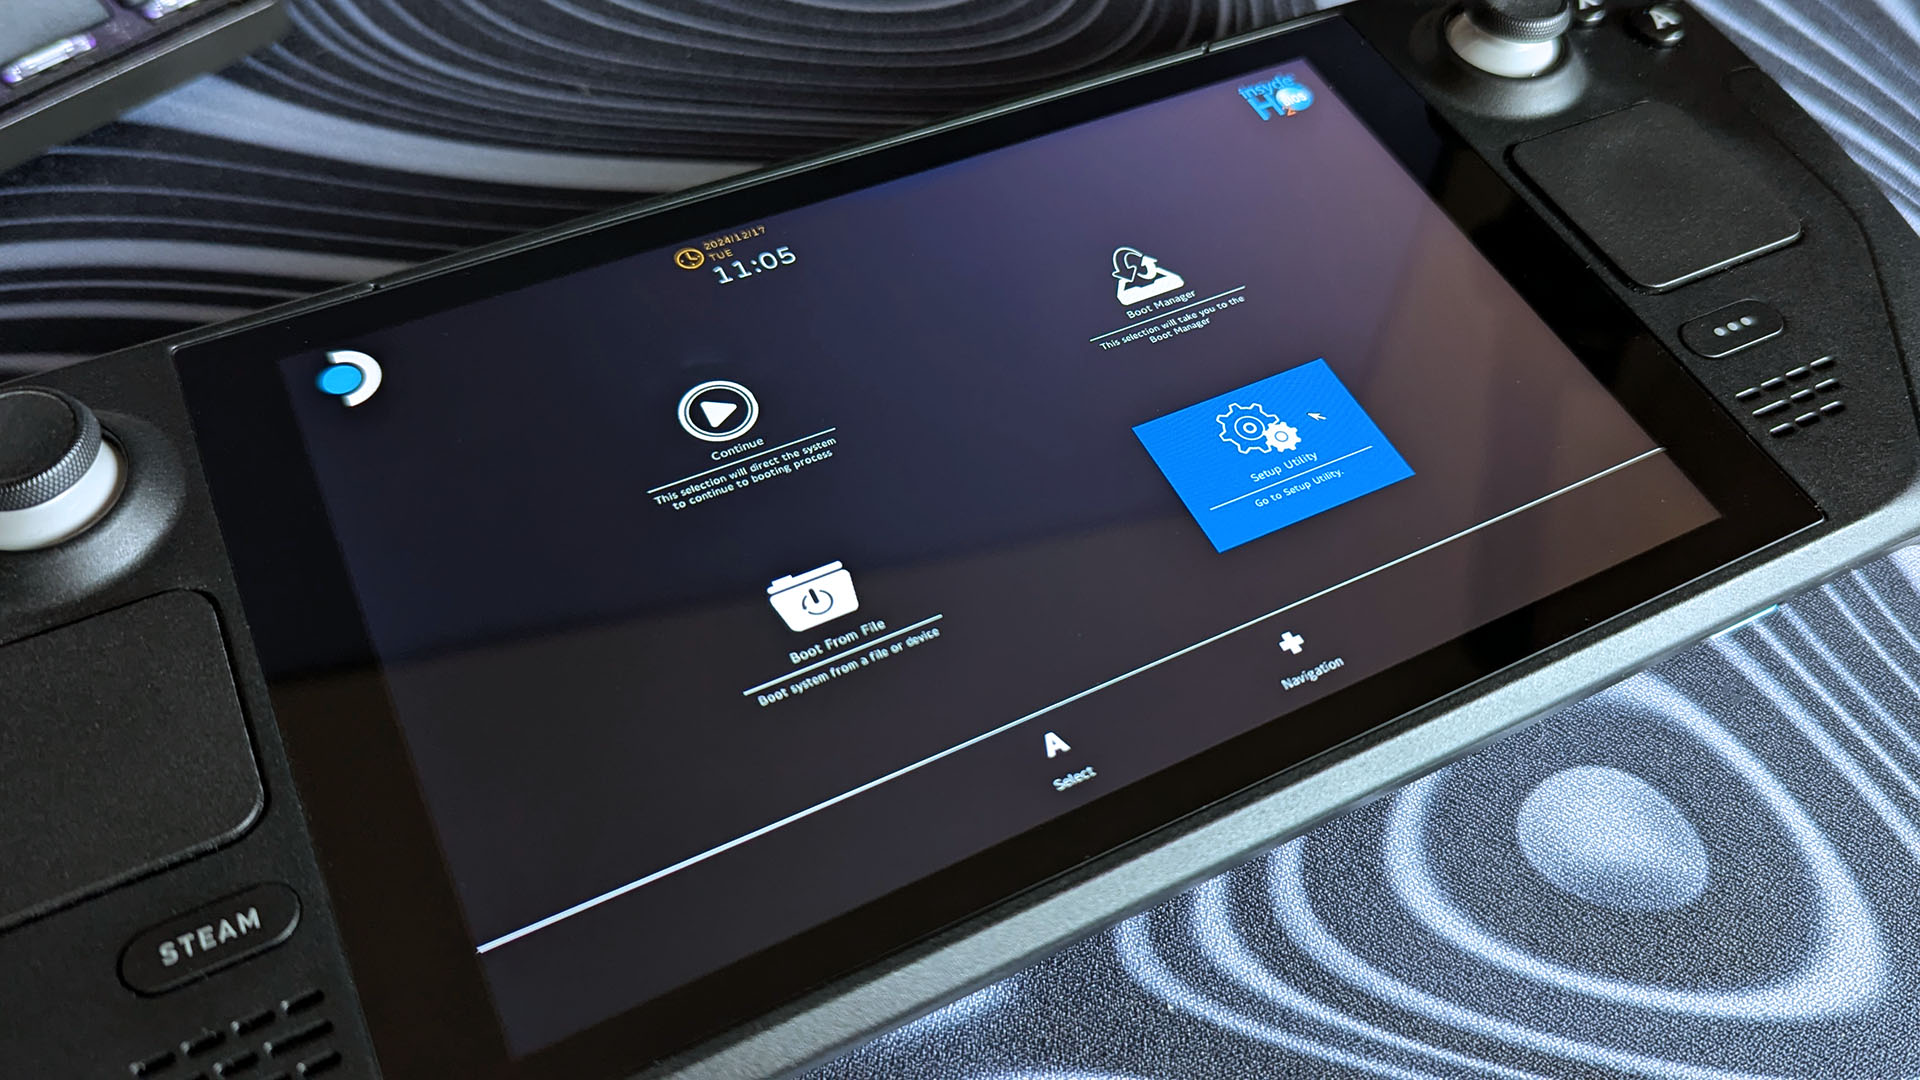
You need to access the BIOS to adjust the Steam Deck’s minimum VRAM allocation. You can access it from a cold boot sequence after a complete shutdown rather than quick-pressing the power button to enter sleep mode.
- Hold the power button to show a ‘Power’ menu in ‘Gaming Mode.’
- Select ‘Shutdown’ and wait for your Steam Deck to switch off completely.
- Hold the volume up (+) button and press the power button.
- When the Steam Deck icon appears, release volume up (+)
- Select ‘Setup Utility’ with the touchscreen or touchpad.
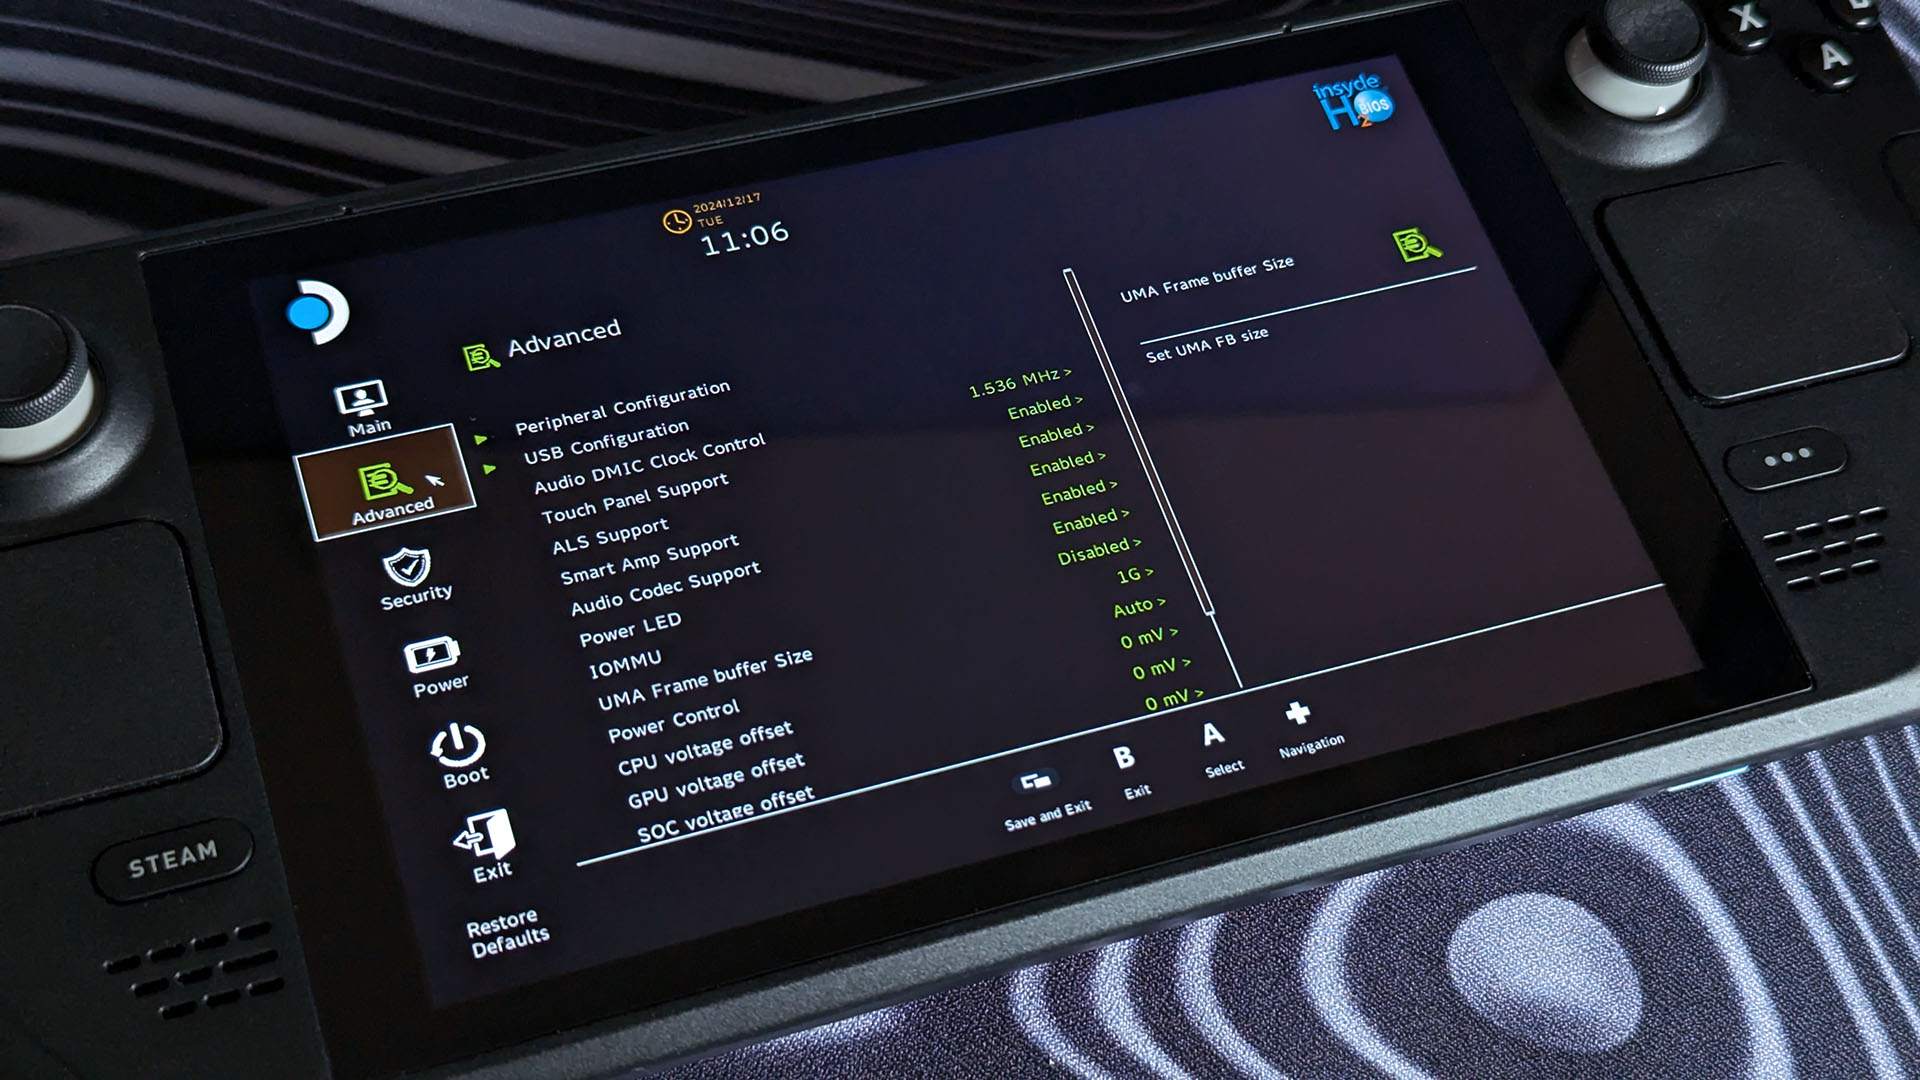
- Navigate to ‘Advanced’ on the left-side submenu.
- Select ‘UMA Frame buffer Size’ with the touchscreen or touchpad.
- Set the ‘UMA FB’ size to your liking, from 256M (MB) to 4G (GB)
- Check that your change is reflected in the ‘Advanced’ menu.
- Select ‘Save and Exit’ or push the ‘View’ button to do the same.
- Choose ‘Yes’ when you see the ‘Exit Saving Changes’ dialog.
How to check VRAM in SteamOS
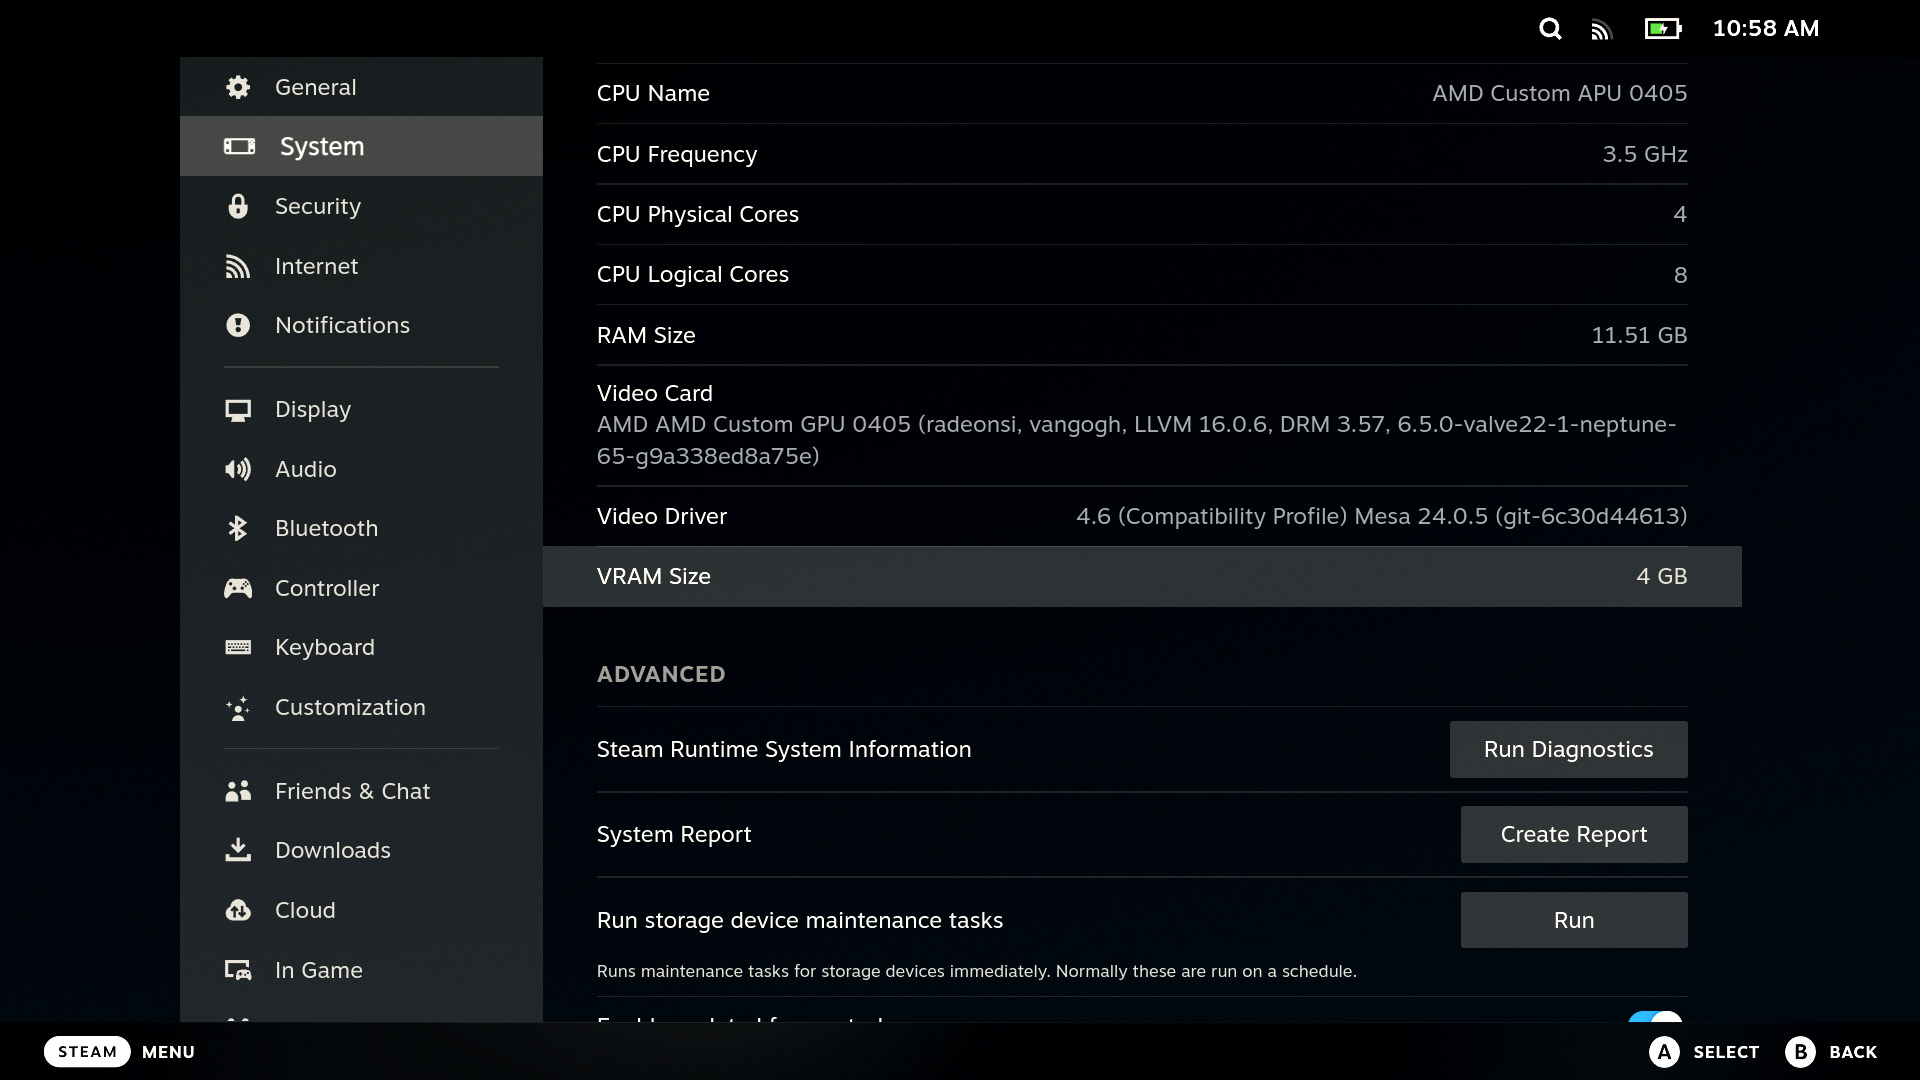
- Press the STEAM button in ‘Gaming Mode’ and select ‘Settings.’
- Select ‘System’ in the left-side submenu.
- Navigate down to check that ‘VRAM Size’ reflects your change.
A default ‘UMA Frame buffer Size’ of 1G (1GB) shows in the Steam Deck’s ‘System’ menu as 1,024 MB, while 4G (GB) displays 4 GB. It’s the most straightforward way to check that your BIOS changes have affected the minimum VRAM size.
How to check VRAM in Windows 11
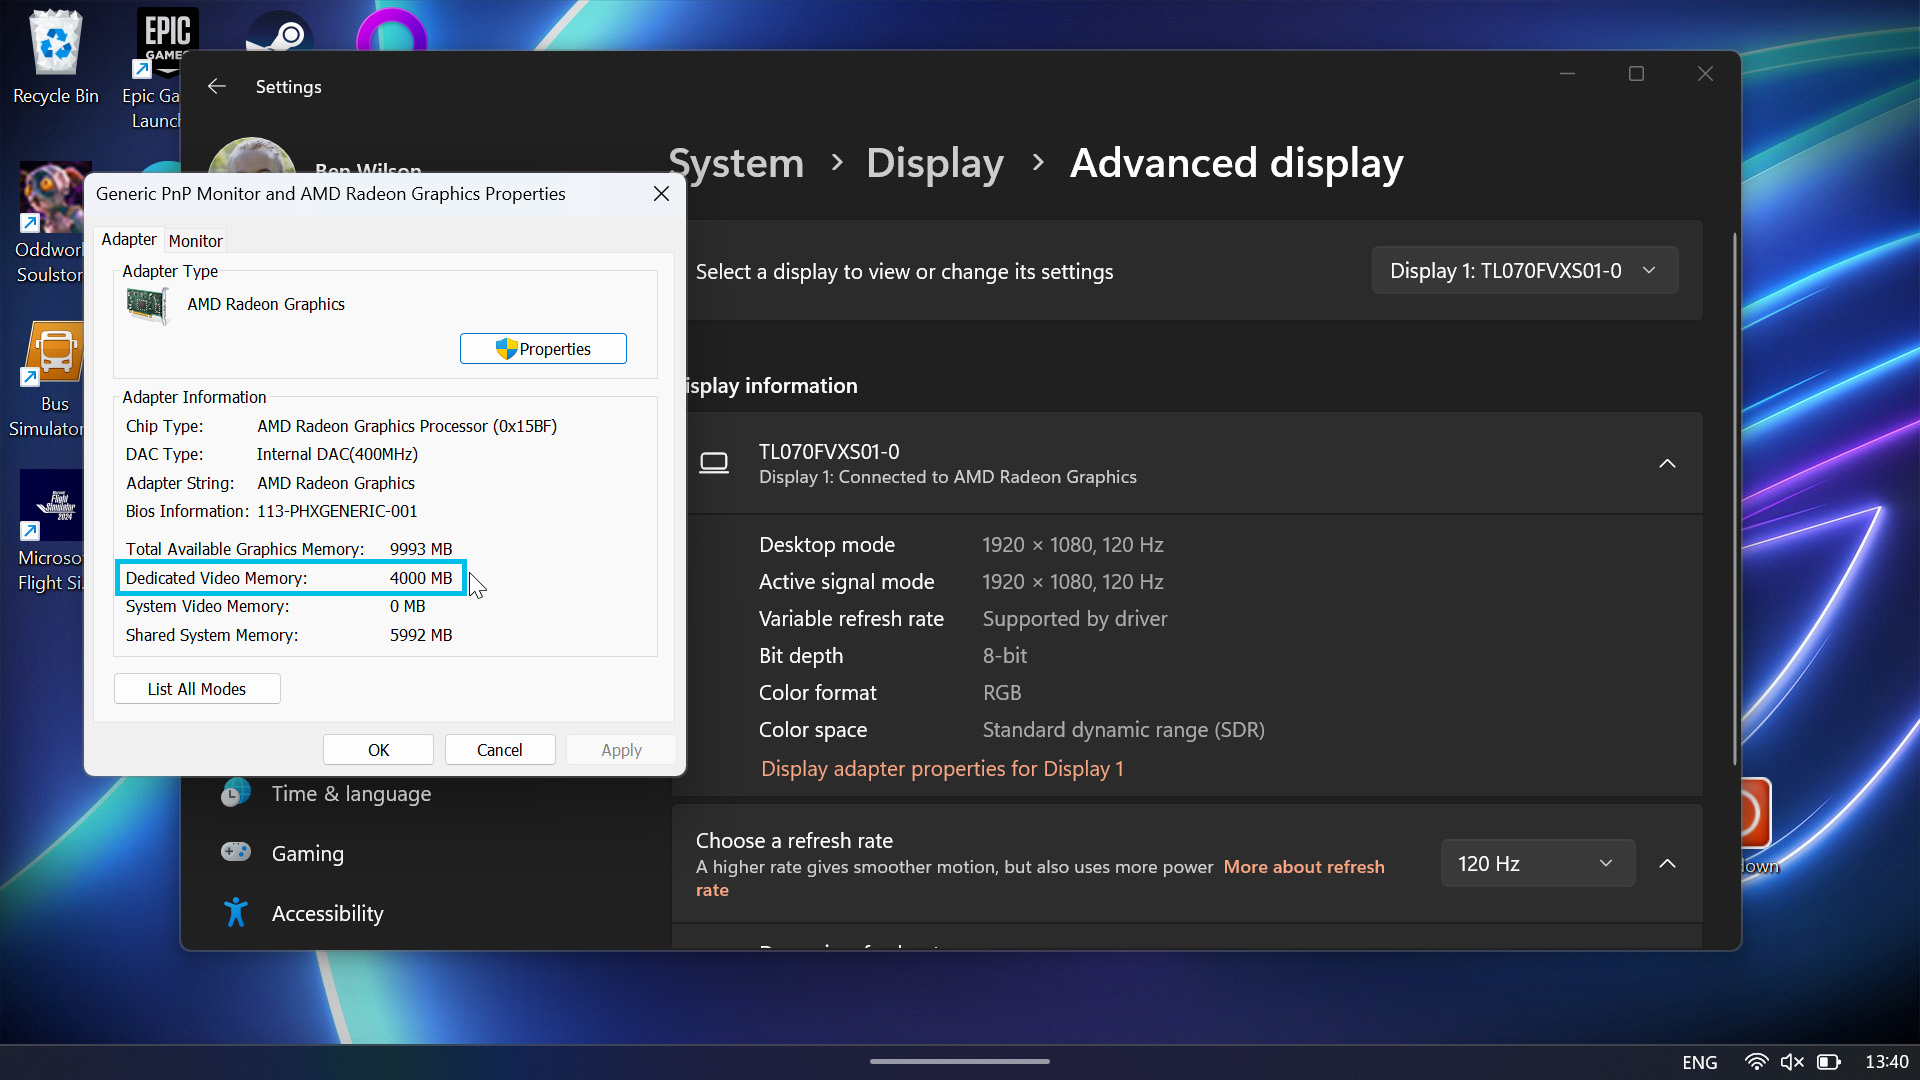
- Right-click on your desktop and select ‘Display settings.’
- Scroll down the ‘Display’ menu to select ‘Advanced display.’
- Click ‘Display adaptor properties for Display 1’ (or the closest match.)
- Check the ‘Dedicated Video Memory’ field for a value listed in MB.
Windows 11 responds more strictly to your VRAM allocation than SteamOS and should reflect the value you selected in the Steam Deck BIOS. Use the same method to check for any further changes, including returning to the default 1G (1GB) should you ever choose to.
Changing VRAM allocation isn’t a secret formula that magically increases performance, but it can affect the stability of specific games.
It has a more noticeable effect on a Steam Deck running Windows 11 than any device running Valve’s Linux-based SteamOS, as the latter automatically balances RAM and VRAM no matter what UMA Frame Buffer Size you select in its BIOS.
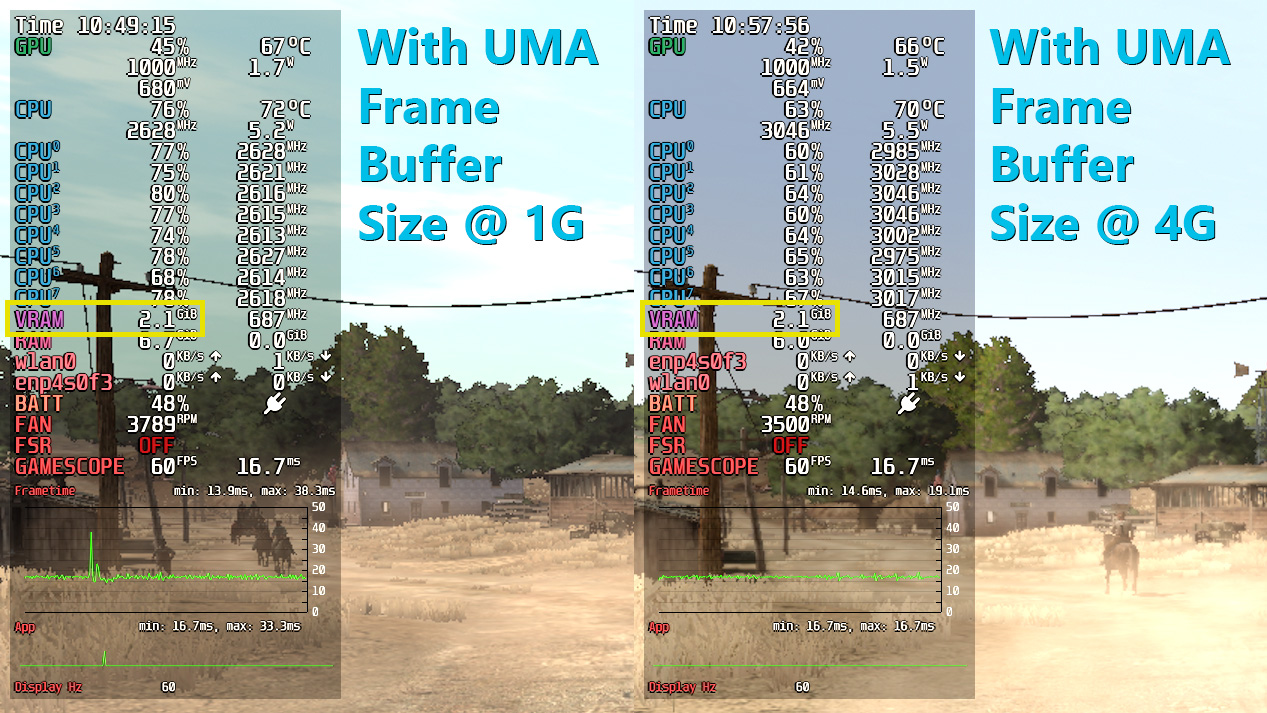
Comparing side-by-side performance in Red Dead Redemption shows little to no effect in SteamOS, with a constant 2.1GB of VRAM in use, regardless of whether I selected 1G or 4G modes.
Games with more demanding GPU usage, like The Witcher 3, can sometimes benefit from a larger minimum allocation of VRAM.
Still, it comes at the cost of traditional memory (RAM), so the trade-off can be tricky to balance if other games in your library are negatively affected. Thankfully, it’s not a particularly complex process, and the Steam Deck’s BIOS loads quickly enough, but extra VRAM will generally be more beneficial to gamers running Windows 11 over SteamOS.
As always, proceed with caution when tweaking your BIOS, and check our guide on how to factory reset a Steam Deck if you get stuck.


