

Oracle’s VirtualBox emulator now runs on Apple Silicon Macs.

VirtualBox is now available for Apple Silicon-based Macs, although with spotty x86 support. Here’s how to use it.
Oracle’s VirtualBox emulator is a free app which allows you to run other OS’es on your Mac, PC, or Linux computer. Until this past August VirtualBox only ran on Intel x86-based Macs.
Now a “work in progress” Apple Silicon version of VirtualBox is available for download from the VirtualBox website.
VirtualBox was written by a German company originally, then acquired by the now-defunct Sun Microsystems in 2008. When Sun went out of business, Oracle Corporation acquired its assets including VirtualBox, Java technology, and the Sun SPARC CPU architecture.
Running – but not ready for prime time
It’s clear the Apple Silicon version of VirtualBox isn’t fully finished yet, but just how much is working isn’t clear. Your best bet to see if it can do what you want on your Apple Silicon Mac is to read the VirtualBox Mac forums.
From user posts on the forums it’s evident that some older versions of Windows for x86 (such as Windows XP or Windows 7) will run – albeit with incomplete support. Expect intermitent crashes when running these versions of Windows in VirtualBox on Apple Silicon Macs.
It’s also clear from the forums that while Windows 10 and 11 can run in the emulator, support for them is not as far along or as complete.
Some versions of Linux run well in VirtualBox for Apple Silicon, including Ubuntu 24 and Ubuntu Server. In particular most ARM-based Linux distros seem to run well overall – although we still experienced a few crashes with ARM OS’es.
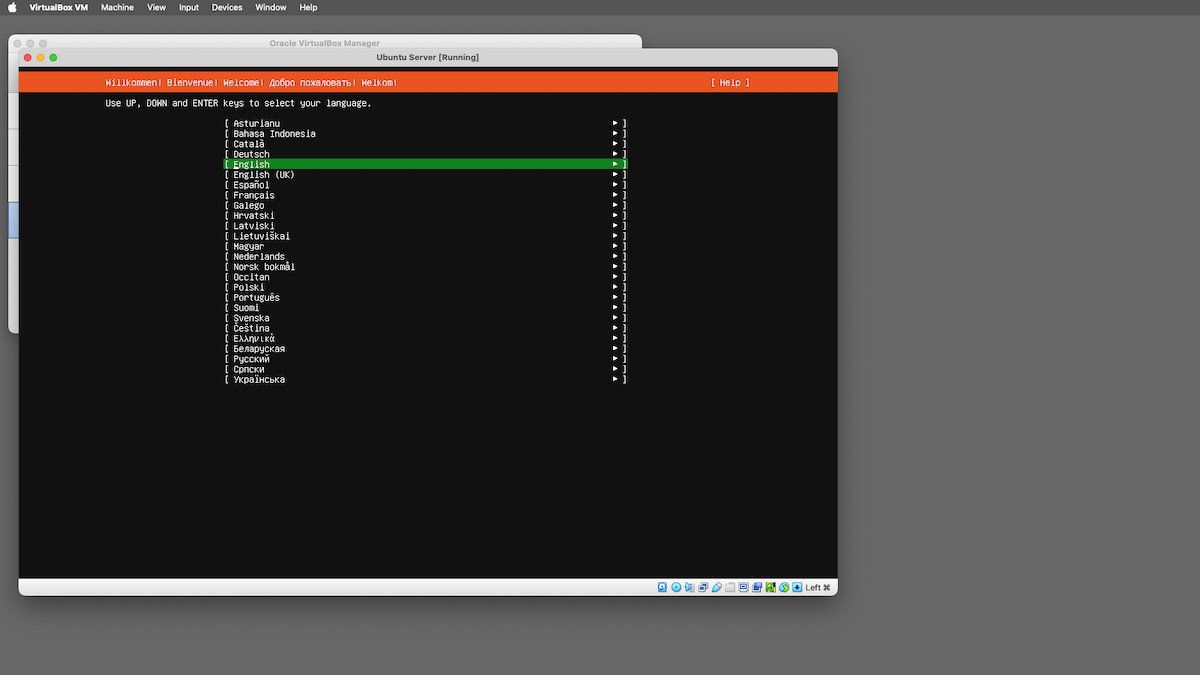
Ubuntu Server 24 install for ARM running in VirtualBox on Apple Silicon.
How to install VirtualBox for Apple Silicon
To install VirtualBox for Apple Silicon on your Mac go to the website and download version 7.1.4 (as of this writing) and the extension pack which you’ll want to install once the main emulator app is installed.
Once you download the .dmg file, open it and run the VirtualBox installer contained on it. This installs the app into your Mac’s /Applications folder, and a few small driver pieces. Once your quit the installer, drag the extensions pack file onto the app icon, and follow the steps onscreen to install it.
Once all that’s done you’re ready to start using VirtualBox. The .dmg also includes a full PDF user guide (there’s an HTML version online).
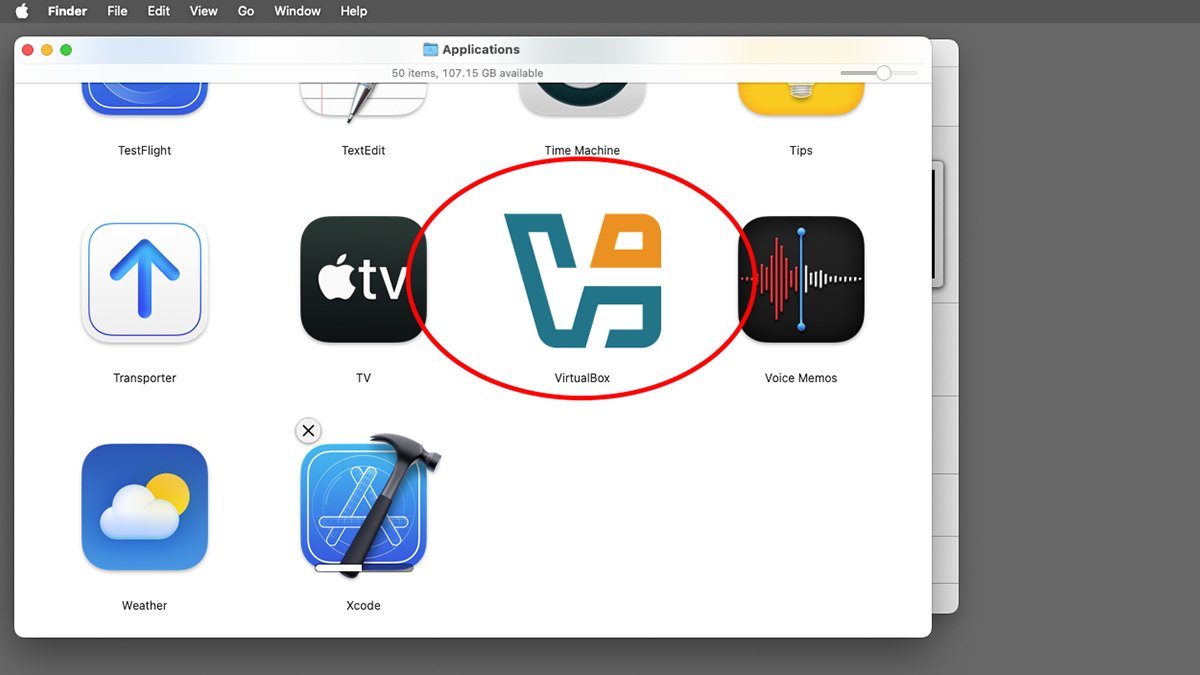
VirtualBox installed in the /Applications folder.
First run
When you run VirtualBox you’ll see an empty list on the left, and a row of toolbar buttons at the top. Click New to create a new Virtual Machine (.vbox) file on your drive. You’ll be asked where to store the file, a path to an .iso image file containing the OS installer you want, and type, subtype and architecture of the .iso file.
Once that’s all set, click Finish. You can also set the location for a virtual hard drive (.vdi) file, and where to store it as well.
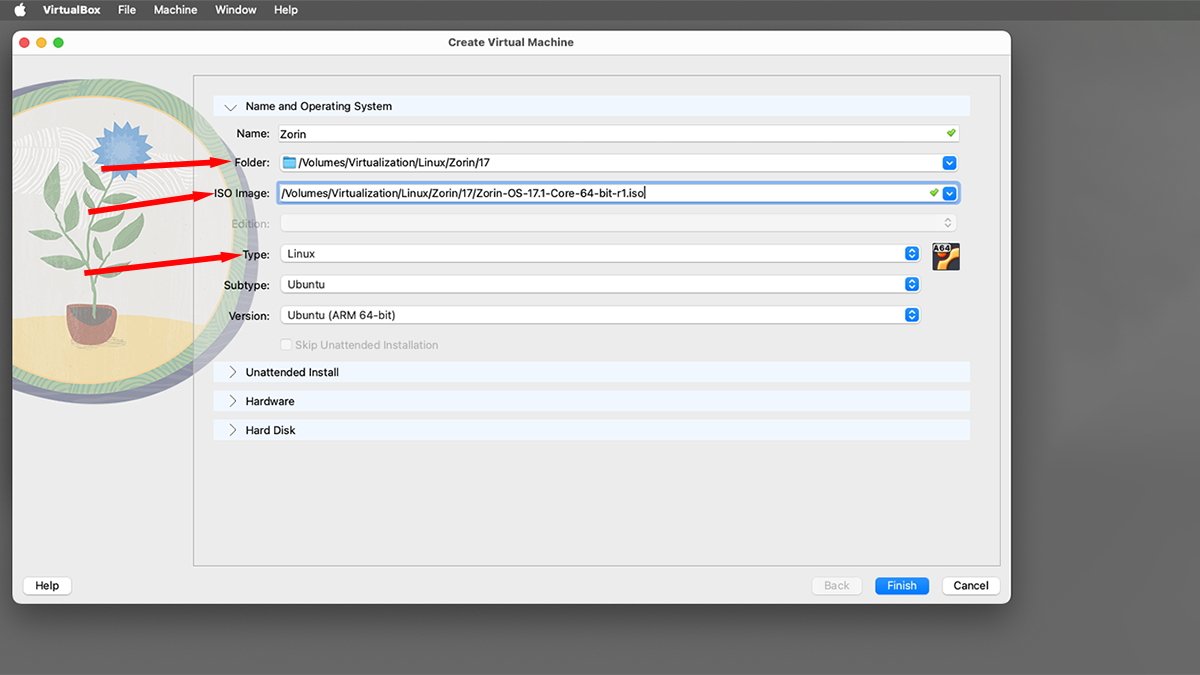
Setting up a new virtual machine in VirtualBox.
You can also import existing .ova machine (appliance) files from the File menu – although we experienced a lack of reliability with some .ova files also.
Each new .vbox you create gets added to the machine list on the left in the main window. You can next click the Settings button for any existing .vbox to change its parameters – in particular storage, video, and special settings for hardware and OS’es are important.
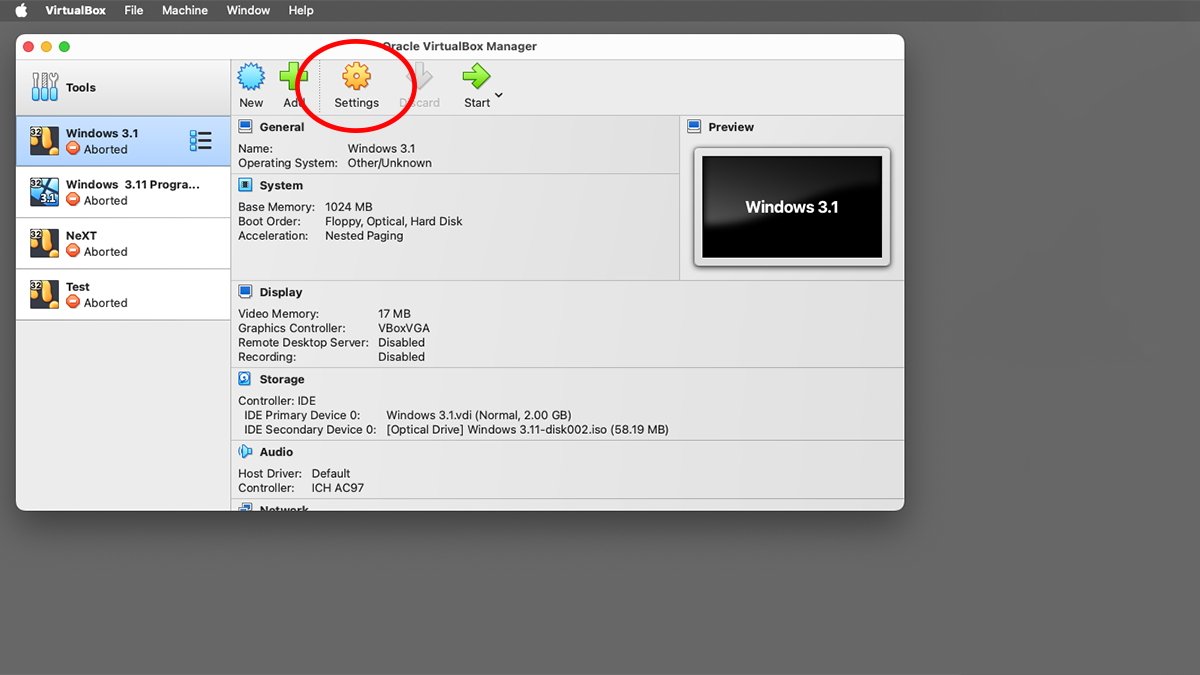
Click the Settings button to change machine variables.
Once you have everything set the way you want it, click the Start button. VirtualBox will attempt to start the machine in a new window. If the machine’s storage uses an .iso or .vdi file containing an OS with an unsupported architecture, you’ll get a VBOX_E_PLATFORM_ARCH_NOT_SUPPORTED error window saying it can’t be run.
To quit a running virtual machine, simply click its window’s close box. If a particular machine can’t be run the previous time, a red stop icon will appear next to that machine’s name in the list on the left in the main window.
If this happens you can go back to Settings and try to adjust the controls to see if the machine can be started again.
System Settings
In some cases you might get a warning saying you need to open the macOS System Settings app to turn on Input Monitoring or Accessibility. If so, go ahead and enable those. In some cases VirtualBox needs to use the Apple Accessibility API to record keystrokes from your keyboard to be sent to the virtual machine while it’s running.
Don’t worry – this is normal and VirtualBox isn’t logging your keystrokes for nefarious purposes.
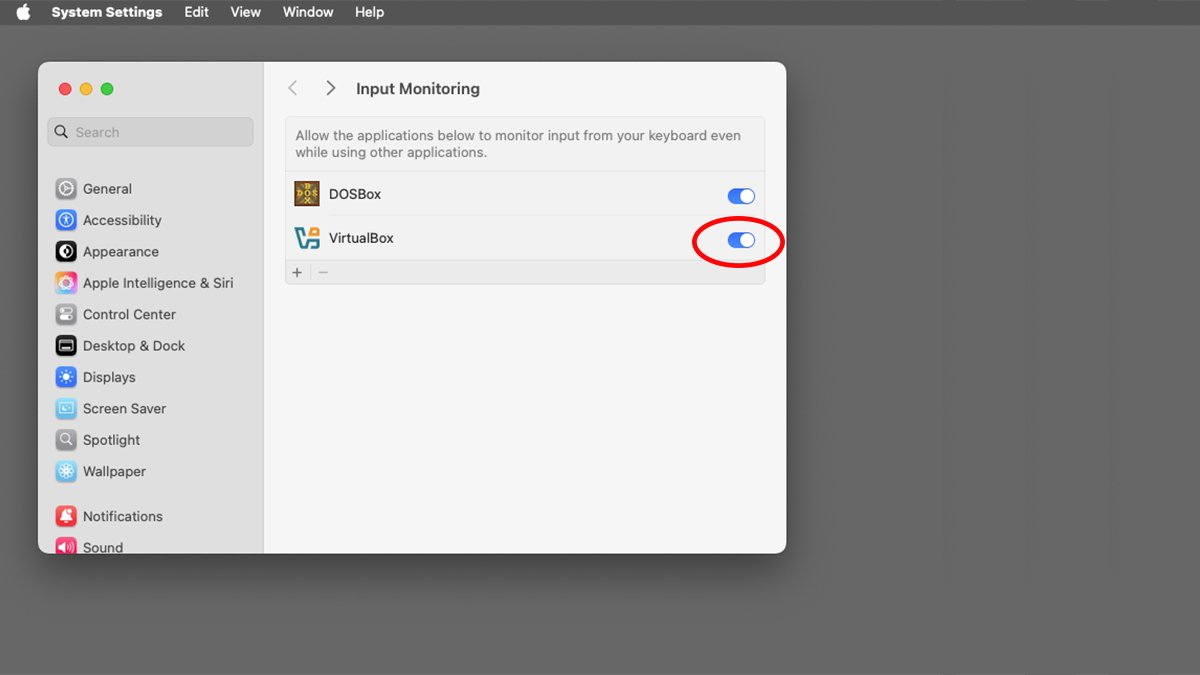
Turn on Input Monitoring or Accessibility in System Settings in macOS.
Performance
Both app launch and virtual machine start times are noticably faster in the Apple Silicon version of VirtualBox – and we can only expect those times to improve as the app approaches its final release. Not surprisingly, ARM-based OS’es launch several times faster than running the same OS’es in Intel versions or in VirtualBox running in Rosetta emulation (which doesn’t work properly anyway on Apple Silicon Macs).
Even the Intel version of VirtualBox 7.x is still a bit buggy so don’t expect miracles from the Apple Silicon version just yet. It’s still a work in progress.
The promise of a fully working native Apple Silicon version of VirtualBox is exciting because once complete and bug free you’ll be able to run a variety of foreign operating systems on Macs with great performance. Another interesting prospect will be the ability to run older versions of ARM-based macOS on Apple Silicon in emulation alongside native macOS running directly on hardware.
Overall this release of VirtualBox for Apple Silicon is a big step forward – even if it’s not quite ready to be deployed in a production environment. VirtualBox is one of the most popular free emulators around and once the bugs are worked out on Apple Silicon it has an exciting future.


