Imagine working on a key document in Google Drive, only to find out later that someone made unwanted changes. To prevent this, Google Drive lets you lock files for editing, ensuring only you can modify them. This guide will show you how to secure your files and maintain full control.
Why Locking Files in Google Drive is Useful
Locking files in Google Drive is a simple way to keep important documents safe from accidental edits or unwanted changes. If you’re sharing a file with teammates or clients, locking it ensures that no one can make changes without your approval. This is especially helpful for finalized reports, contracts, or any document that needs to stay exactly as it is.
It also makes version control easier. Instead of stressing over someone accidentally deleting key details, you can lock the file and share it with confidence. No more digging through version history to fix mistakes! For businesses, it helps maintain accuracy and keeps sensitive documents secure.
By locking your files, you stay in control of your content while still allowing others to view and collaborate without the risk of unwanted edits.
How to Lock Files for Editing In Google Drive
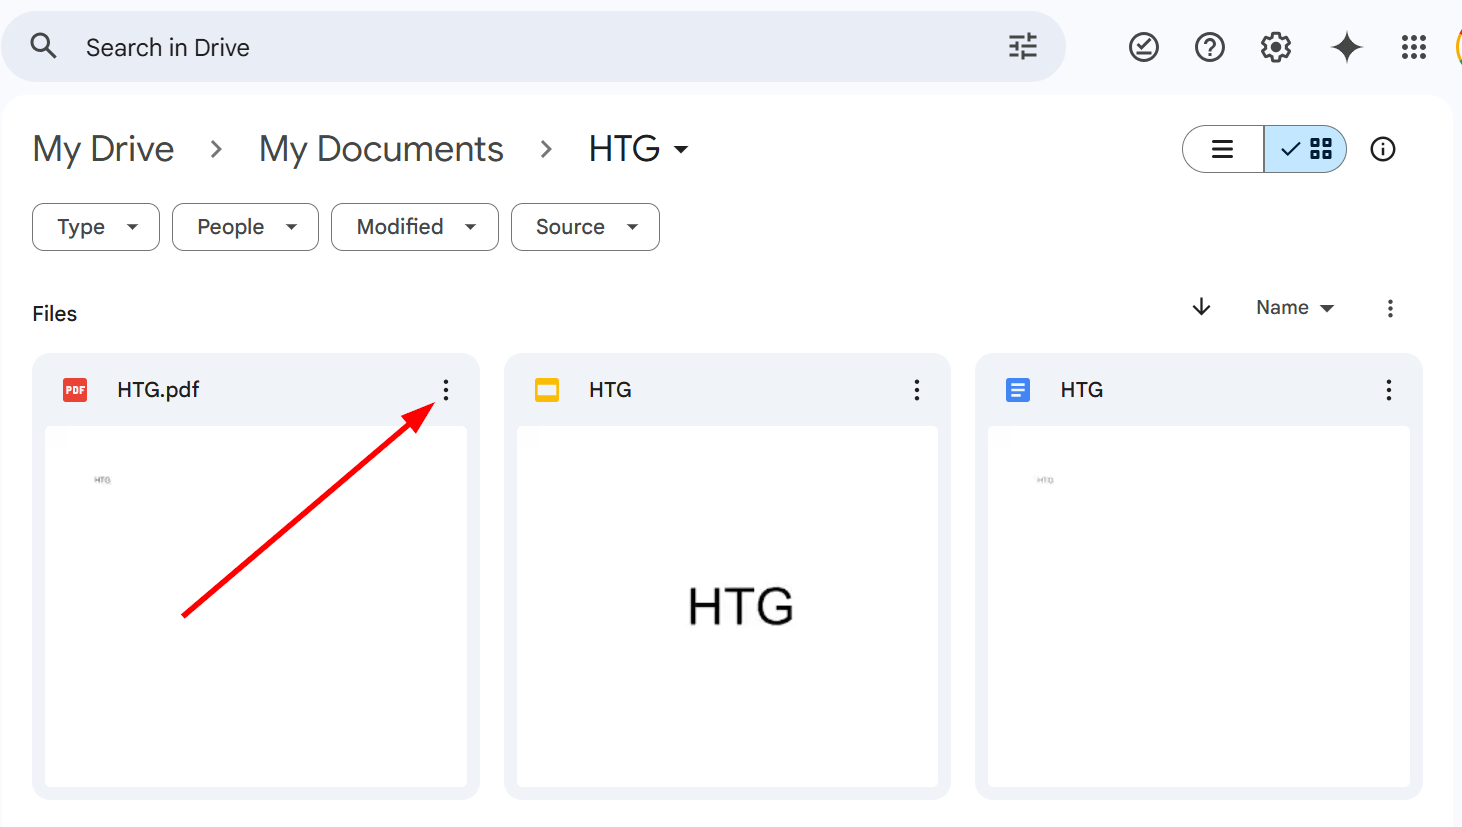
Start by opening Google Drive in your browser at drive.google.com and navigating to the file you want to lock.
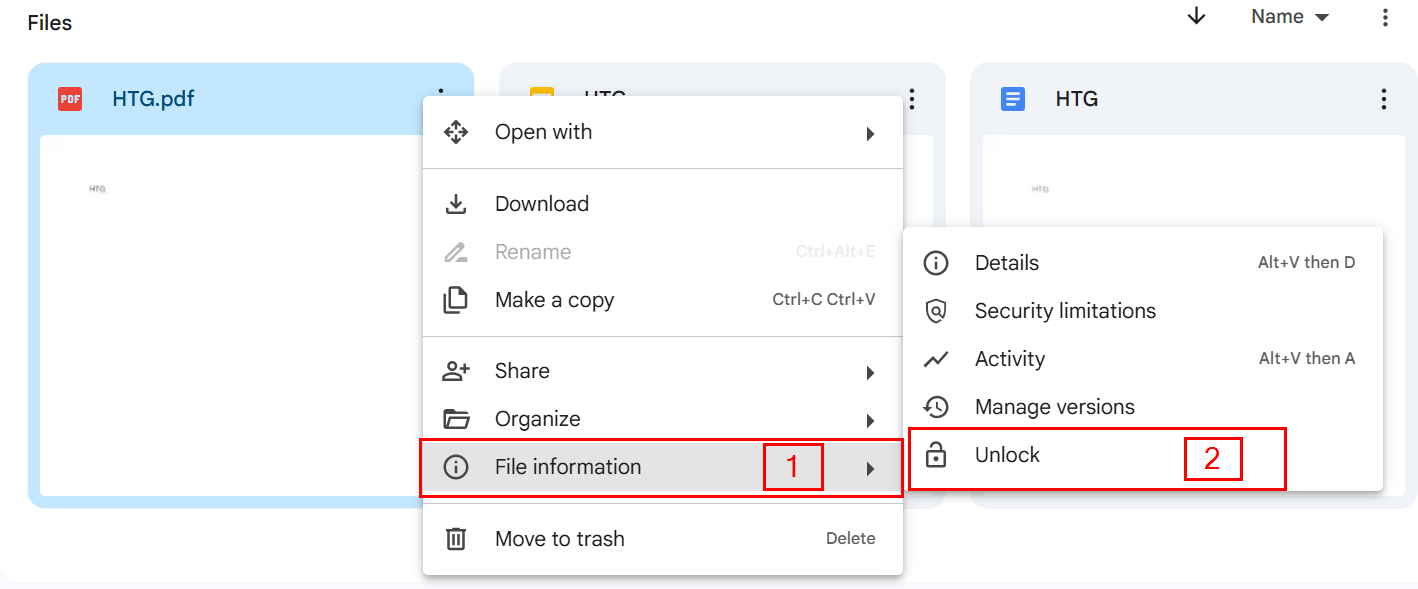
Right-click on the file or tap the three-dot menu at the top right corner of the file.
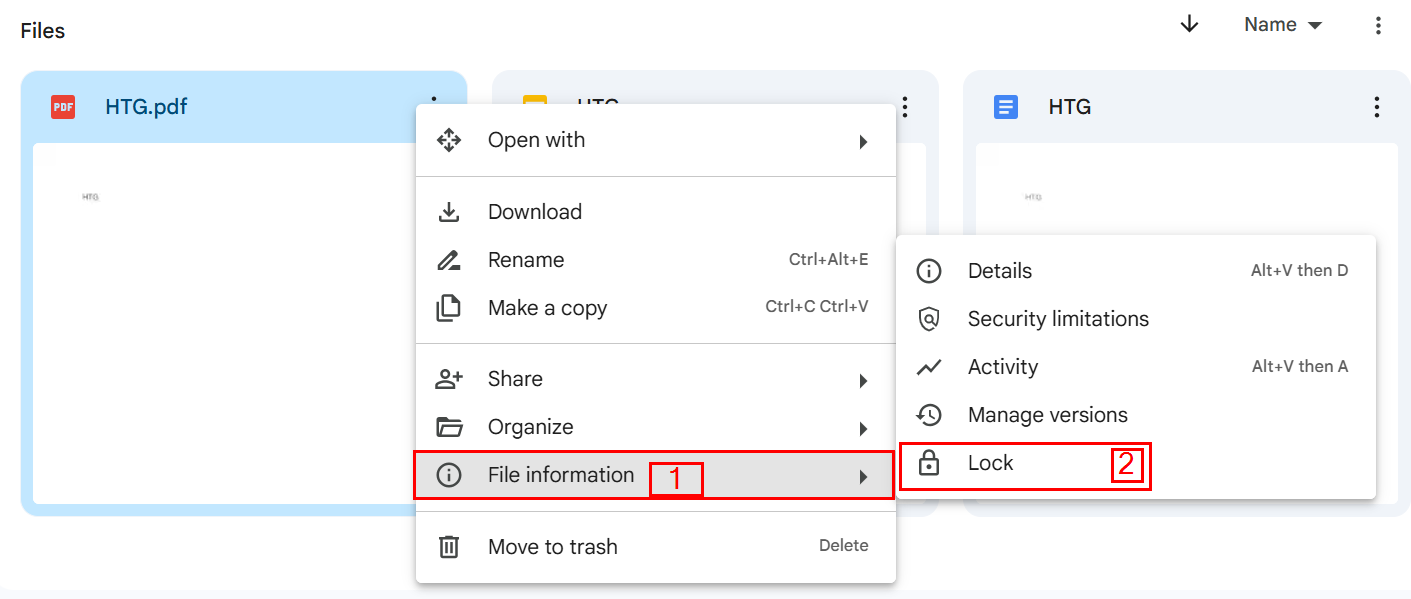
From the menu that appears, select “File information”, then choose “Lock”.
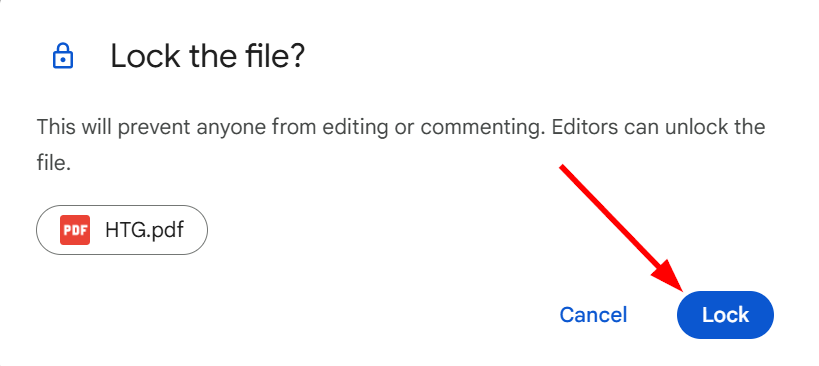
A confirmation message will pop up saying:
“Lock the file? This will prevent anyone from editing or commenting. Editors can unlock the file.”
Click “Lock”, and the file will be locked.
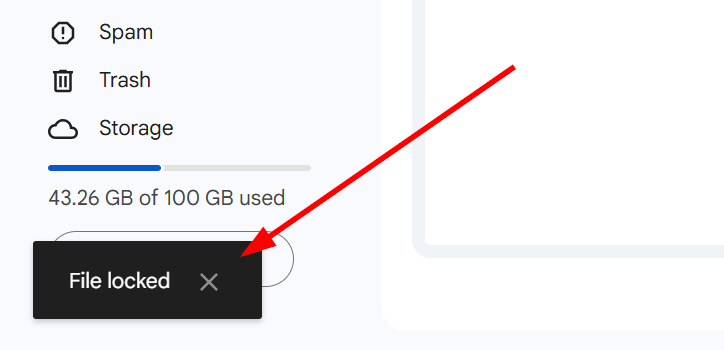
A pop-up message will appear at the bottom left menu of your screen, confirming that the file has been locked.
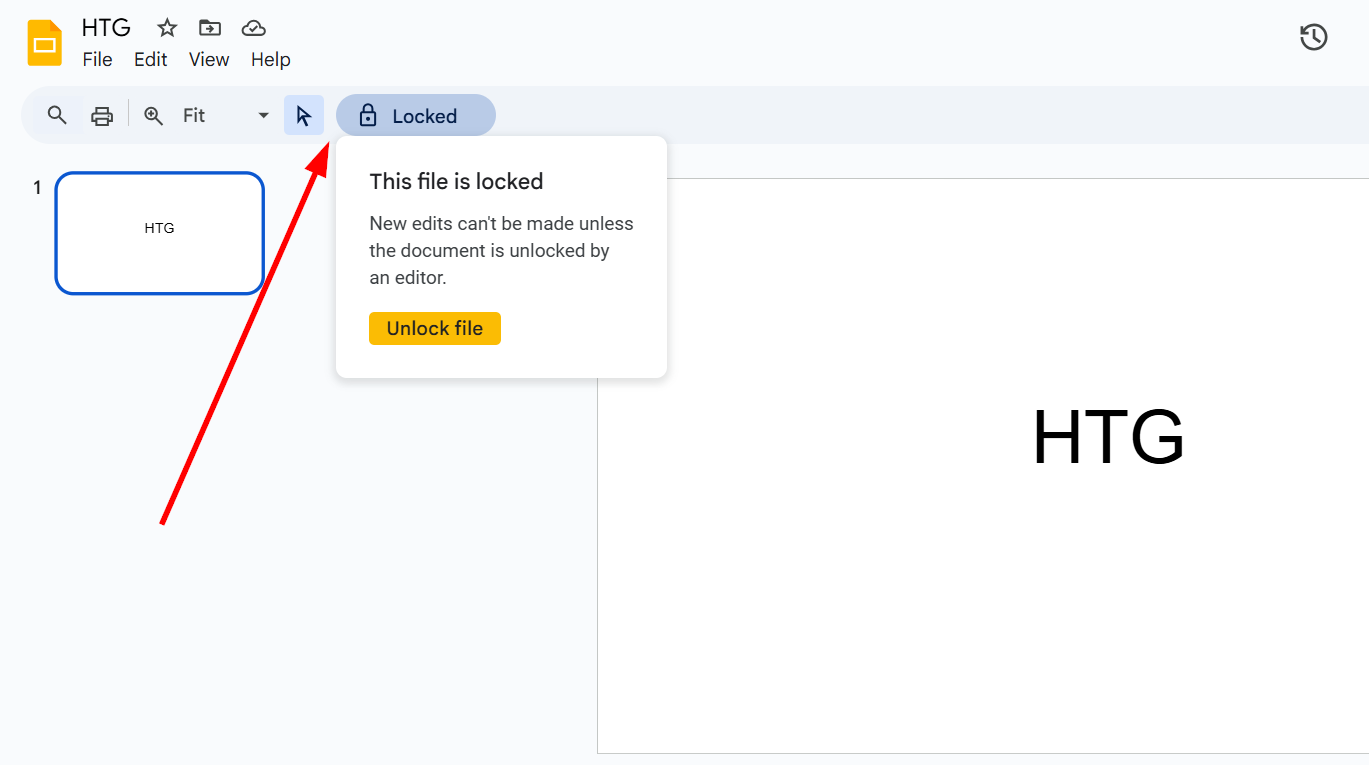
If you lock a Google Doc, Slide, or Sheet, opening it will display a notification stating that the file is locked and no edits can be made unless an editor unlocks it.
Once locked, the file remains viewable and can still be shared, downloaded, or copied, but no one can make changes unless they have editor access to unlock it. This is a great way to prevent accidental edits, especially when working on important reports, contracts, or finalized documents.
To unlock the file, right-click or tap the three-dot menu, select “File information”, and click “Unlock”.
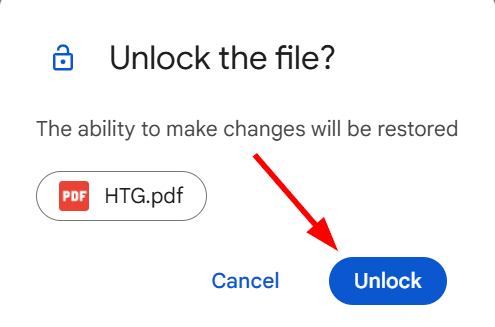
When you click “Unlock”, a confirmation message will pop up saying:
“Unlock the file? The ability to make changes will be restored.”
Click “Unlock” again, and the restrictions will be removed.
Keep in mind that only editors can lock and unlock files, so if you’re sharing a file with collaborators, ensure that the right people have the appropriate permissions.
Keep Your Files Secure with Google Drive’s Lock Feature
Locking files in Google Drive is a simple yet effective way to prevent unwanted changes. Whether you’re working on an important report, a finalized project, or a shared document with multiple collaborators, enabling the lock feature ensures that your content stays exactly as you left it. Instead of worrying about accidental edits or unauthorized modifications, you can confidently share files while maintaining full control over their contents.
One of the best things about this feature is that it doesn’t restrict access to the file entirely. Viewers can still read, download, or make copies, but they won’t be able to edit unless an editor manually unlocks the file.
By taking advantage of Google Drive’s file locking, you can prevent mistakes, protect important documents, and streamline collaboration without worrying about unintended edits. Try it out today and keep your files safe from unwanted changes!


