If you make video calls on your computer through Zoom, Skype, WhatsApp, or any other video service, and the brightness and contrast aren’t the best, you can adjust these and other settings through the Camera settings on Windows 11.
However, the available settings will depend on the capabilities of the device. For example, in addition to the brightness, contrast, and rotation, some cameras may include the option to use High Dynamic Range (HDR) or the Eye contact feature that allows the system to project your face as if you were looking directly into the camera.
Furthermore, through the “Privacy & security” settings, you can allow or deny access to the camera.
This guide will walk you through the steps to manage the camera settings on Windows 11.
How to configure webcam settings on Windows 11
To manage the webcam settings on your computer, use these steps:
- Open Settings.
- Click on Bluetooth & devices.
- Click the Cameras page on the right side.
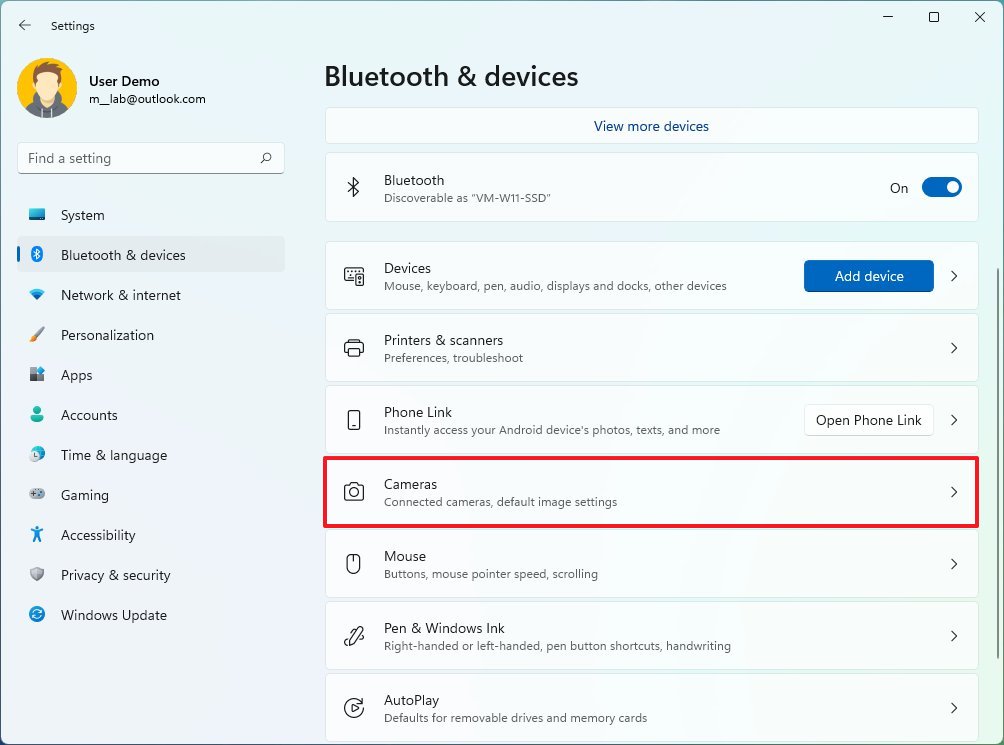
- Under the “Connected cameras” section, click on the webcam installed on the computer.
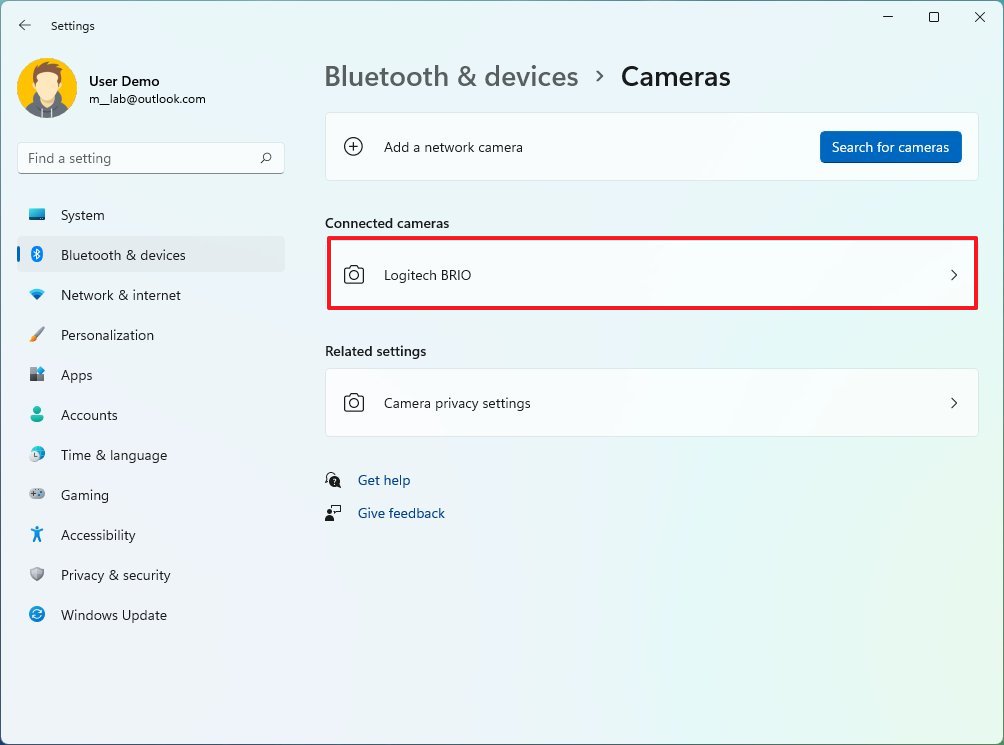
- Use the Brightness setting to adjust the camera brightness.
- Use the Contrast setting to adjust the device contrast.
- (Optional) Use the Video rotation setting to rotate the camera right 90, left 90, or 180 degrees.
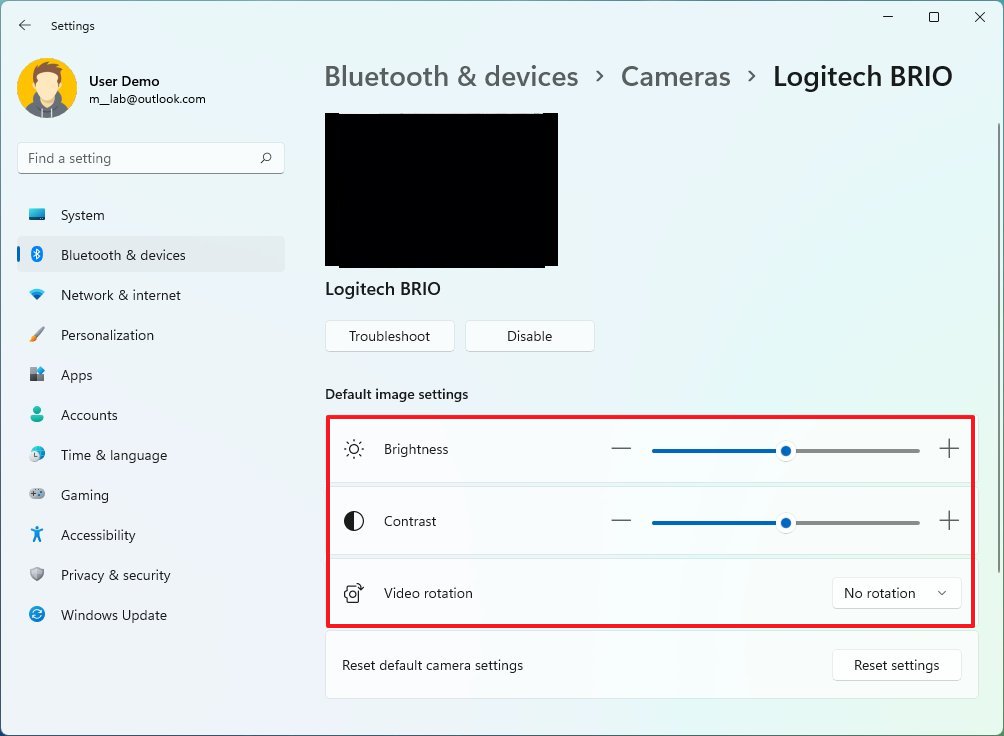
Once you complete the steps, the settings will apply to the camera automatically.
If you want to revert the changes to the defaults, you can use the same steps, but on step 5, click the Reset settings button.
How to disable webcam on Windows 11
To disable a camera on Windows 11, use these steps:
- Open Settings.
- Click on Bluetooth & devices.
- Click the Cameras page on the right side.

- Click the Disable button.
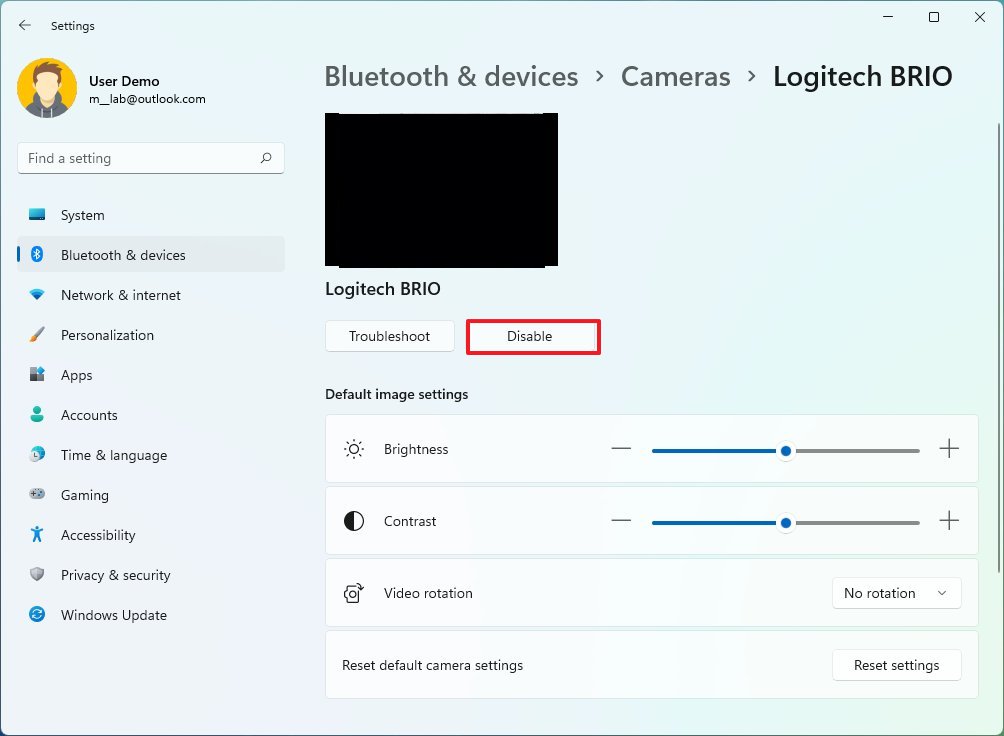
After you complete the steps, the webcam will be disabled, but it’ll continue to be installed on the computer.
If you want to re-enable the device, you can use the same instructions, but on step 3, click the Enable button next to the webcam.
How to fix common webcam problems on Windows 11
If the camera isn’t working, Windows 11 includes a troubleshooter specifically designed to detect and resolve more problems automatically.
To fix camera problems on Windows 11, use the steps:
- Open Settings.
- Click on Bluetooth & devices.
- Click the Cameras page on the right side.

- Click the Troubleshoot button.
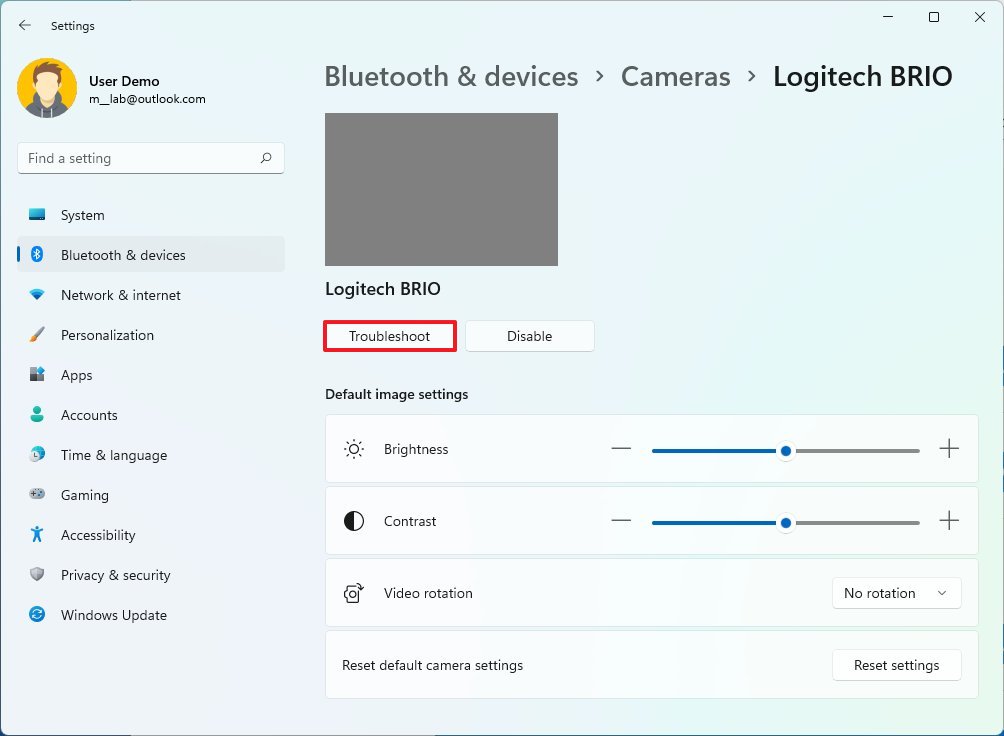
- Continue with the on-screen wizard to fix the camera.

Once you complete the steps, the troubleshooter will prompt you to answer some questions to run diagnostics and apply fixes-based answers.
How to control webcam privacy settings on Windows 11
To allow or deny users and apps access to the webcam, use these steps:
- Open Settings.
- Click on Privacy & security.
- Click the Camera page on the right side.
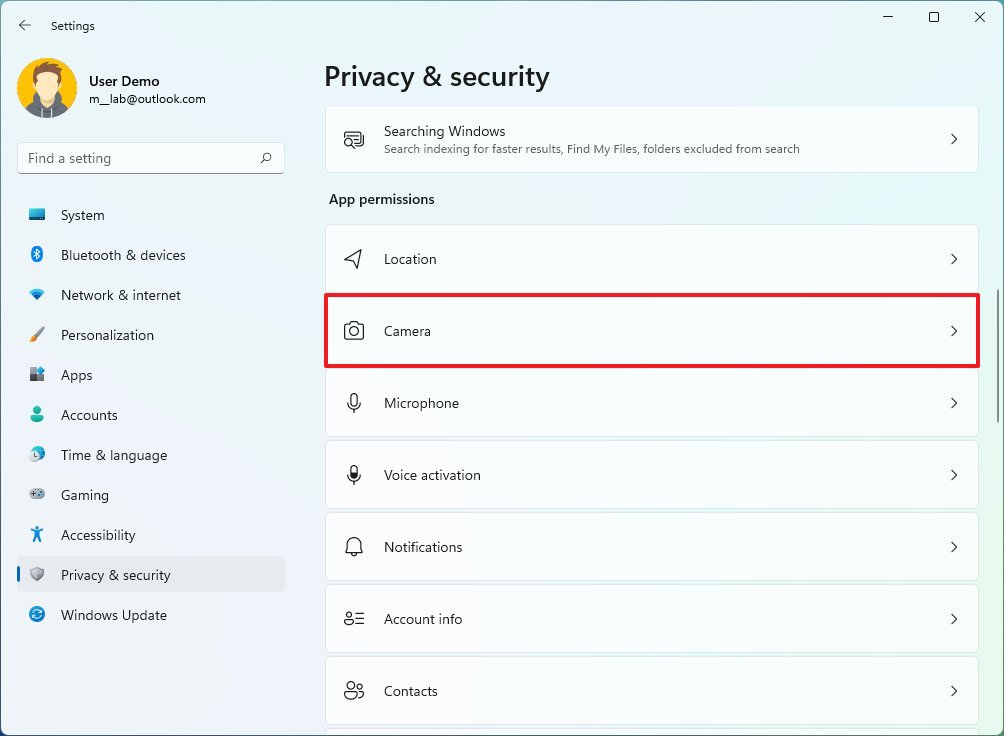
- Turn on or off the Camera access toggle switch to allow or deny users access to the webcam.
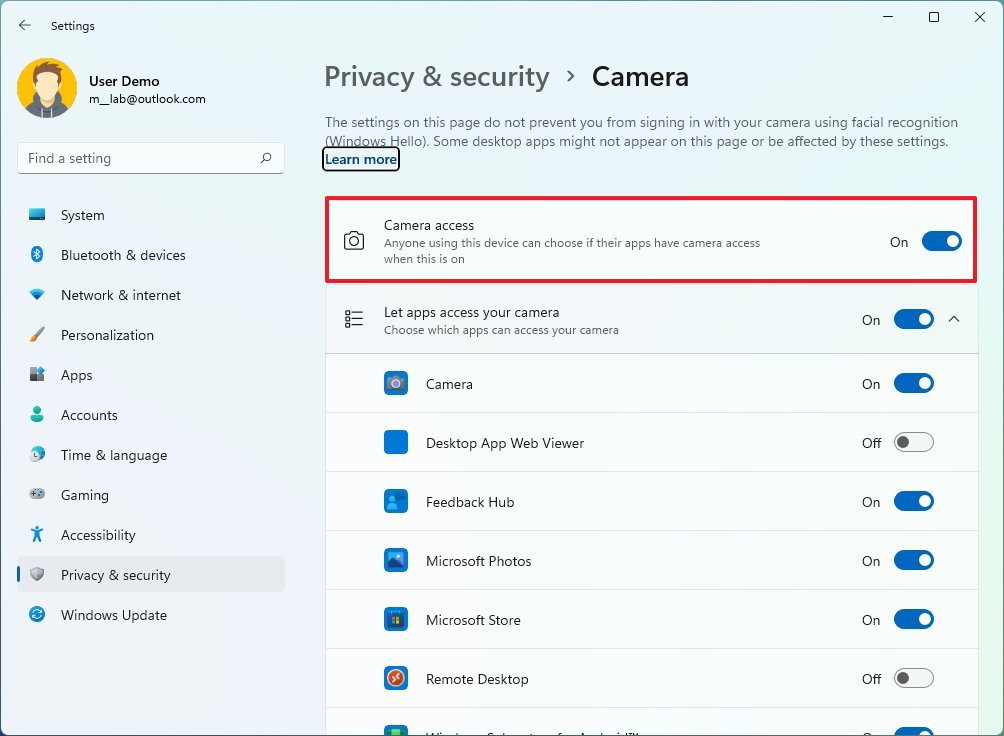
- Turn on or off the “Let apps access your camera” toggle switch to allow or deny users access to the webcam.
- (Optional) Turn off the toggle switch for the apps for which you want to have restricted access to the camera.
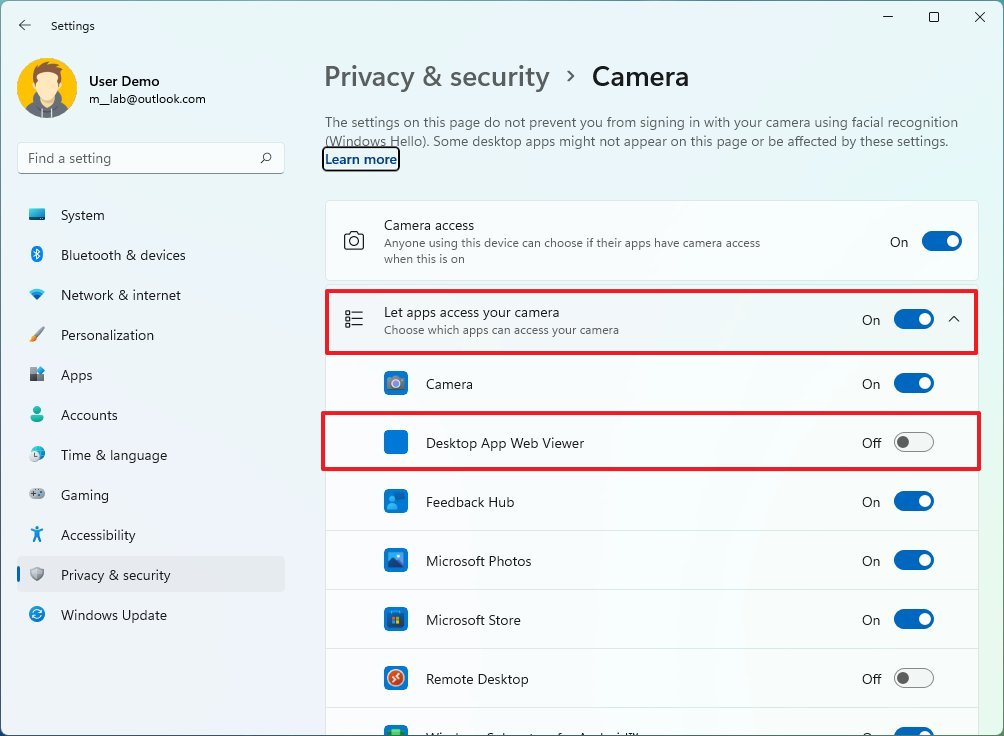
Once you complete the steps, the camera will be available for users and apps according to your configuration.
More resources
For more helpful articles, coverage, and answers to common questions about Windows 10 and Windows 11, visit the following resources:


