Windows 11 saw a, dare we say, Mac-flavoured redesign come to Microsoft’s operating system. Nowhere was this more evident than with the taskbar, shifting to the middle everything over to the middle. If it’s not for you, here’s how to move it back.
The redesign of Windows for its latest iteration saw a focus on more rounded corners, glass-like Windows and an overall more aesthetically-pleasing experience. Windows has always been about function but the operating system now has a boosted form too.
One of the most obvious changes for users was the decision to move the taskbar from the bottom-left of the display to the middle, like in MacOS. To some it may seem like a small change, a welcome one even. But, to others, you might just be used to how Windows has been for many years and would rather have it back. Here’s our easy guide on how to move the taskbar in Windows 11. Also, check out our Troubleshooting section if you have any further queries on the taskbar.
What you’ll need:
The Short Version
- Open Settings
- Go to Personalisation
- Select Taskbar
- Click Taskbar Behaviours
- Change Taskbar Alignment to Left
-
Step
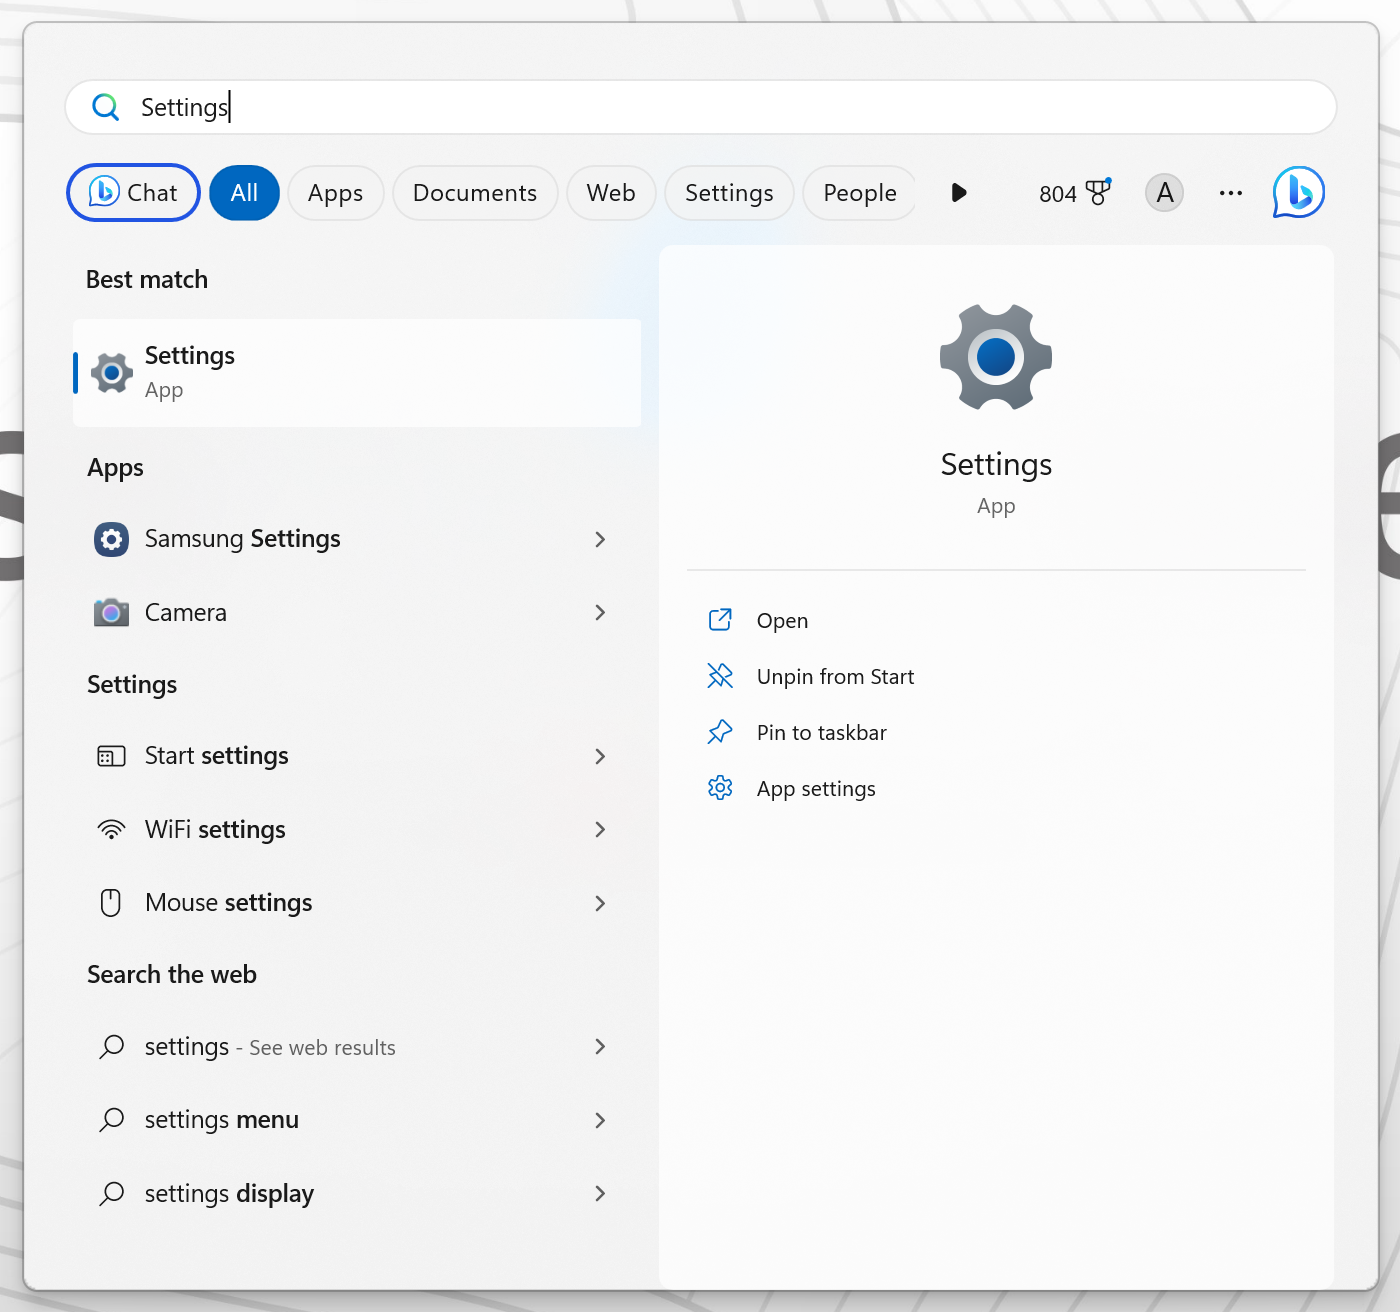
1Open Settings
Open the Start menu and search for Settings.
-
Step
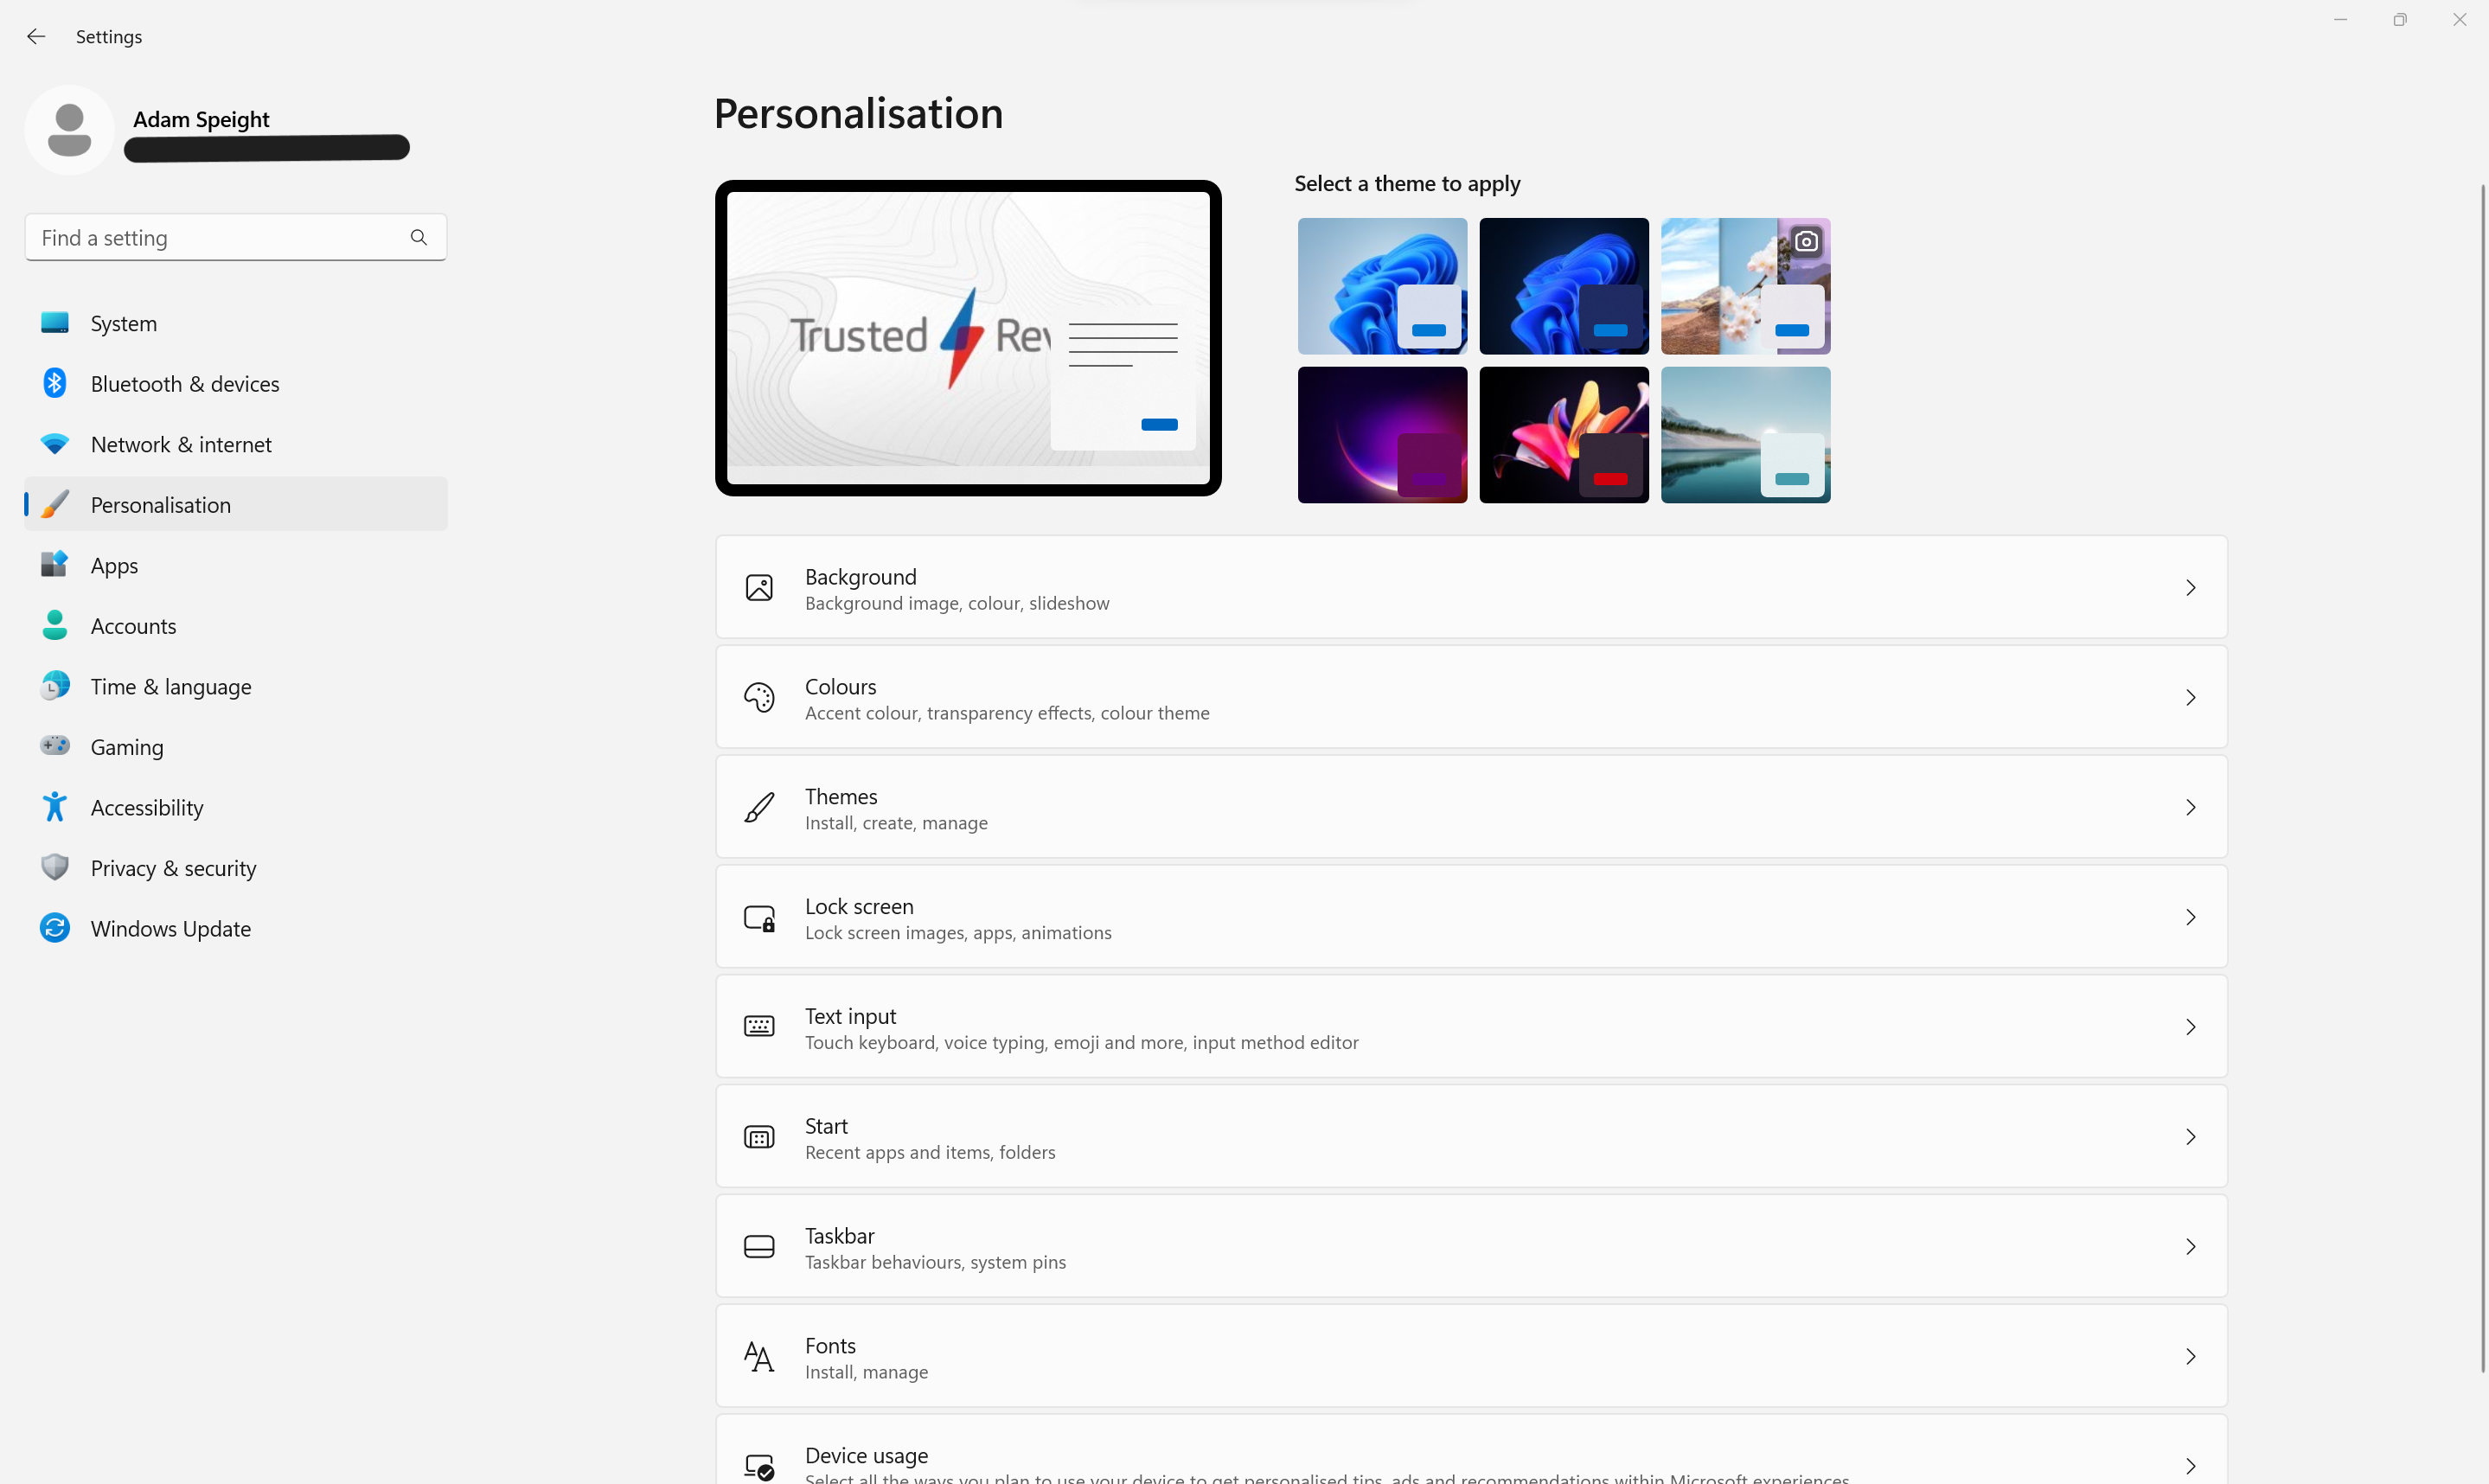
2Go to Personalisation
Once in Settings, select Personalisation.
-
Step
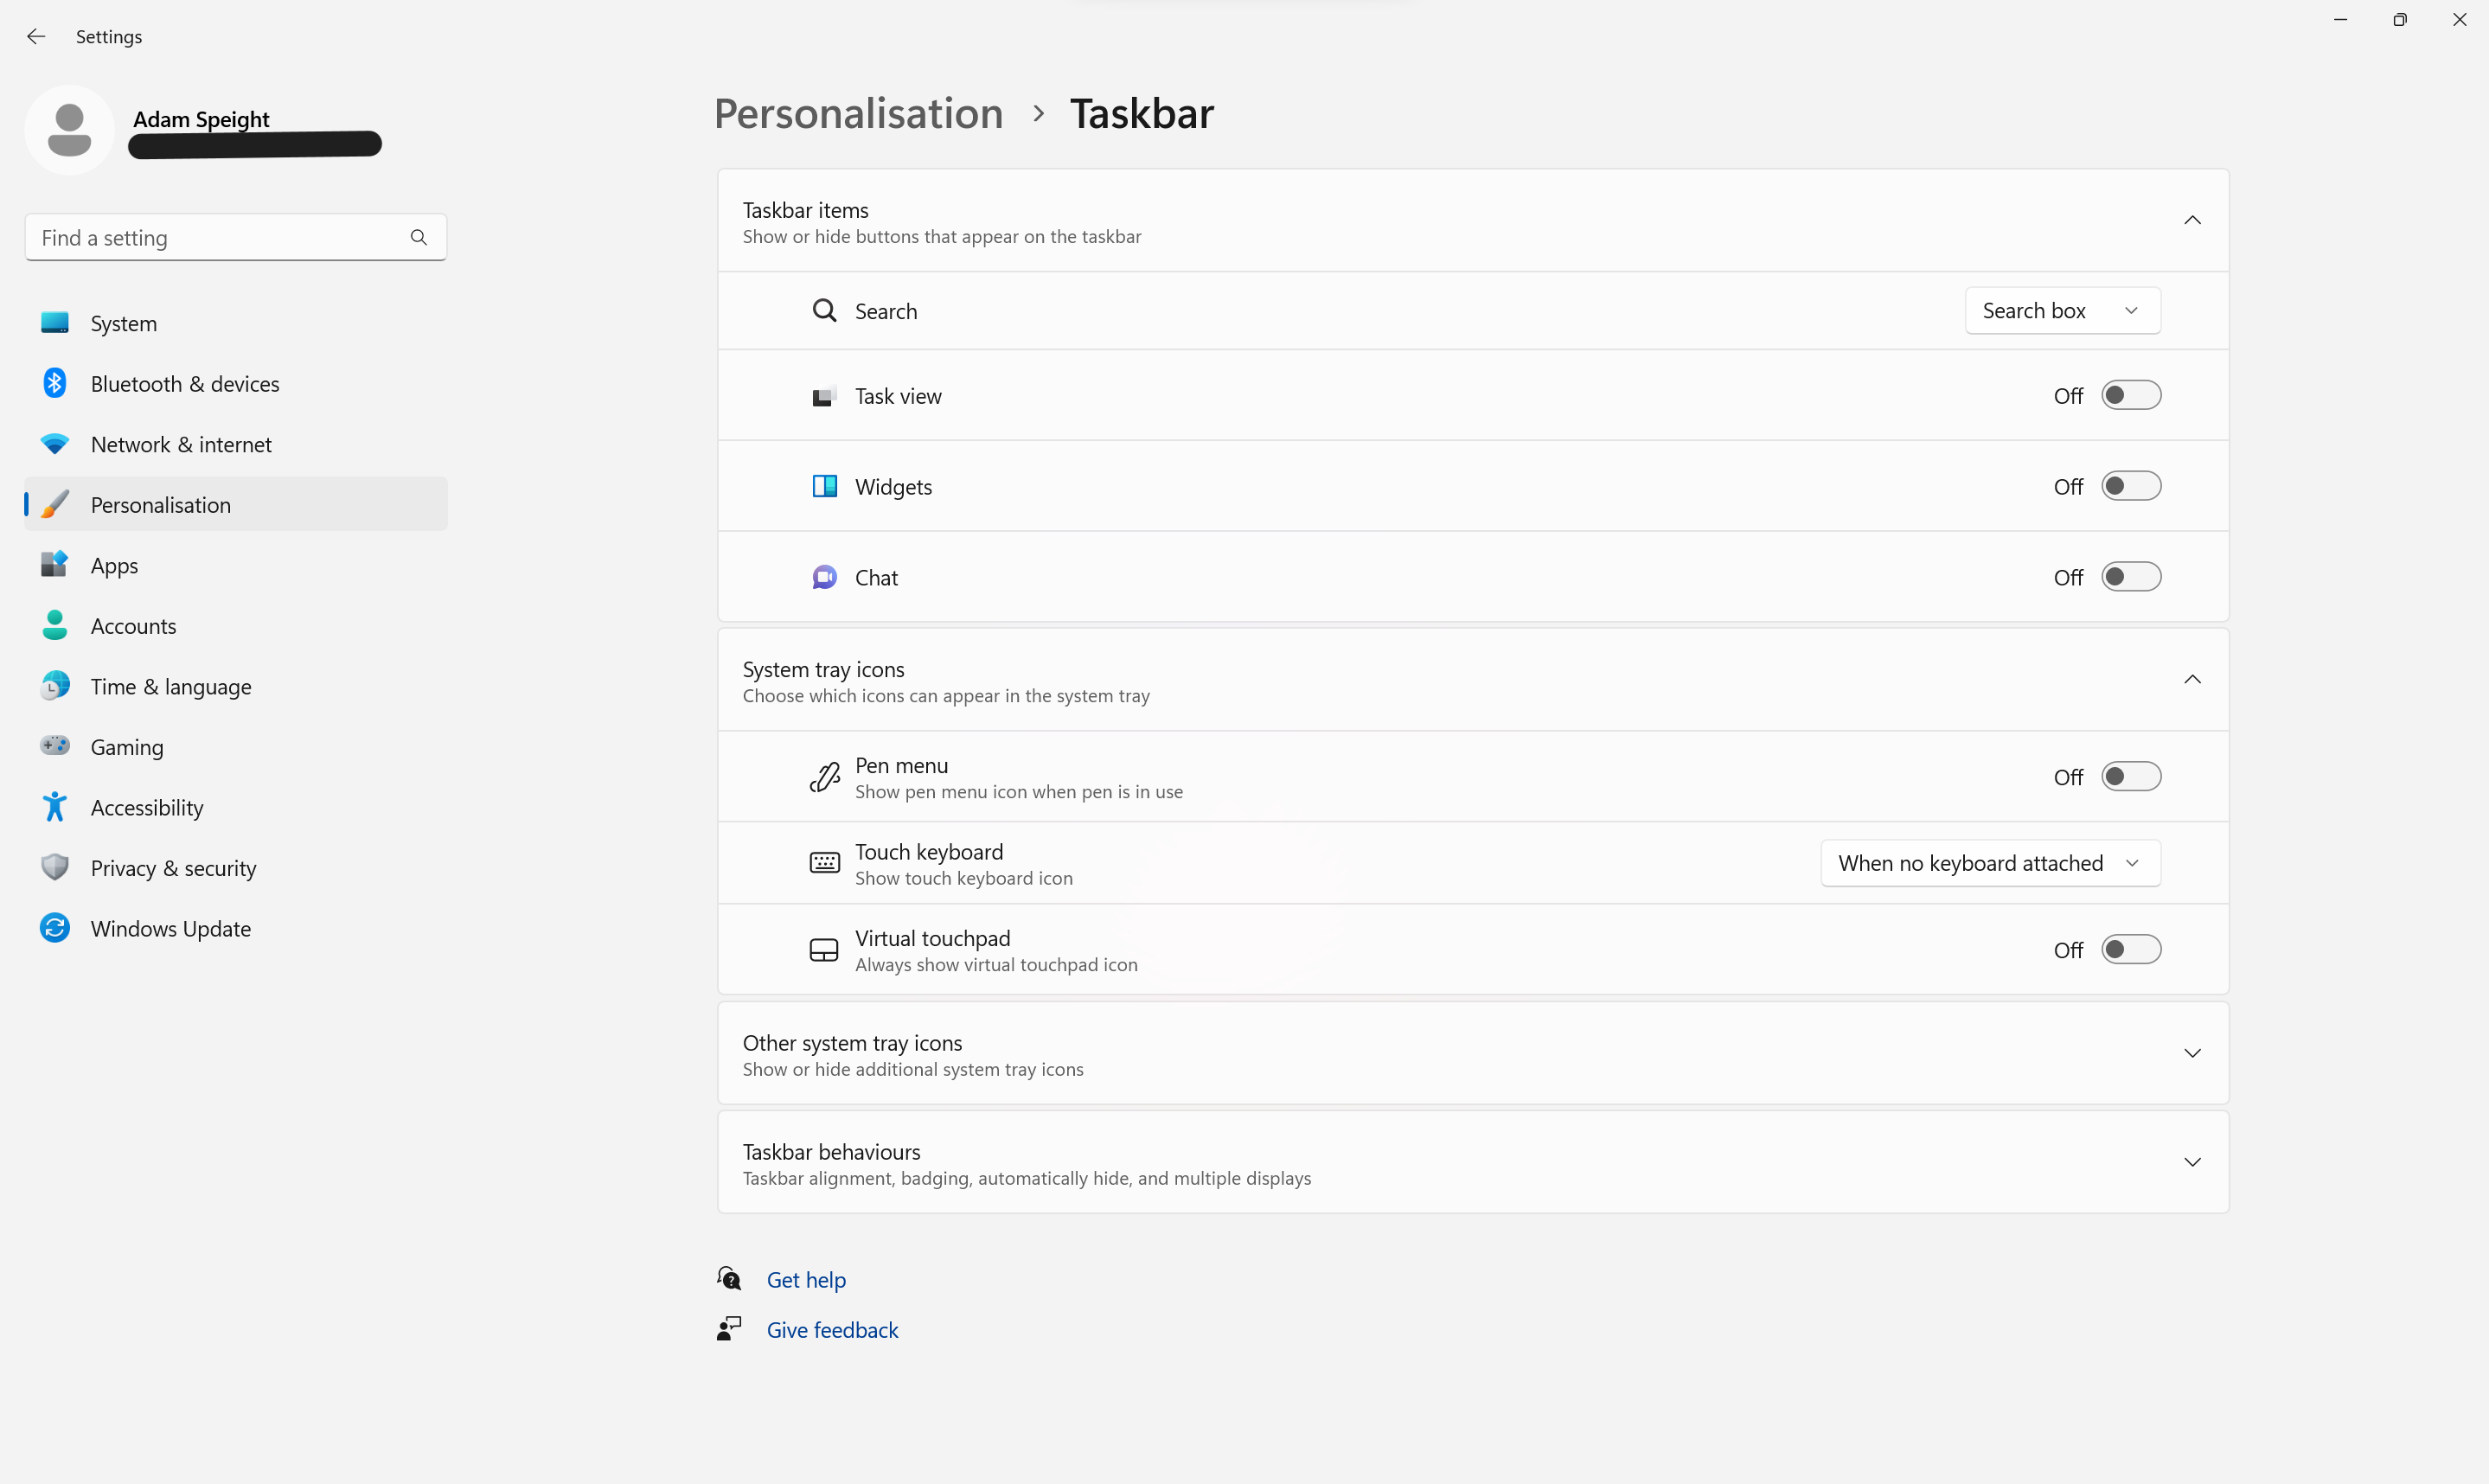
3Select Taskbar
From the Personalisation menu, click Taskbar.
-
Step
4Click Taskbar Behaviours
Select Taskbar Behaviours to open its menu.
-
Step
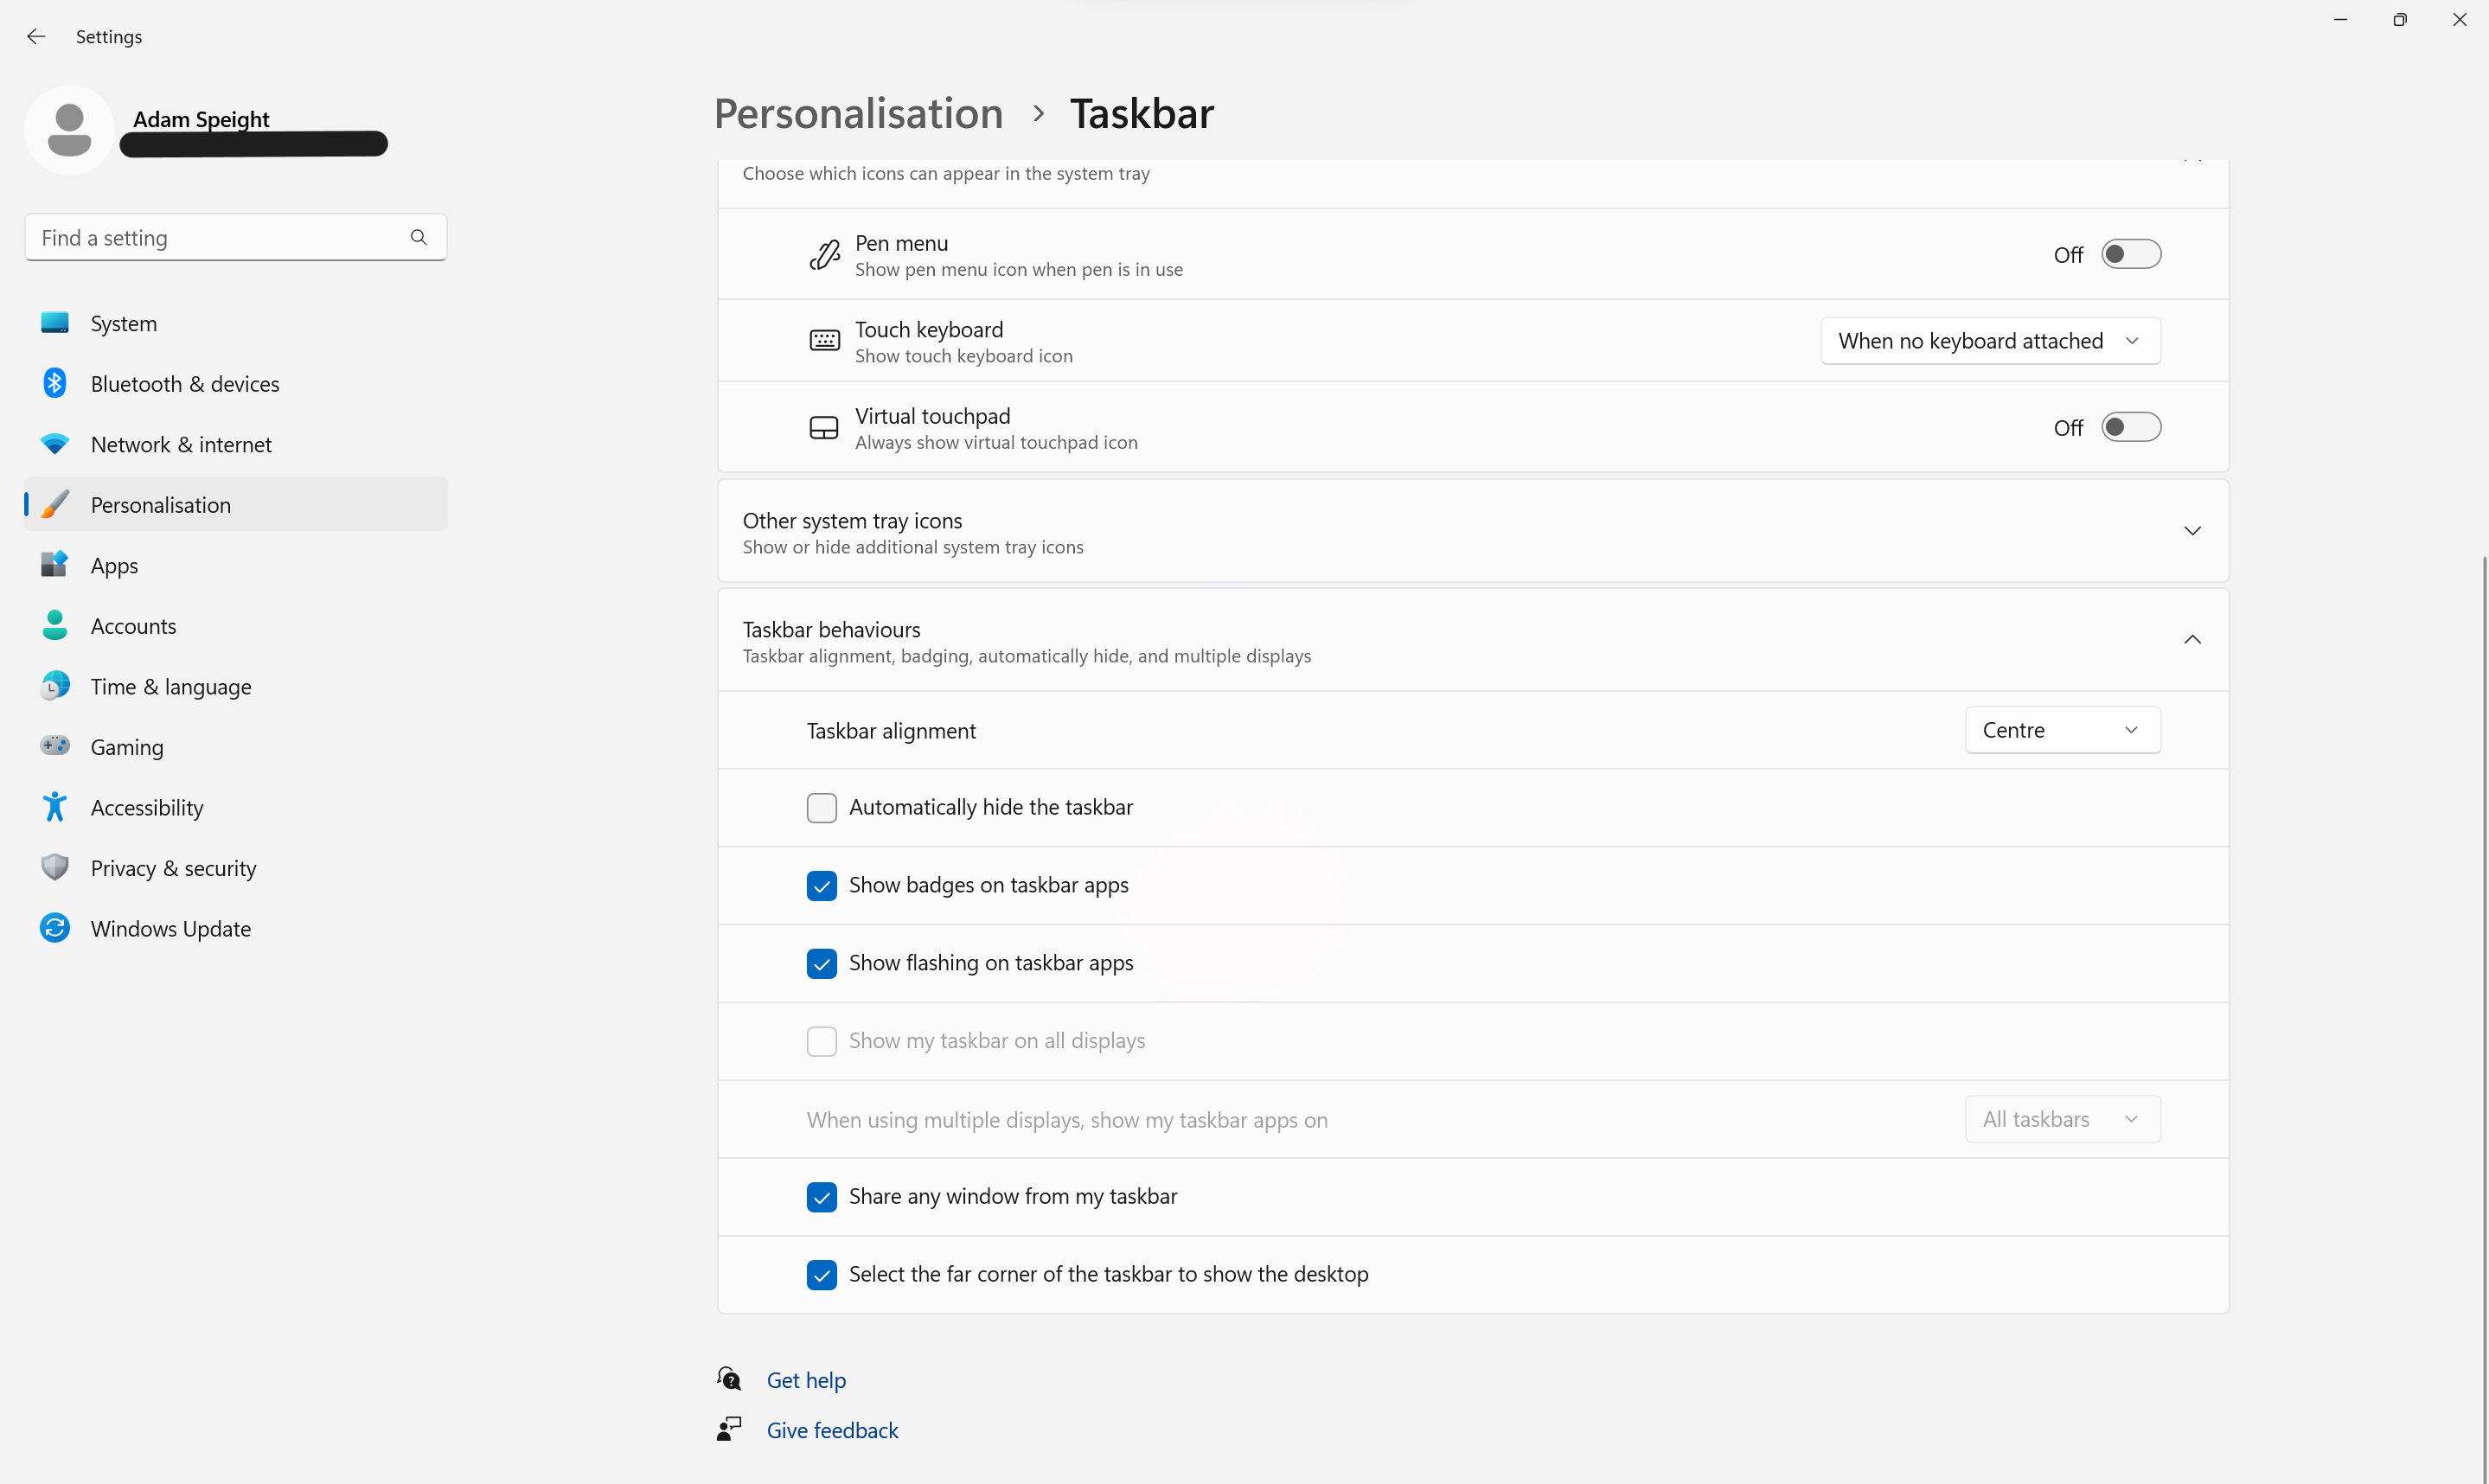
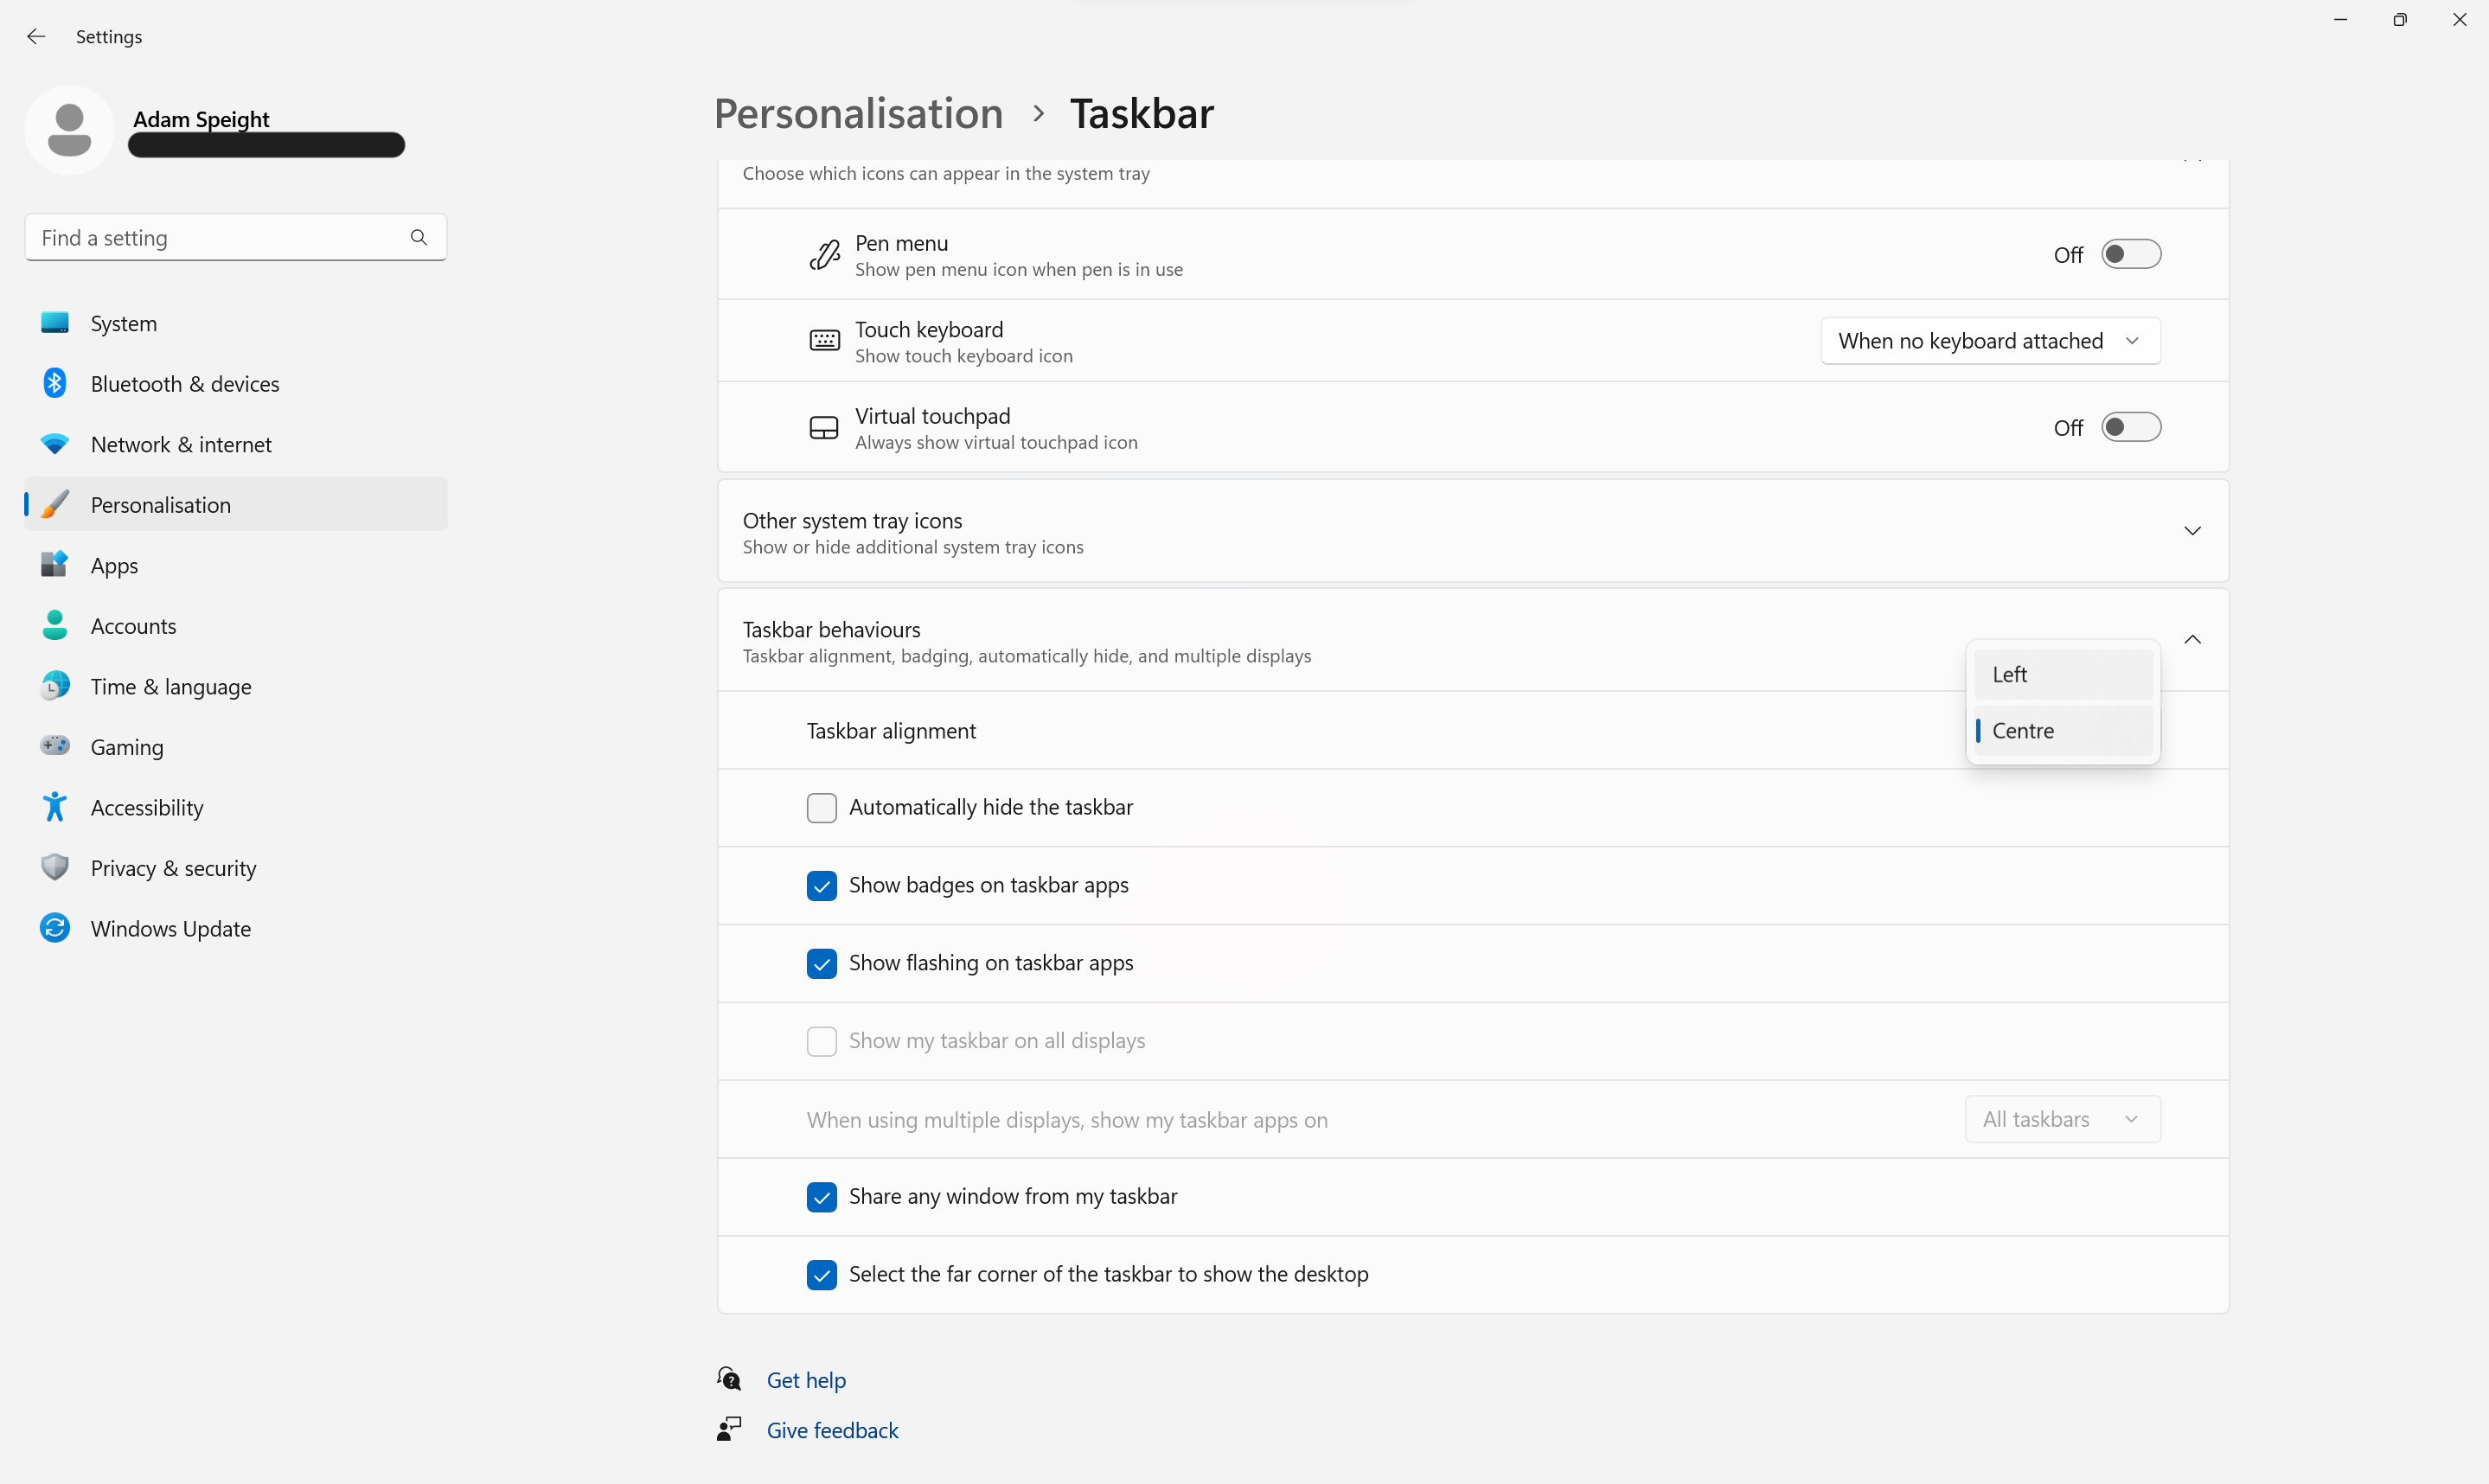
5Change Taskbar Alignment to Left
In the Taskbar Alignment dropdown menu, change Centre to Left. Or, vice versa, if you’re changing it back.
Troubleshooting
In Windows 10, it was quite easy to move the entire taskbar to a different location on your screen. Windows 11 opts for keeping it at the bottom, with the option to move the alignment of the taskbar instead.

