Quick Links
Key Takeaways
- Migrating a Windows installation means transferring all the contents of the drive where Windows is installed to another drive.
- You can use free tools like DiskGenius for migrating your Windows installation to a different drive.
- Once Windows is migrated, you must change the boot order to ensure your computer boots the operating system from the correct drive.
Do you want to move your Windows 11 OS files to an SSD to improve your computer’s speed? Or is your current drive running out of space, and you want to move the OS files to one with more space? Whatever the reason may be, it’s very easy to move your Windows 11 OS files to a new drive.
Things You Need to Be Aware of Before Starting the Migration
One of the most important things to be aware of when migrating Windows 11 from one drive to another is that the migration process will transfer all the contents of the drive to the new one. For example, if you have Windows installed on your C drive and want to move it to an SSD labeled as the F drive, all the content from the C drive will be migrated to the F drive. This means you can’t simply move the Windows folder from the C drive to another drive.
All the information that Windows needs to run properly isn’t contained in the Windows folder on the C drive; the required data is spread across different folders on the C drive.
Another thing to be aware of is that the total used space on the drive where Windows 11 is installed must be less than the total capacity of the drive you’re moving the installation to. For example, if your C drive, where Windows 11 is installed, has 300 GB of used space, the new drive should have more than 300 GB of available space.
How to Migrate Windows 11 Installation to a New Drive
There are several tools you can use to migrate Windows 11 installation to a new drive, but I prefer using the DiskGenius tool. To start, visit the DiskGenius website and download the tool. Then, double-click the downloaded executable file (.exe) to begin the installation process.
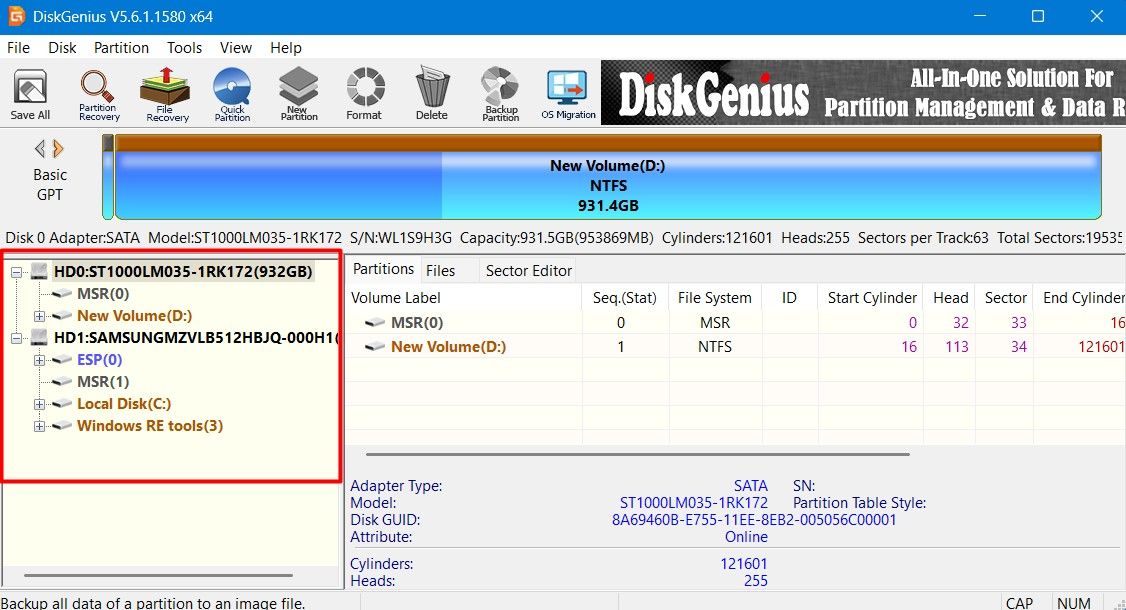
While installing the application, make sure you’re not installing it on the drive where you plan to move the Windows installation, as this could result in data loss. Once the installation is complete and you’ve connected the drive where you want to move the Windows installation, open DiskGenius. In the left sidebar, you’ll see all the devices connected to your computer.
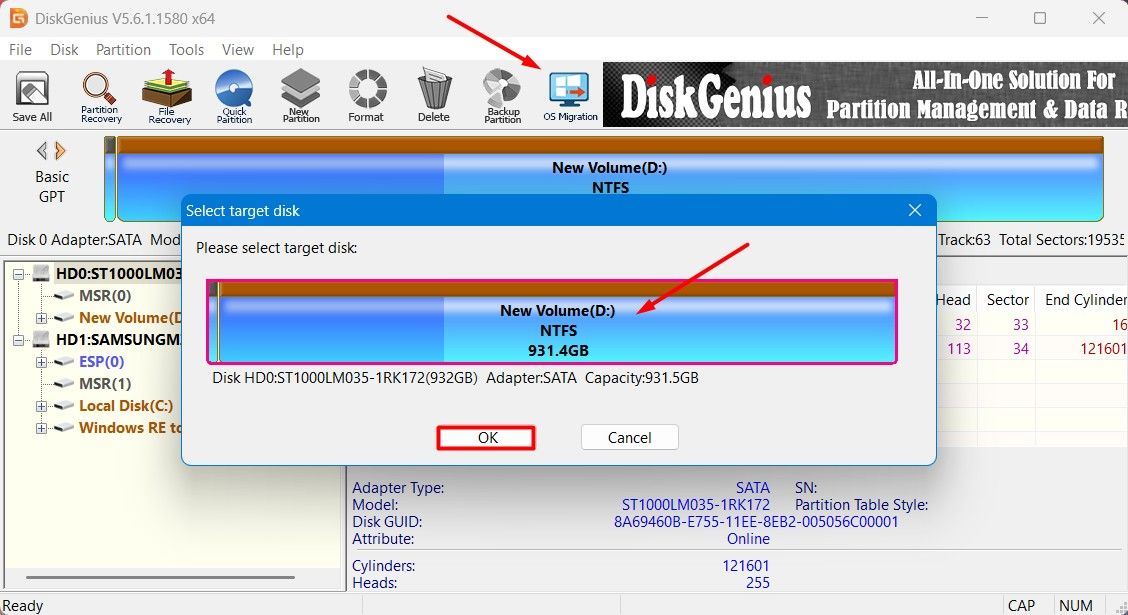
Click the “OS Migration” option in the top menu, select your target disk in the Select Target Disk dialog box that appears, and click “OK.”
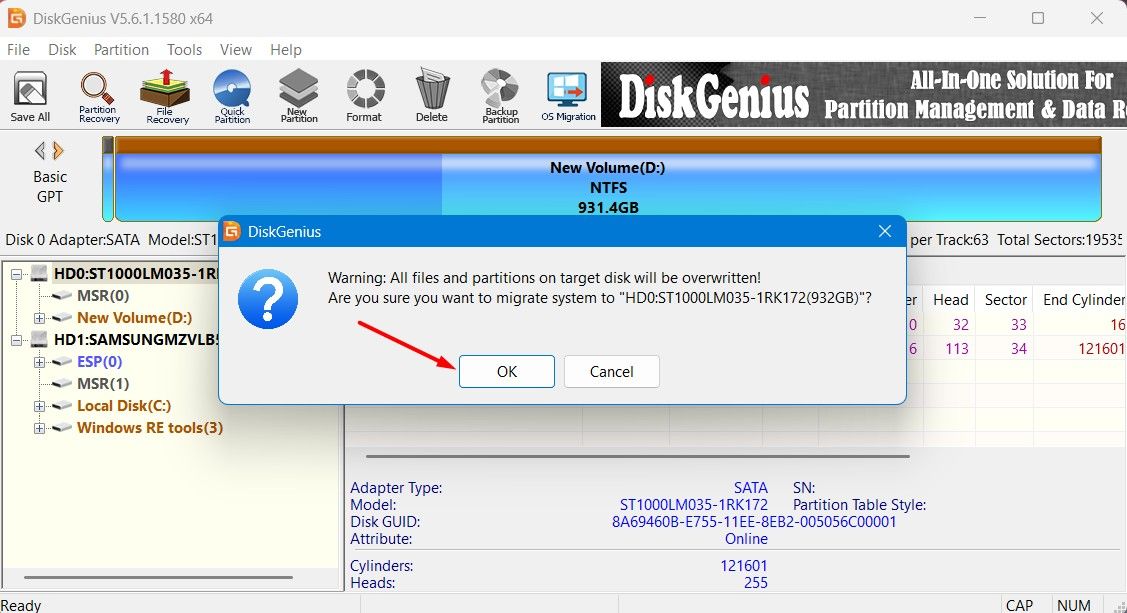
DiskGenius will then prompt you with a confirmation box, asking for permission to wipe all data on the drive where you’re moving the Windows installation. Click “OK” to confirm.
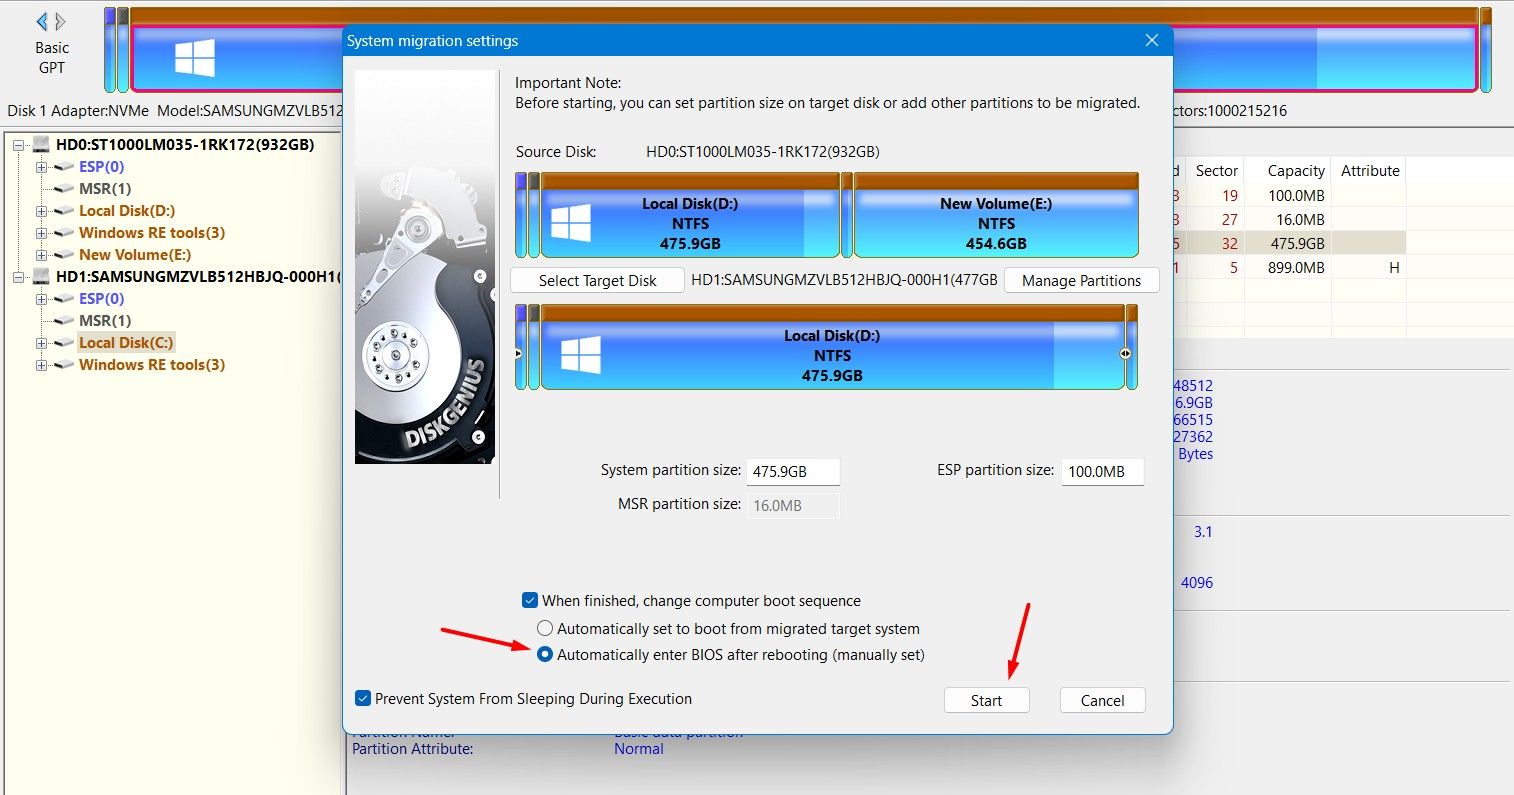
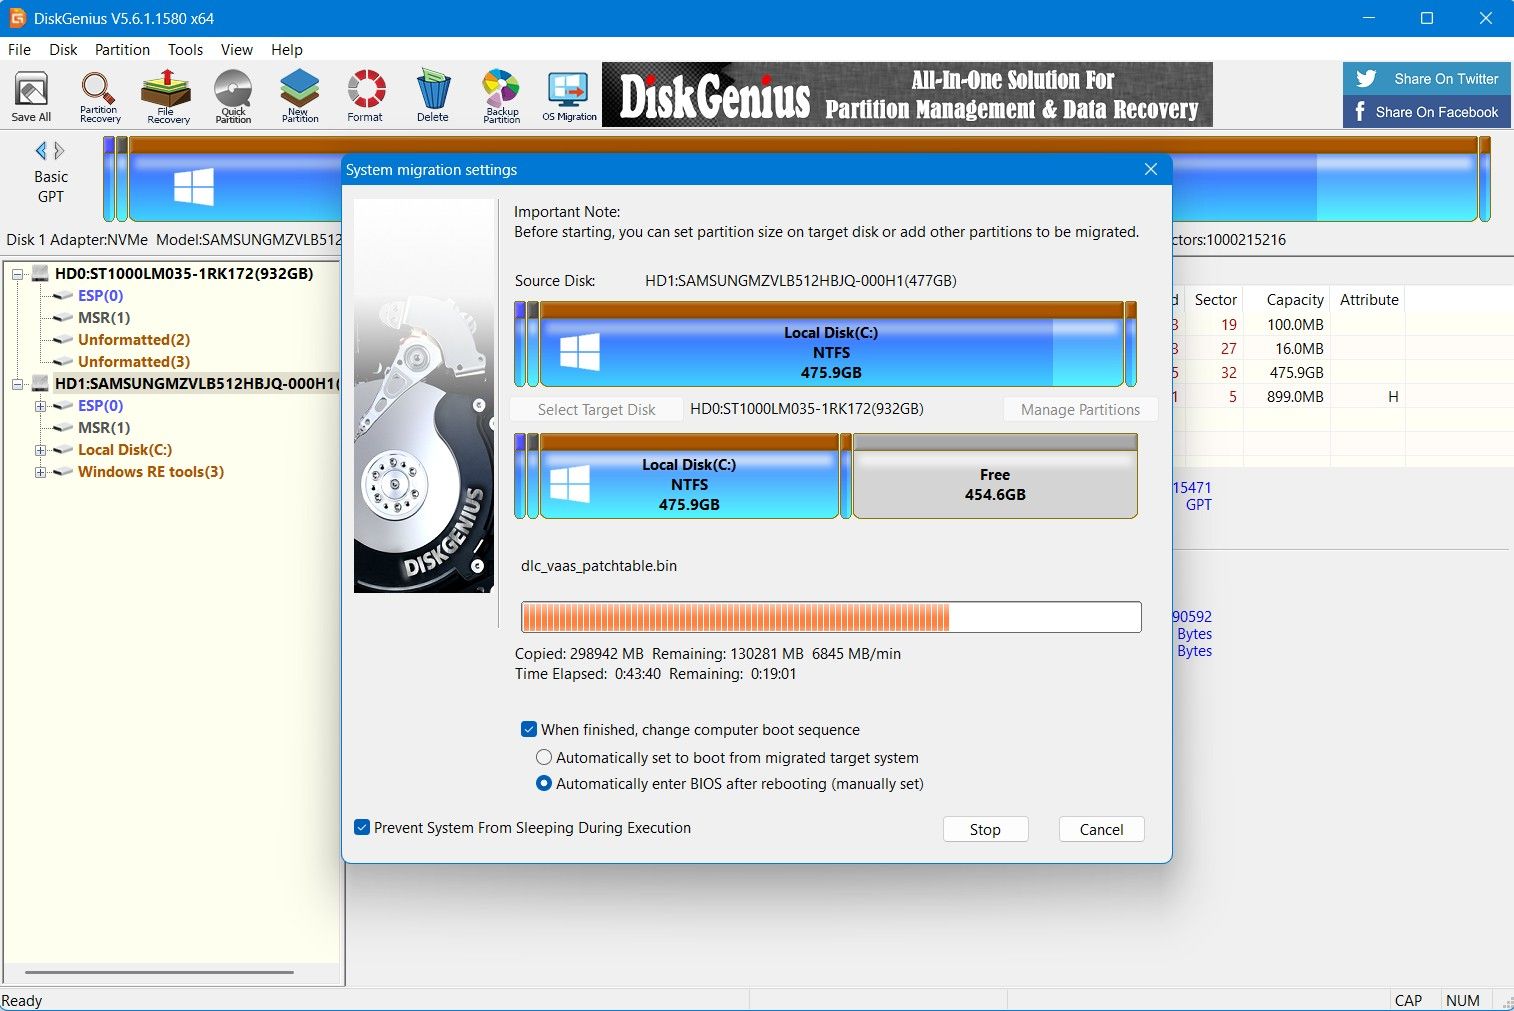
In the System Migration Settings window, you’ll be prompted to choose whether you want DiskGenius to automatically change the boot order or if you prefer to do it manually. While both the methods works well, I recommend doing it manually so that you can understand what exactly happens behind the scenes. Select the option “Automatically enter BIOS after rebooting (manually set)” and click “Start.” DiskGenius will remind you again that all data on the target drive will be erased. Click “OK” to proceed.
Choose the “Hot Migration” option.The process will begin and may take some time, depending on the amount of data.
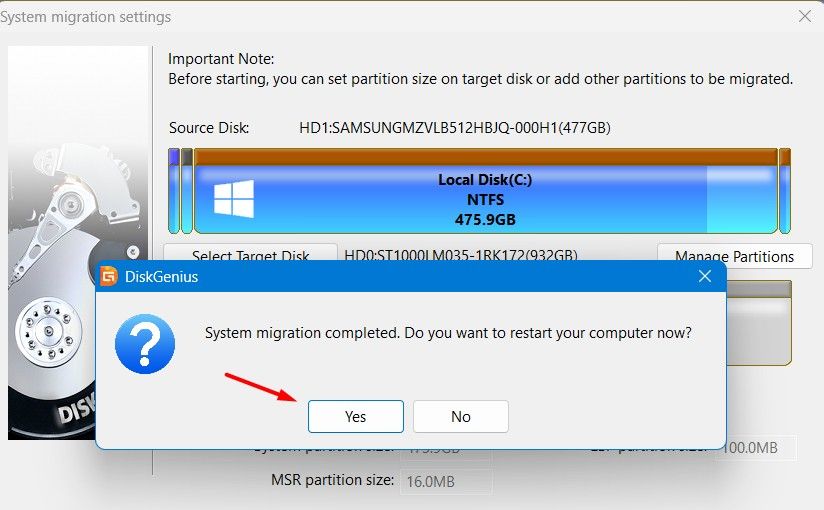
Once the migration is complete, click “Yes” to confirm you want to restart your computer.
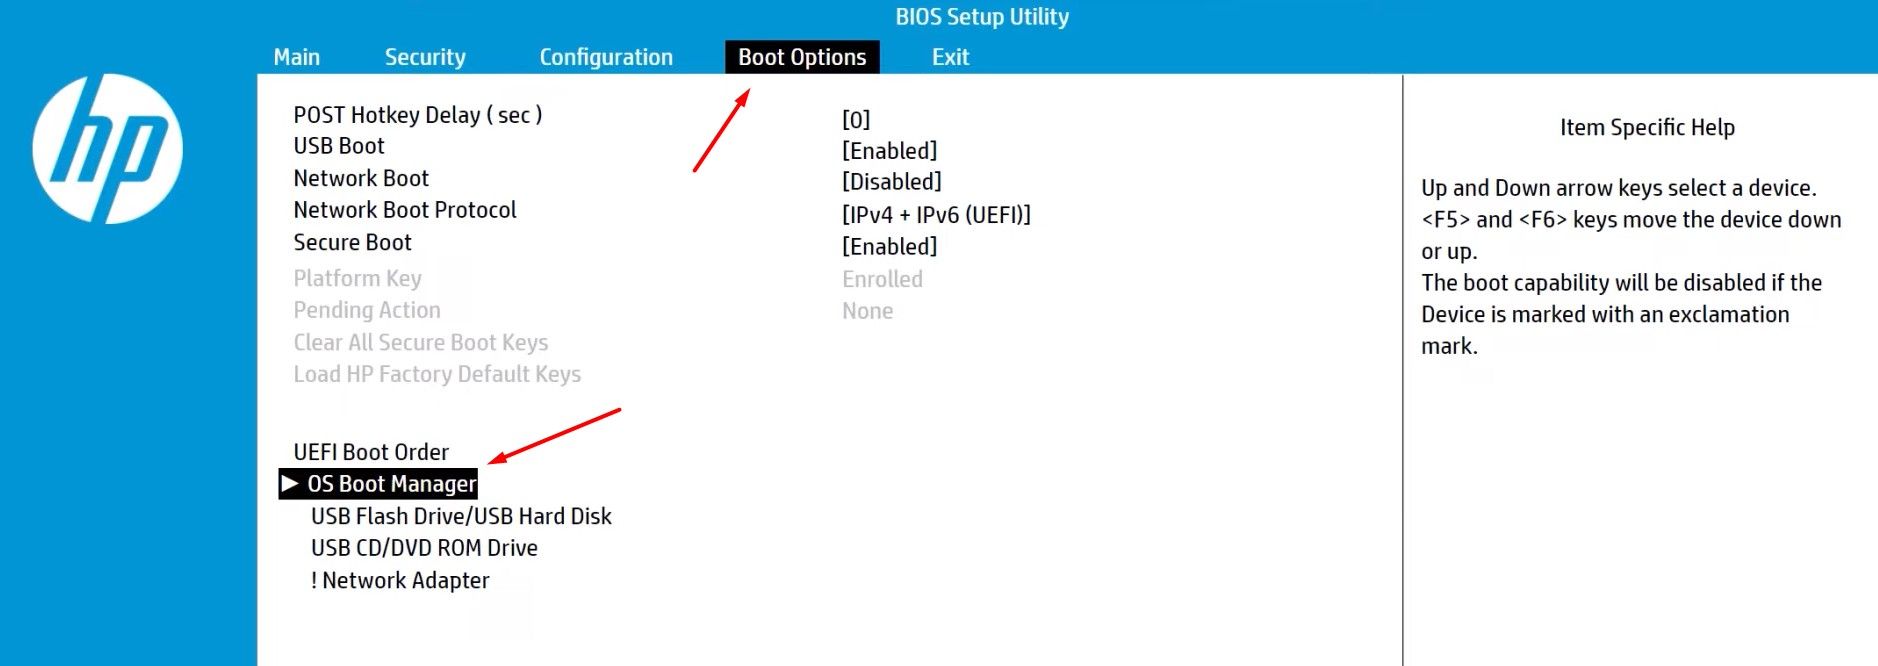
Since you’ve chosen to configure the boot order manually, your computer will restart and enter the BIOS menu. It’s crucial to change the boot order, so your computer knows which drive to load the operating system from. For example, if you’ve moved the Windows 11 installation from the C: drive to the F: drive, you’ll need to adjust the boot order to load the operating system from the F drive instead of the C drive. If you don’t change the boot order, your computer will fail to load the operating system.
I’m performing these steps on an HP laptop, so the following instructions apply to that brand. If you’re using a different computer, the
BIOS menu
and process to change the boot order may vary slightly.
Click the “Boot Options” in the top menu. Then, under the UEFI Boot Order section, use the F5 and F6 keys to move the devices up or down. Make sure that “OS Boot Manager” is at the top of the boot order. You can also double-click the “OS Boot Manager” option to check and ensure that the drive that contains the OS files is selected.
Afterward, click the “Exit” button at the top and select “Save Changes and Exit.”
And that’s about it! You’ve successfully migrated the Windows 11 installation to a new drive. Once your computer starts, open File Explorer and check to ensure everything is fine with the drive. Access the Properties window of both the previous and current locations of your Windows installation, and make sure the used space is nearly the same. It might not be exactly identical—there could be a difference of around 5-6 GB, but that’s completely normal.
After that, if you’d like, you can wipe the old drive where the Windows 11 installation files were stored.
This was all about migrating Windows 11 installation files from one drive to another. Wasn’t the process easy and straightforward? Now that your previous drive, where the Windows 11 installation files were kept, is empty, you can use it for other purposes, like storing personal data and other items.


