Key Takeaways
- To prevent Windows 11 or 10 from locking itself, first disable Dynamic Lock and the “On Resume, Display Logon Screen” option in screensaver settings.
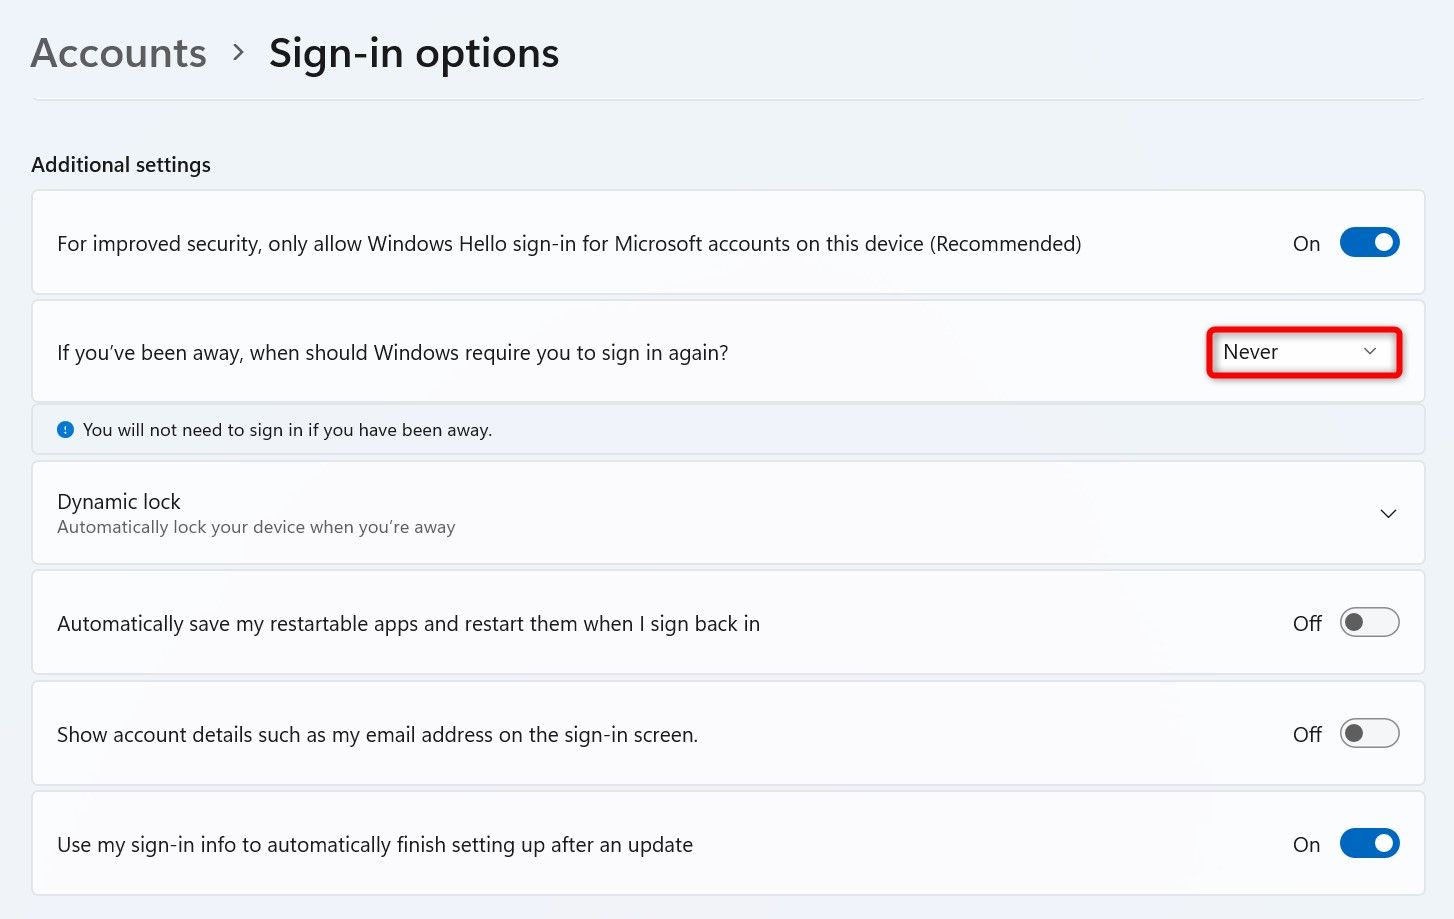
- Then, on Windows 11, head into Settings > Accounts > Sign-In Options, click the “If You’ve Been Away, When Should Windows Require You to Sign In Again?” drop-down menu, and choose “Never.”
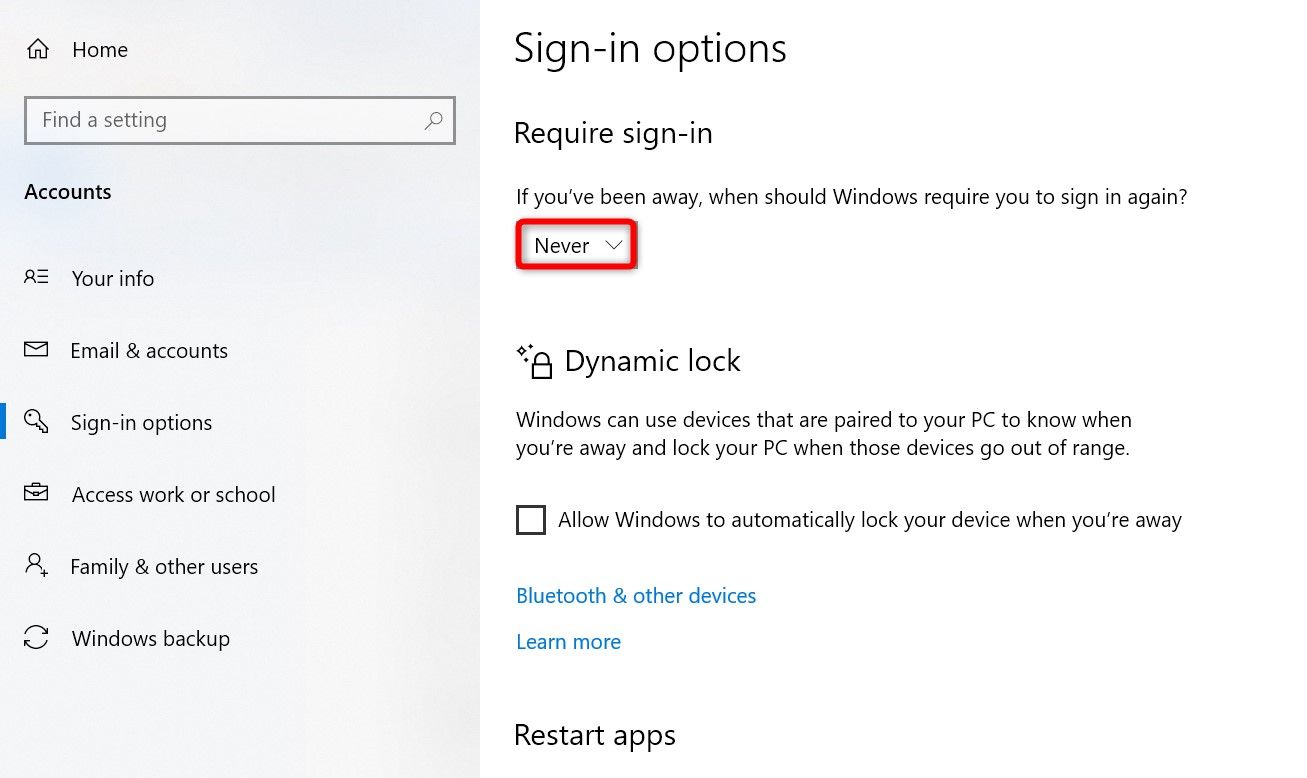
- On Windows 10, go to Settings > Accounts > Sign-In Options, and choose “Never” from the drop-down menu in the “Require Sign-In” section.
Do you not want your Windows 11 or Windows 10 PC to automatically lock itself? You have various ways to prevent that and keep your machine unlocked. I’ll show you the available methods to achieve the task.
First, Turn Off Dynamic Lock and a Screensaver Option
Before using any methods listed below, ensure you’ve turned off Dynamic Lock and a screensaver configuration option on your PC. If these options are enabled, your PC will automatically lock itself even if you apply the following methods.
How to Turn Off Dynamic Lock
Dynamic Lock in Windows 11 and Windows 10 allows you to lock your PC when your paired device goes out of Bluetooth range. Turn off the feature as follows so that it doesn’t interfere.
On Windows 11
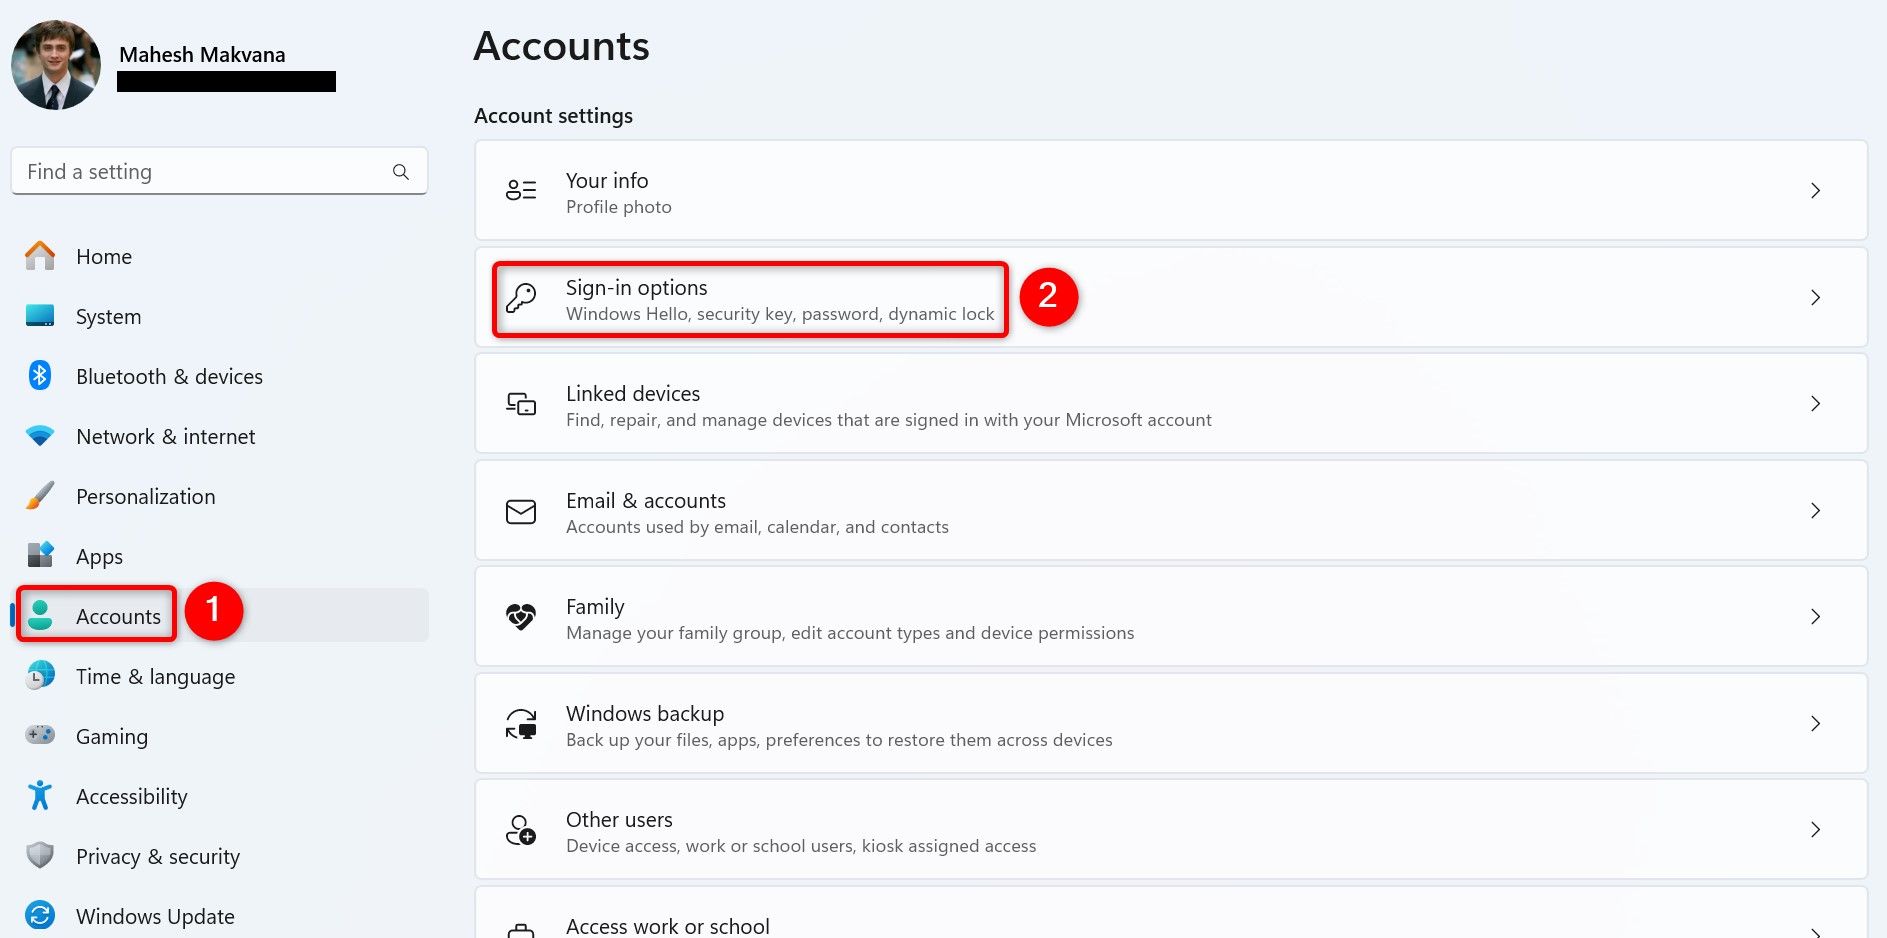
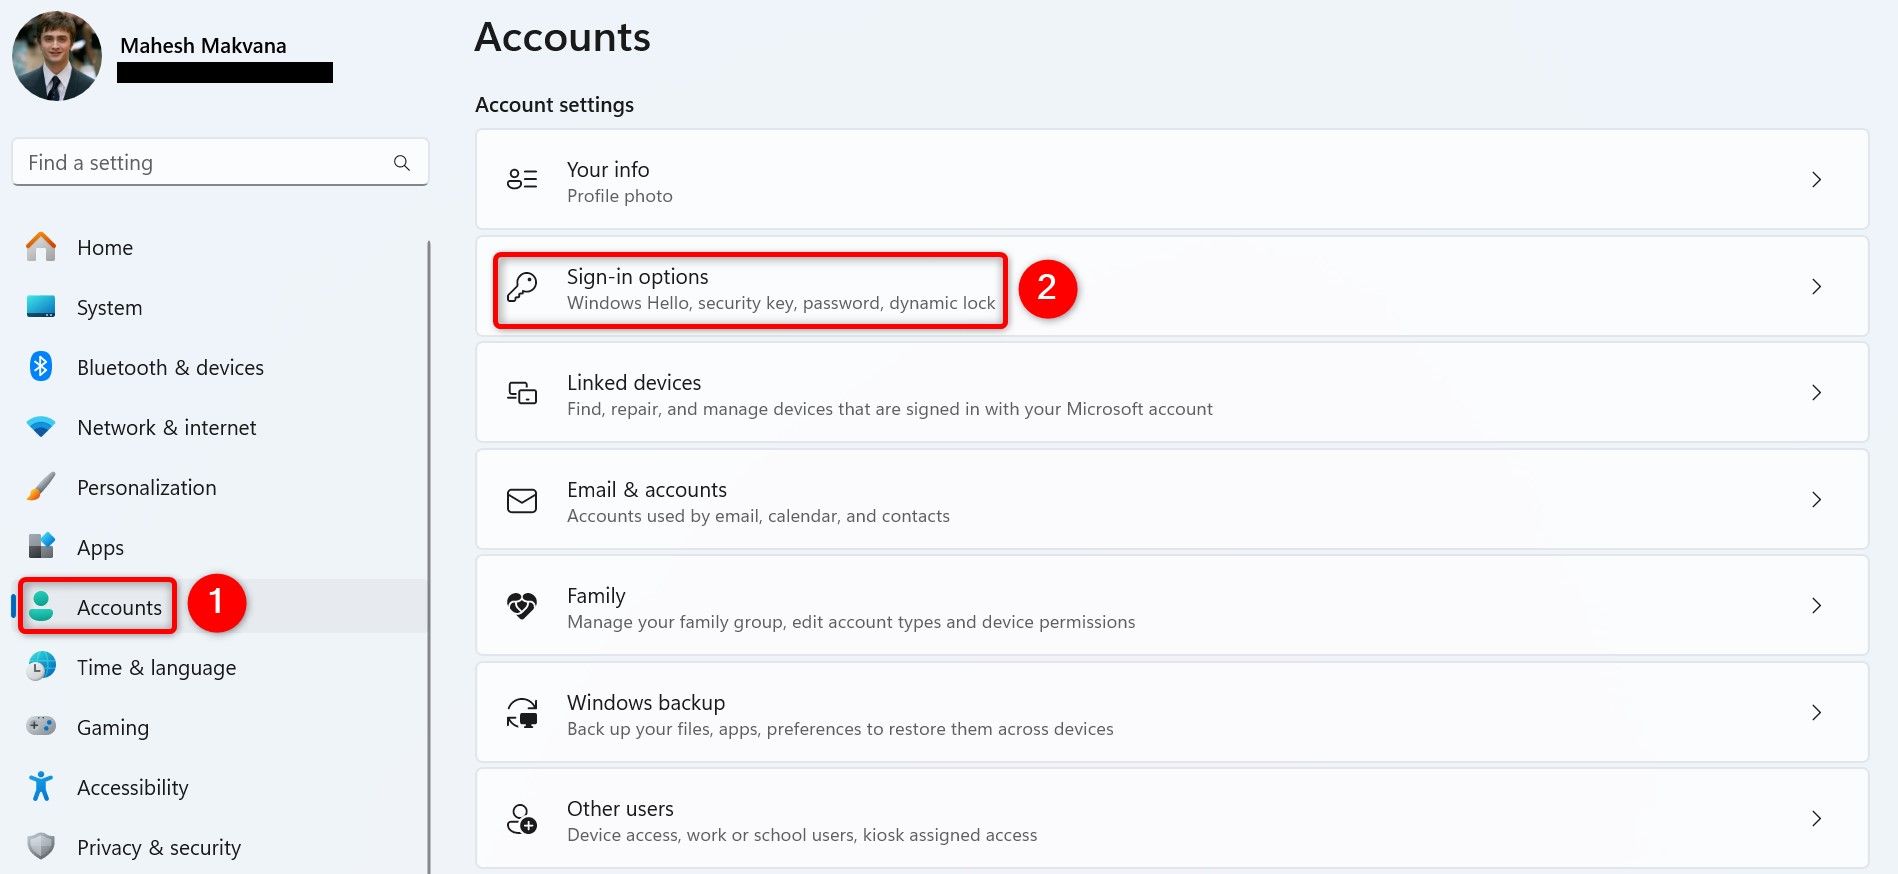
Open Settings using Windows+i. From the left sidebar, select “Accounts.” On the right pane, choose “Sign-In Options.”
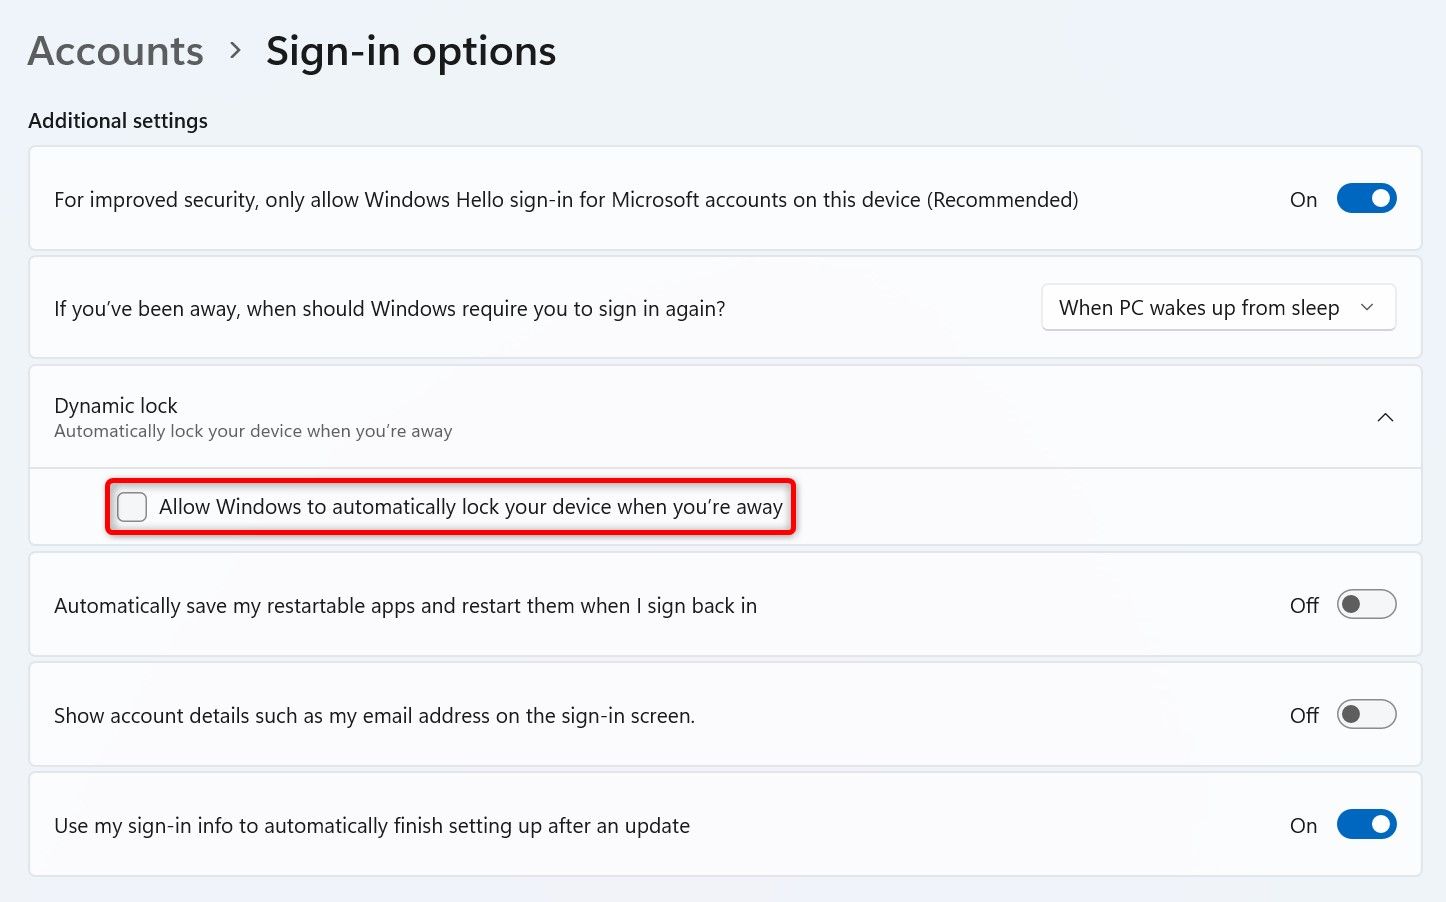
Select “Dynamic Lock” to expand the menu. Now, turn off the “Allow Windows to Automatically Lock Your Device When You’re Away” option.
You’re set.
On Windows 10
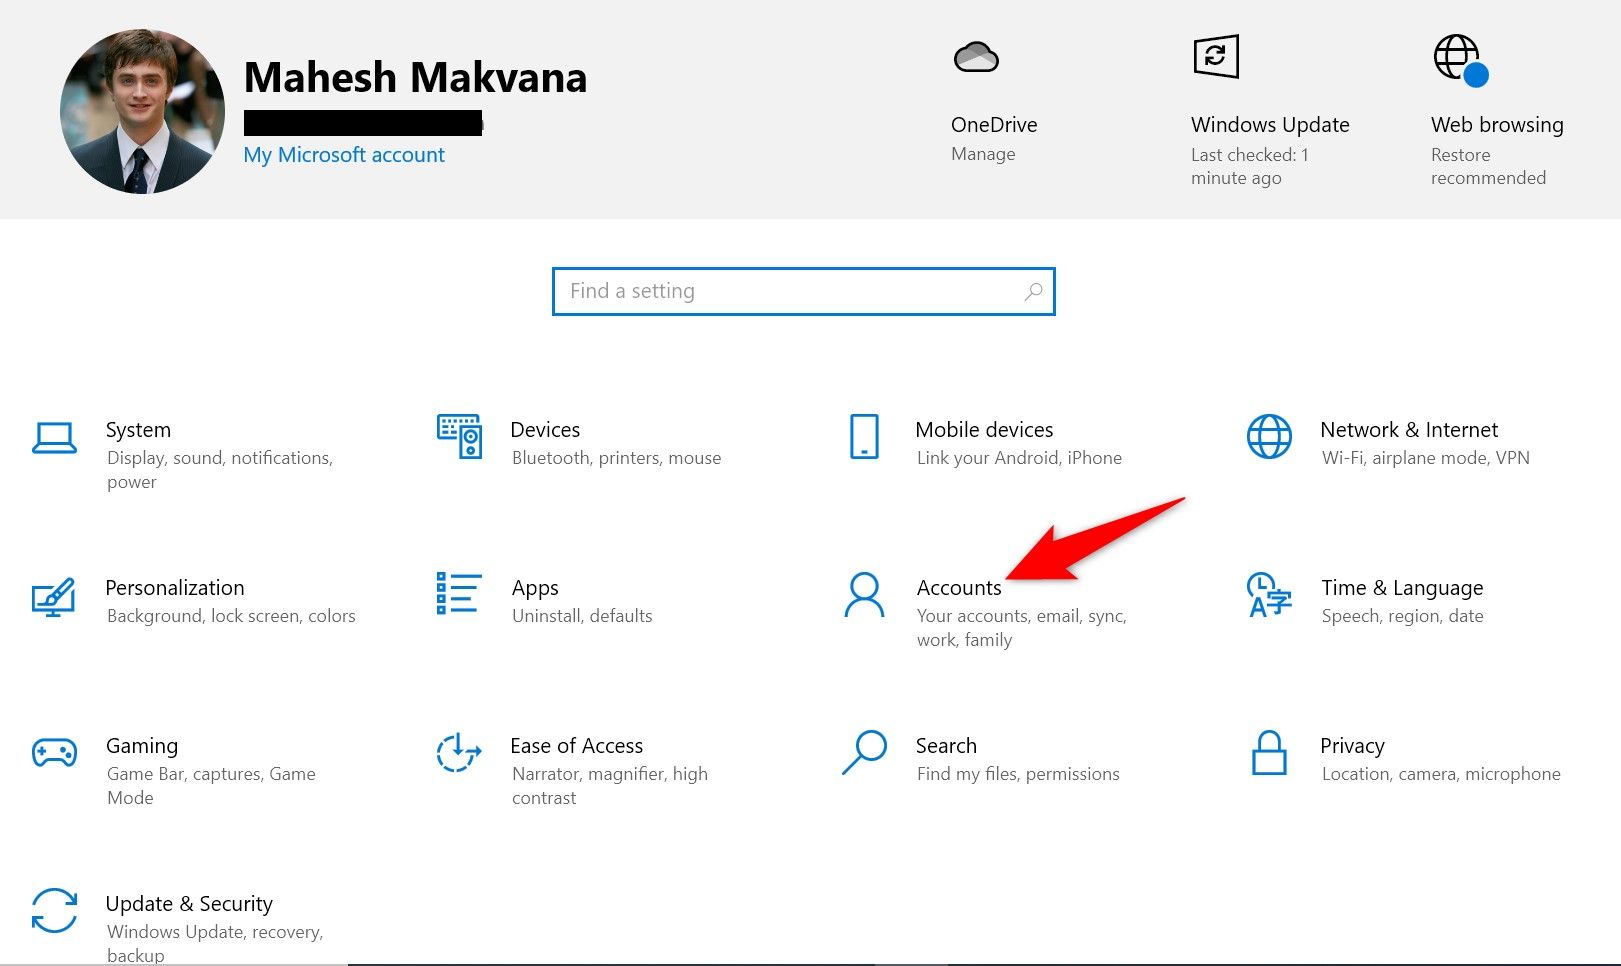
Launch Settings using Windows+i and select “Accounts.”
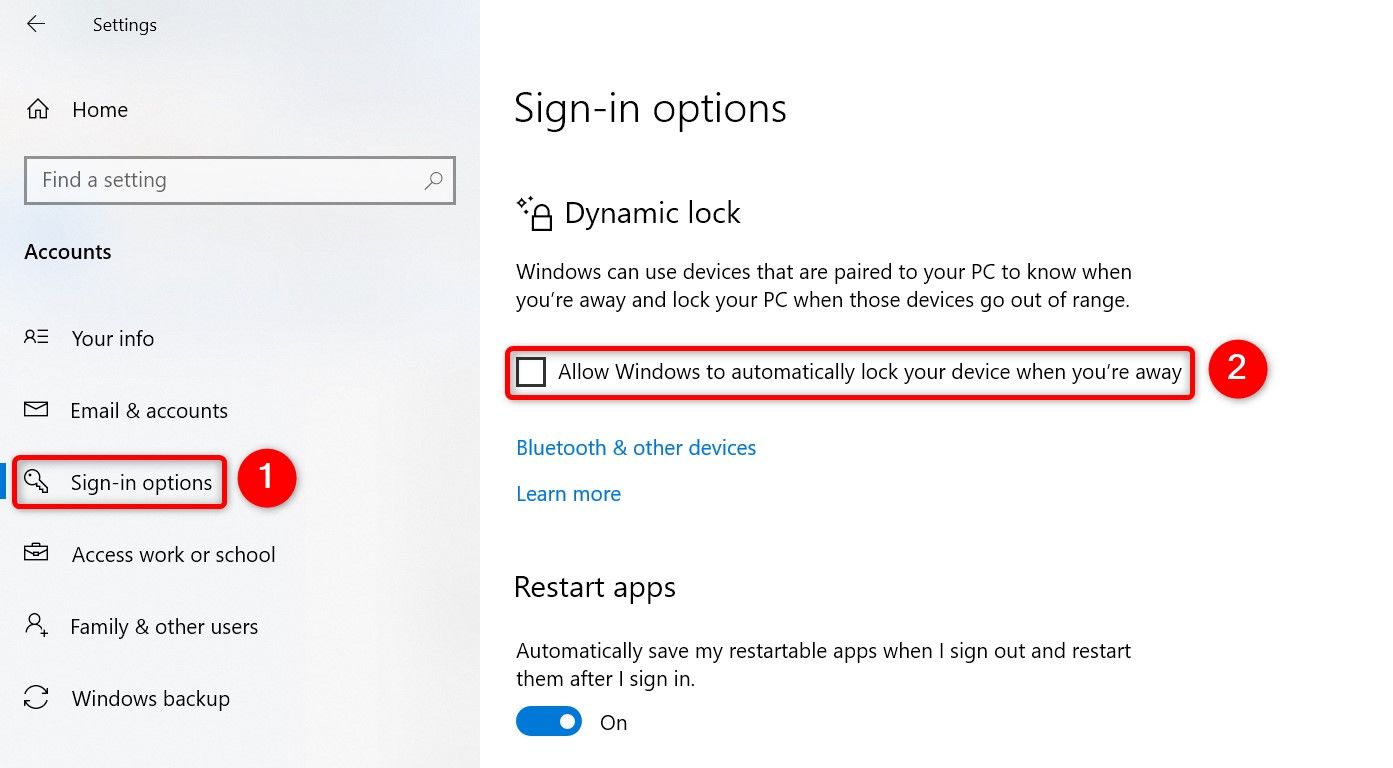
From the left sidebar, choose “Sign-In Options.” On the right pane, in the Dynamic Lock section, turn off the “Allow Windows to Automatically Lock Your Device When You’re Away” option.
You’re done.
How to Turn Off the Logon Option in Your Screensaver Configuration
When you configure a screensaver, Windows offers the option to display the lock screen when the screensaver is deactivated. Turn off this feature to prevent your PC from locking itself.
On Windows 11
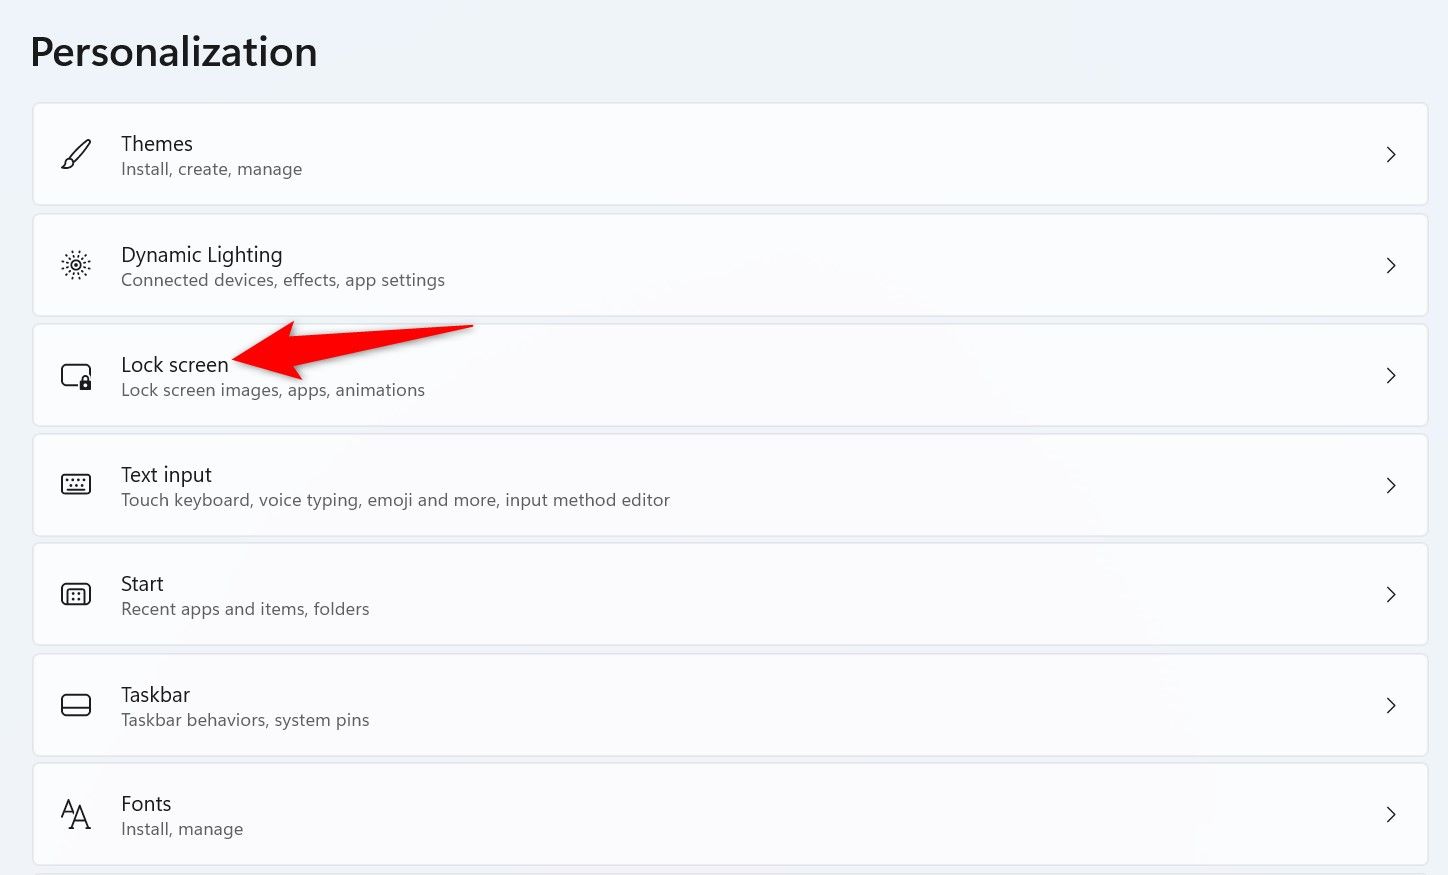
Go to your desktop (by pressing Windows+D), right-click anywhere blank, and choose “Personalize.” On the following screen, select “Lock Screen.”
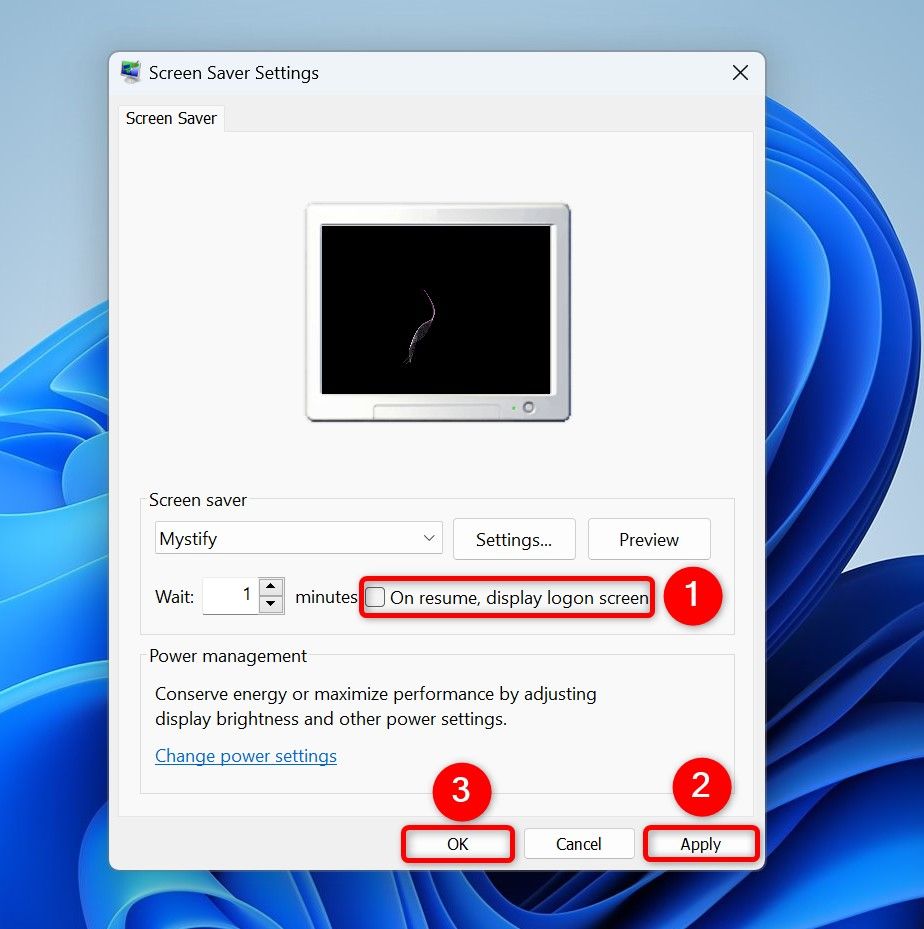
From the Related Settings section, select “Screen Saver.” On the Screen Saver Settings window, disable the “On Resume, Display Logon Screen” option. Then, choose “Apply” followed by “OK.”
That’s it.
On Windows 10
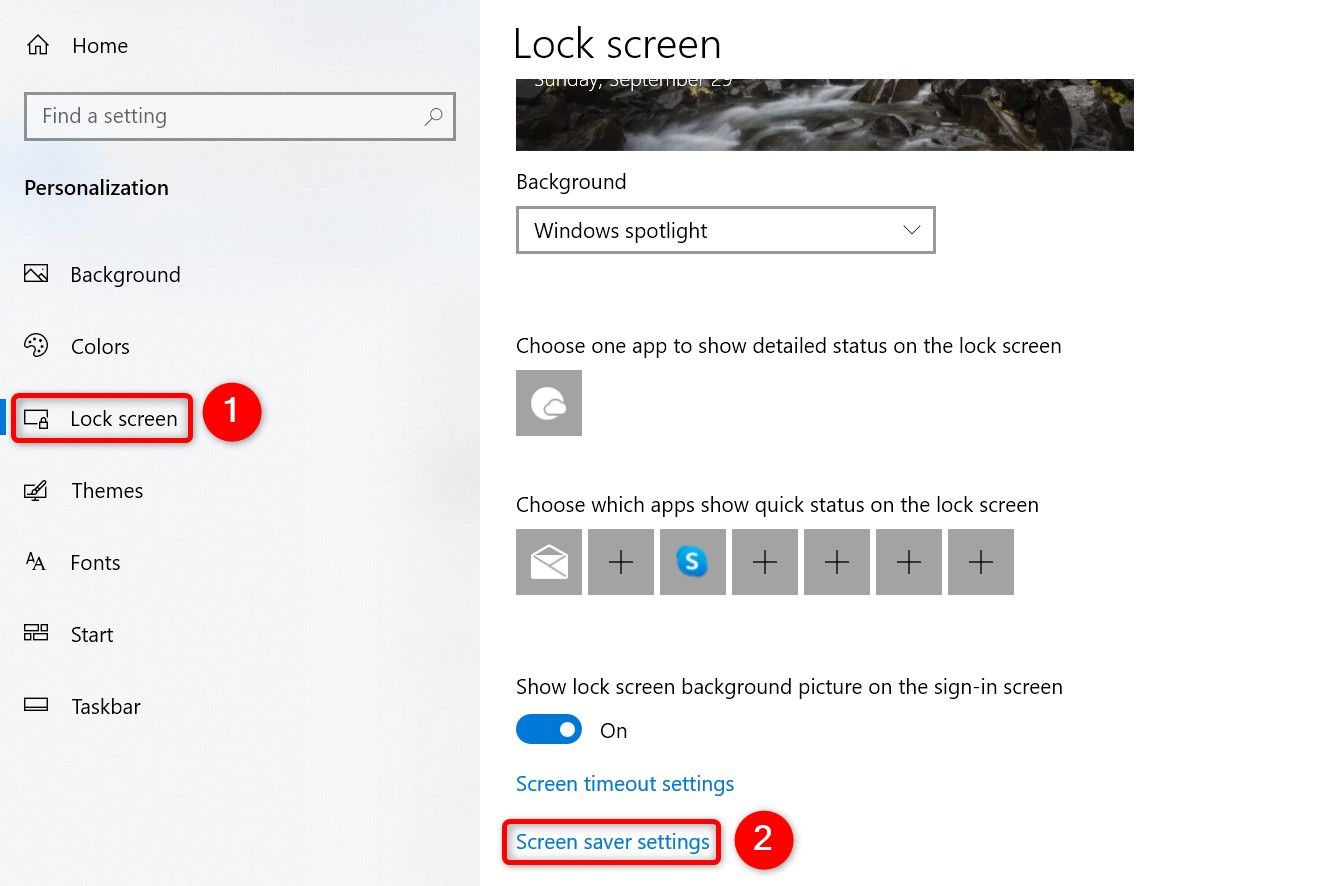
Access your desktop (by pressing Windows+D), right-click any blank space, and then click “Personalize.” On the open screen, from the left sidebar, select “Lock Screen.” On the right pane, at the bottom, choose “Screen Saver Settings.”
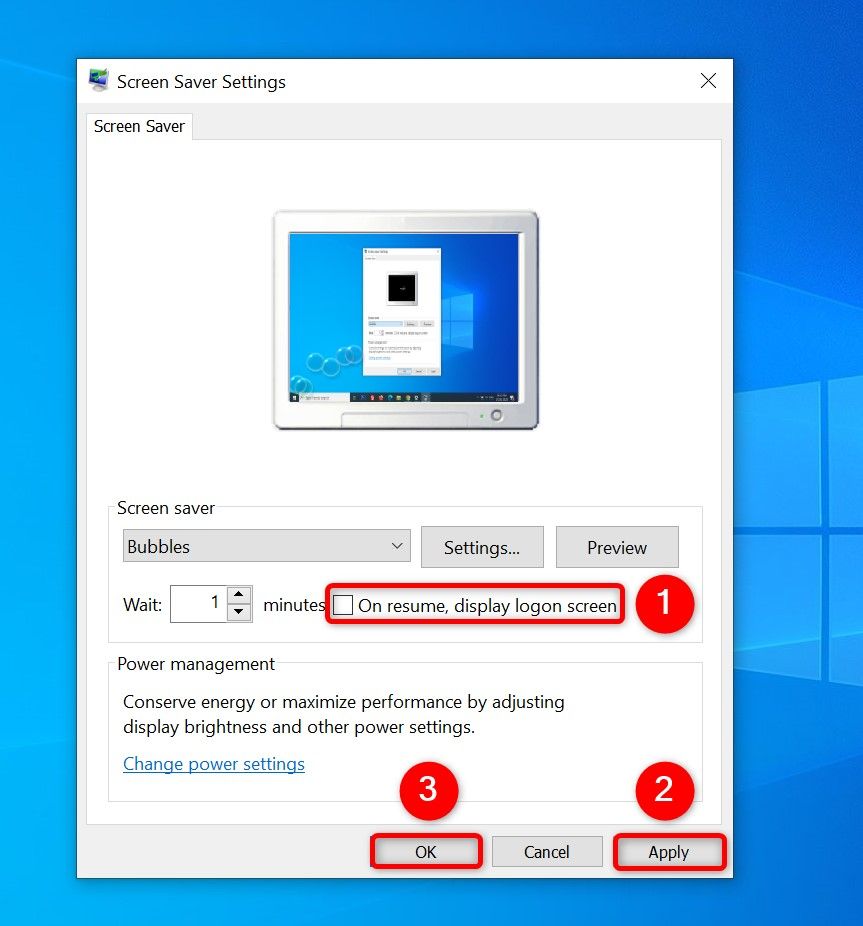
Turn off the “On Resume, Display Logon Screen” option. Then, select “Apply” followed by “OK.”
You’re done.
Method 1. Change a Sign-In Option
One way to prevent Windows from locking itself is to change a sign-in option. This ensures you aren’t asked to log in to your account.
On Windows 11
Open Settings by pressing Windows+i. From the left sidebar, select “Accounts.” On the right pane, choose “Sign-In Options.”
In the Additional Settings section, click the “If You’ve Been Away, When Should Windows Require You to Sign In Again?” drop-down menu and choose “Never.”
That’s it.
On Windows 10
Launch Settings with Windows+i. Select “Accounts” and choose “Sign-In Options.” On the right pane, in the “Require Sign-In” section, click the drop-down menu and choose “Never.”
You’re all set.
Method 2. Change a Power Setting Option
You can tweak a power setting option so your PC never goes to sleep, preventing the system from being locked.
On Windows 11
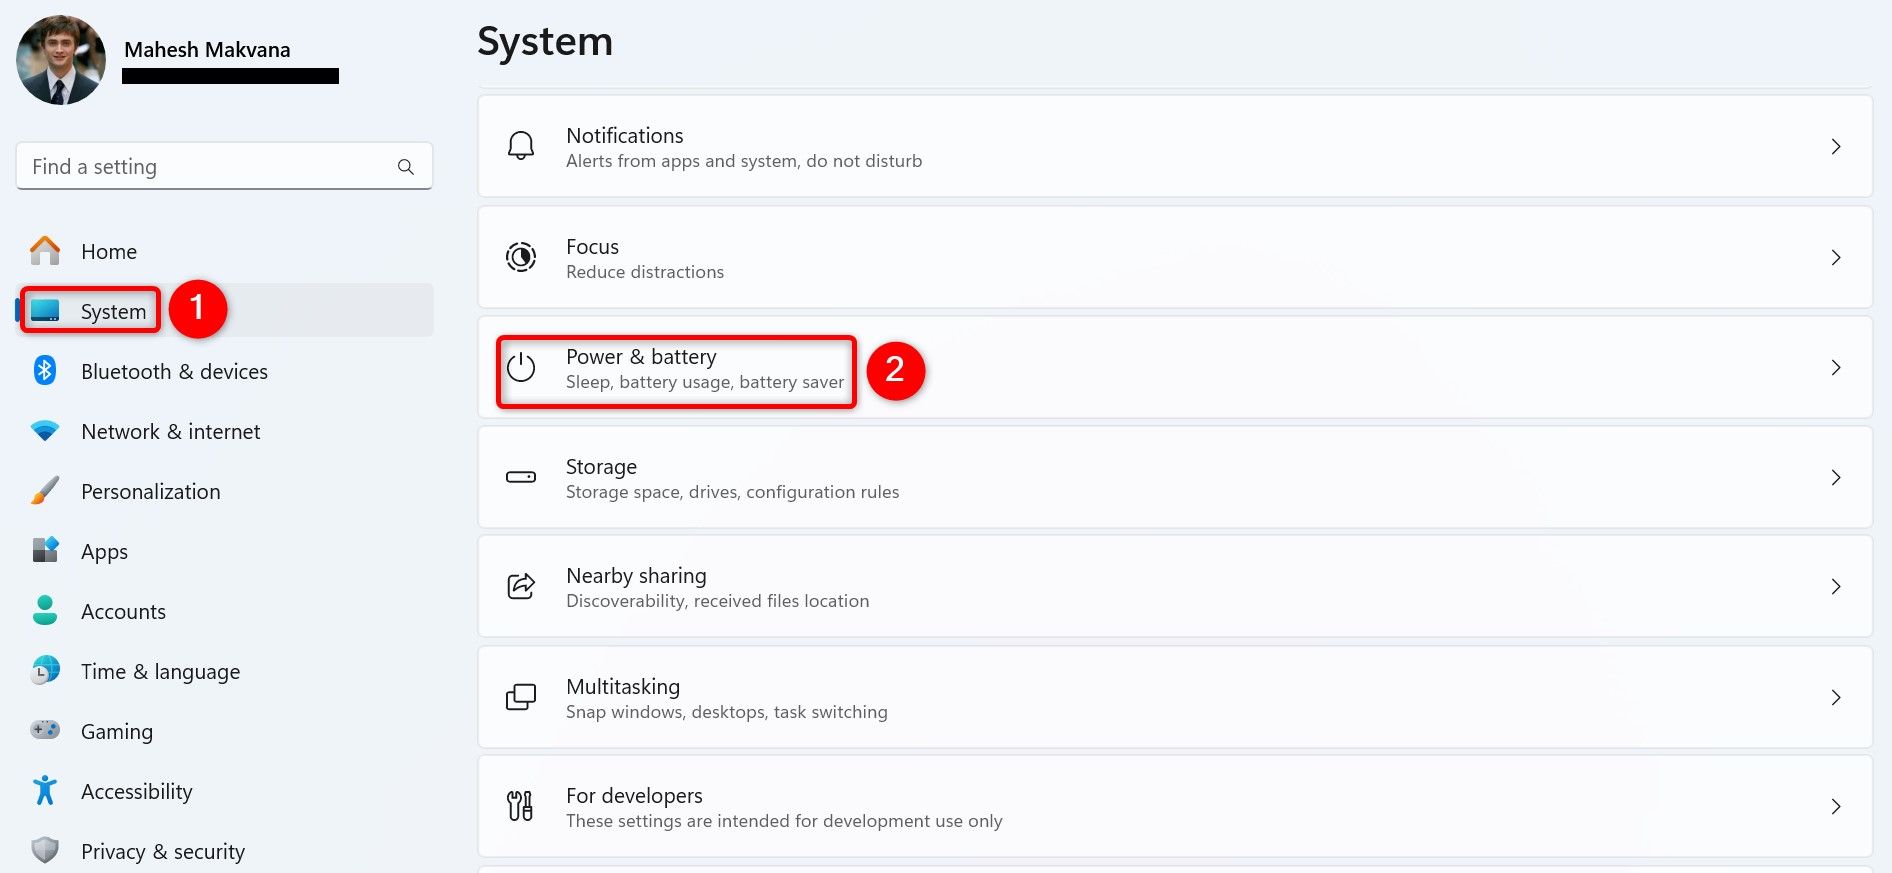
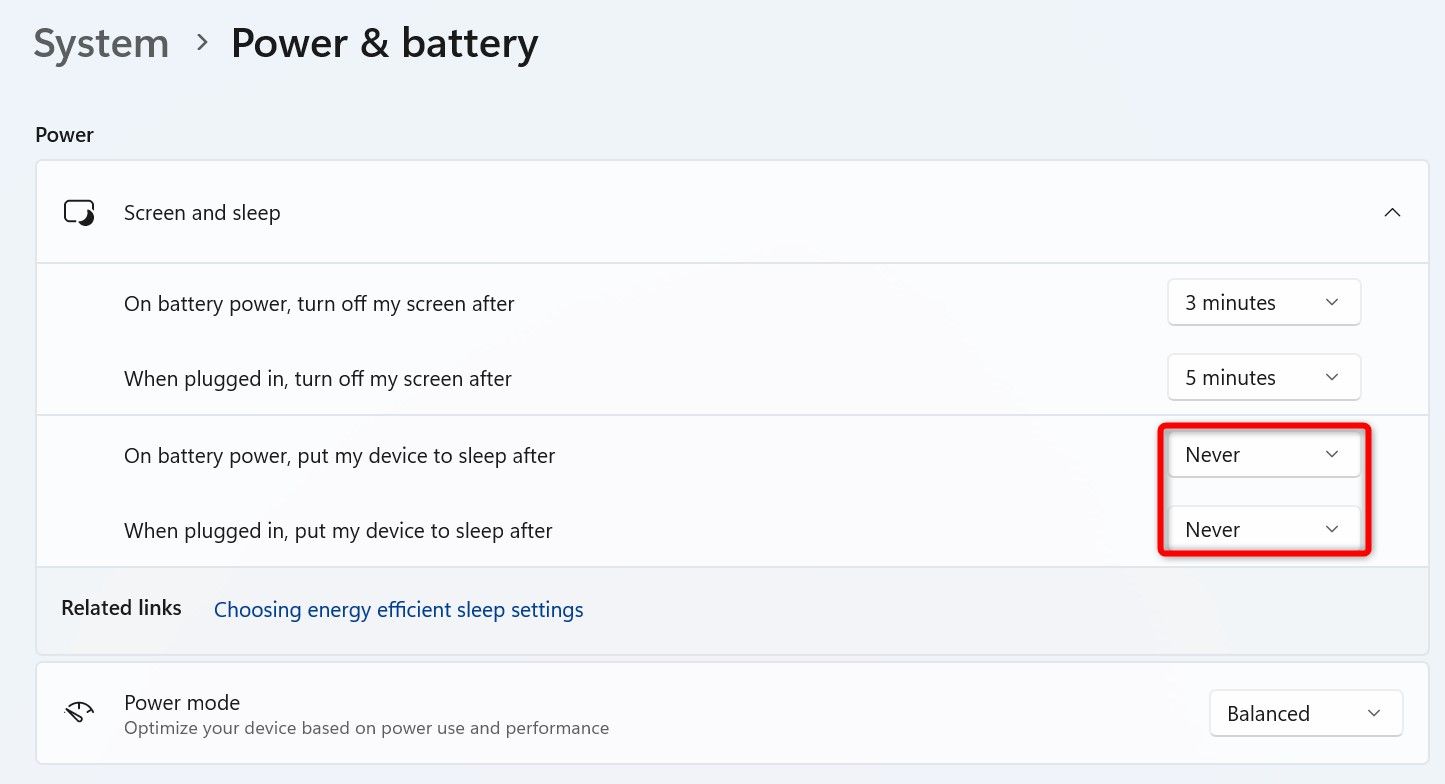
Launch Settings using Windows+i. From the left sidebar, choose “System.” On the right pane, select “Power & Battery.”
Select “Screen and Sleep” to expand the menu. In the expanded menu, click the “On Battery Power, Put My Device to Sleep After” drop-down menu and choose “Never.” Similarly, click the “When Plugged In, Put My Device to Sleep After” drop-down menu and select “Never.”
You’re done.
On Windows 10
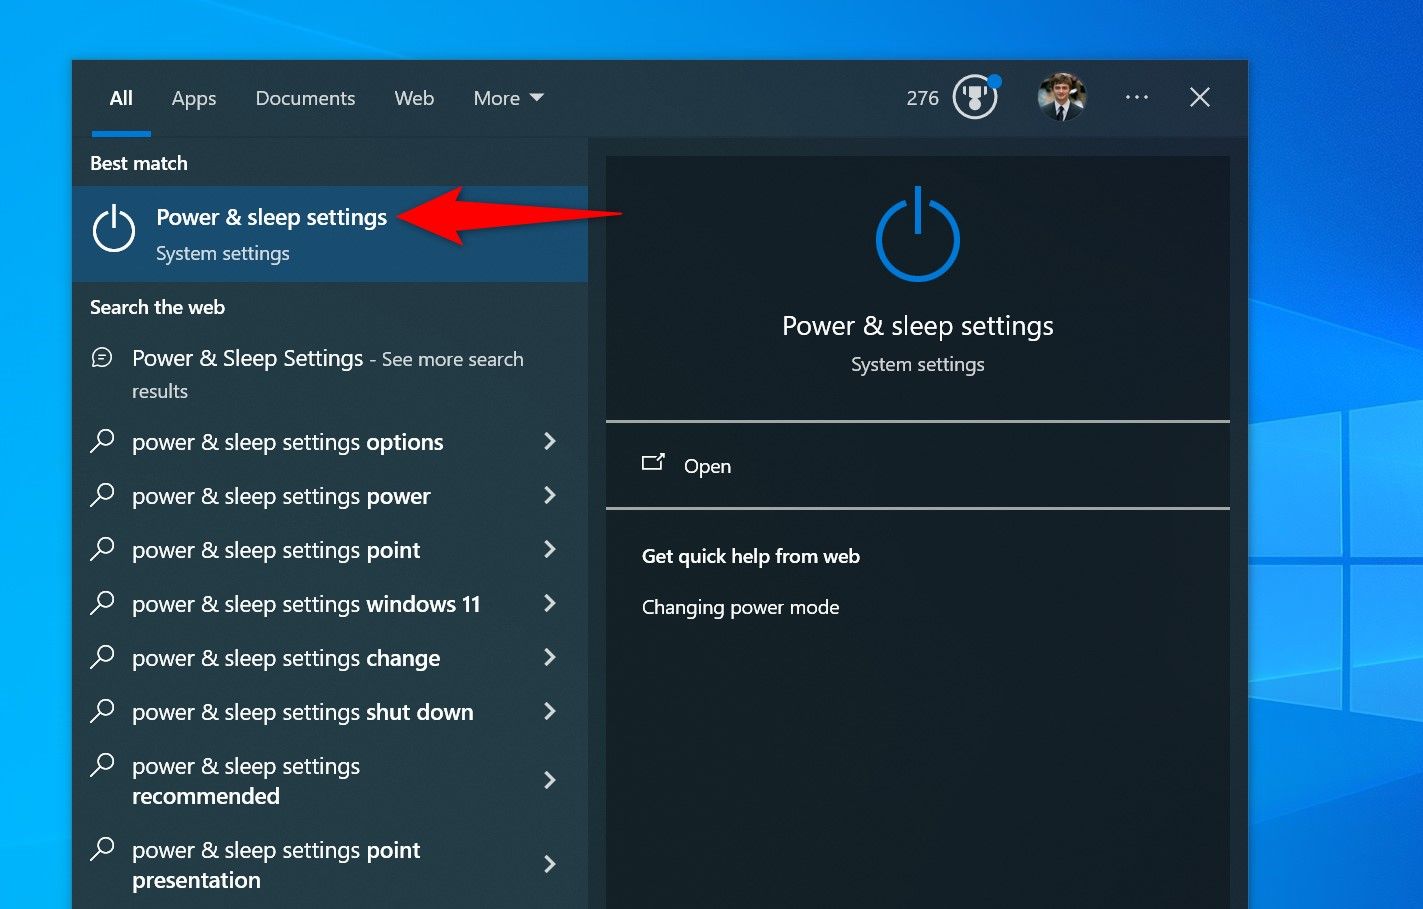
Open Windows Search, type Power & Sleep Settings, and select the item with that name in the search results.
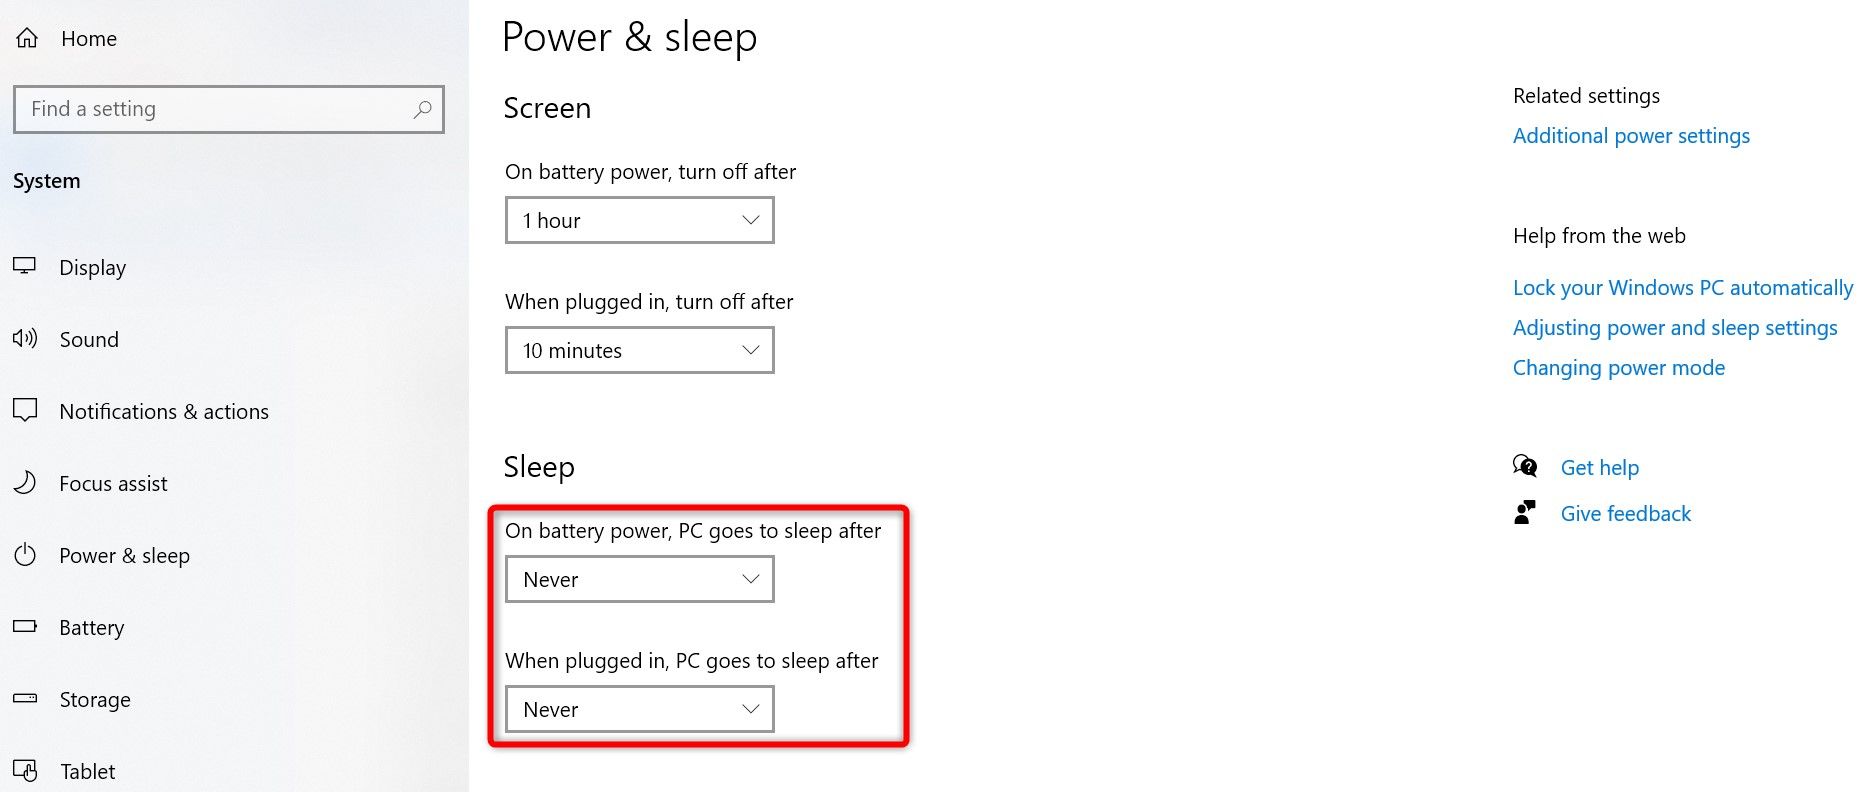
In the Sleep section, click both drop-down menus (one at a time) and choose “Never.”
You’re set.
Method 3. Use the Local Group Policy Editor
On Windows 11 or Windows 10’s Pro edition, you can use the Local Group Policy Editor tool to prevent your PC from automatically locking itself.
The following steps apply to both Windows 11 and Windows 10.
Start by opening Run using Windows+R. Type the following in the open box and press Enter:
gpedit.msc
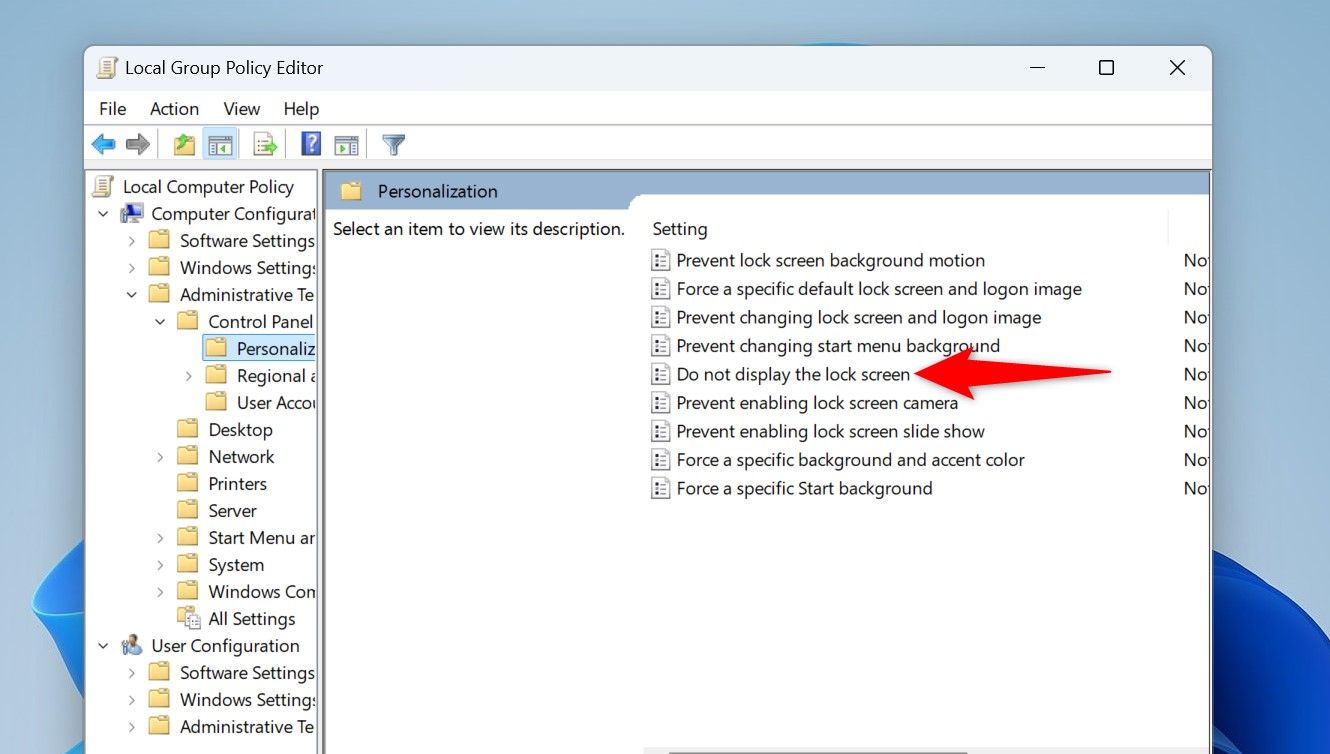
In Local Group Policy Editor, navigate to the following path:
Computer Configuration > Administrative Templates > Control Panel > Personalization
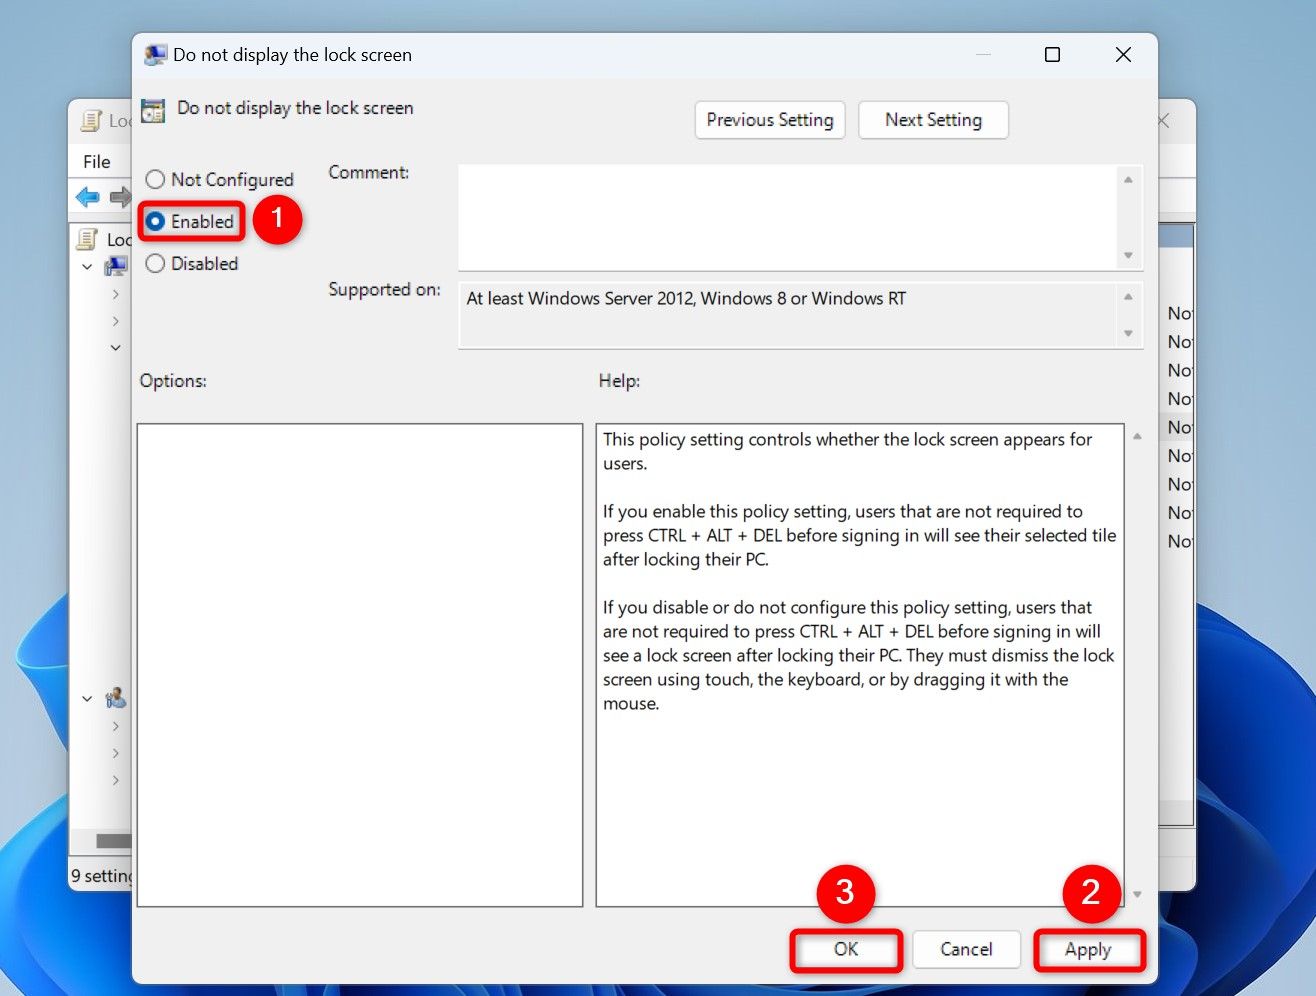
On the right pane, double-click the item that says “Do Not Display the Lock Screen.”
On the window that opens, select “Enabled” and choose “Apply” followed by “OK.”
You’re set.
Method 4. Tweak the Windows Registry
On Windows 11 and Windows 10’s Pro and Home editions, you can tweak a Windows registry value to prevent the PC from automatically locking itself. Use the same steps below for both Windows versions.
Making accidental changes in the Windows registry can cause your system to be unstable. Follow the instructions carefully to avoid unexpected results.
Start by launching Run using Windows+R, type the following in the box, and press Enter:
regedit
In the User Account Control prompt, select “Yes.”
In Registry Editor, navigate to the following path.
You can copy the following path, paste it in the Registry Editor’s path box, and press Enter.
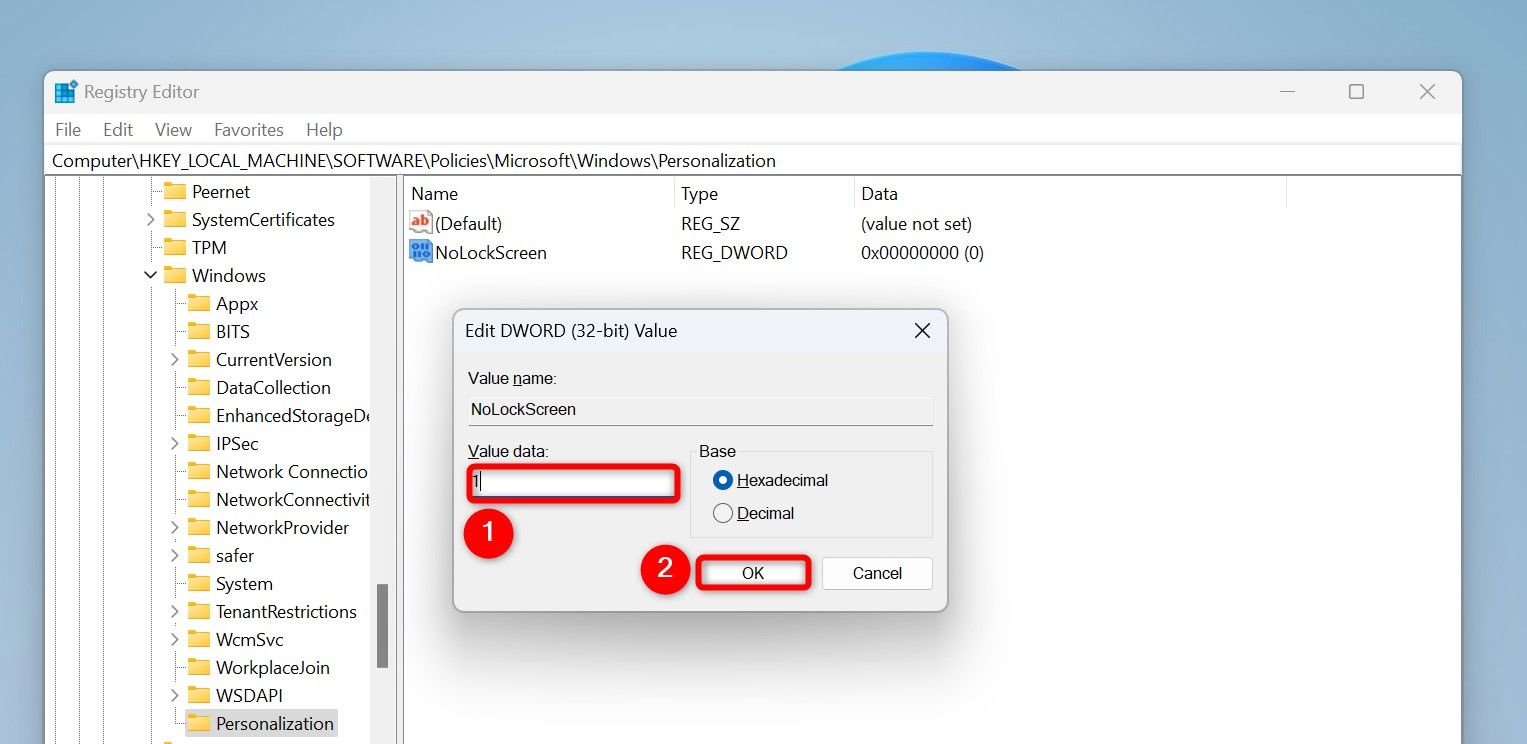
HKEY_LOCAL_MACHINE\SOFTWARE\Policies\Microsoft\Windows\Personalization
If you don’t see the Personalization key, right-click “Windows,” choose New > Key, type Personalization, and press Enter.
On the right pane, right-click anywhere blank and choose New > DWORD (32-bit) Value. Type NoLockScreen as the item name and press Enter. Double-click the newly created item, type 1 in the “Value Data” field, and select “OK.”
Restart your Windows 11 or Windows 10 PC to bring the changes into effect. And that’s it.


