Taking screenshots is easy, but what about a longer, more complicated video recording of what’s happening on your phone? Whether you’re taking a recording to show something fun to your friends or creating a video for professional purposes, there are a number of ways to record the screen on an Android device.
Here are easy ways to record the screen on an Android device, whether it’s by downloading an app, using the built-in screen recorder on Android 12, or using in-built tools available on some older Android versions.
Recording your screen on an Android 12 device
It’s fairly easy to record your screen on an Android 12 device. After teasing the option before Android 11’s launch, Google’s developers have designed a built-in screen recorder for Android versions 11 and higher. Here’s how to use the feature.
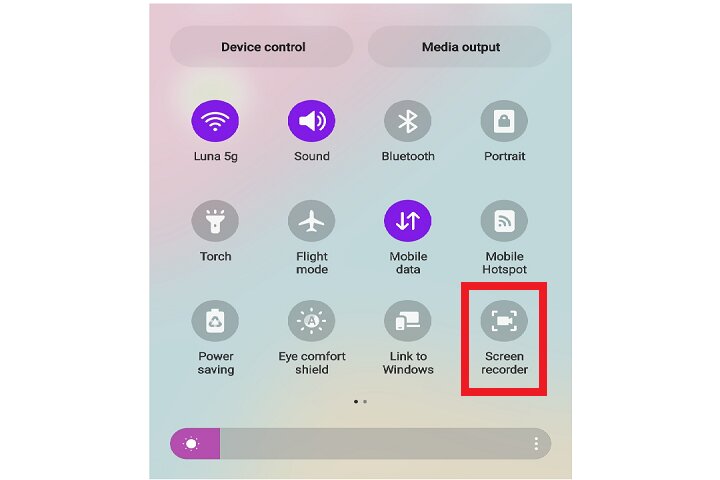
Step 1: Pull down your phone’s Quick settings panel by swiping down the Notification panel twice.
Step 2: Select the Screen recorder option.

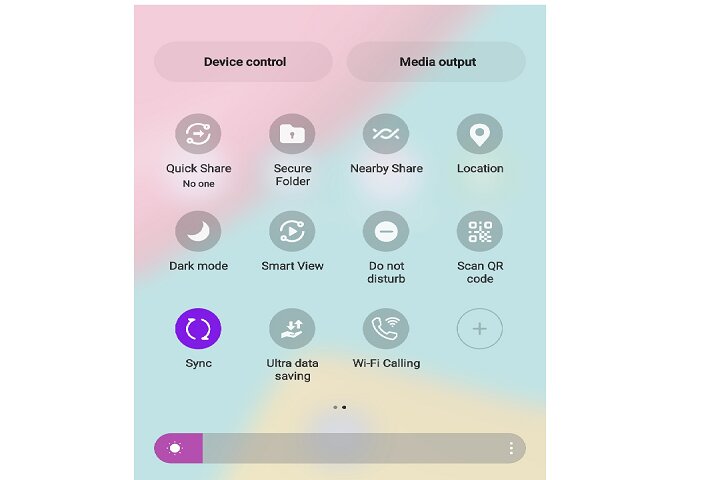
Step 3: If you don’t see the Screen Recorder option, click on the Plus symbol that appears at the end of all the icons.

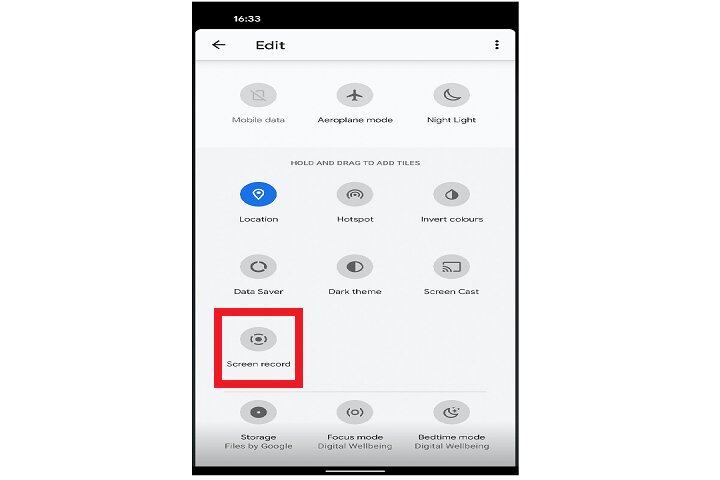
Step 4: Now select the Screen recorder option, drag it down, and place it among the other icons in the Quick Settings menu.
Step 5: Once you click on the Screen Recorder option, you will be asked whether you also want to record audio and show touches on the screen.

Step 6: Make your desired choices, and then select Start recording to begin recording your screen.
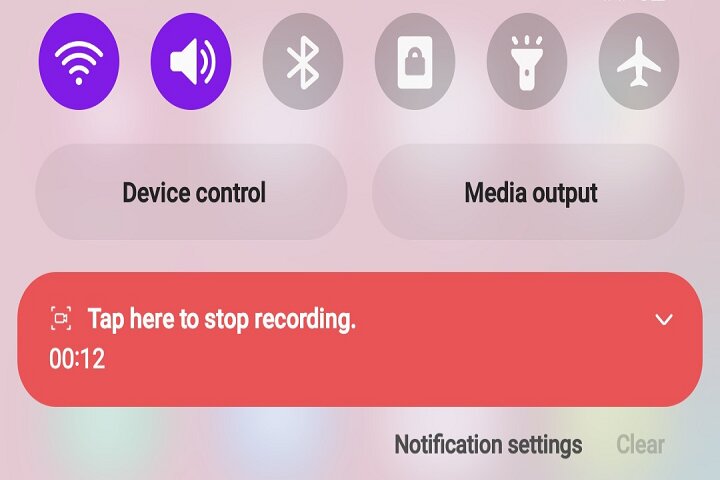
Step 7: A red recording icon or notification will appear at the top of your screen while your phone is recording. You can click on the Tap here to stop recording option whenever you’re done capturing your screen.

Recording your screen on Android 10 devices
While the process to record your screen on Android 12 and 11 is the same, Android 10 has a similar method you can try. For instance, Samsung and LG phones on Android 10 have a similar Screen Record tool in the Quick Settings panel. Here’s how to use it.
Step 1: Open your Quick settings panel by swiping down on your screen.
Step 2: Scroll down to find the Screen record option. If you don’t see it, follow the same steps as the section above. Find the Edit or Plus icon, find the Screen record option, and drag it into the Quick Settings panel.

Step 3: Press Start, wait for the countdown, and your phone will begin recording the screen.
Step 4: Samsung also lets you add your own video to your footage. Just select the Front camera icon (it looks like a person’s silhouette).

Step 5: If you’re recording on a Galaxy Note phone, you’ll also be able to use the S Pen to draw on the recording. Just select the Pencil icon at the top.
Step 6: You can try this technique with most phones supporting the screen-recording function.
How to record your screen using apps
Don’t have an Android device that supports built-in screen recording? Don’t worry, you can still use the function with external apps. Here are the best ones we recommend.
AZ Screen Recorder is a simple recording app with no time limits or watermarks. The app also includes the option to cut and edit the video, crop the screen as necessary, replace the audio with whatever you want, and convert sections to GIFs as needed.
Developed by InShot, XRecorder is hugely popular with more than 100 million downloads. You can use the app to share your recordings and take screenshots, and it also provides a range of settings for you to tweak according to your own preferences. These include quality options, the ability to deactivate audio, and also the option to change the orientation of your recordings.
Did you know the native Google Play Games app lets you record your screen? Along with screen recording, the app also lets you upload your video to YouTube. The best part? It’s completely free to use.
Editors’ Recommendations


