Summary
- Resetting network settings reinstalls all adapters, erases saved Wi-Fi networks, and custom DNS settings.
- To perform a network reset, head into Settings > Network & Internet > Advanced Network Settings, click “Network Reset,” choose “Reset Now,” and select “Yes.”
- If network issues persist, your network adapter or ISP might have problems.
If you’re experiencing internet problems or your PC just won’t connect to Wi-Fi, resetting the network settings can help fix the problem. I’ll show you how to do that on your Windows 11 PC.
What Happens When You Reset Network Settings
When you reset network settings, Windows 11 removes and reinstalls all Wi-Fi, Ethernet, and VPN adapters. It deletes all your saved Wi-Fi networks. It also erases your custom DNS settings, proxy settings, and any IP configurations.
If you’ve saved many Wi-Fi networks on your PC and you don’t want to log in to each one after resetting the network settings, export those networks to a file (as shown in the section below).
When Should You Perform a Network Reset?
There are many situations where a network reset can help. For example, if you have trouble connecting to the internet or you’re facing other network problems, resetting the network configuration can likely resolve those issues. It also helps fix frequent Wi-Fi connection drops, if you’re experiencing that.

Related
How to Reset the TCP/IP Stack on Windows 10 and Windows 11
“Reset it to default” isn’t a cliche like “Have you tried turning it off and back on again,” but it works nearly as often.
If someone has configured a VPN or proxy settings and those settings are interfering with your work, a network reset can erase those items to fix your problem. You may want to bring your network settings to the defaults if you’re switching networks and want to start fresh.
How to Reset Network Settings
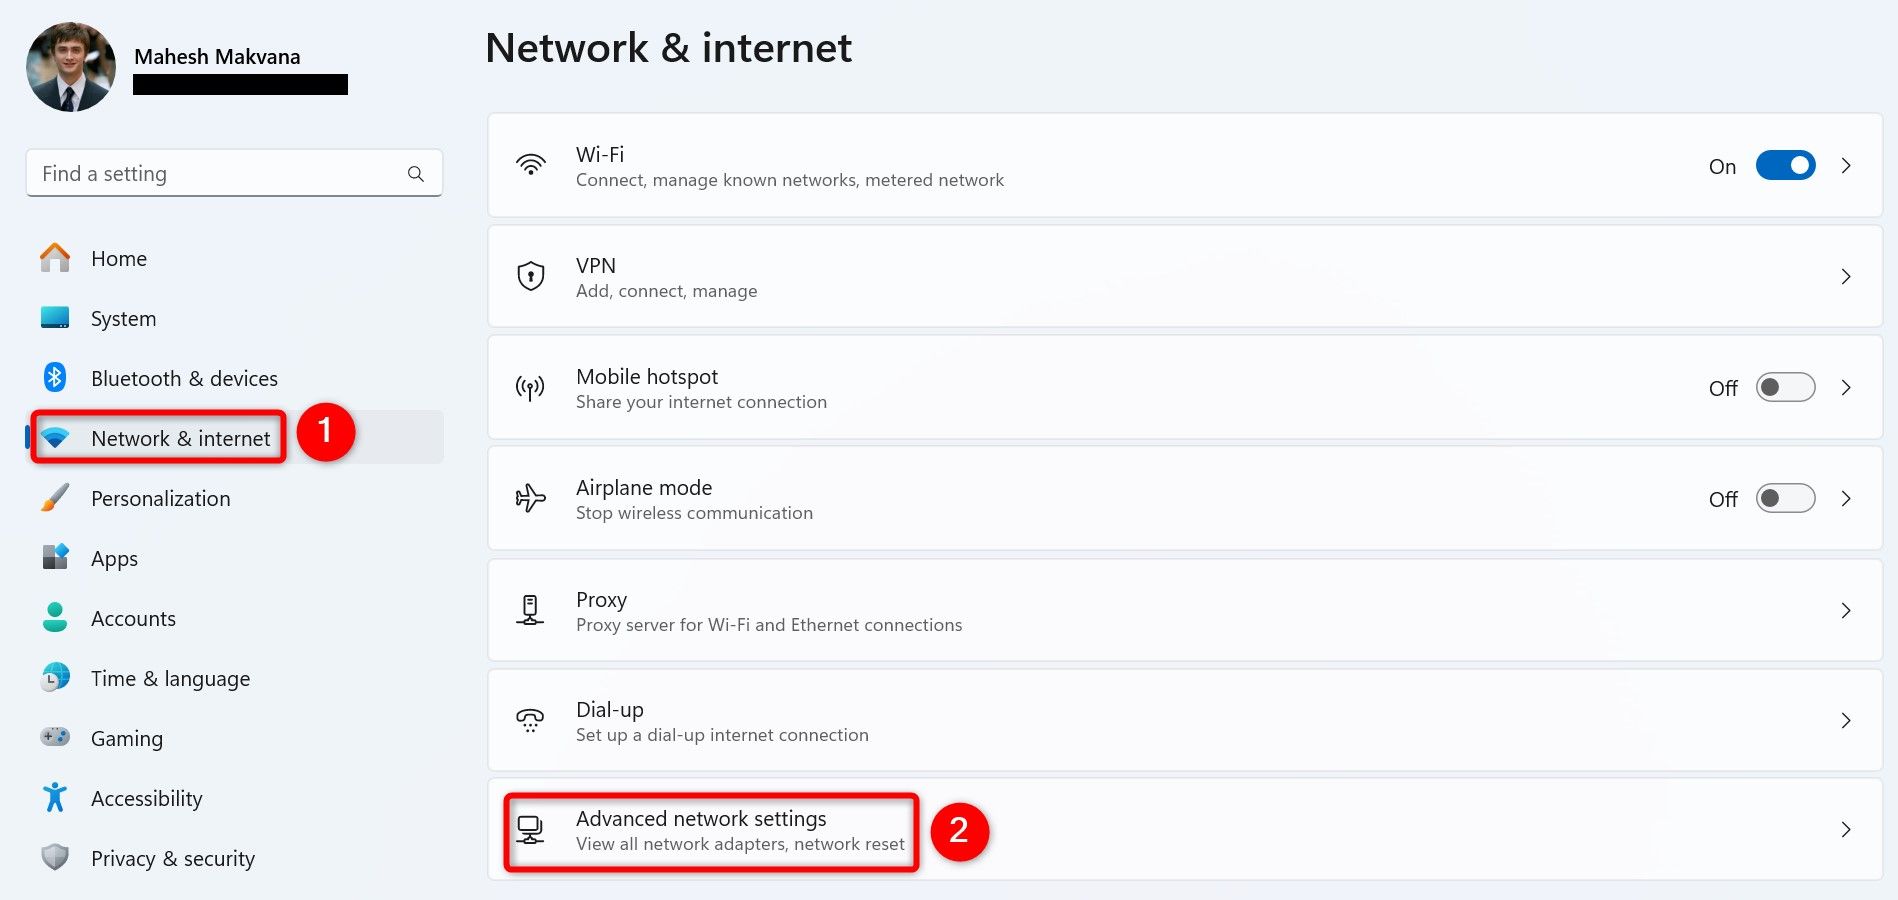
To perform the network reset process on Windows 11, launch Settings by pressing Windows+i. From the left sidebar, choose “Network & Internet.” On the right pane, select “Advanced Network Settings.”
On the following screen, in the More Settings section, choose “Network Reset.”
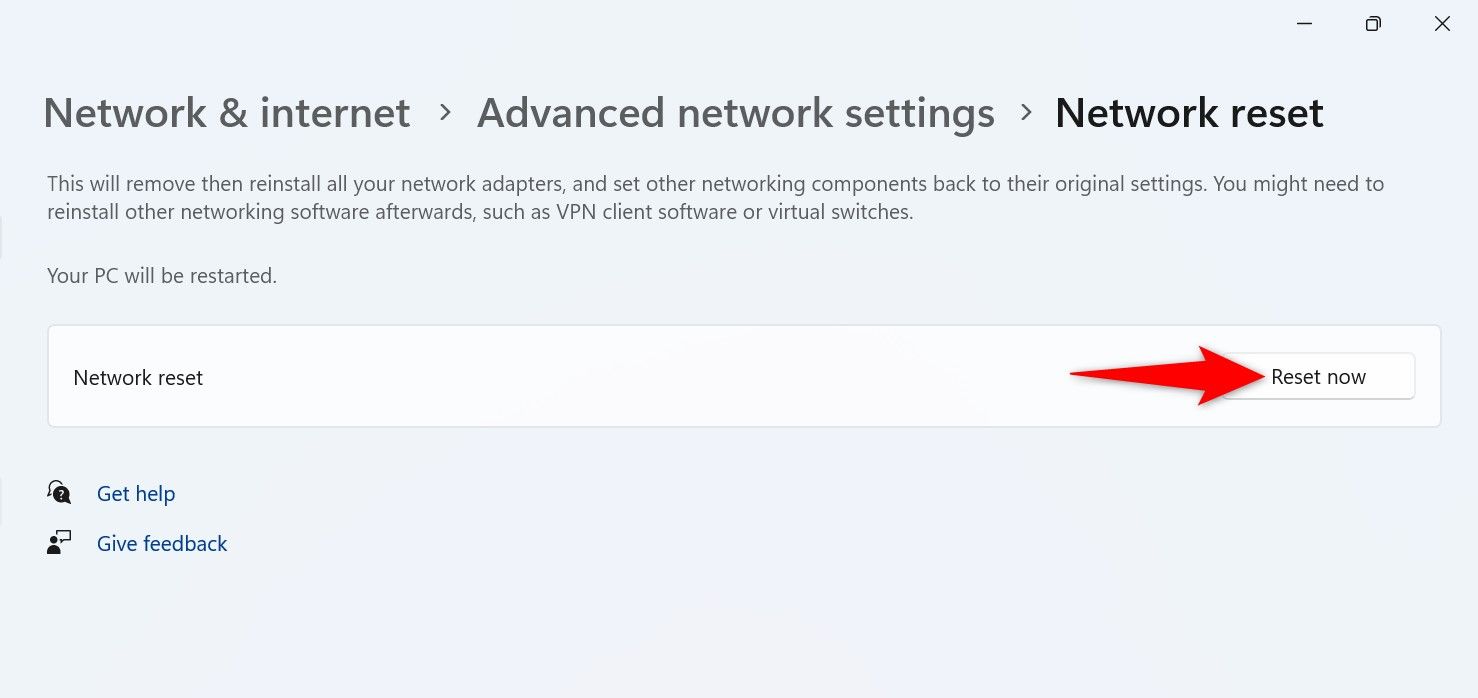
On the following page, next to Network Reset, click “Reset Now.”
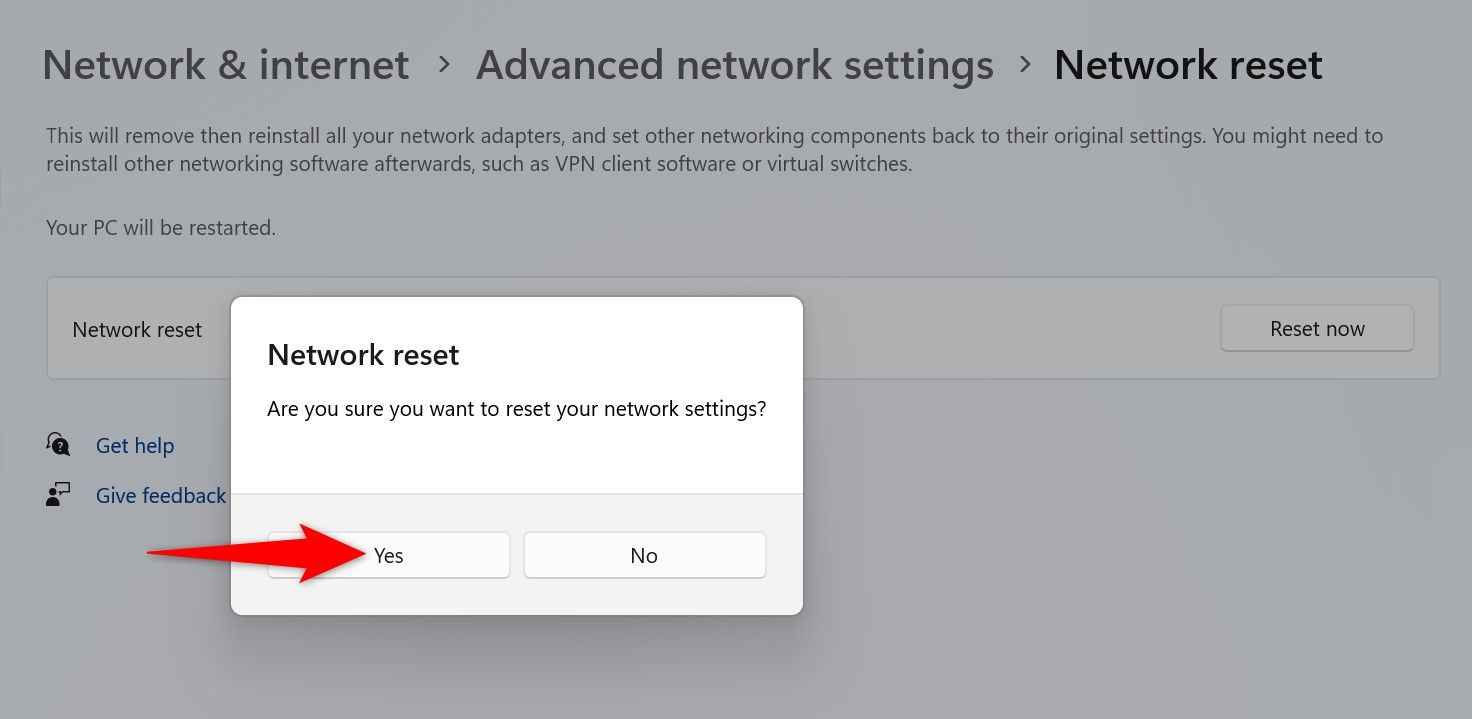
You’ll get a prompt asking if you really want to erase your network settings. Click “Yes” to proceed.
Windows 11 will begin erasing your network settings.
What to Do After Resetting the Network Settings?
After you’ve reset the network settings, you’ll want to configure a few network options to get connected to the internet. You’ll want to connect to your Wi-Fi networks by selecting them on the Wi-Fi list and entering their passwords. You may also want to install your VPN if you had one before.
If you had assigned a static IP address or configured custom DNS settings, you may want to add those details again to your system, as network reset has erased them.
Export Saved Wi-Fi Networks on Your PC
If you have saved many Wi-Fi networks on your PC, you can export them to individual files along with their passwords to your system. This lets you quickly connect to those networks after resetting the network settings.

Related
To do that, make a folder where you want to save the Wi-Fi networks. For example, open the root folder of the C drive and create a folder named WiFiBackup. Then, open Windows Search (press Windows+S), type Command Prompt, and select the utility in the search results.
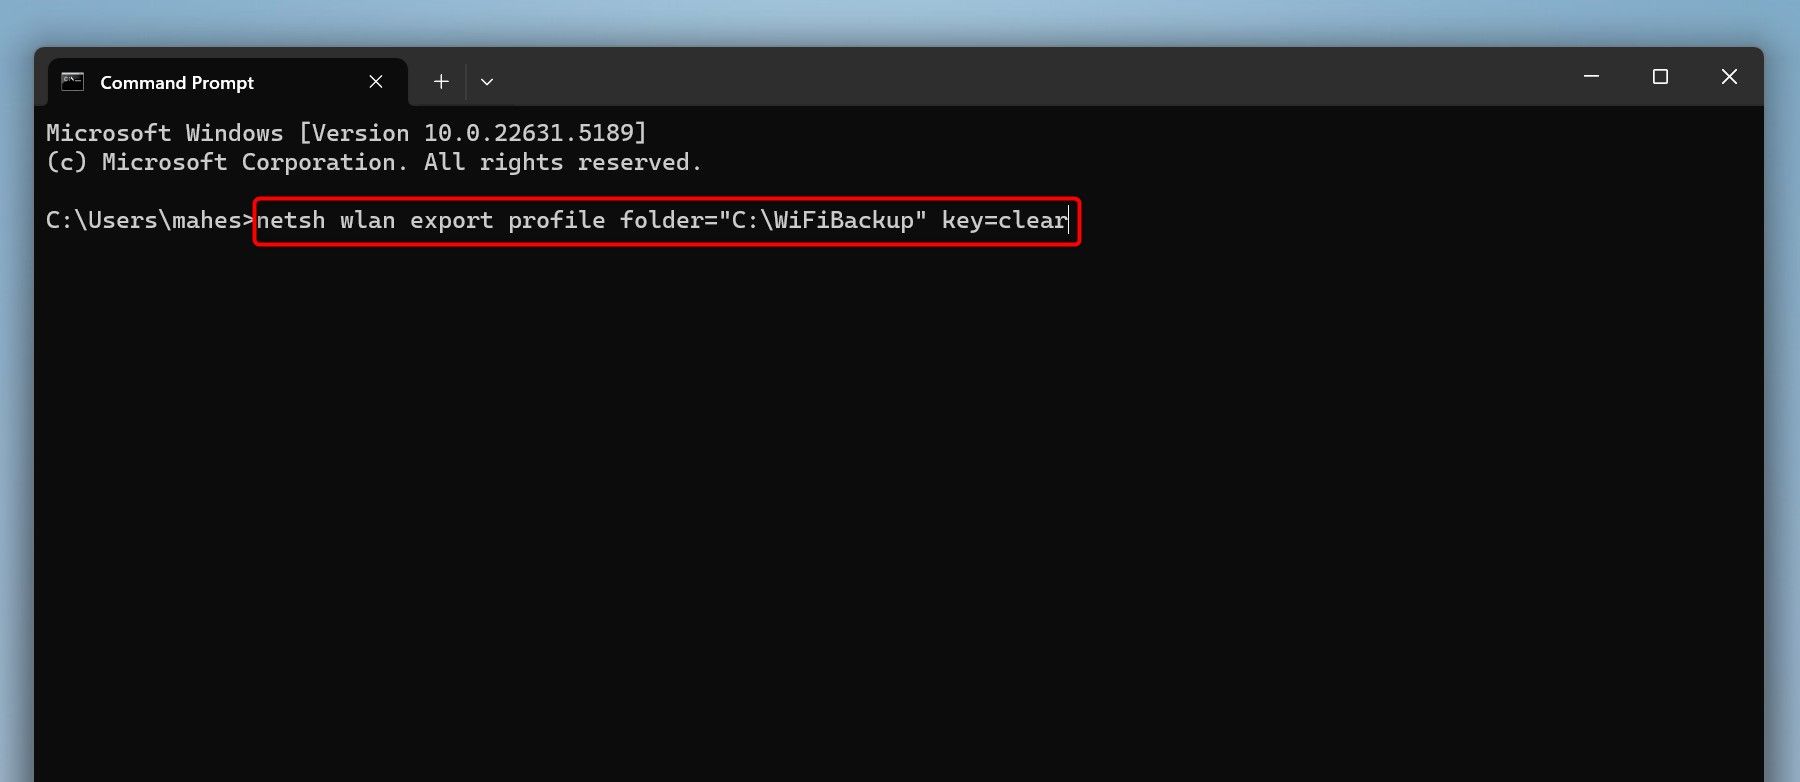
On the Command Prompt window, type the following command and press Enter:
netsh wlan export profile folder="C:\WiFiBackup" key=clear
In the WiFiBackup folder, you’ll find an XML file for each of your saved Wi-Fi networks. Open the file using an app like Microsoft Edge to see the network’s password. Later, you can import this file on your PC. To do that, open Windows Search (press Windows+S), type Command Prompt, and choose “Run as Administrator.” Select “Yes” in the User Account Control prompt. On the CMD window, type the following command and press Enter:
for %f in ("C:\WiFiBackup\*.xml") do netsh wlan add profile filename="%f"
What if the Network Issues Persist Even After a Reset?
If you continue to face issues even after resetting your network settings, the problem might lie with other components and not your system. It’s possible your physical network adapter is faulty, causing connectivity problems. In this case, you’ll have to repair or replace the physical adapter.
If your ISP (Internet Service Provider) has issues on its end, you can’t fix them on your system. You’ll have to reach out to them and see what the problem is. Also, if malware or a firewall setting option is causing the problem, you’ll have to look into that and fix it. For example, you can run an antivirus scan on your PC to find and remove malware.

Related
How to Fix Common Issues With Wi-Fi in Windows 11
To fix common issues with your Wi-Fi in Windows 11, there are some quick and easy tricks you can use.
To check whether the issue is with your PC or your network, try using another device on your network. If this device also faces the same issues, the issue is with your network and not your computer. In this case, you might want to consult a network technician to figure out the problem and then assist in fixing it before you connect your Windows 11 PC to it.
And that’s how you erase the custom network configuration and bring all the network settings back to the defaults on Windows 11. If that doesn’t help, you also have the option to factory reset your Windows 11 PC.


