Do you want to receive custom messages or alerts at a predefined time? If so, you have various ways to schedule those notifications on your Windows 11 PC. I’ll show you your options.
Using Task Scheduler to Set a Notification
The easiest way to schedule tasks on Windows 11 is by using the built-in Task Scheduler utility. You tell the utility the action to perform and the trigger, and it’ll take care of the rest.
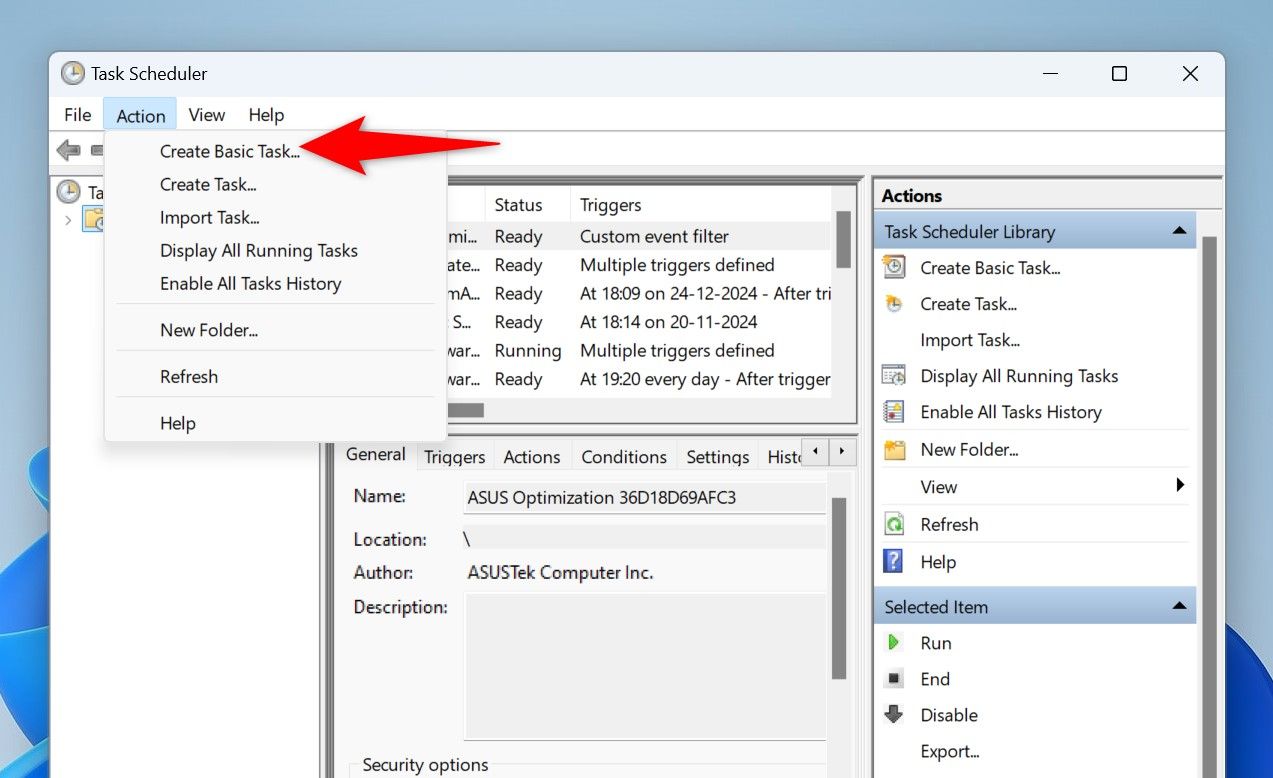
To schedule a custom notification with this method, launch Windows Search (press Windows+S), type Task Scheduler, and open the utility. From the menu bar, select Action > Create Basic Task.
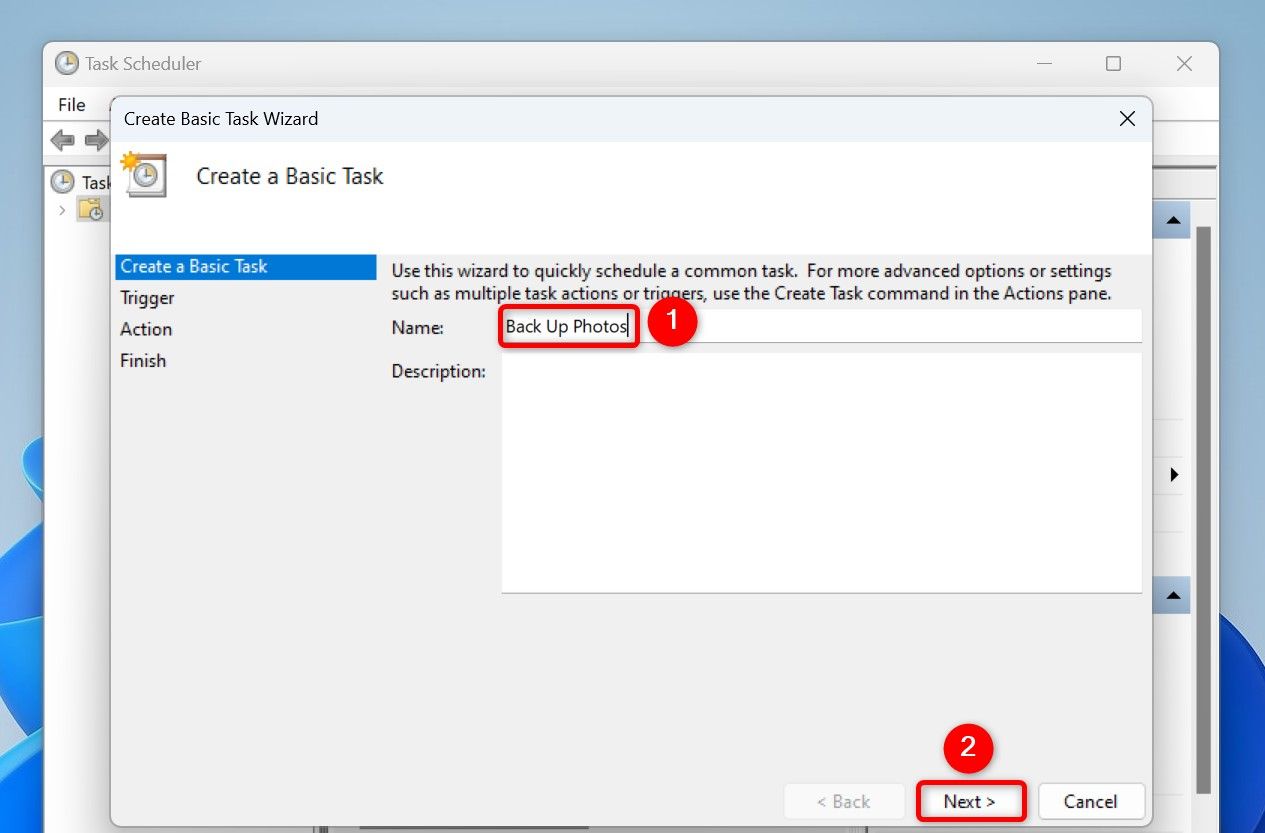
Select the “Name” field and type a name for your task, such as Back Up Photos. Optionally, type a description for the task in the “Description” field, then, click “Next.”
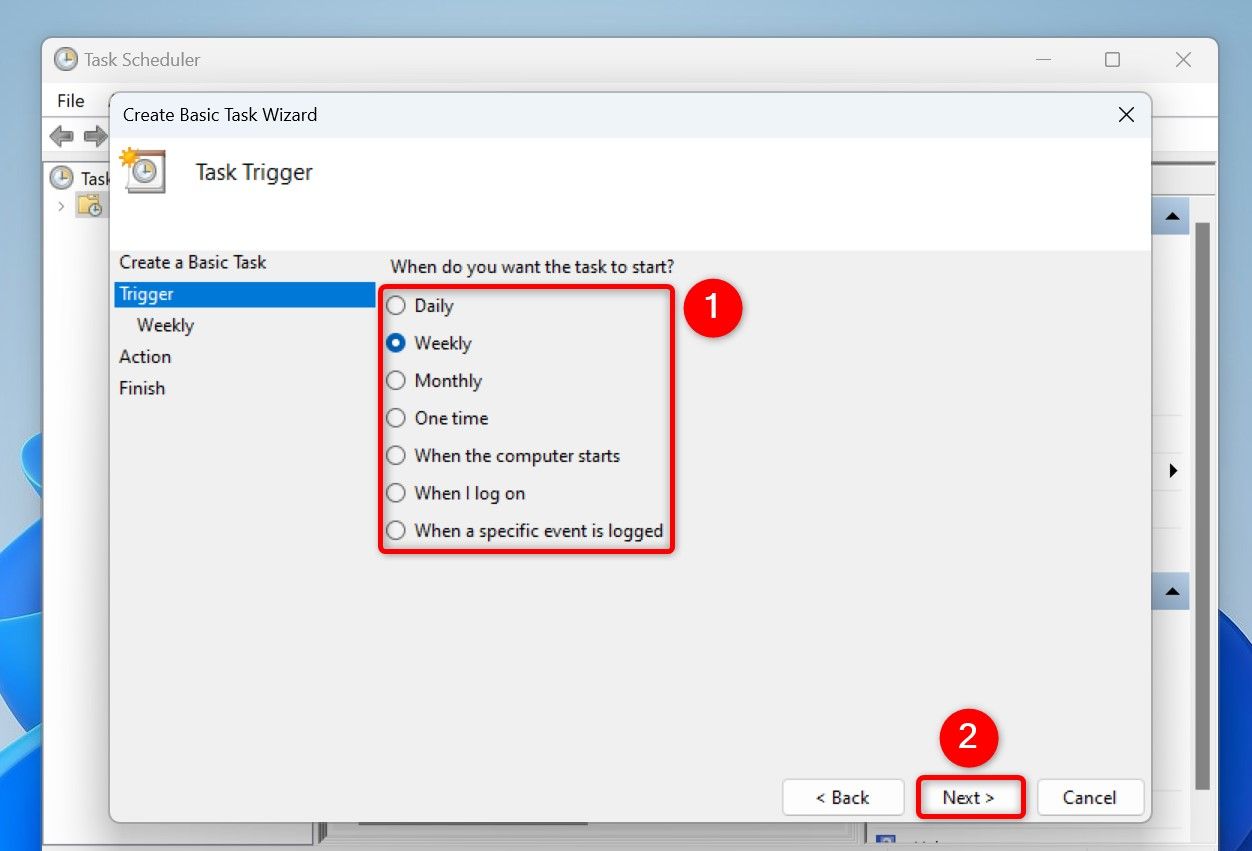
Select the frequency of the task. This is how often the task should be performed. If you want to receive the alert every week, for example, choose “Weekly.” Then, click “Next.”
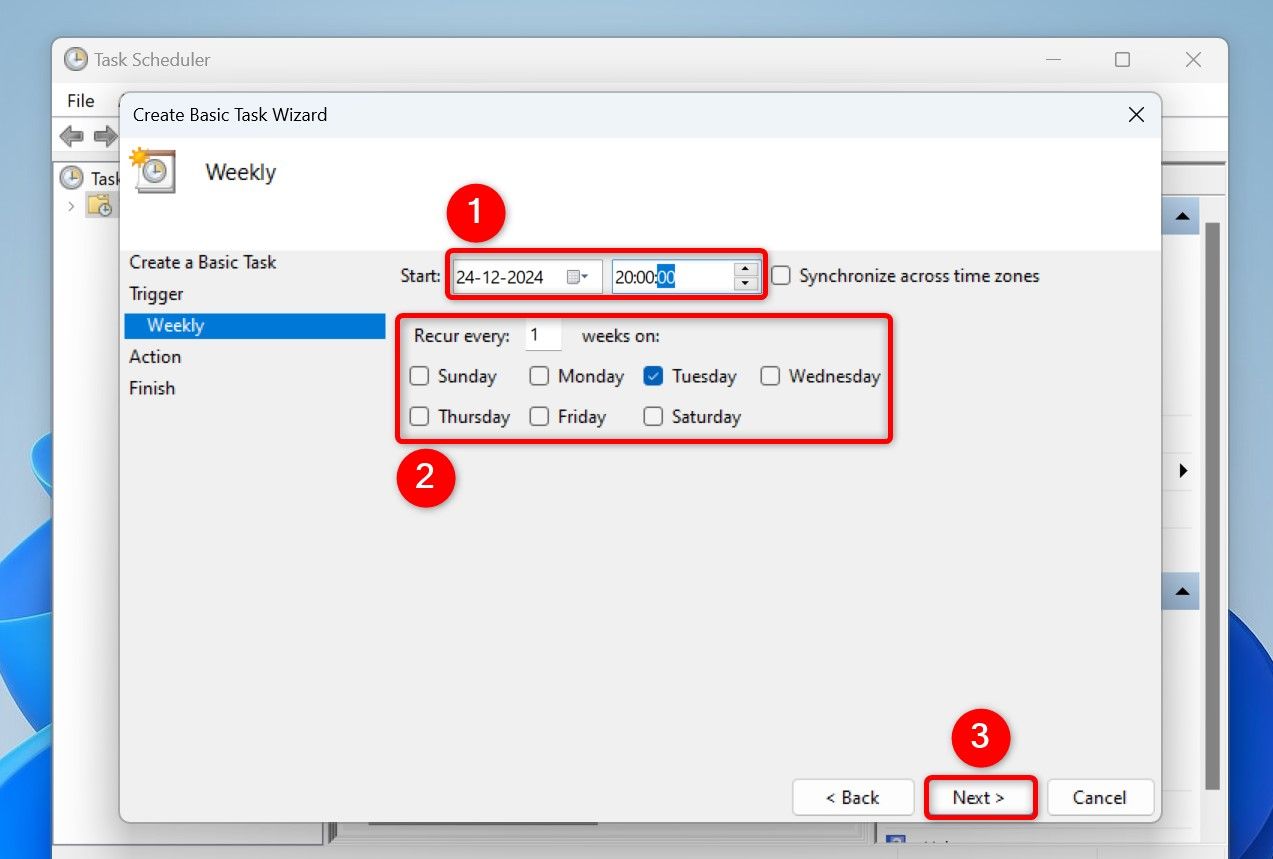
Choose the “Start” field and select the date and time when the task should be performed. Fill in any other options and click “Next.”
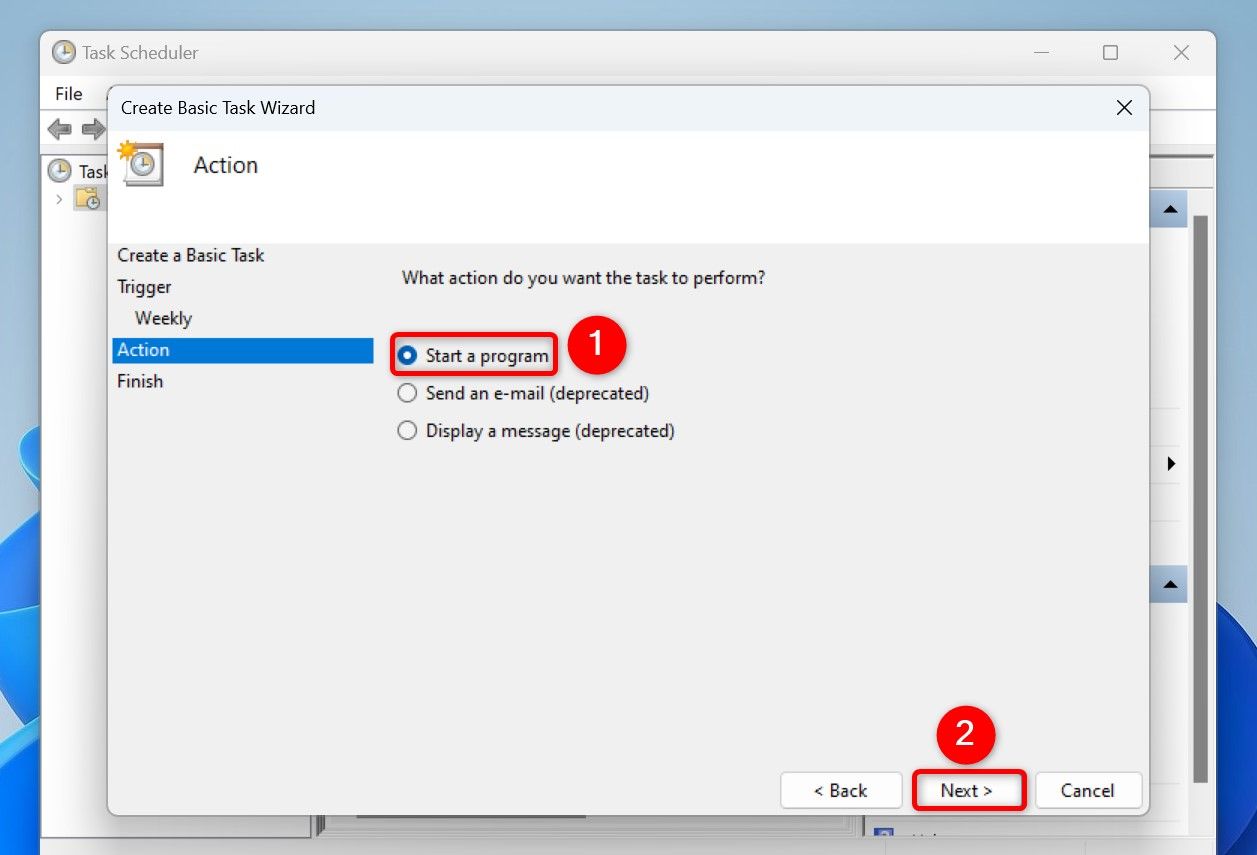
Task Scheduler will ask what action you want to perform. Here, choose “Start a Program.” You can select the “Display a Message (Deprecated)” option, but as the name says, it’s deprecated. Then, choose “Next.”
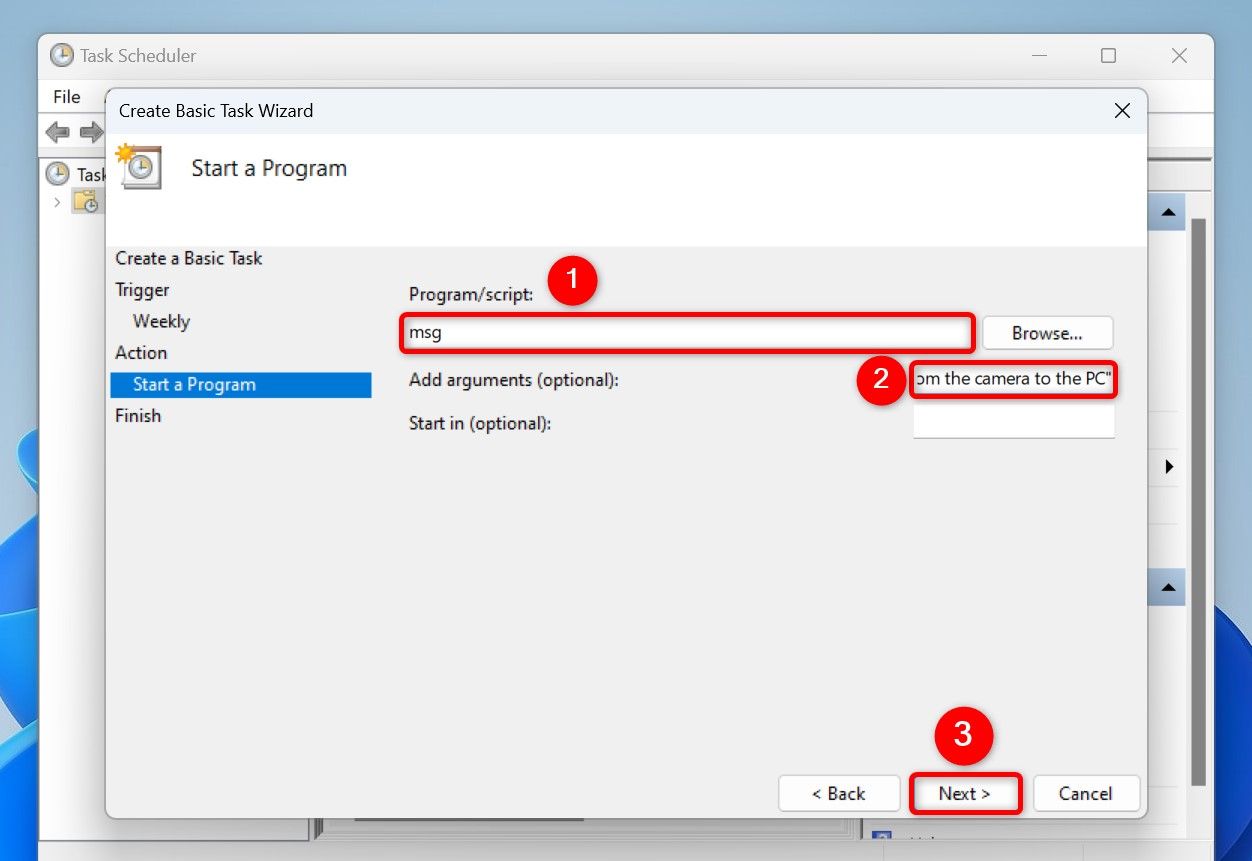
Select the “Program/Script” field and type msg. Select the “Add Arguments (Optional)” field and type the following. In this text, replace “Your Custom Message” with the message you want to receive. Then, click “Next.”
* "Your Custom Message"
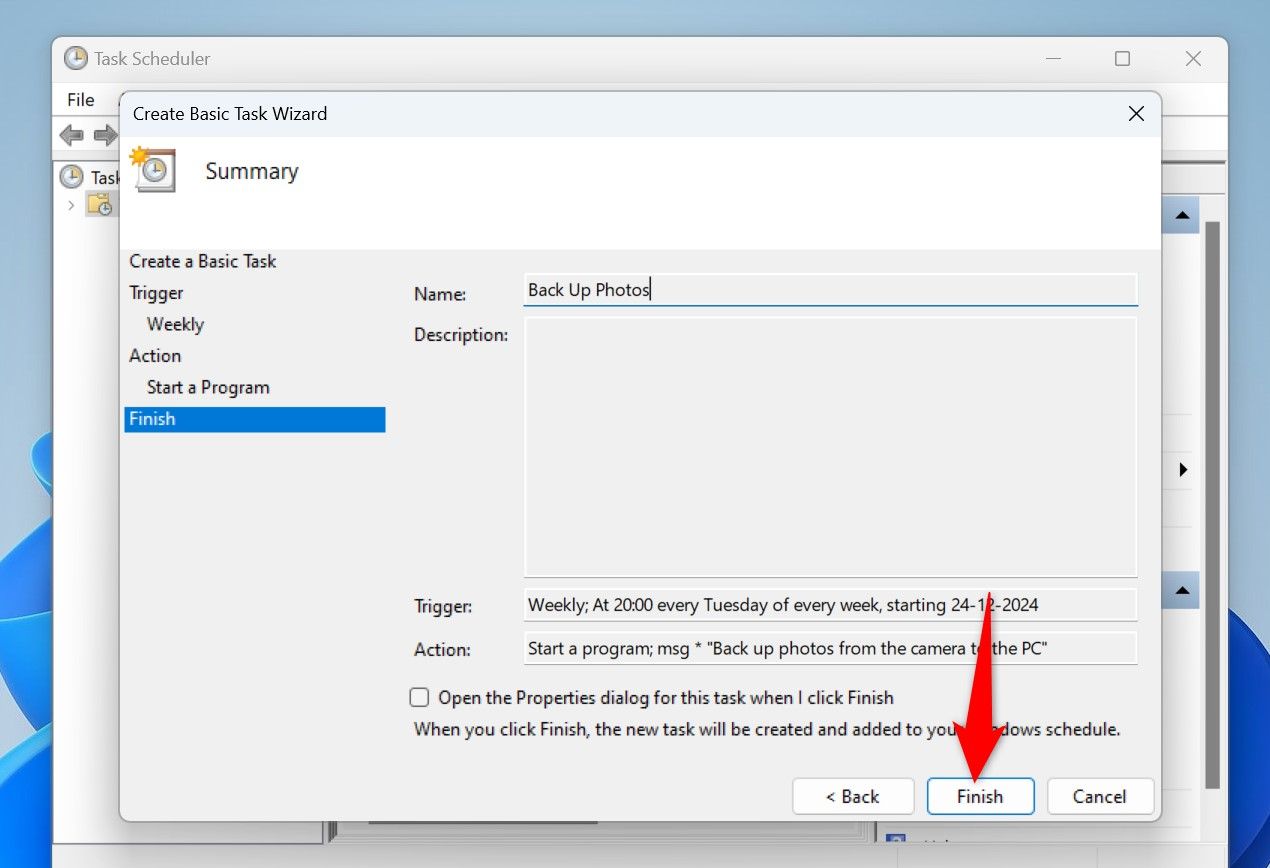
On the final page, review the task details. If everything looks good, click “Finish” to save the task.
Task Scheduler will now display your custom message at the specified date and time. In the future, if you’d like to stop receiving notifications, launch Task Scheduler, right-click your task, choose “Delete,” and select “Yes” in the prompt.
Set Custom Reminders with Microsoft To Do
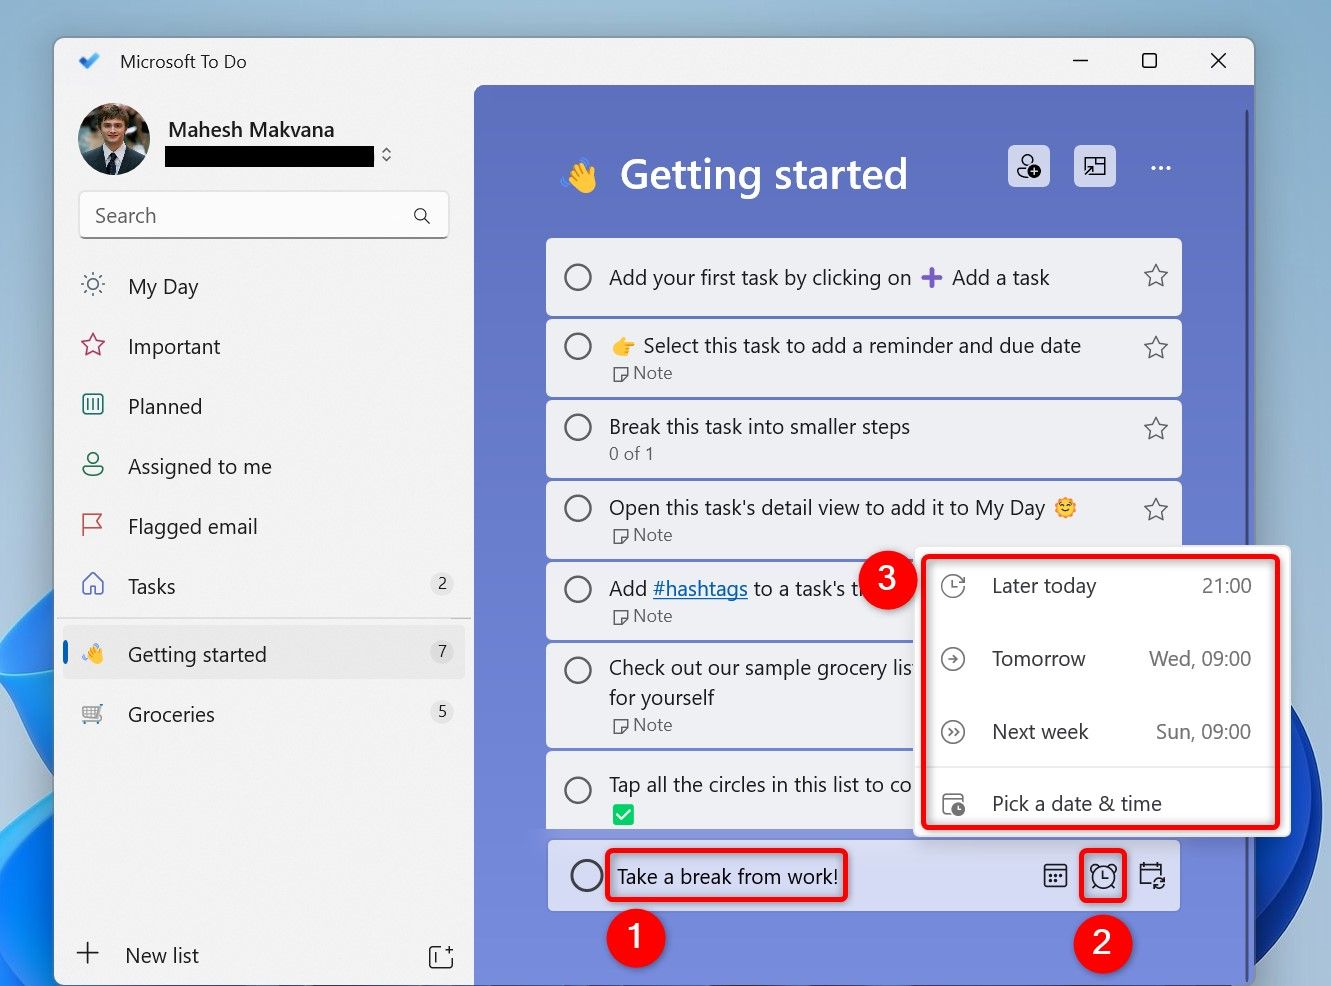
You can use the Microsoft To Do app to have your tasks (custom messages) pop up at the specified time and date. To do that, launch Microsoft Store, type Microsoft To Do in the search box at the top, and press Enter. Select the app in the search results and choose “Get” to install the app.
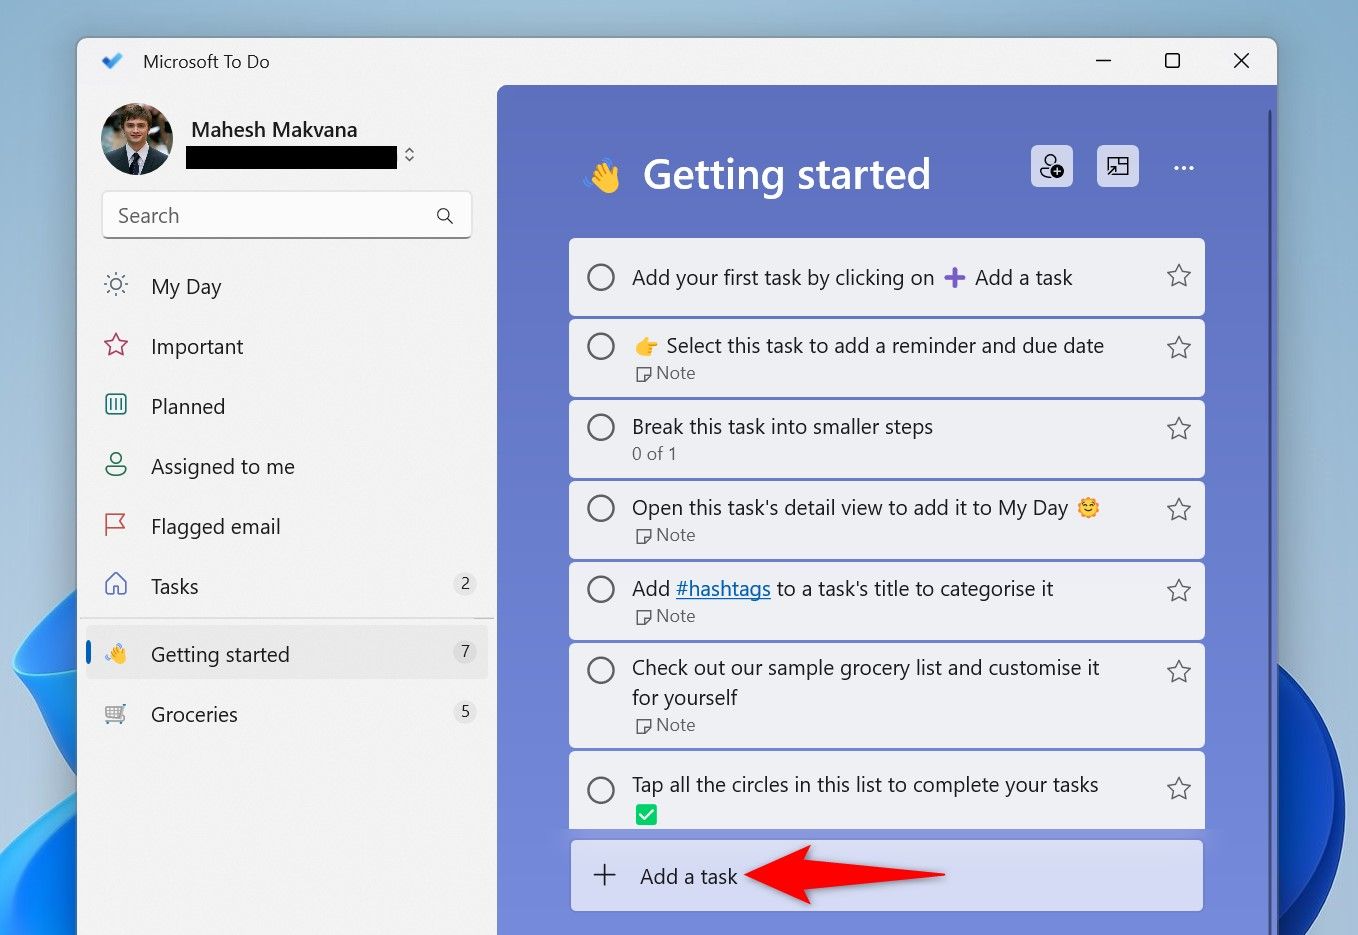
Launch the newly installed app and select “Add a Task.”
Type the custom message you want to receive. Next to the message field, click “Remind Me” (the clock icon) and select when you want to receive a notification about this message.
The app will remind you about your specified task (message) at the time you’ve chosen.
You can delete any message you don’t want to keep by right-clicking that message in the app and choosing Delete Task > Delete.
Use System Scheduler to Program a Notification
System Scheduler is a free third-party app you can use to schedule tasks on your PC. This app aims to be a replacement for the built-in Task Scheduler utility.
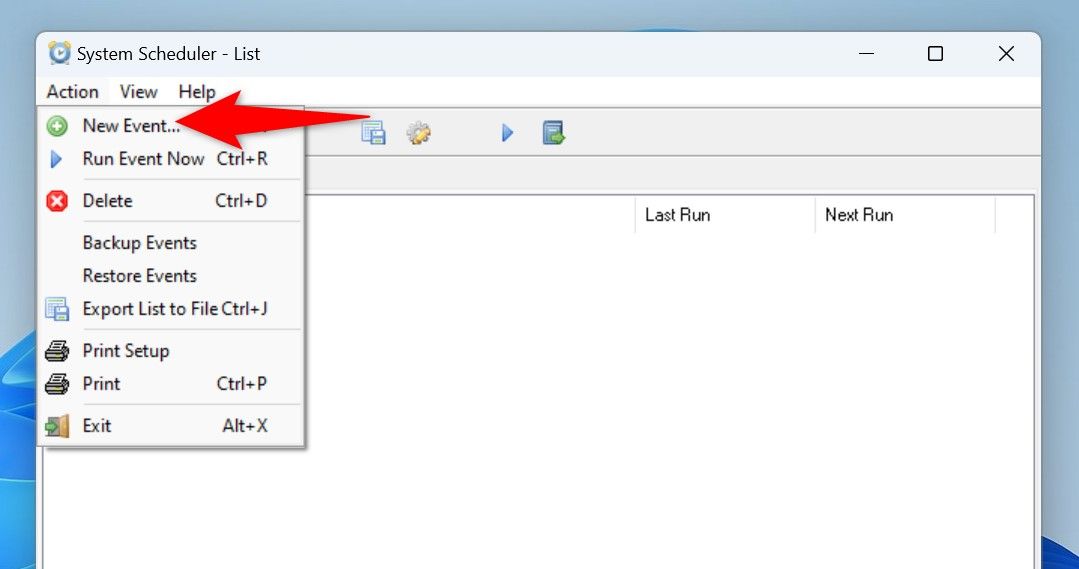
To use it, launch the System Scheduler site and download and install the app on your PC. Launch the app and select Action > New Event or press Ctrl+N.
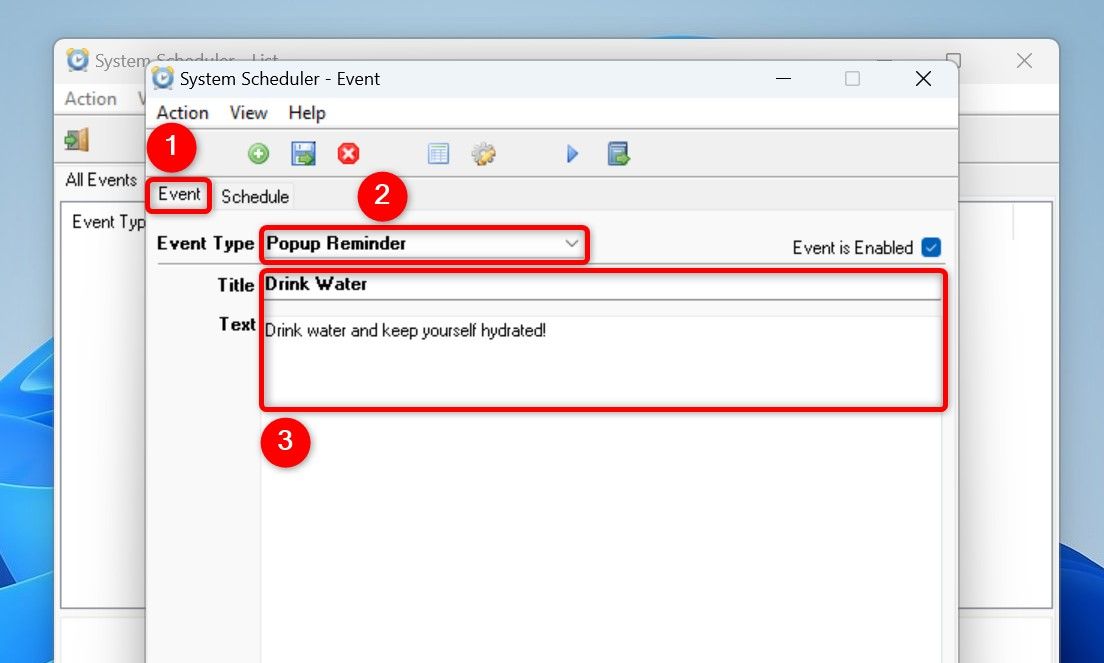
On the Event window, open the “Event” tab. Click the “Event Type” drop-down menu and choose “Popup Reminder.” Select the “Title” field and type the title of the message you want to receive. Select the “Text” field and type the full message.
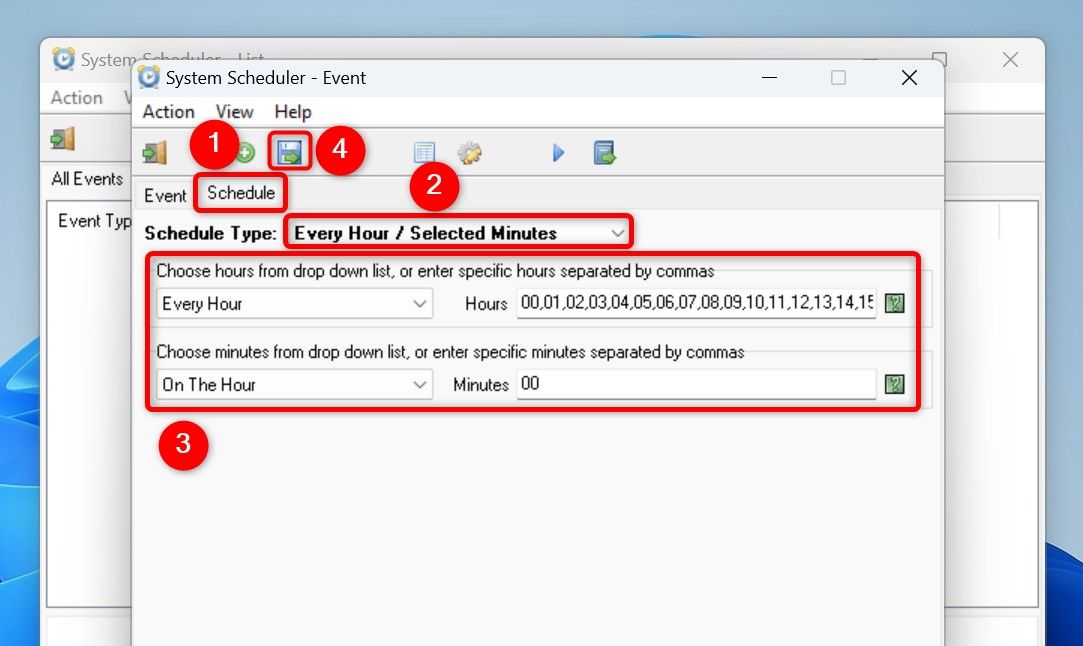
Open the “Schedule” tab as you want to schedule your message. Click the “Schedule Type” drop-down menu and select how often you want to receive your message. For example, to receive the specified alert every hour, choose the “Every Hour/Selected Minutes” option and specify the options.
Save the task by clicking “Save and Exit” (the floppy disk icon) at the top. The app will send you a reminder at your chosen frequency and time.
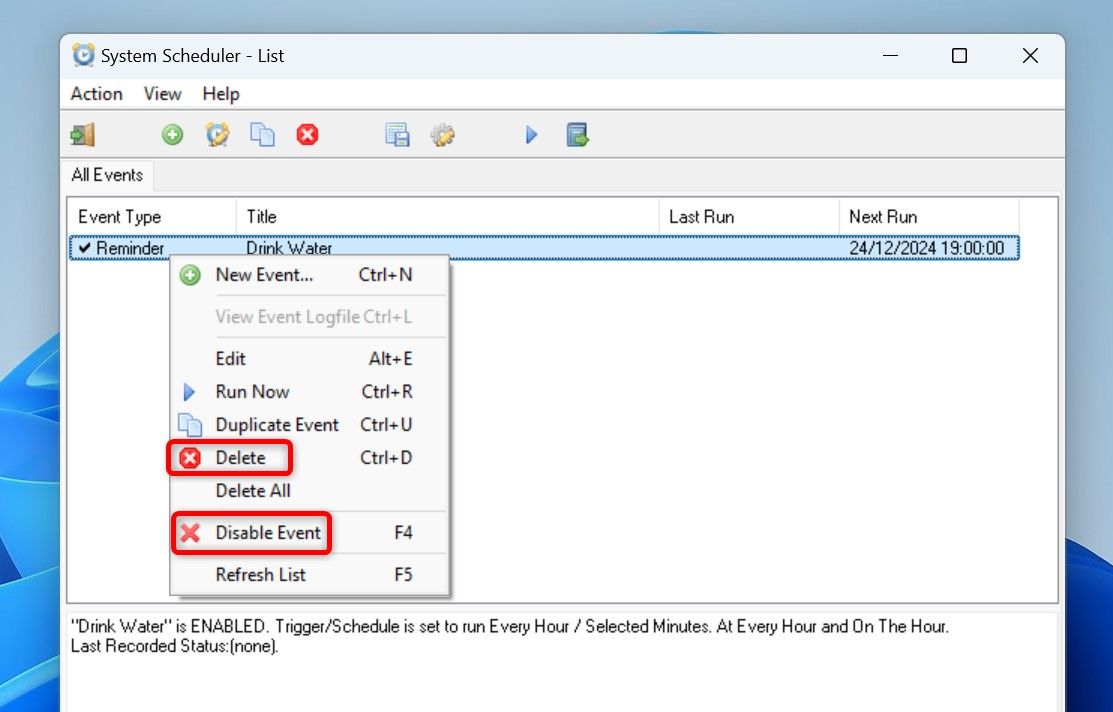
To disable your alert, open System Scheduler, right-click your event, and choose “Disable Event.” To remove the event for good, right-click the event and choose “Delete.” Select “Yes” in the prompt.
Schedule a Written Notification with Sticky Notes
You can create a custom note in Sticky Notes and use Task Scheduler to launch this app at your specified time. To do this, open Windows Search (press Windows+S), type Sticky Notes, and launch the app.
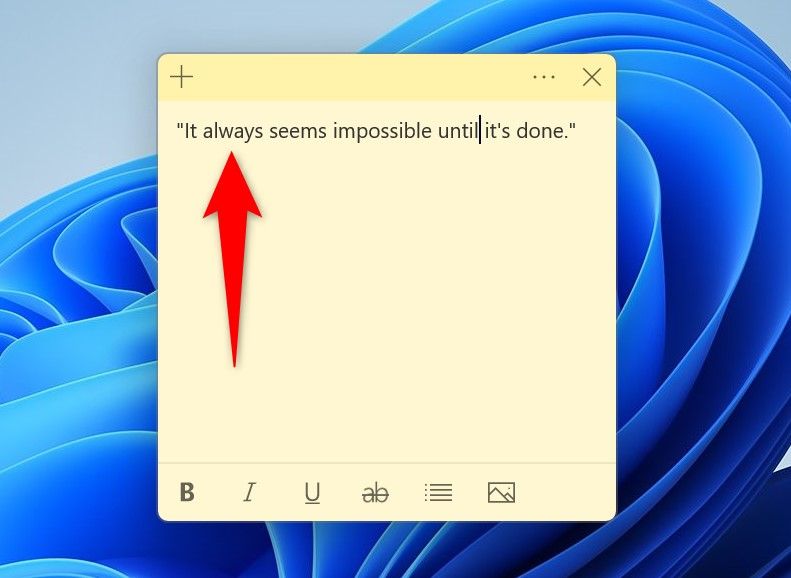
Make a new note with your custom message.
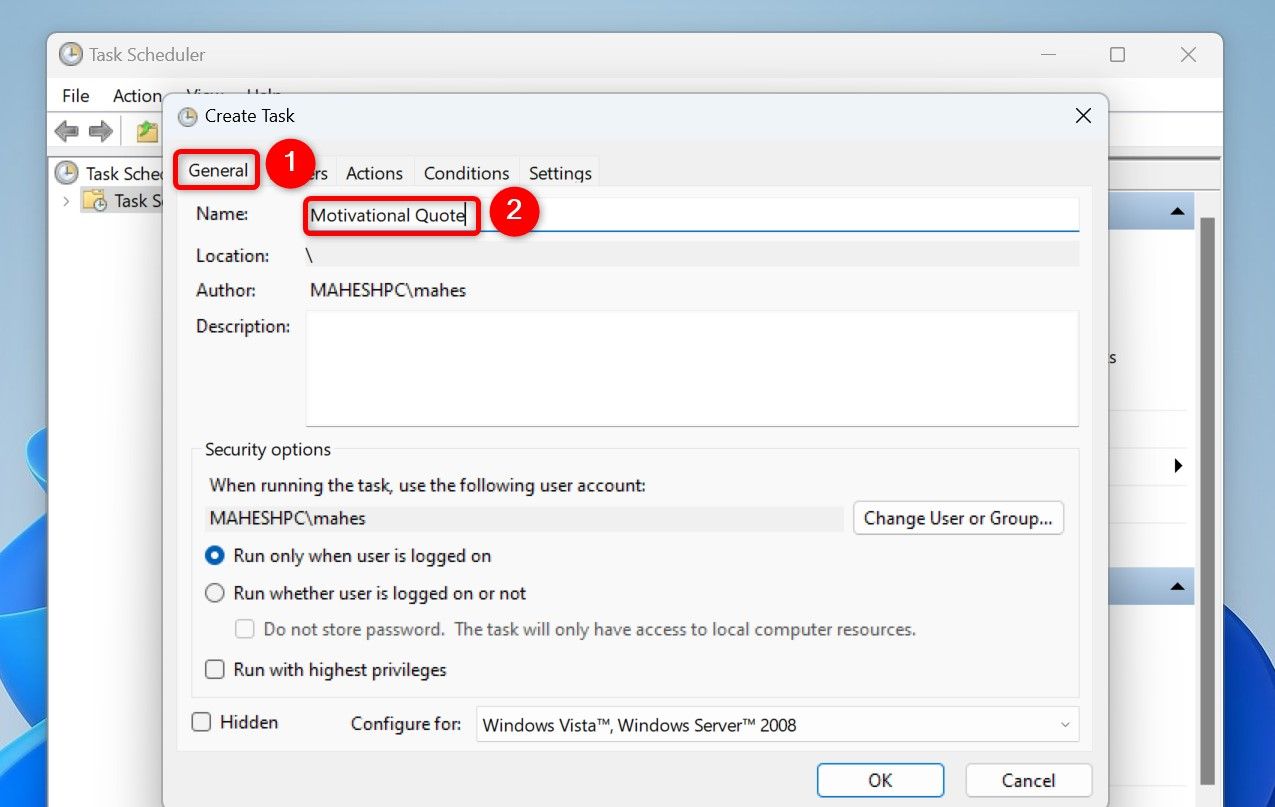
Open Windows Search again, type Task Scheduler, and launch the utility. From the menu bar, select Action > Create Task. Open the “General” tab, select the “Name” field, and type a name for the task.
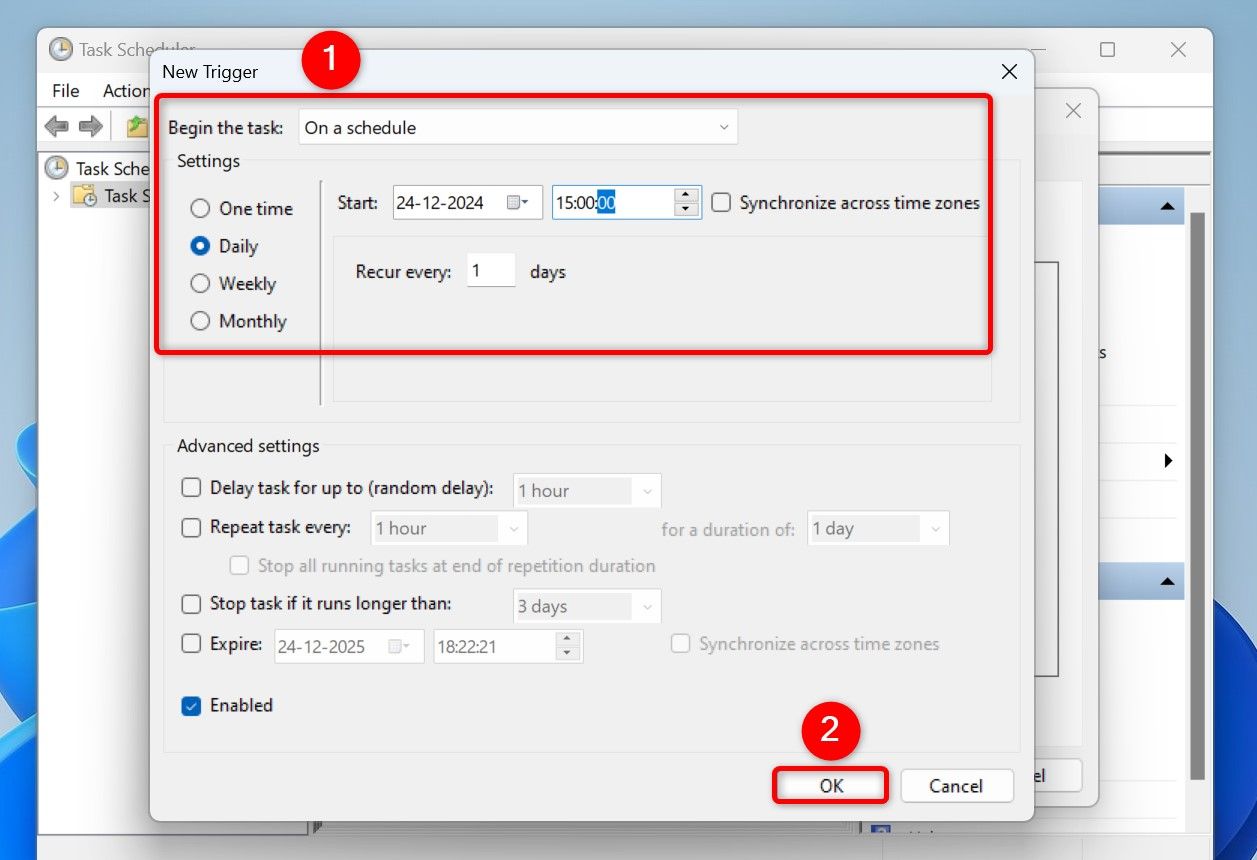
Access the “Triggers” tab, click “New,” and specify when and how often you want to see your Sticky Notes note. Then, select “OK.”
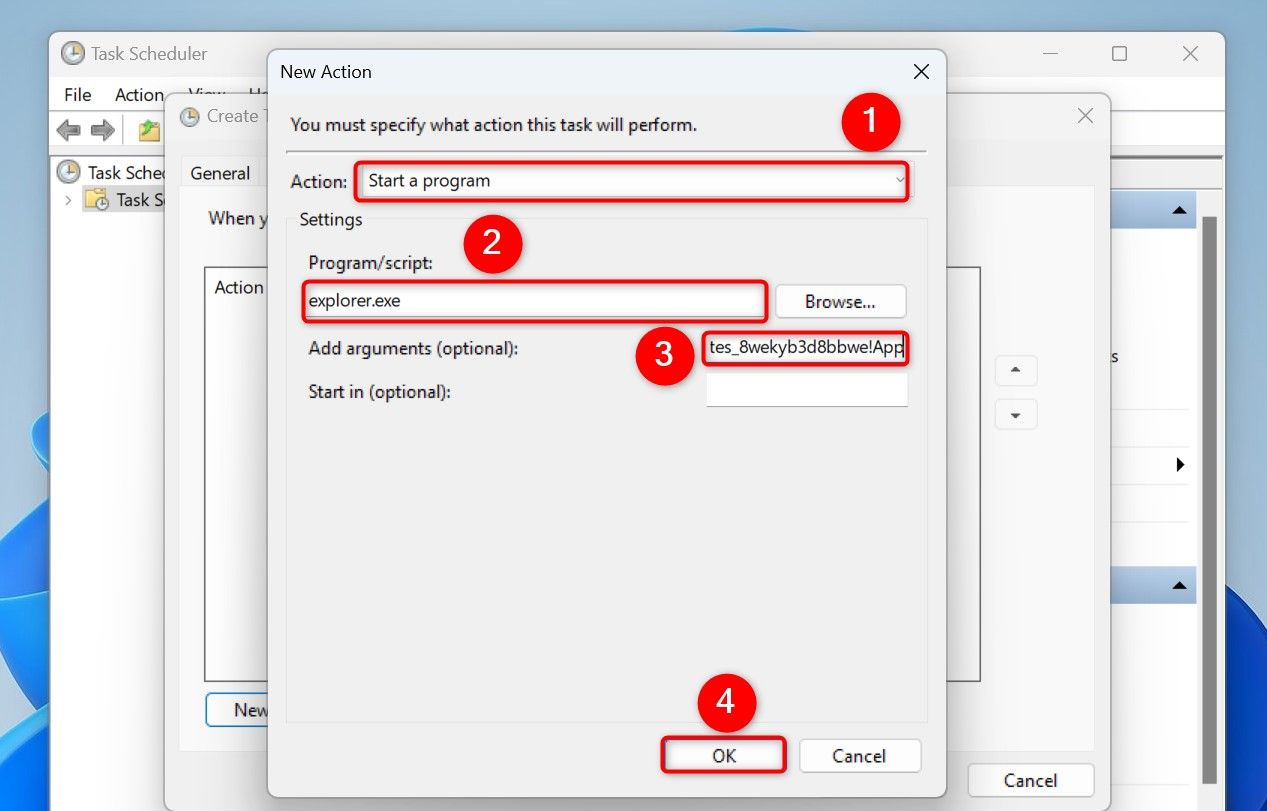
Access the “Actions” tab and choose “New.” Select the “Action” drop-down menu and choose “Start a Program.” Click the “Program/Script” field and type the following
explorer.exe
In the “Add Arguments (Optional)” field, type the following. Then, click “OK.”
shell:appsFolder\Microsoft.MicrosoftStickyNotes_8wekyb3d8bbwe!App
On the Create Task window, click “OK” to finish creating the task.
Task Scheduler will launch the Sticky Notes app with your custom note in it at the specified time.
Using the Clock App to Create an Alarm
You can set alarms in Windows 11’s built-in Clock app with custom names, and the app will display those names (messages) at the defined time. If you’d like to use this method, launch Windows Search (press Windows+S), type Clock, and open the app.
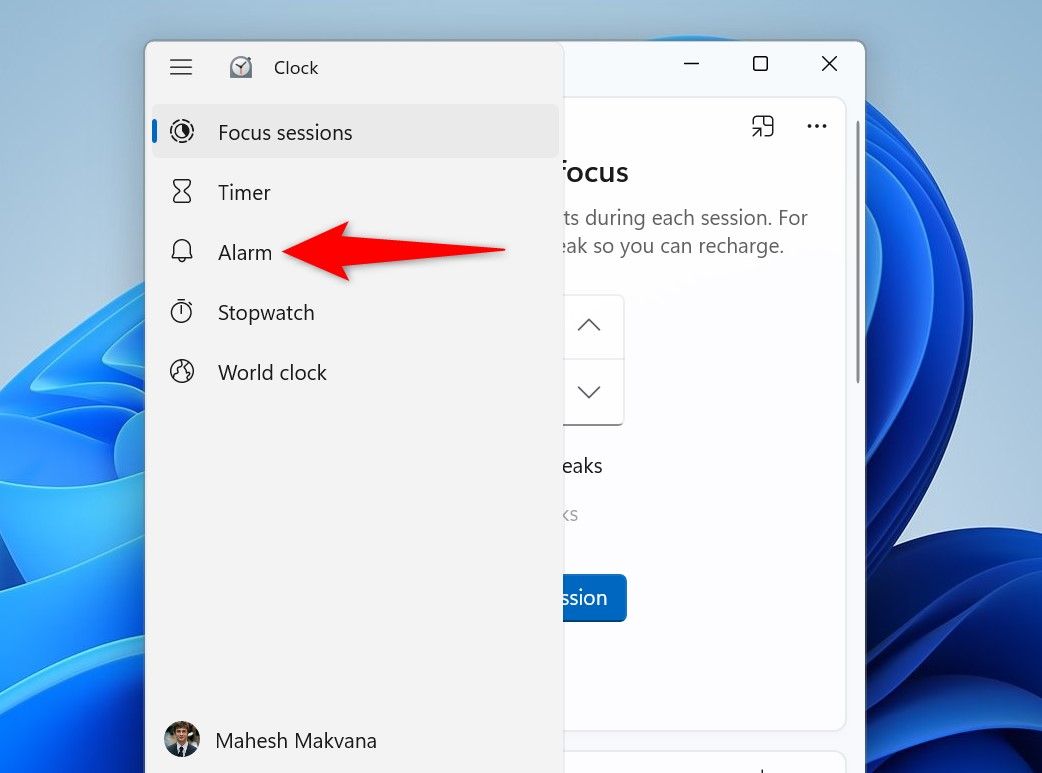
In the Clock app’s top-left corner, click the hamburger menu (three horizontal lines) and choose “Alarm.”
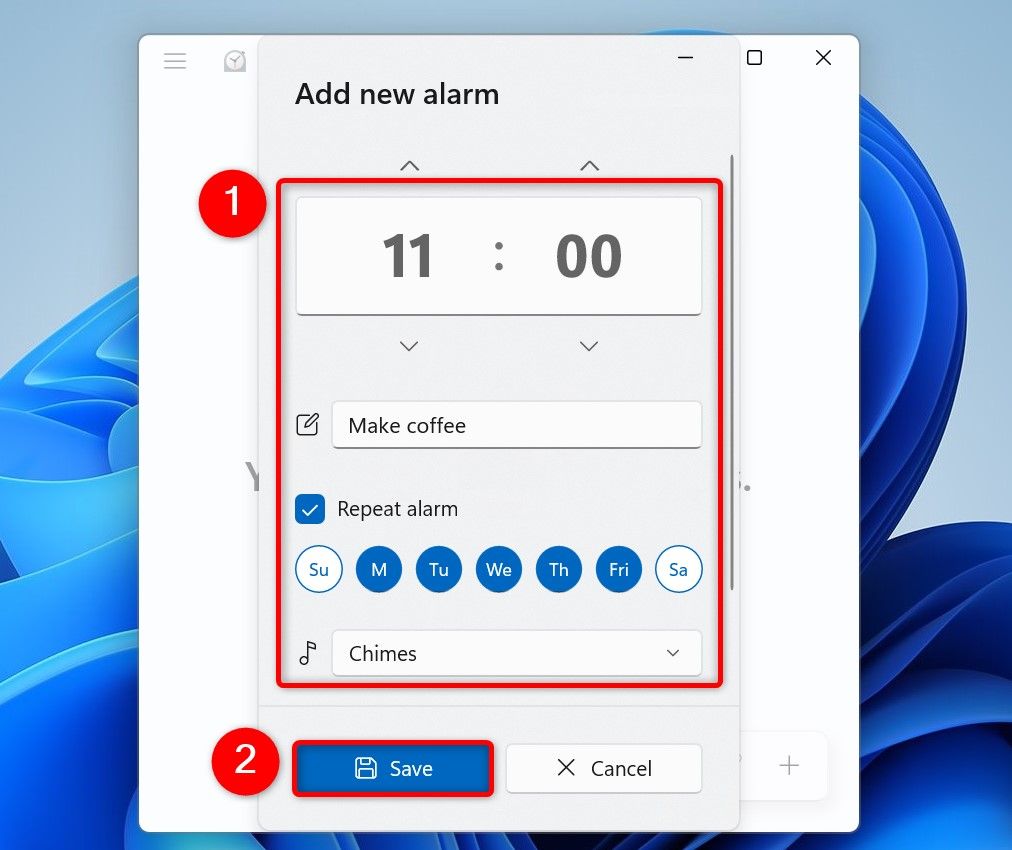
On the right pane, at the bottom, click “Add an Alarm” (the plus sign). On the open Add New Alarm window, specify the time when you want to receive your custom notification. Click the “Alarm Name” field and type the message you want to receive. Configure other options like the tone and so on, then click “Save.”
Clock will alert you at the specified time.
And that’s how you get your Windows 11 PC to send you notifications at predefined times. Like this, you can also automate many other tasks on your PC using batch files.


