Microsoft Outlook doesn’t exactly have a reputation for being easy to use. But the “new” version of the software, which is the default in the web version of Outlook, really is an improvement when it comes to setting up Rules for your inbox.
Why You Need to Use Rules
If you get a lot of important emails that fall into different categories, it makes sense to sort them into different folders to keep your inbox organized. But if you get a lot of emails, and you’re manually sorting them into different folders, it’s going to suck a lot of time out of your day. That’s why Rules are helpful to set up in Outlook, so your inbox gets sorted automatically!
How to Set Up Rules in the New Outlook
In the “old” Outlook, the Rules system was fairly straight-forward, but a little bit clunky, with a lot of dropdowns and options that were a bit confusing. The Rules in the “new” Outlook, however, are a lot more user-friendly and intuitive to set up. The process starts the same, by right-clicking on the email that you want to create a Rule for. Note that you cannot set up rules using the mobile app, but you can set them up using the web-based version of Outlook.
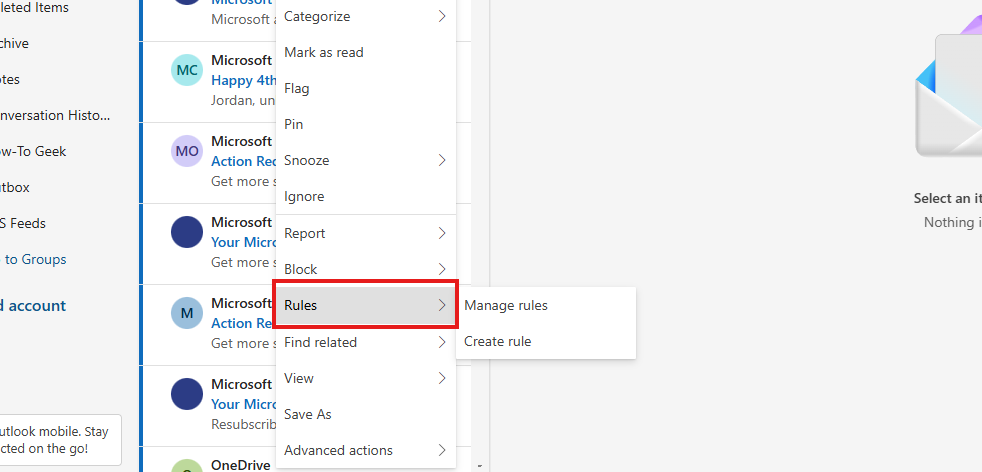
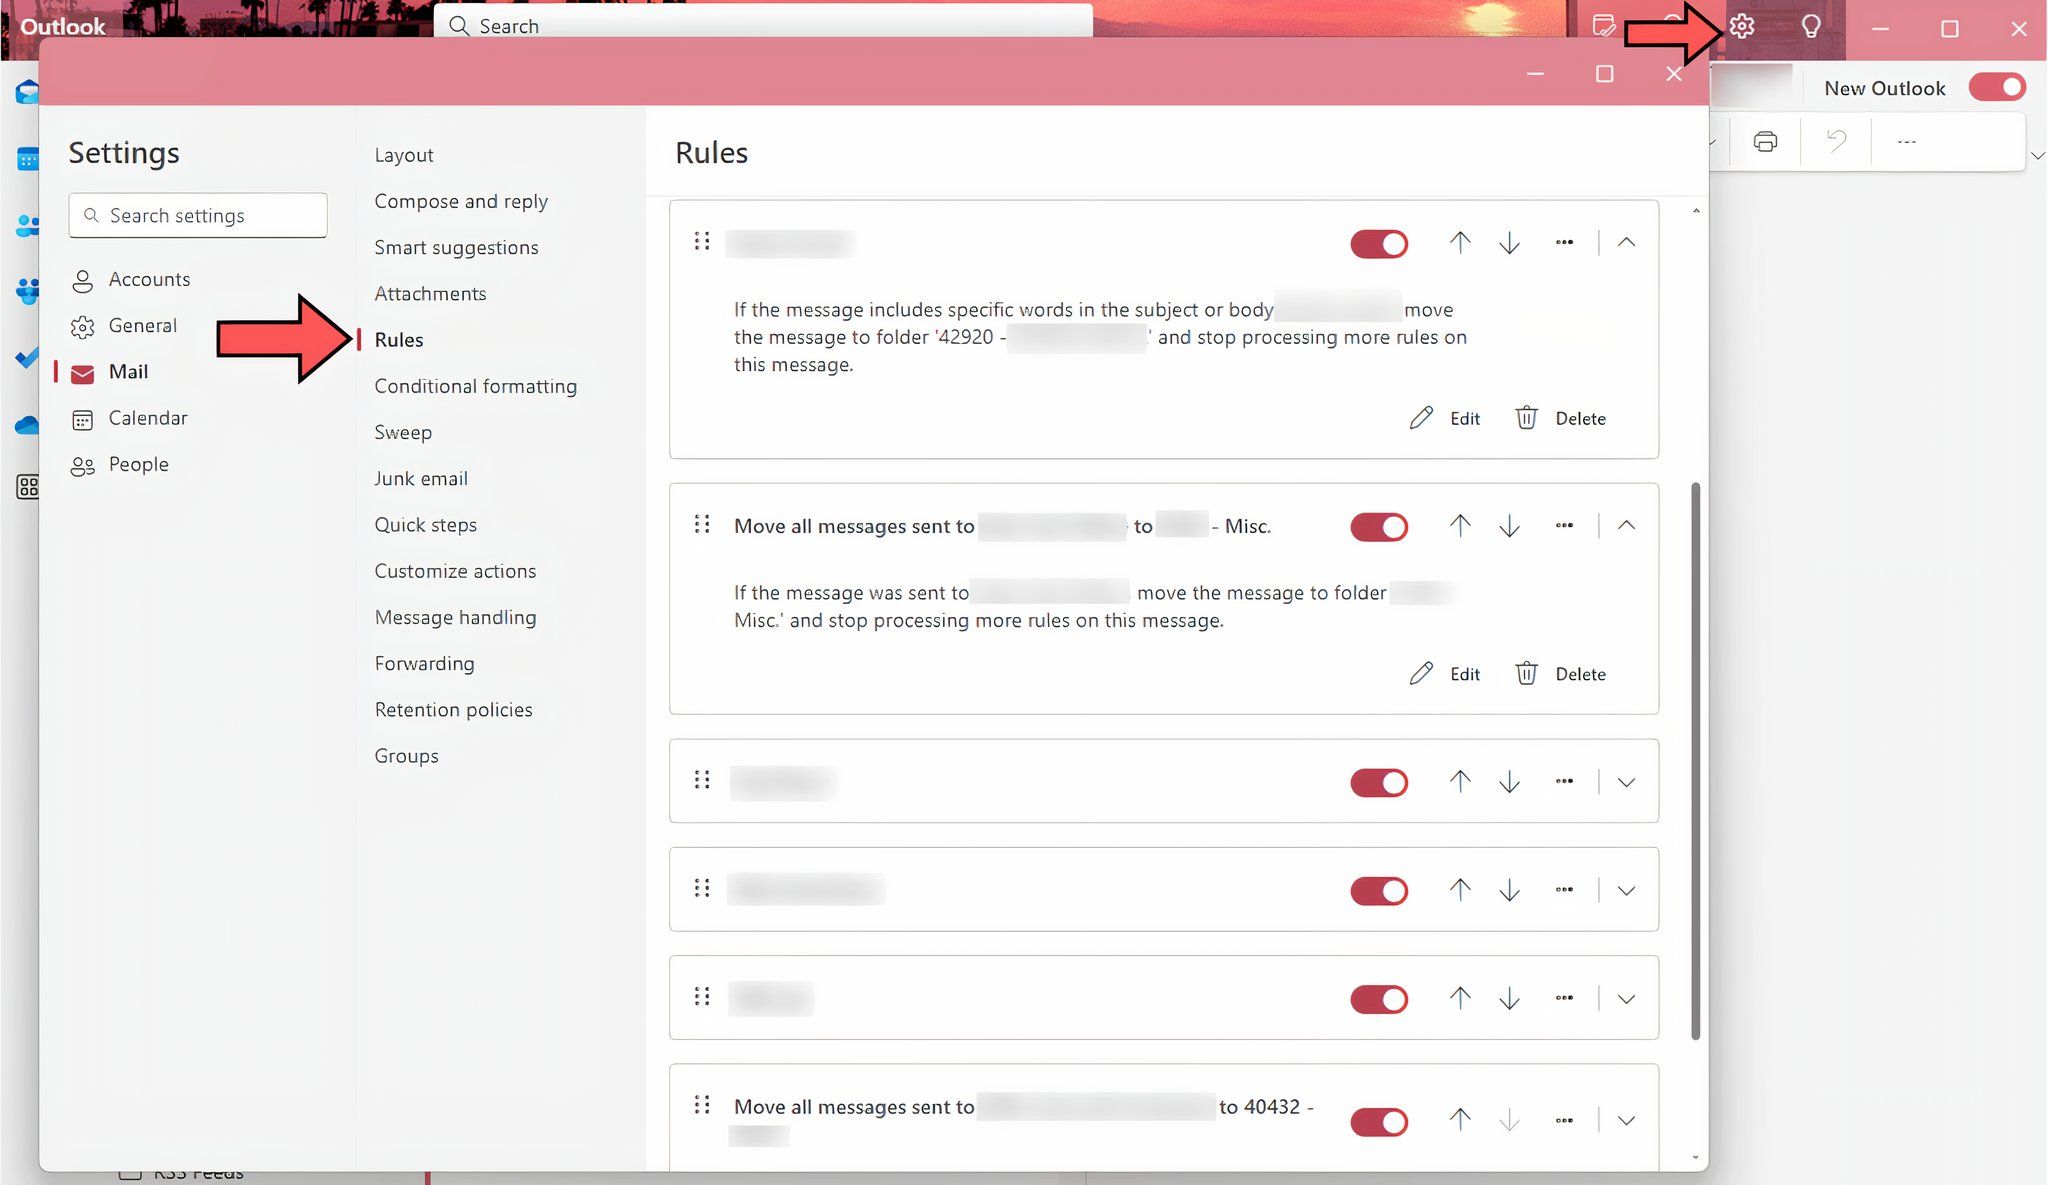
When you right-click on an email, a menu similar to what you’d see in the old Outlook (except a little more modernized) will appear. Go to Rules > Create Rule to make a new Rule in Outlook, or click “Manage Rules” to access the Rules menu and refine any existing Rules that you might already have. You can also find the Rules menu by hitting the Settings button, which looks like a gear in the upper right-hand corner.
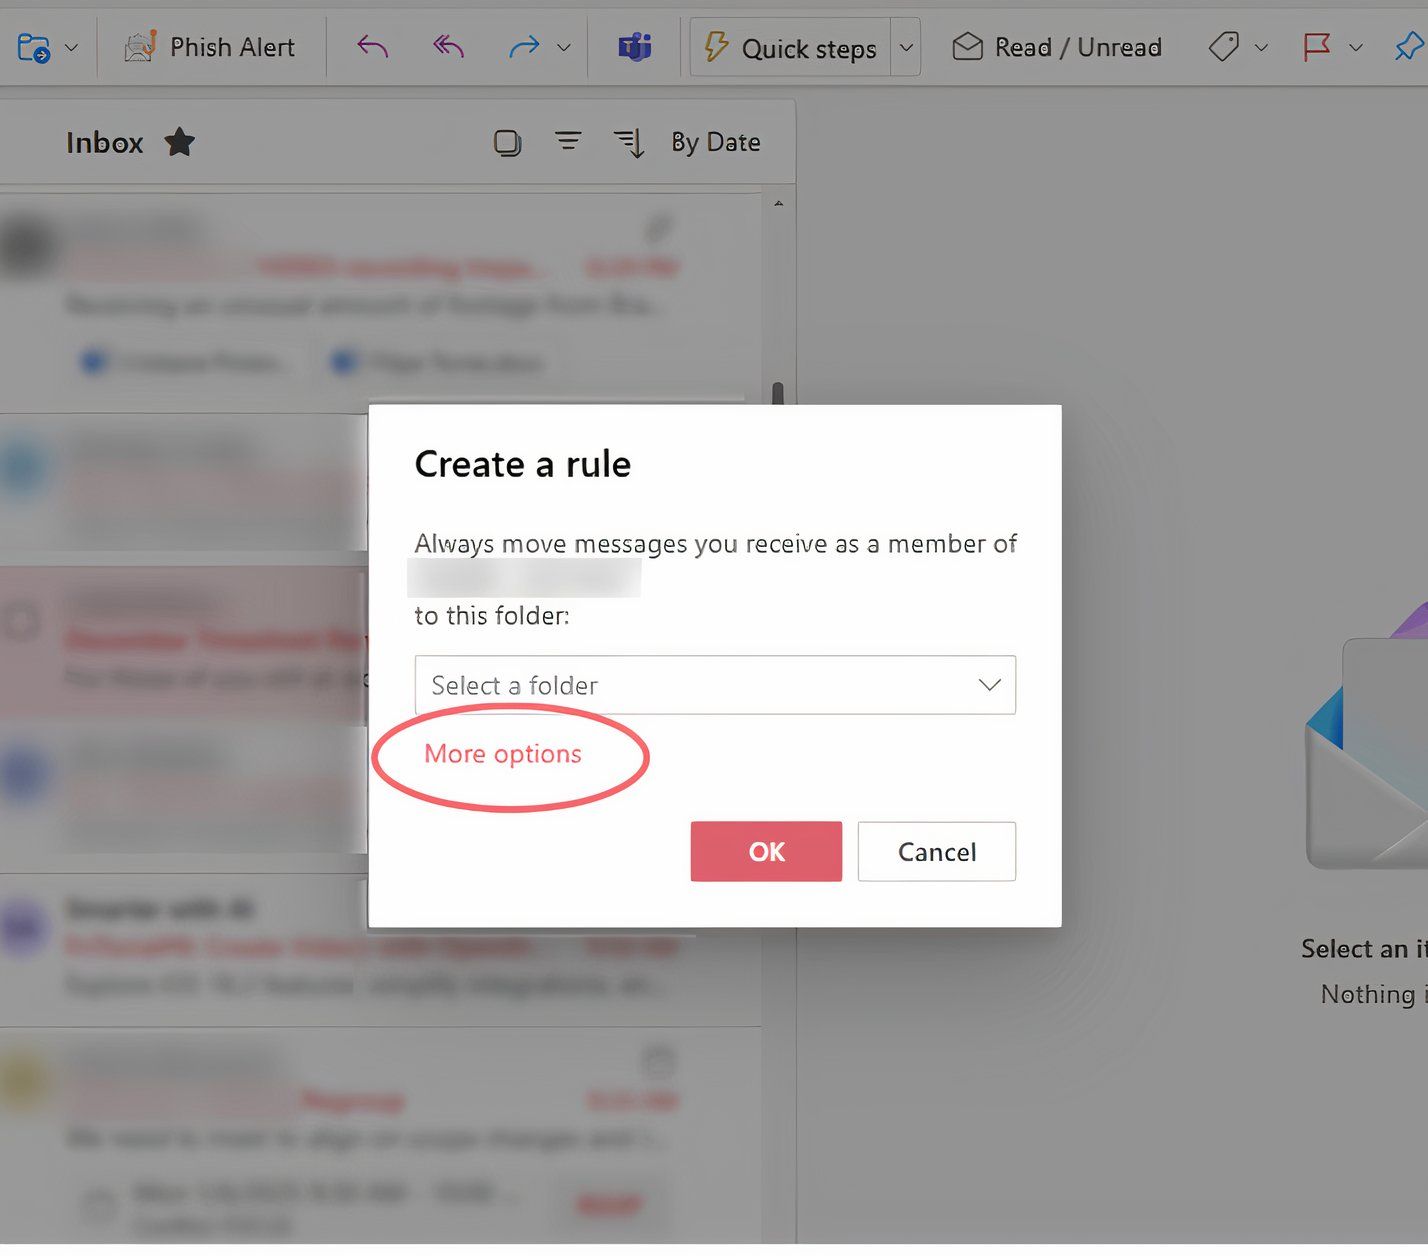
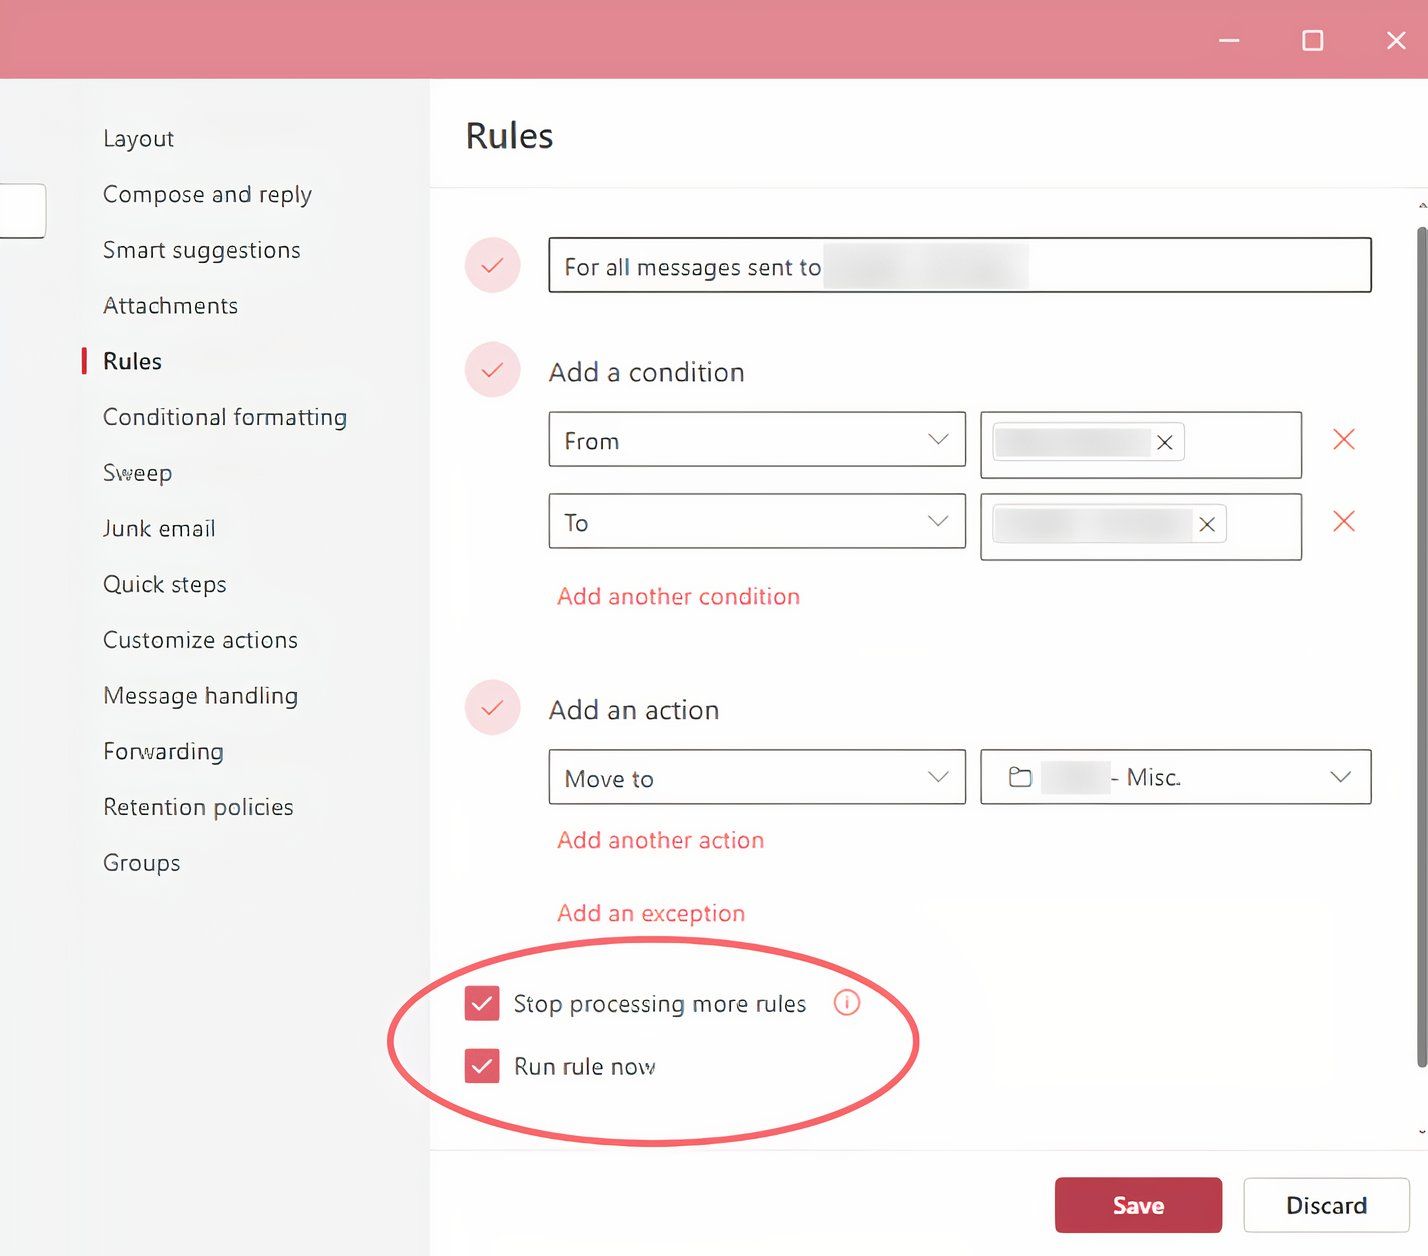
Let’s start by creating a new Rule. When you click on “Create Rule,” Outlook will automatically start setting up the Rule for you. But if you have a different Rule in mind, or want to refine the details more, you can click on “More options” to see all the settings available for your Outlook Rules.
I recommend giving your Rules specific titles to keep things organized. Outlook will automatically create a default title for your Rule, but you can change it to whatever you’d like in the top box in the Rules set up screen.
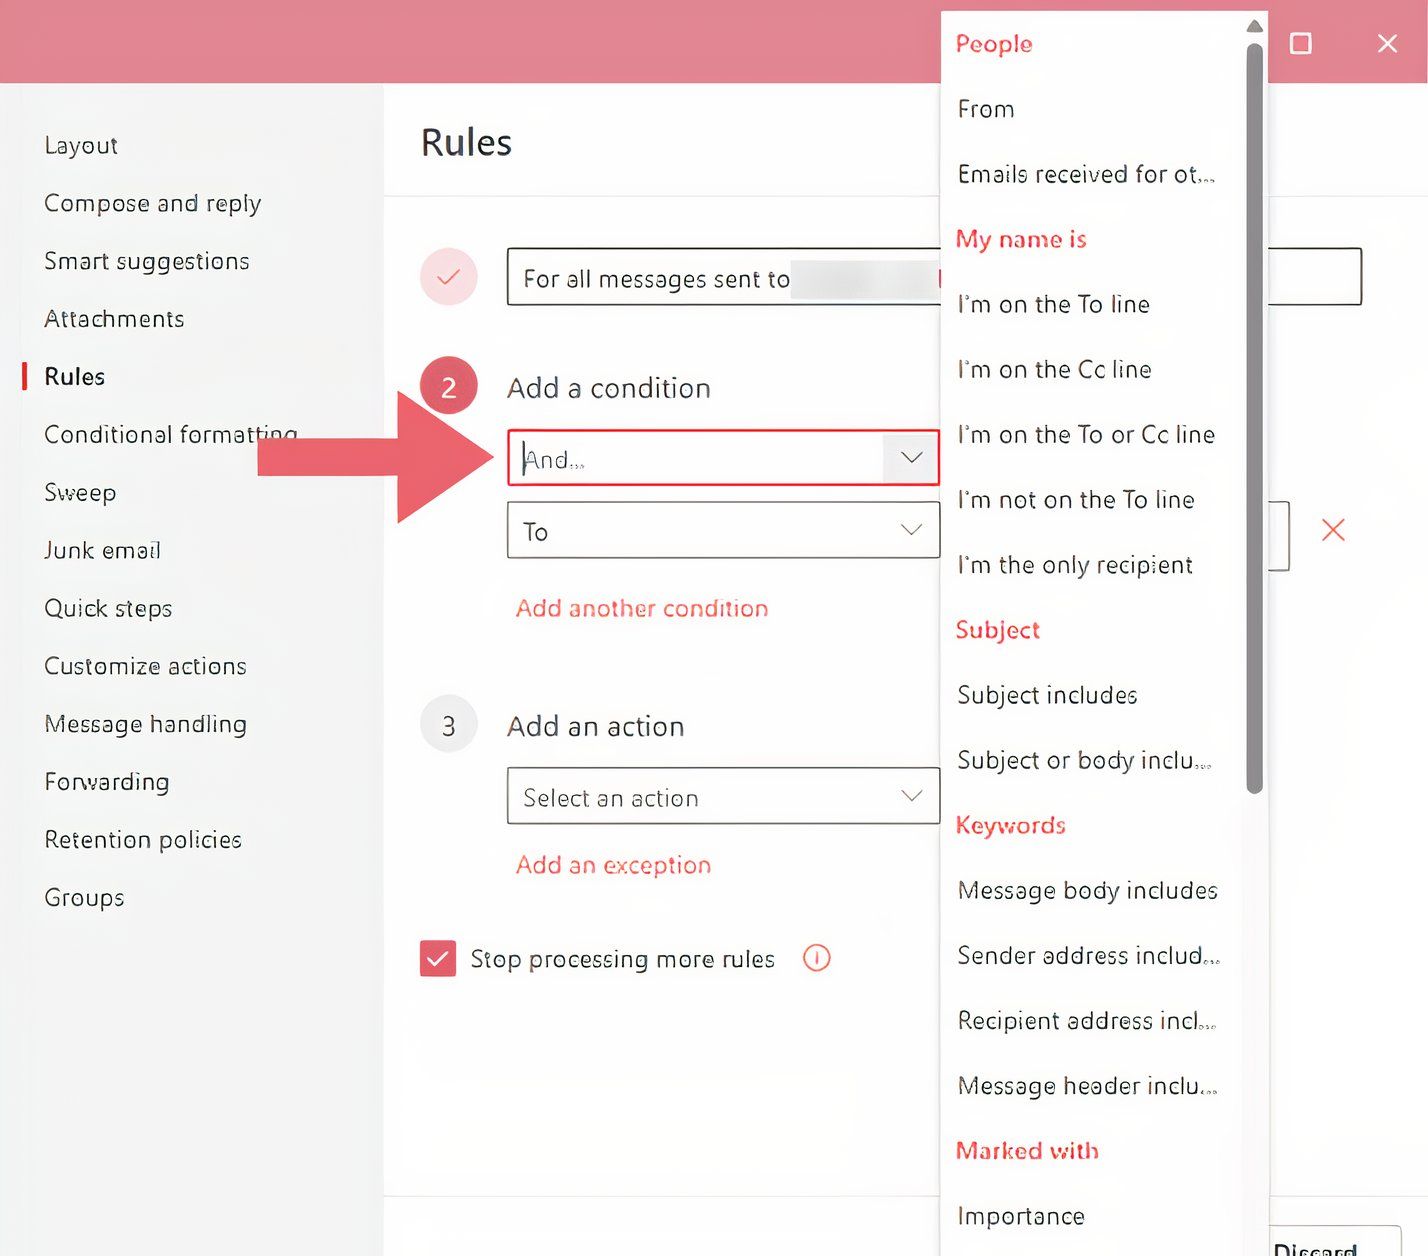
Under the title, you can determine the parameters for your Rule. You can set all kinds of Rules depending on what you need to do. You can set up a Rule that all emails from a particular individual, or a specific domain, all get moved to a specific folder. Or you can set up a particular keyword in the email’s subject or body that will flag Outlook to take a specific action. Scroll through the drop-down list to explore all of the customizable options. You can set multiple conditions to a single rule to be more specific with the automation.
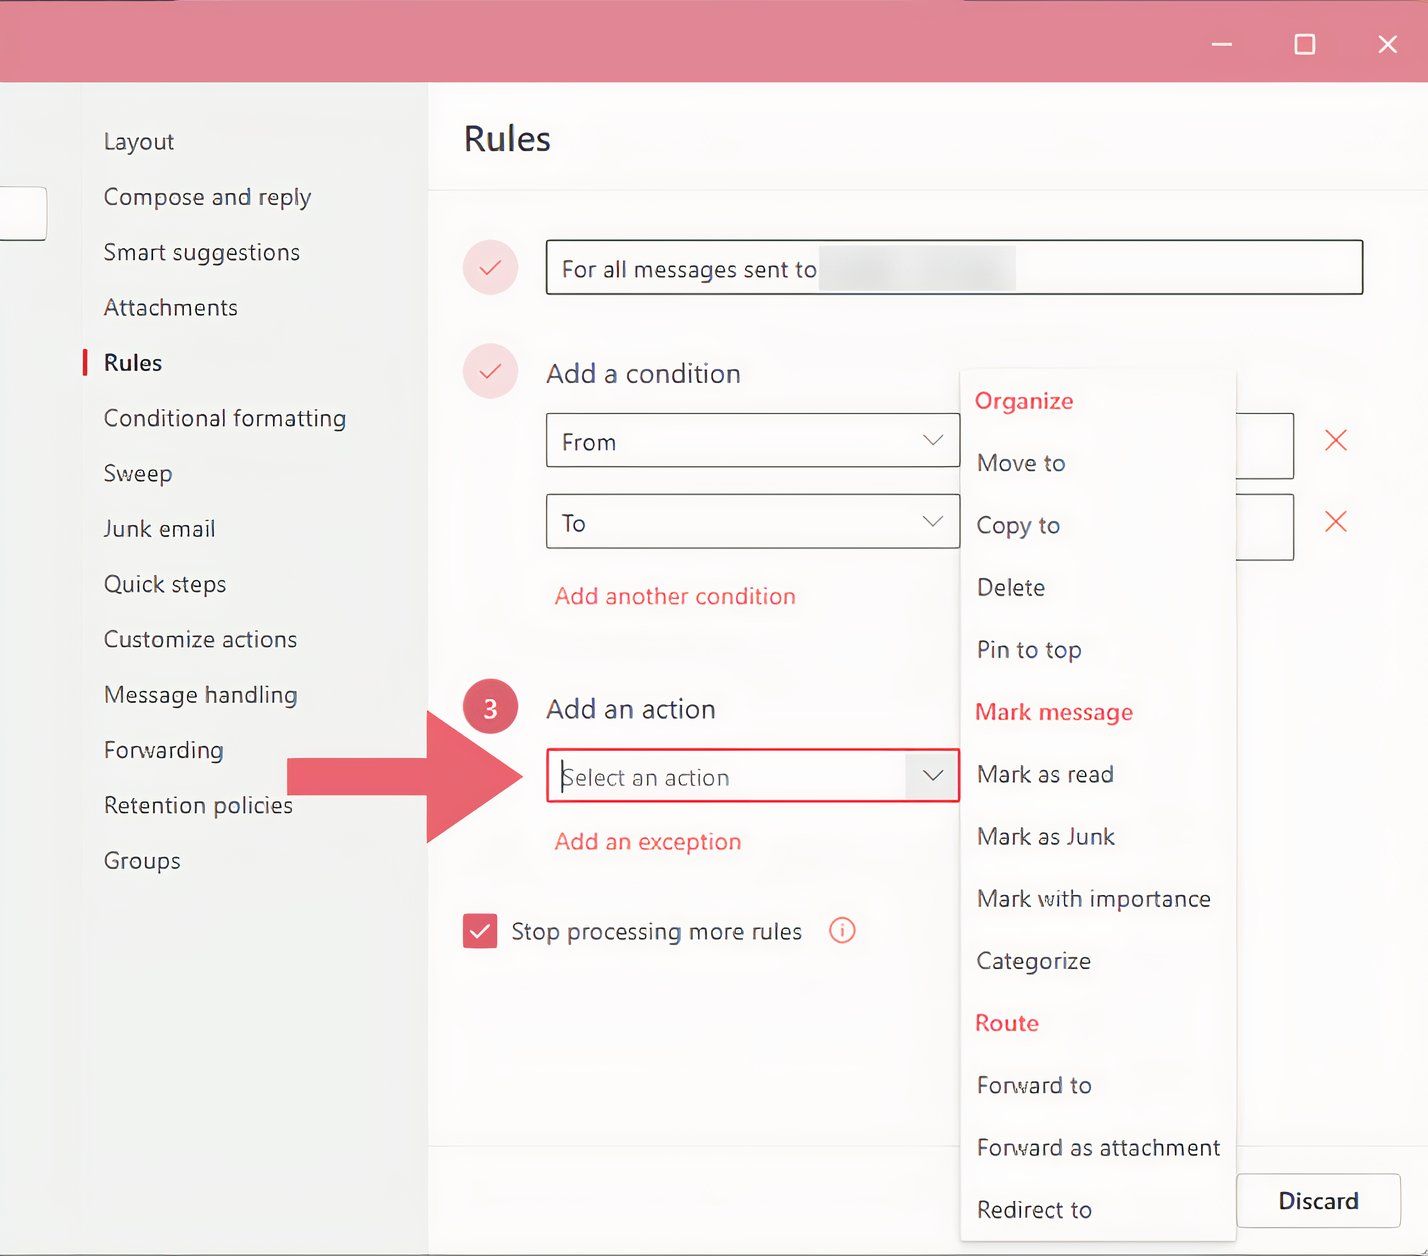
Once you have determined what Outlook needs to look for, you need to set up an action for Outlook to take once it finds an email that meets your criteria. Actions include moving to a specific folder, marking as junk mail, pin to the top, or even just deleting the email. All you have to do is select from the dropdown menu to choose what Outlook should do.
A Note About Processing Multiple Rules
After the Rule is set up, there are two more options underneath. The first is “Stop processing more rules.” Simply put, this means that you’re telling Outlook that once it runs this Rule on an email, it shouldn’t try to run any other Rules on that same email. This keeps it simple if you have a basic Rule that wouldn’t apply to multiple use cases, such as sending all emails from your favorite online store into a Shopping subfolder in your Outlook.
However, there might be use cases where you’d want Outlook to keep checking for more applicable Rules. For example, let’s say you have a Rule that flags all emails with an attachment, and also have a Rule that deletes all email from a spammy domain. Then you get an email from a spammy domain, but it also has an attachment. You’ll want Outlook to run both of those Rules to ensure that this spammy attachment email gets deleted like it should. If you notice that Outlook isn’t sorting your emails the way you expected, check to see if you are processing multiple Rules or if you set Outlook to stop.
The second option at the bottom of the Rule setup menu is to “Run rule now.” If selected, Outlook will immediately run the Rule and take the specified action on any emails in your Inbox that apply to your set parameters.
Managing Your Rules
Once you have Rules set up, you can manage, edit, update, and delete your Rules at any time. You can access all of your rules by right-clicking on any email, navigating to the Rules and selecting “Manage Rules.” It will open up the Rules menu, which lists all of your existing Rules. You can also get to this same menu by clicking on the Settings gear in the upper right corner and selecting Rules under the “Mail” menu.
If you’ve ever set up Rules in the “old” Outlook, you probably have noticed that this entire Rule setup process is simpler and easier. The UX and menus are more user-friendly and have a cleaner, modern look. The options for Rules are more intuitive and the software is often able to predict the Rule that you’re trying to create and can do most of the work for you. Normally, I don’t love when “new” versions of software get rolled out, but Microsoft really did make Rules better in the “New” Outlook.


