

Although most people nowadays have their own devices, there are still many situations when you may need to share a Windows 11 computer with family members and friends.
However, whatever the situation might be, you should never let other people use your computer logged with your credentials since anyone would have access to your files and information. Instead, everyone should have their own account with their own space without interfering with your experience.
If you already upgraded to Windows 11, you have many different ways to create accounts for family members and friends. For example, you can add a family member with a Microsoft account. You can create a restricted profile for young people in the family, which you can further control to limit screen time, apps, and games access, and restrict the websites they can visit. And if the person doesn’t have a Microsoft account, you can also set up a local account to access the web and apps.
In this Windows 11 guide, we’ll walk you through the different ways you can configure your computer to share it with other family members or friends.
How to create a family member account on Windows 11
To share a device with a family member with a Microsoft account, use these steps:
- Open Settings.
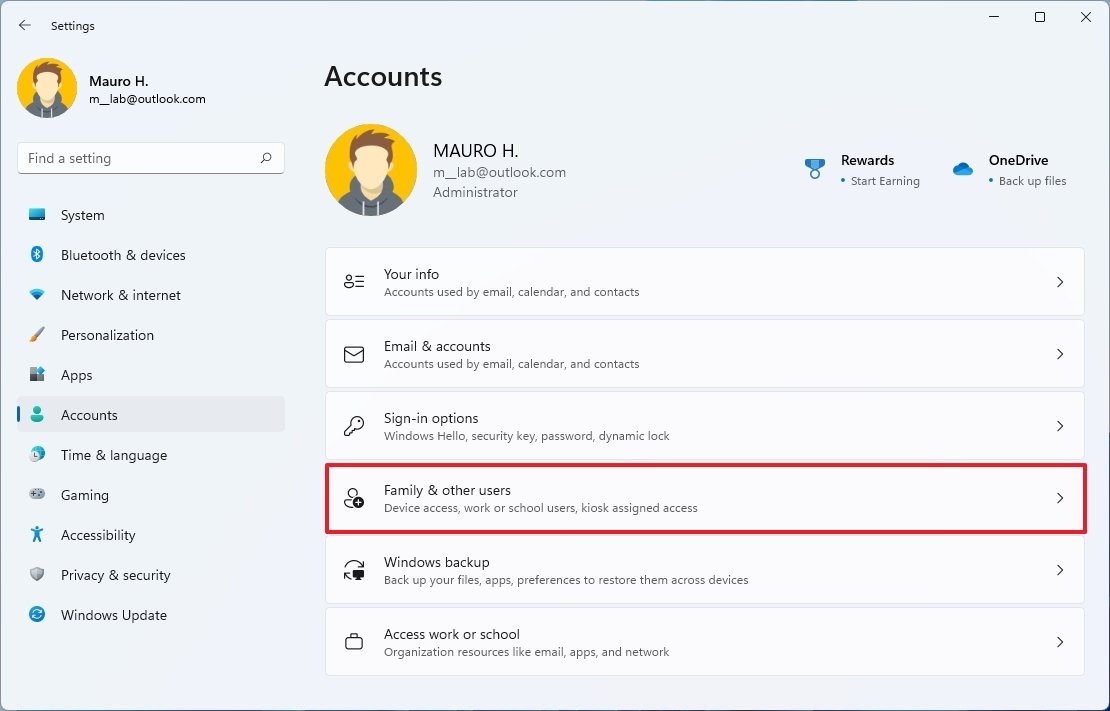
- Click on Accounts.
-
Click the Family & other users page on the right side.

 Source: Windows Central
 -
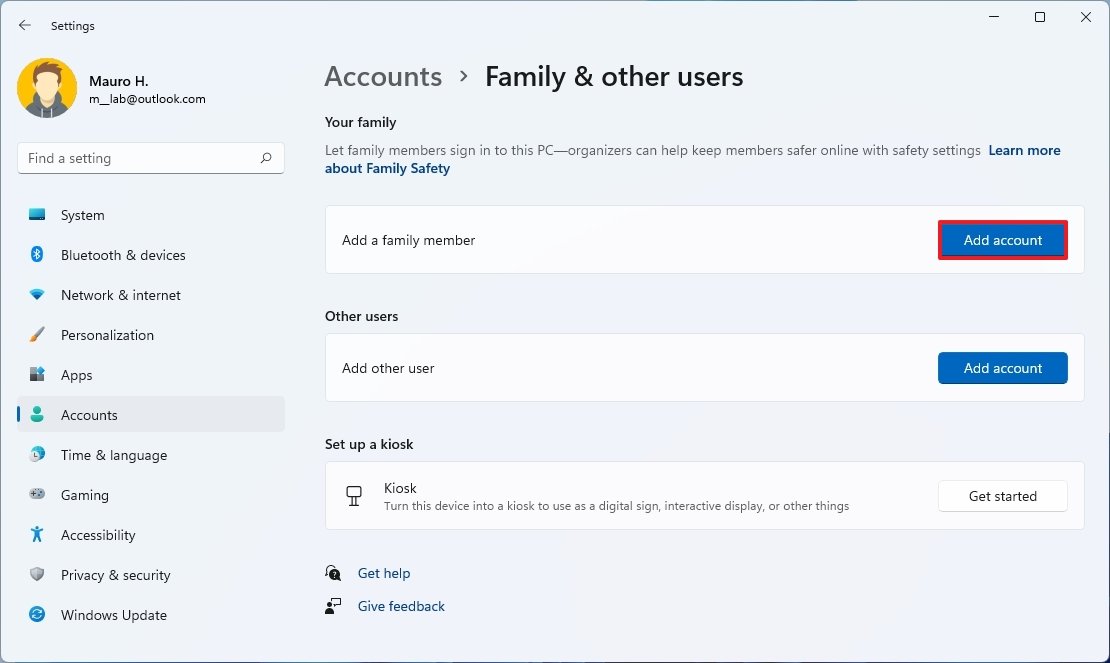
Under the “Your family” section, click the Add account button.

 Source: Windows Central
 -
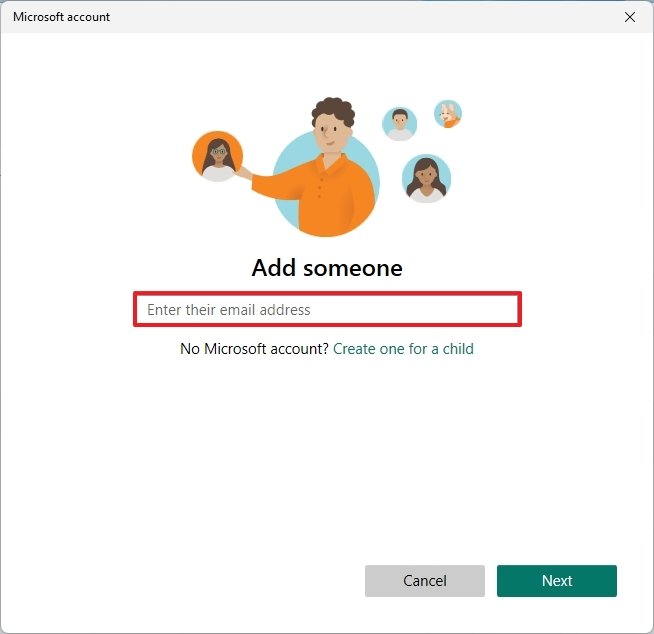
Confirm the family member’s email address.

 Source: Windows Central
 - Click the OK button.
-
Select the role of the account:
- Organizer: Users to edit family and safety settings.
- Member: Users can edit their settings, but they cannot control other users’ settings.
 Source: Windows Central
 - Click the Invite button.
Once you complete the steps, the person should now be able to sign into their own account from the Sign-in screen as you pass the Lock screen.
Whether the option you choose to create an account, the new account will be available from the sign-in screen as you lock or sign out of your computer. Also, during the first login, the new user will be prompted to create a PIN to speed up the sign in process instead of using a complicated password.
How to create a child account on Windows 11
To create a restricted account for a young person, use these steps:
- Open Settings.
- Click on Accounts.
-
Click the Family & other users page on the right side.
Source: Windows Central -
Under the “Your family” section, click the Add account button.
Source: Windows Central -
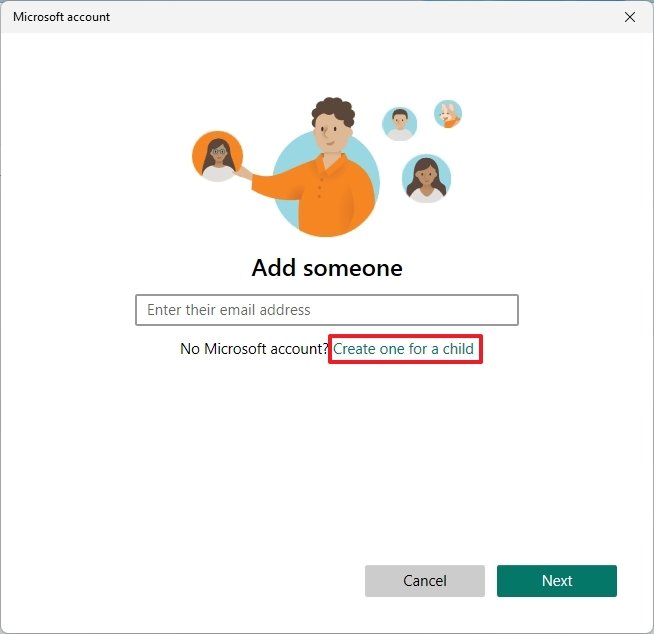
Click the Create one for a child option.
 Source: Windows Central
 -
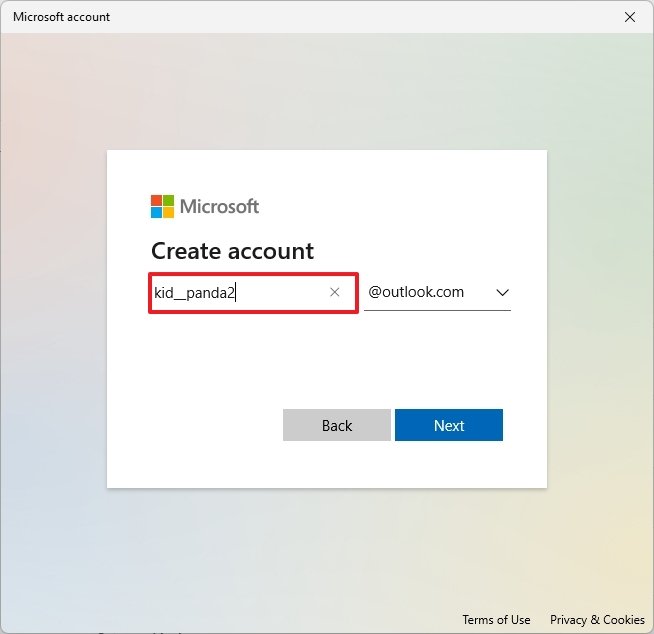
Create the email address of the young person you want to add.
 Source: Windows Central
 - Click the Next button.
-
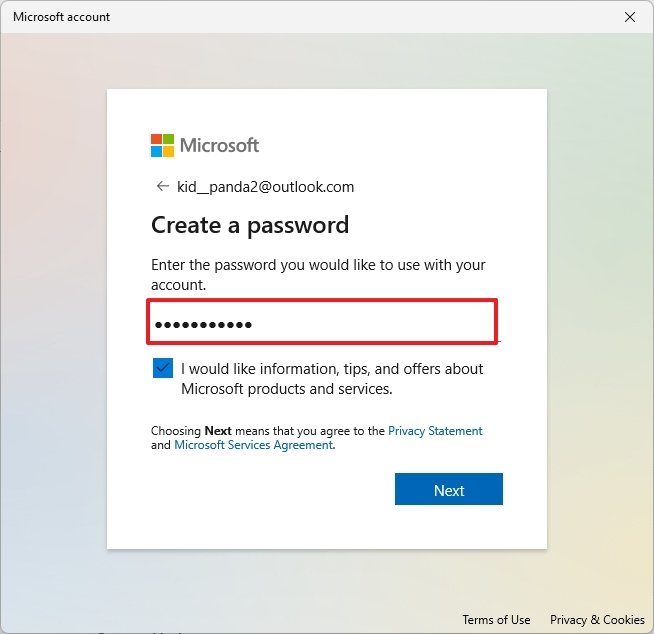
Create a new password for the child’s account.
 Source: Windows Central
 - Click the Next button.
-
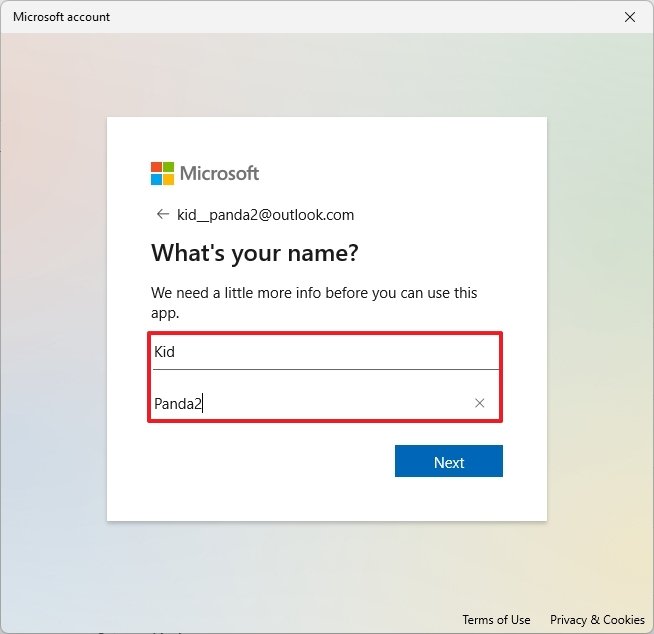
Confirm the name of the person.
 Source: Windows Central
 - Click the Next button.
-
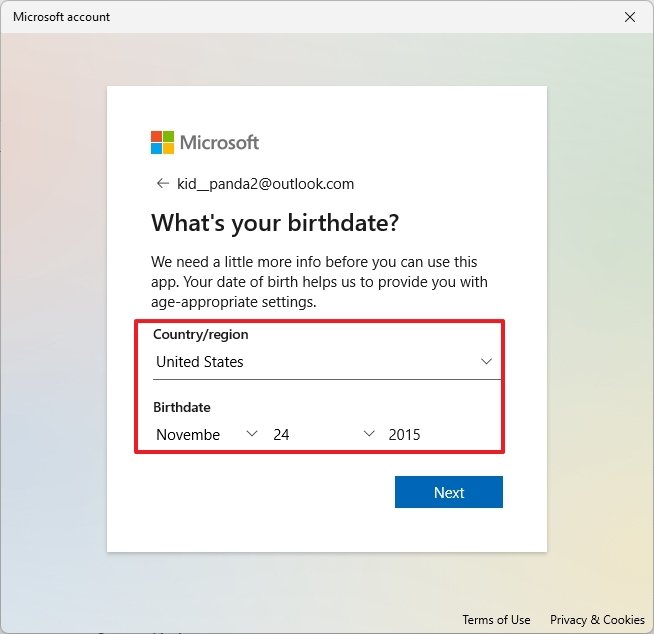
Confirm the person’s region and birthday.
 Source: Windows Central
 - Click the Next button.
-
Confirm the newly created email account.
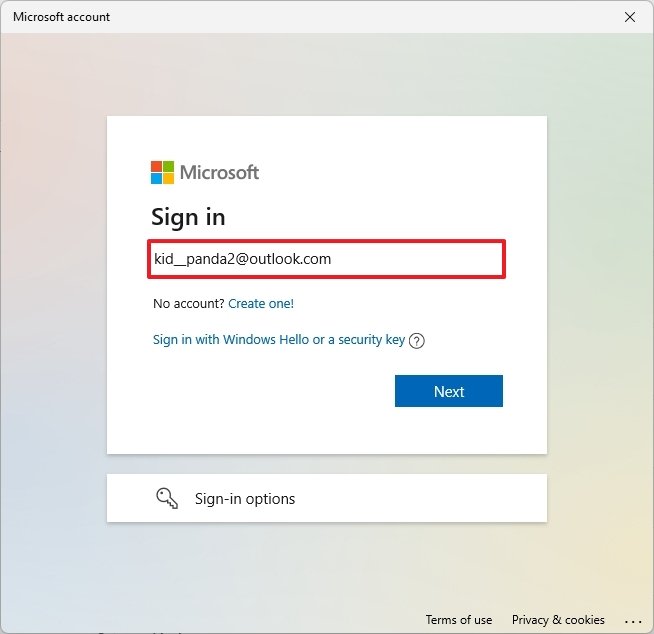 Source: Windows Central
 - Click the Next button.
- Confirm the account password.
- Click the Sign in button.
-
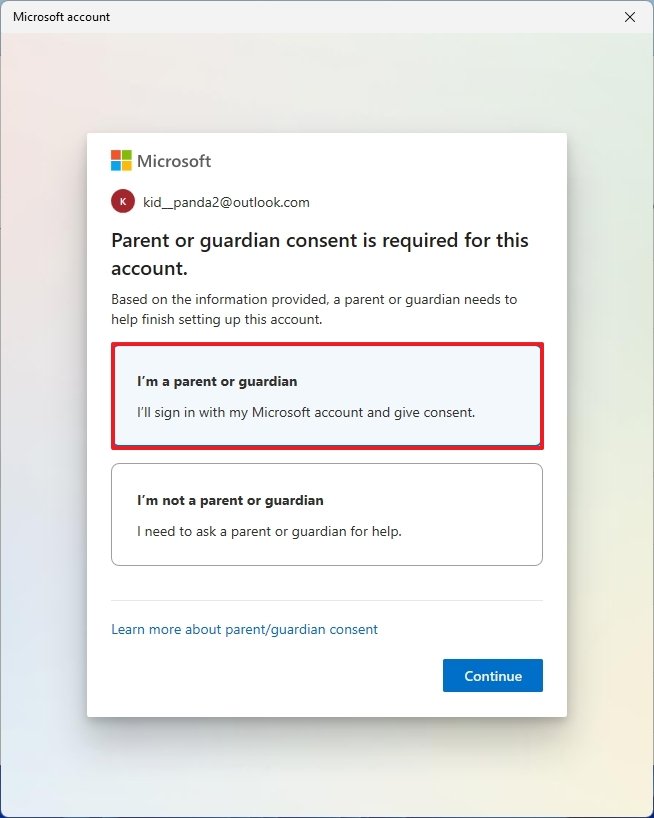
Confirm the parent or guardian’s consent.

 Source: Windows Central
 - Click the Continue button.
-
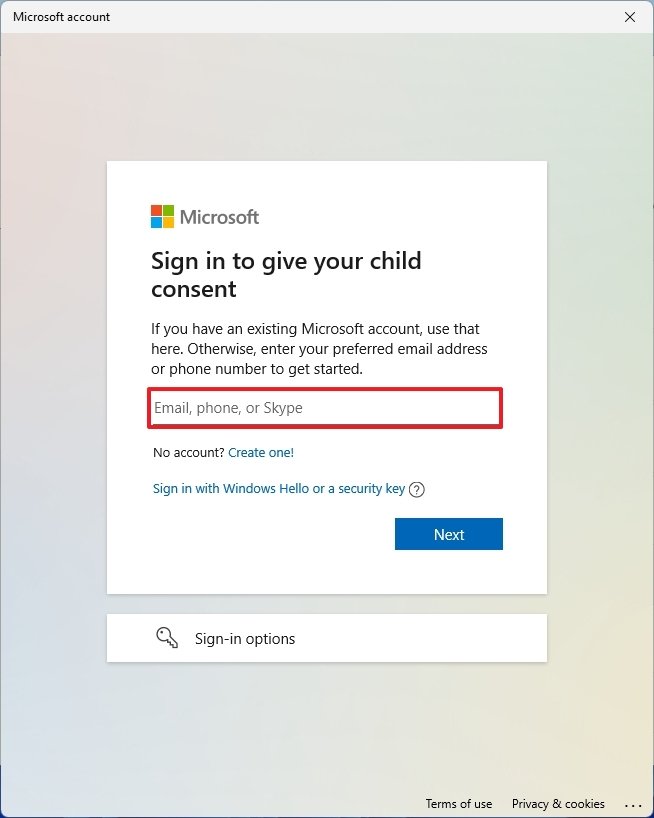
Confirm your parent or guardian email account.
 Source: Windows Central
 - Click the Next button.
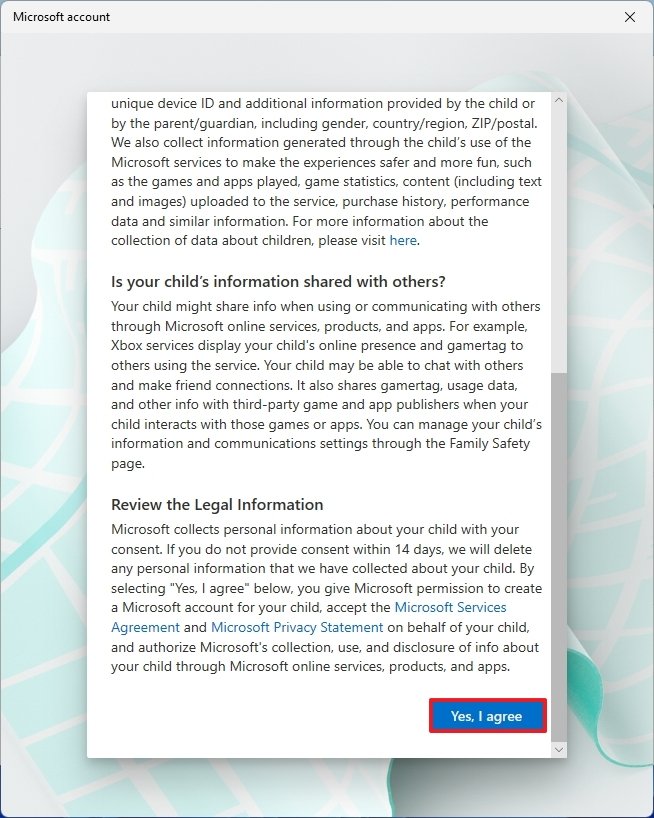
- Sign Microsoft’s consent form by typing your name as shown in the form.
-
Click the Yes, I agree button.
 Source: Windows Central
 -
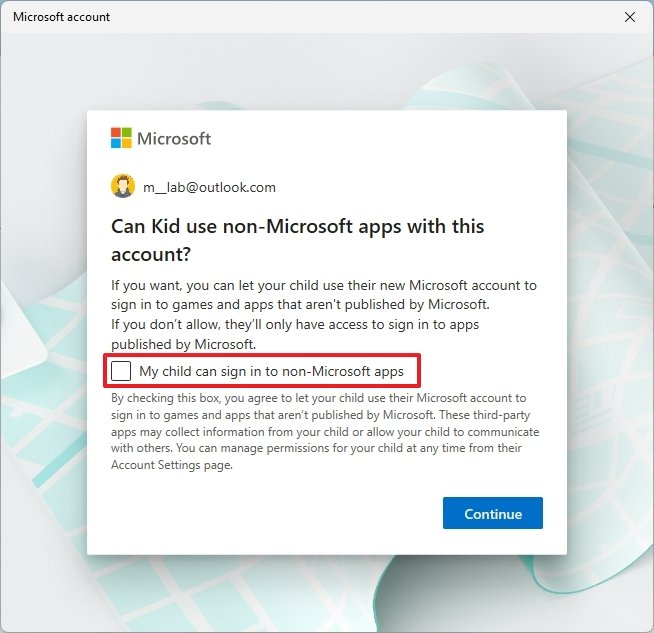
(Optional) Clear the My child can sign in to non-Microsoft apps option.

 Source: Windows Central
 - Click the Continue button.
-
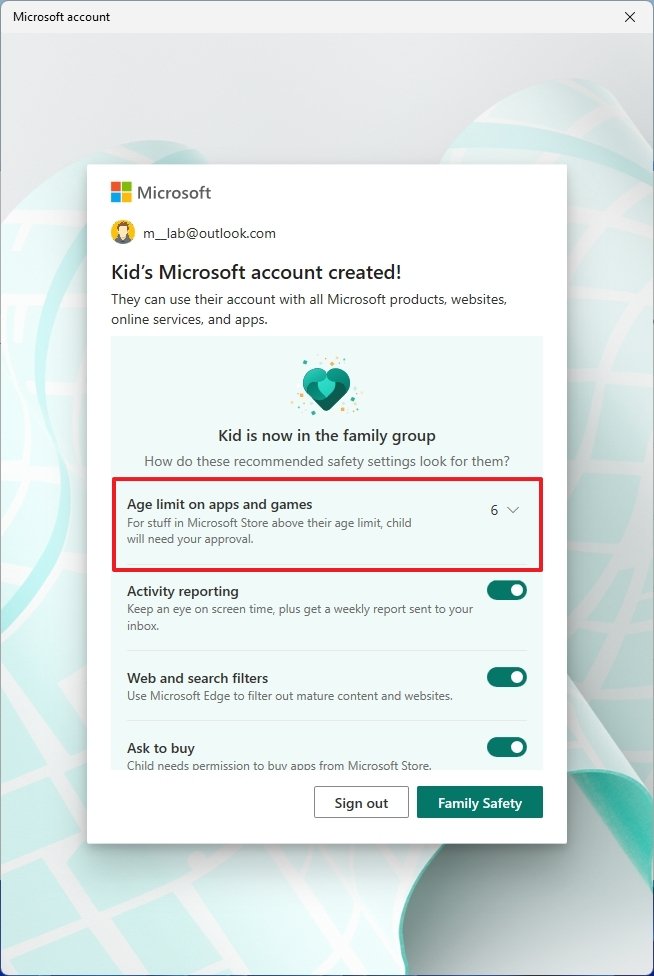
(Optional) Confirm the age limit for apps and games.

 Source: Windows Central
 - Turn on the Activity reporting toggle switch.
- Turn on the Web and search filters toggle switch.
- Click the Sign out button.
After you complete the steps, a standard account with limited access will be created for the child, and the new member will be able to sign in immediately. If you want to control their experience further, you can use the Family Safety settings in your Microsoft account online.
How to create a Microsoft account on Windows 11
To create another account for someone else with a Microsoft account, use these steps:
- Open Settings.
- Click on Accounts.
-
Click the Family & other users page on the right side.
Source: Windows Central -
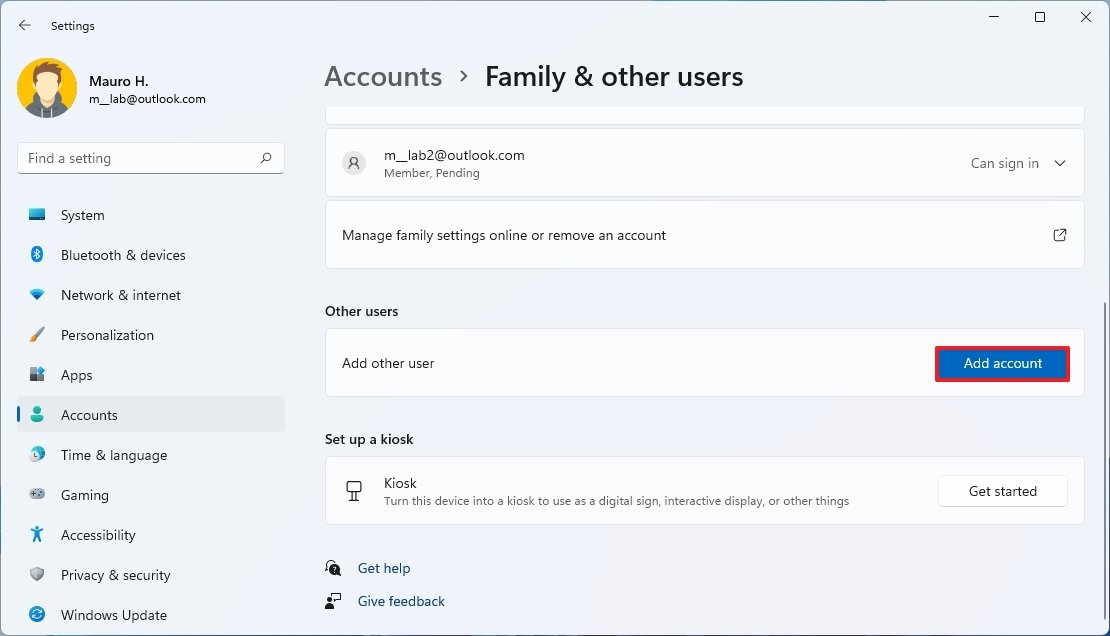
Under the “Other users” section, click the Add account option for the “Add other user” setting.

 Source: Windows Central
 -
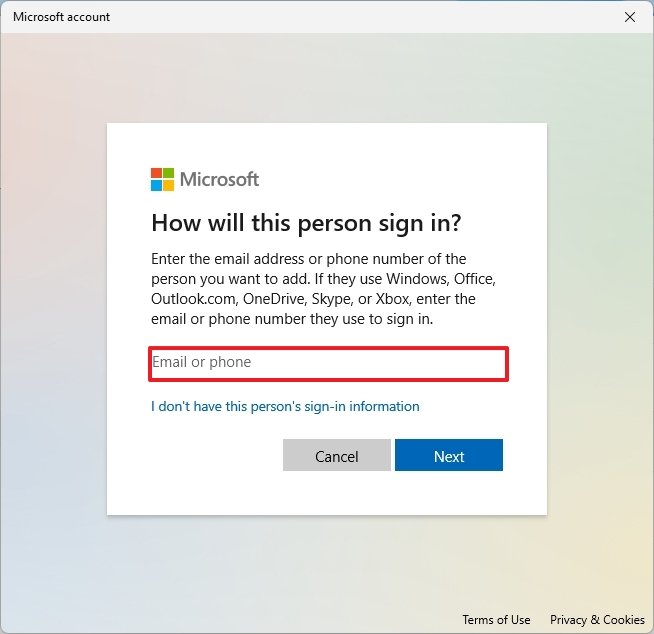
Confirm the email address of the person you plan to share the device with.
 Source: Windows Central
 - Click the Next button.
Once you complete the steps, the person should now be able to sign into the standard account without interfering with your account.
How to create a local account on Windows 11
To create a local account on Windows 11 for another person, use these steps:
- Open Settings.
- Click on Accounts.
-
Click the Family & other users page on the right side.
Source: Windows Central -
Under the “Other users” section, click the Add account option for the “Add other user” setting.
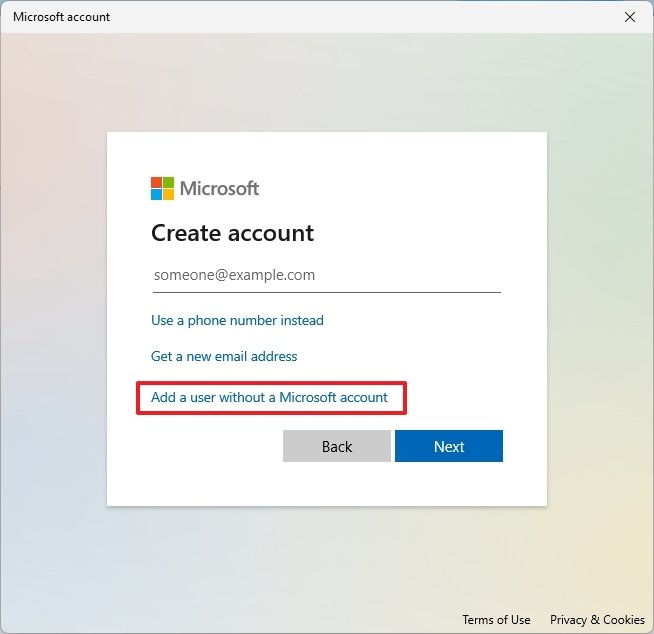
Source: Windows Central - Click the I don’t have this person’s sign-in information option.
-
Click the Add a user without a Microsoft account option.
 Source: Windows Central
 -
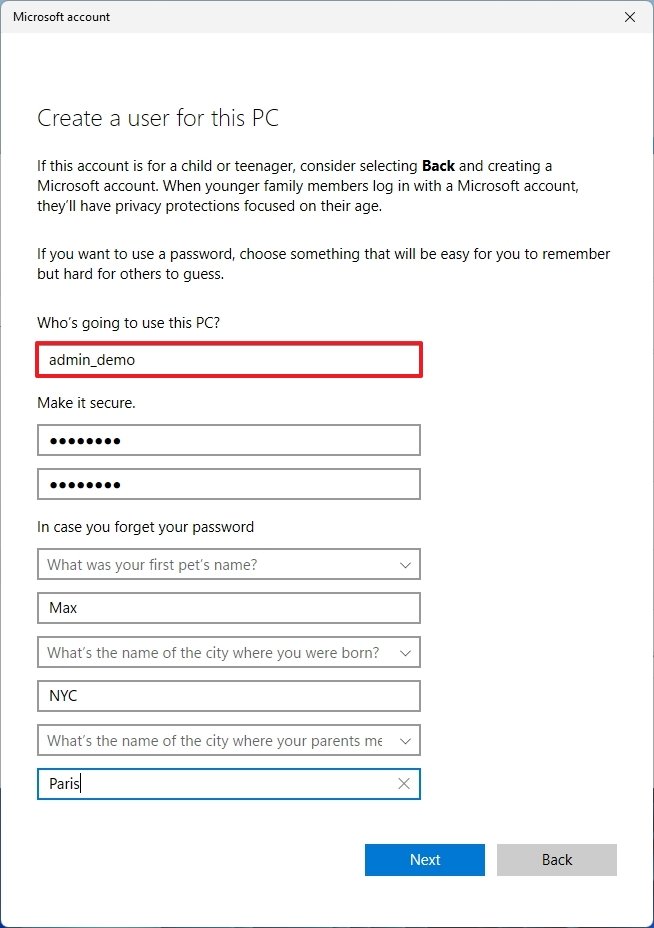
Confirm the name of the new user.

 Source: Windows Central
 - Create a strong password.
- Confirm the security questions to reset the password as necessary.
- Click the Next button.
After you complete the steps, a new local account will be created without linking to any of the Microsoft services.
How to change account type on Windows 11
To change the account type from “Standard User” to “Administrator” or vise versa, use these steps:
- Open Settings.
- Click on Accounts.
-
Click the Family & other users page on the right side.
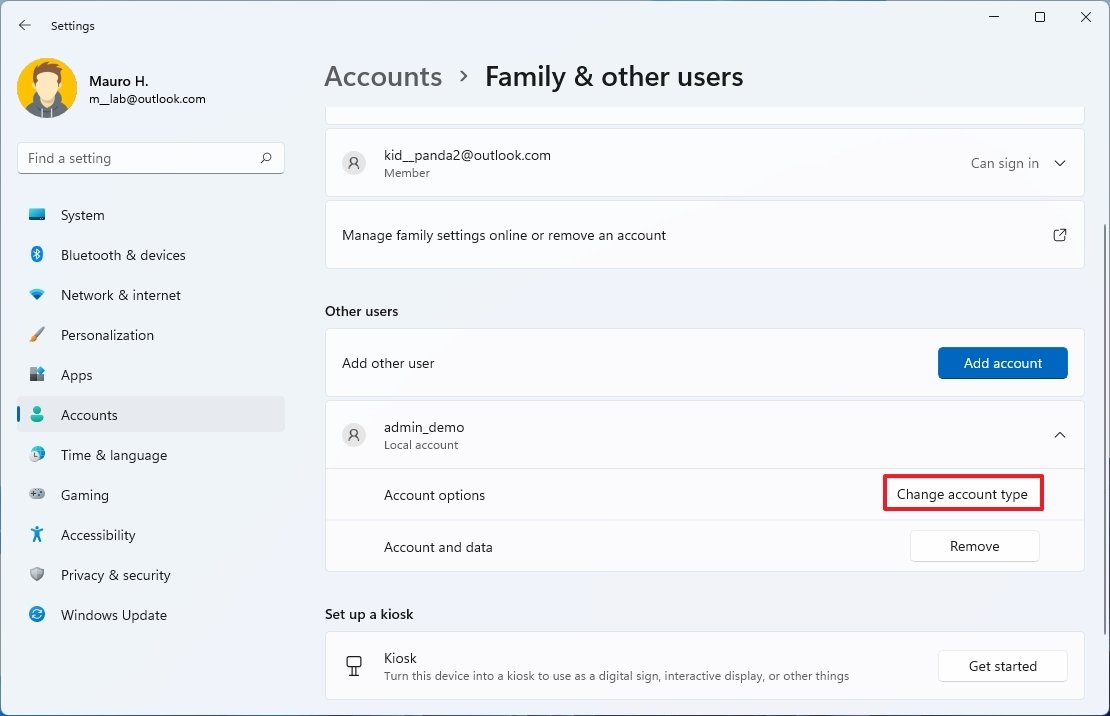
Source: Windows Central - Under the “Other users” section, select the user account.
-
Click the Change account type button.

 Source: Windows Central
 -
Use the “Account type” menu and select one of the available options:
- Standard User:
- Administrator User:

 Source: Windows Central
 - Click the OK button.
Once you complete the steps, the account will be updated to the privileges you specified.
How to delete user account on Windows 11
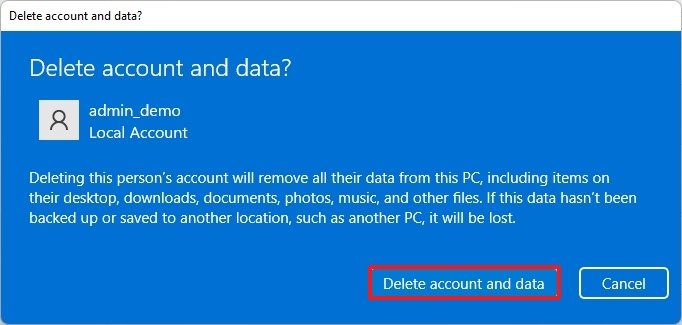
The option to remove an account also deletes the data from that account, which means that if the account has important files, it’s recommended to back them up before proceeding with these instructions.
To remove a Windows 11 account, use these steps:
- Open Settings.
- Click on Accounts.
-
Click the Family & other users page on the right side.
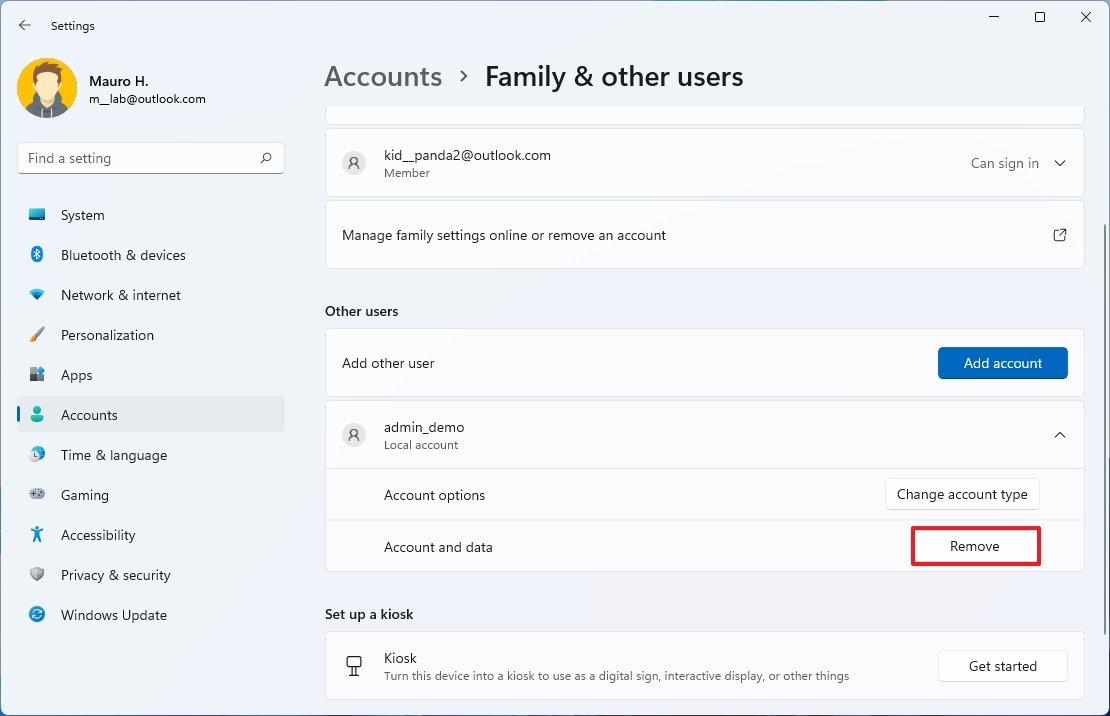
Source: Windows Central - Under the “Other users” section, select the account.
-
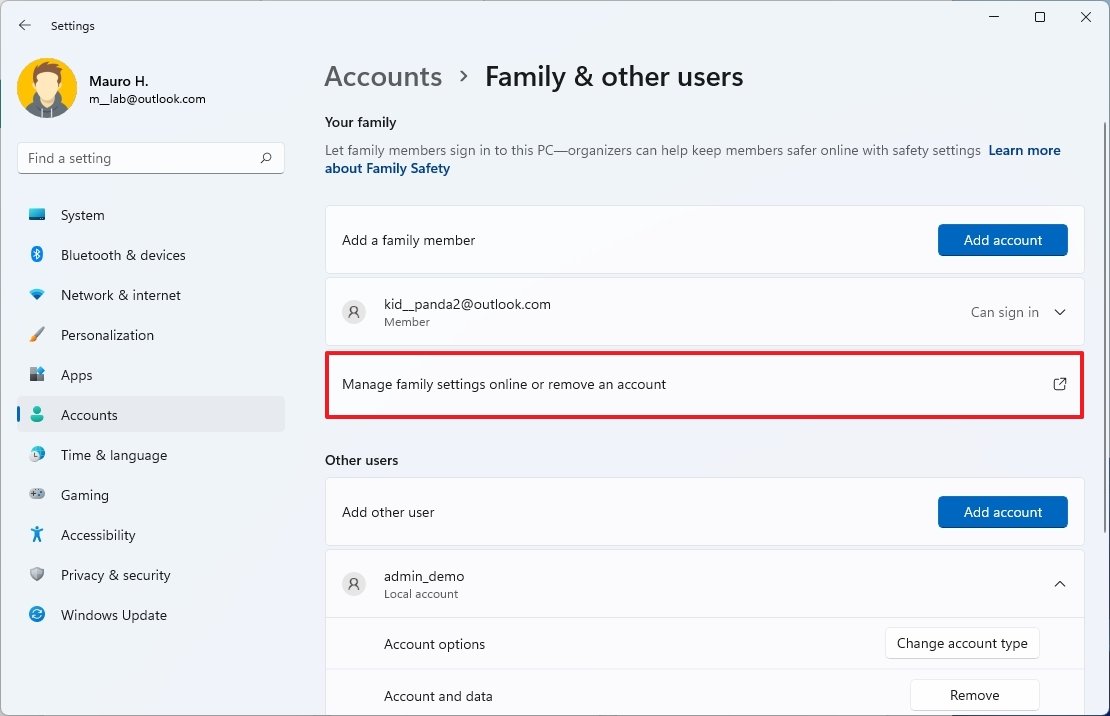
Click the Remove button.
 Source: Windows Central
 -
Click the Delete account and data button.

 Source: Windows Central
After you complete the steps, the account and only the account data will be deleted. This action won’t affect the other accounts configured on the device.
Remove family member
If you want to remove a child or another family account, use these steps:
- Open Settings.
- Click on Accounts.
-
Click the Family & other users page on the right side.
Source: Windows Central -
Under the “Your family” section, click the Manage family settings online or remove an account option.
 Source: Windows Central
 - Sign in with your Microsoft account (if applicable).
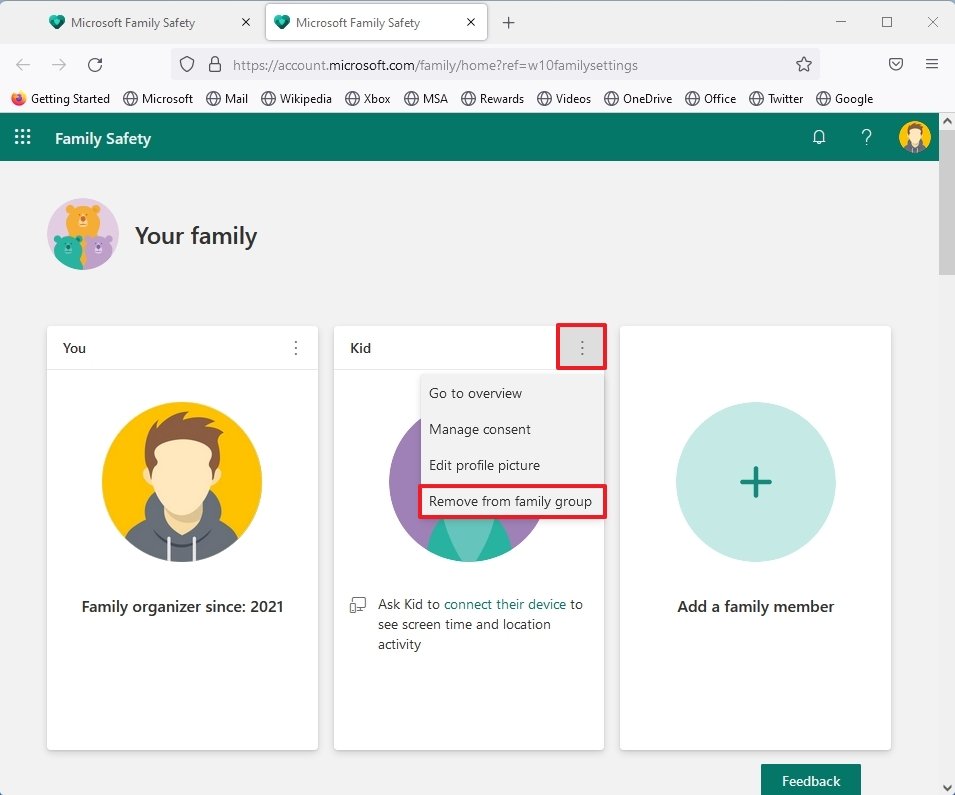
- Click the ellipses (three-dotted) button on the account.
-
Click the Remove from family group option.

 Source: Windows Central
More Windows resources
For more helpful articles, coverage, and answers to common questions about Windows 10 and Windows 11, visit the following resources:
We may earn a commission for purchases using our links. Learn more.

Best Microsoft Cyber Monday deals 2021
Cyber Monday is a huge event. Expect a whole lot of online deals and expect to see those deals throughout November and December. We’ve got all the details you need right here.


