Summary
- Setting up file sharing between Mac and Windows is fast and secure, and avoids the need to rely on internet-based cloud services.
- Configure network settings, enable file sharing on both Mac and Windows, then add shared folders and users for access.
- Access shared folders on Windows by navigating to Network, entering relevant credentials or access Windows shared folders on Mac via Finder.
Sharing files between Macs and Windows shouldn’t be a complicated matter and, with some simple settings changes, you can have your own mixed network up and running in a few minutes.
Why Share Files Between Mac and Windows?
You might already know how to share files between your Mac and Linux machines or from one Mac to another.
Windows and Mac are the two dominant computer operating systems that most people use on a daily basis. So it’s only natural that you might have one or both in your own home. Sharing folders between the two on your own home network is fast and secure, and it avoids some of the nuisances and extra steps cloud and external storage bring to the table.
You will need to configure all your machines before you can share any files. This means verifying your network connections and setting up file sharing on macOS and Windows.
First, Check Your Network Settings
First, ensure both your Mac and Windows machines are connected to the same network by Wi-Fi or Ethernet.
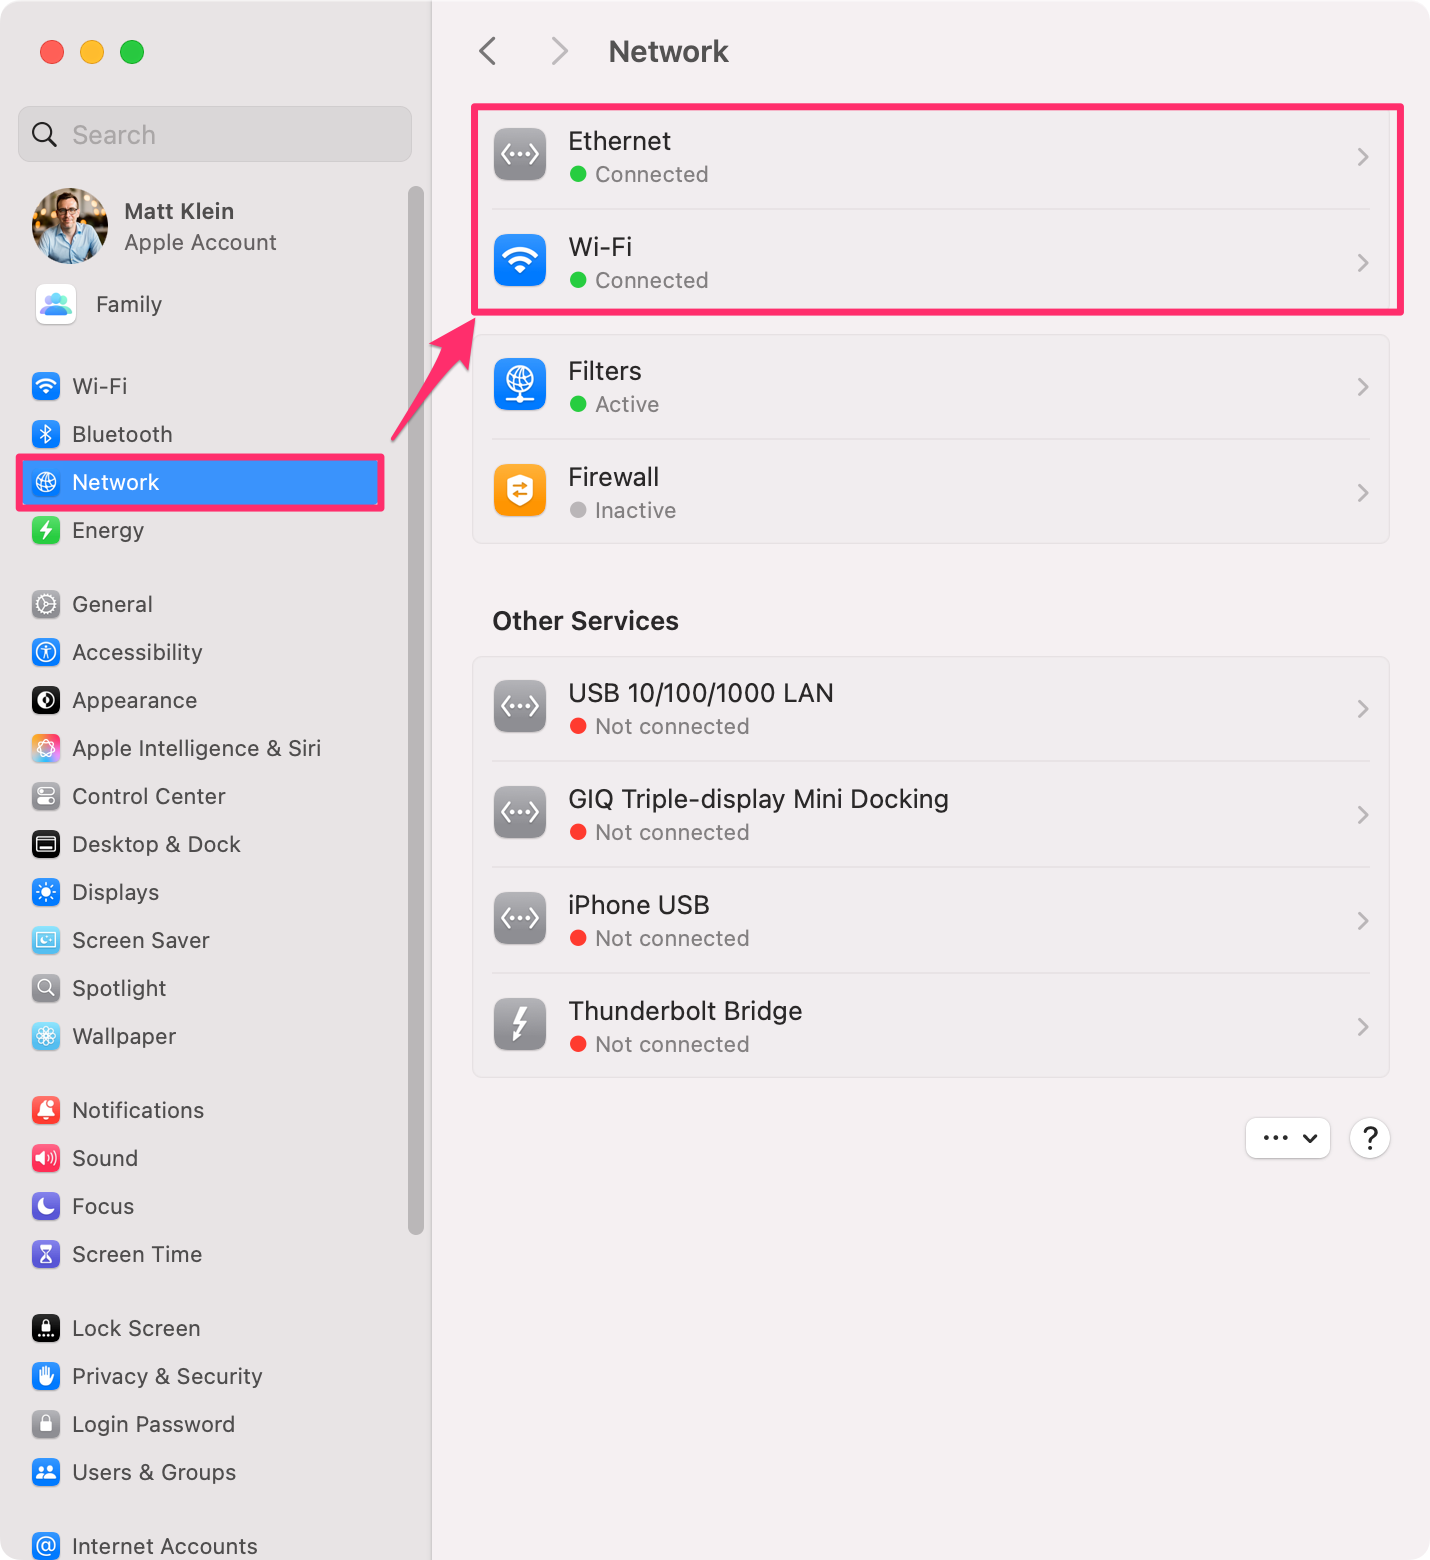
On Mac, check the Wi-Fi status in the menu bar, or go to System Settings > Network to confirm connectivity.
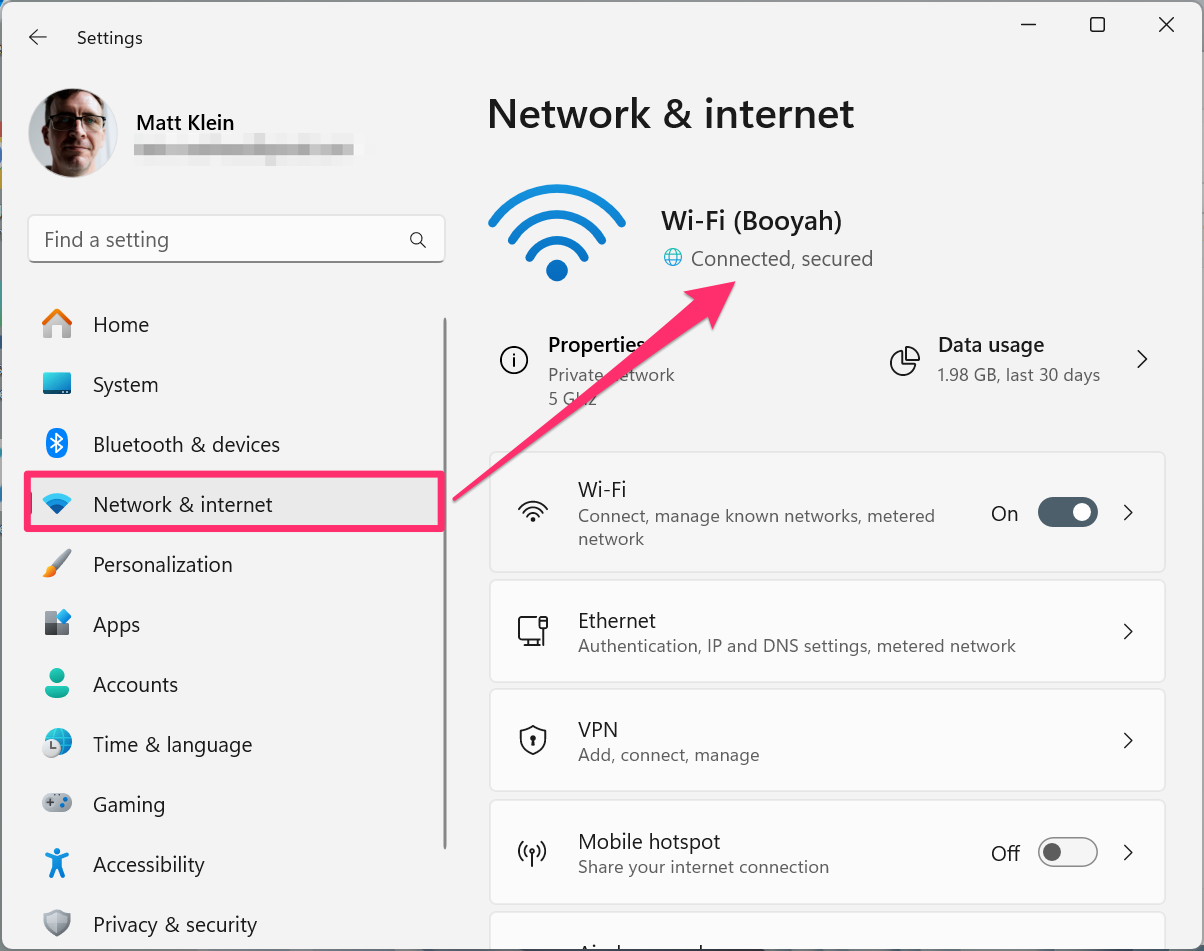
On Windows, open Settings > Network & Internet, then confirm your network status under Wi-Fi or Ethernet.
Enable File Sharing on macOS
By enabling file sharing, your Mac can share files with other devices such as Windows and even Linux machines.
Open System Settings > General > Sharing and enable “File Sharing”, then select the small icon to the right of the toggle to open the Shared Folders configuration window.
Select “Options” in the Shared Folders configuration window, verify SMB File Sharing is on, then enable your account for Windows File Sharing.
Select “Done” to go back to the Shared Folders window.
Add Shared Folders, New Users, and Configure Access
At this point in the process, your Mac is ready to share files and folders, but you need to first select them, and if necessary, add users and how they’ll access them.
Below the Shared Folder pane, click “+”, select the folder, then select “Open”. Configure access by selecting it, then selecting a user and setting access permissions such as “Read Only” for viewing and “Read & Write” for editing.
Click the “+” or “–” buttons at the bottom of the Users pane to add or remove users.
Access macOS Shared Folders on Windows
Accessing macOS shared folders on Windows is pretty straightforward. Open “File Explorer” and select “Network” from the navigation pane. Hopefully, you see the other device or devices on your network. Open the location you want to access, enter your credentials (optionally select “Remember my Credentials”), and you can now access your Mac’s shared folder or folders.
If you’re the only user on your Mac, you’ll need to enter your Mac username (e.g. “matt”) and the password you use to log in to your Mac when your computer restarts.
If you don’t see your Mac show up as a network device, enter the IP address in the address bar, and it should prompt you for credentials.
To find your Mac’s IP address, head back to your Apple computer and hold the Option key on your keyboard then click Apple > System Information. Click on the “Network” heading and then look in the list of network devices under “IPv4 Address” to find your local IP.
If you want to see your devices in the Network view, then you can install something like wssd-native. This simple fix makes “your [macOS] machine visible in Network view of Windows Explorer on newer versions of Windows.”
Enable File Sharing from Windows
Next, you can enable file sharing on your Windows machine so you can easily access shared folders from your Mac.
First, open “Settings” (you can press Win+I), then go to Network & Internet > Advanced Network Settings. Select “Advanced Sharing Settings”, then select “Network Discovery”, and “File and Printer Sharing”.
Finally, if you feel your private network is safe and secure, you can optionally “Turn Off Password-Protected Sharing”.
Add Shared folders on Windows
Sharing folders on Windows is easy and only takes a minute. Open “File Explorer”, right-select the folder you want to share, then select “Properties”.
When the folder’s properties open, select the “Sharing” tab, then “Share”. Next, select the user who can access this folder from other machines, then select “Share”. Finally, on the last window, select “Done”.
You can now access your share folder from other machines, including your Mac.
Access Windows Shared Folders on macOS
You should now be able to access your Windows machine’s shared home folder from your Mac. Open Finder, then select “Network” in the left pane. In the Network window, open your Windows machine, which will say “Connection Failed”.
Select “Connect As” in the upper-right corner of the network window, then enter your network credentials.
You should now be able to access your shared Windows folders, with read and write privileges.
Congratulations! You’ve successfully set up file sharing between your Mac and Windows devices. With just a few simple steps, you’ve created a seamless home network connection to enhance productivity and simplify your workflow. Whether you’re sharing work documents, photos, or media, the process ensures your files are accessible from any device, without the need for cloud storage or external drives.
With your file-sharing setup in place, you’re now ready to make the most of your multi-device network. Keep exploring, and enjoy the ease of managing files across different systems with minimal effort. Check our LocalSend if you’re looking for a way to share wirelessly between Mac, Windows and more.


