

On Windows 11, you can change the visibility of the icons on the desktop. You can hide them all, or each one individually, for a clean desktop without clutter. Or you can show as many as you want for quick access to your apps. You can even bring back the legacy system icons, including Computer, Network, profile folder, and others.
In this Windows 11 guide, we will show you the different ways to show or hide icons for apps on the desktop.
How to show or hide desktop icons on Windows 11
Windows 11 lets you show or hide all the icons on the desktop with a couple of clicks. If you don’t see any icons on the desktop, even though the “Desktop” folder has different contents, the system is configured to hide all the icons.
To show all the icons on Windows 11, use these steps:
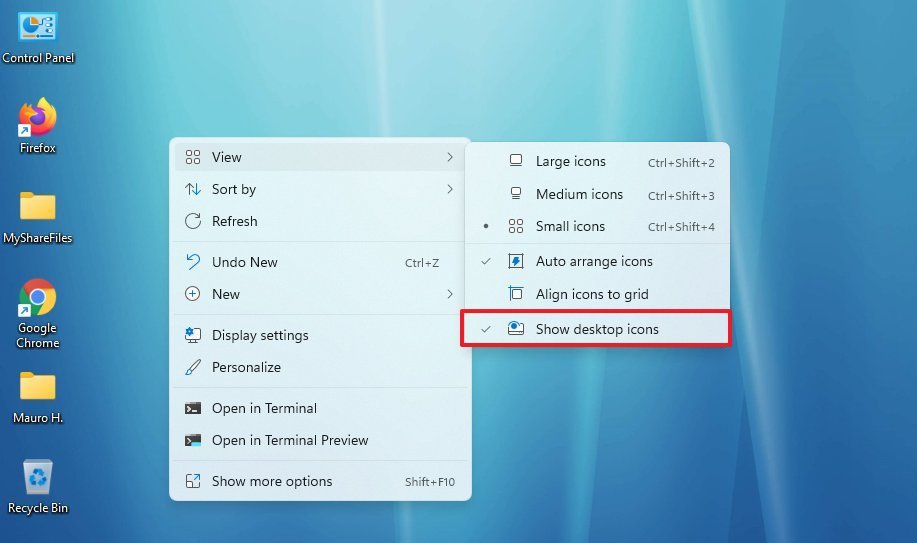
- Right-click on the desktop area.
-
Select the “View” submenu and choose the “Show desktop icons” option.

 Source: Windows Central
 -
(Optional) Change the size of the icons by selecting one of the options:
- Large icons.
- Medium icons.
- Small icons.
-
(Optional) Select the Auto arrange icons option to automatically arrange icons to the left side of the screen.
Quick note: When using this option, you cannot arrange icons manually. If you need to move one or more icons to another region on the screen, you need to disable the option.
- (Optional) Check the Align icons to grid to align icons on the desktop.
Once you complete the steps, all the icons on the Desktop will be visible.
Hide desktop icons
To hide the desktop icons, use these steps:
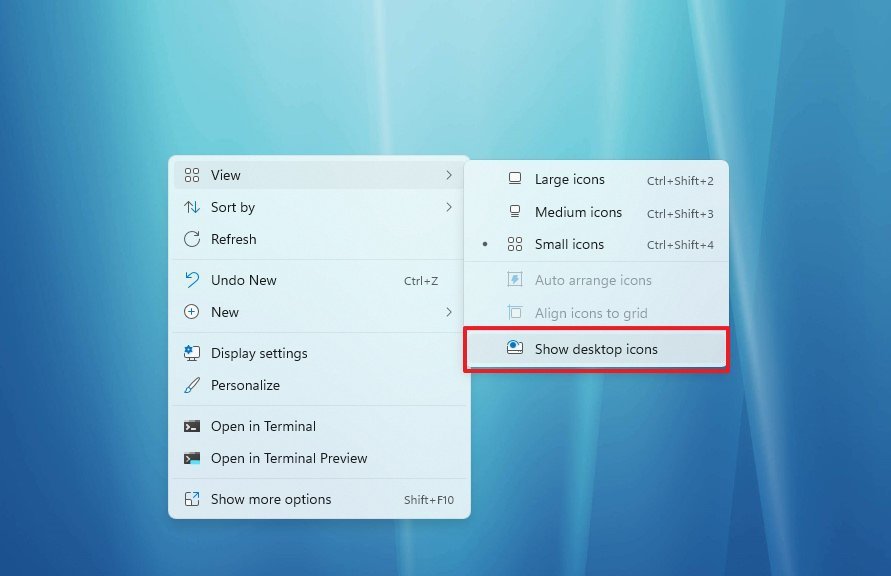
- Right-click on the desktop area.
-
Select the “View” submenu and choose the “Show desktop icons” option again to hide the icons.

 Source: Windows Central
After you complete the steps, the desktop will no longer show any icons, but you can still access them from the “Desktop” folder using File Explorer.
How to add or remove desktop icons on Windows 11
If you only want to show or hide the legacy system icons, you need to use the Settings app.
To add (or show) system icons to the desktop, use these steps:
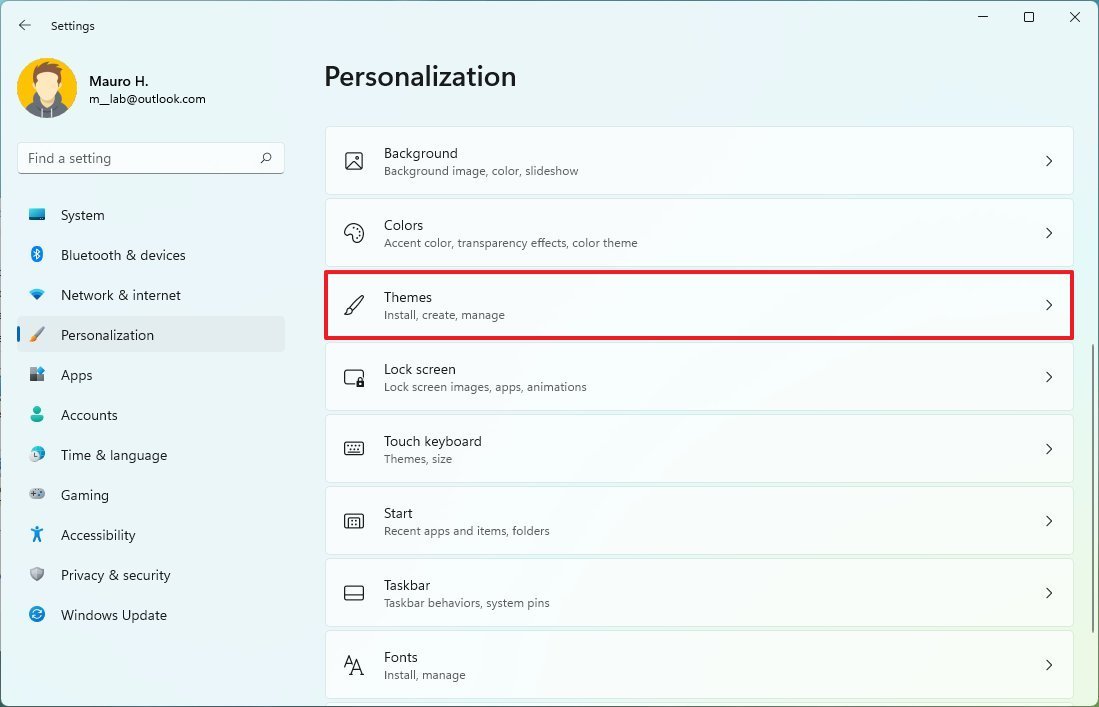
- Open Settings.
- Click on Personalization.
-
Click the Themes page on the right side.

 Source: Windows Central
 -
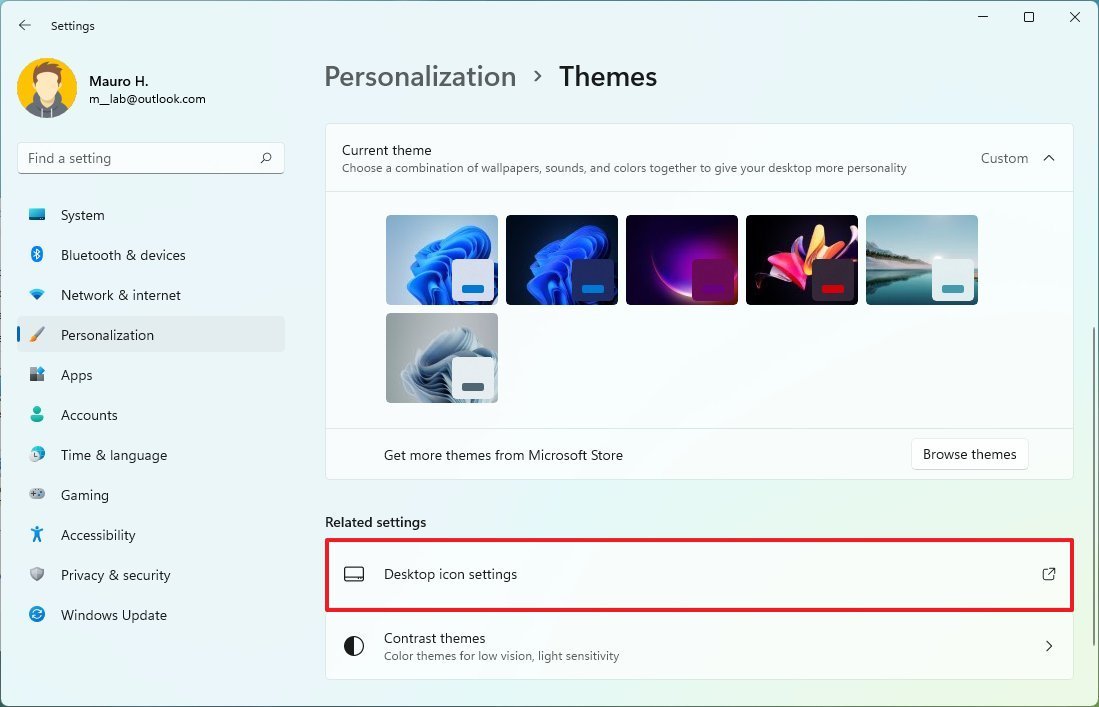
Under the “Related settings” section, click the Desktop icon settings option.
 Source: Windows Central
 -
Check the icons to appear on the desktop:
- Computer.
- User’s Files.
- Network.
- Recycle Bin.
- Control Panel.

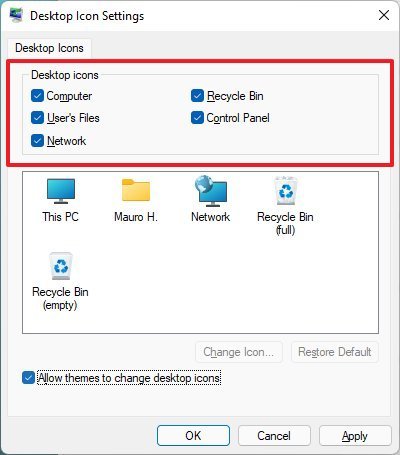 Source: Windows Central
 - Click the Apply button.
- Click the OK button.
Once you complete these steps, the icons will appear on the Windows 11 desktop.
Remove desktop icons
If you no longer want a specific system icon, you can select it and use the Delete key to hide it. Or you can use these steps:
- Open Settings.
- Click on Personalization.
-
Click the Themes page on the right side.
Source: Windows Central -
Under the “Related settings” section, click the Desktop icon settings option.
Source: Windows Central -
Clear the icons you want to hide in the desktop.
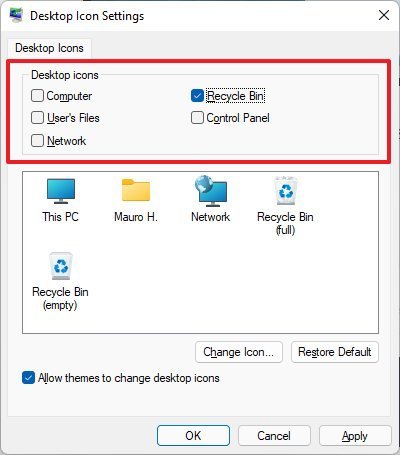 Source: Windows Central
 - Click the Apply button.
- Click the OK button.
After you complete the steps, the system icons will hide from the desktop.
How to add or remove any app icon on Windows 11
In the case you want to show specific apps on the desktop, you can do this easily from the system “Applications” folder, whether it’s a legacy or modern app you downloaded from the Microsoft Store.
To add app icons to the Windows 11 desktop, use these steps:
- Open Start.
- Search for Run and click the top result to open the app.
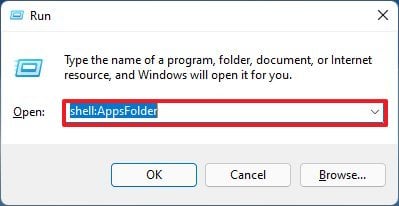
-
Type the following command to open the system’s Applications folder and click the OK button:
shell:AppsFolder
 Source: Windows Central
 -
Select and drag the app to the desktop to create an icon on the desktop.

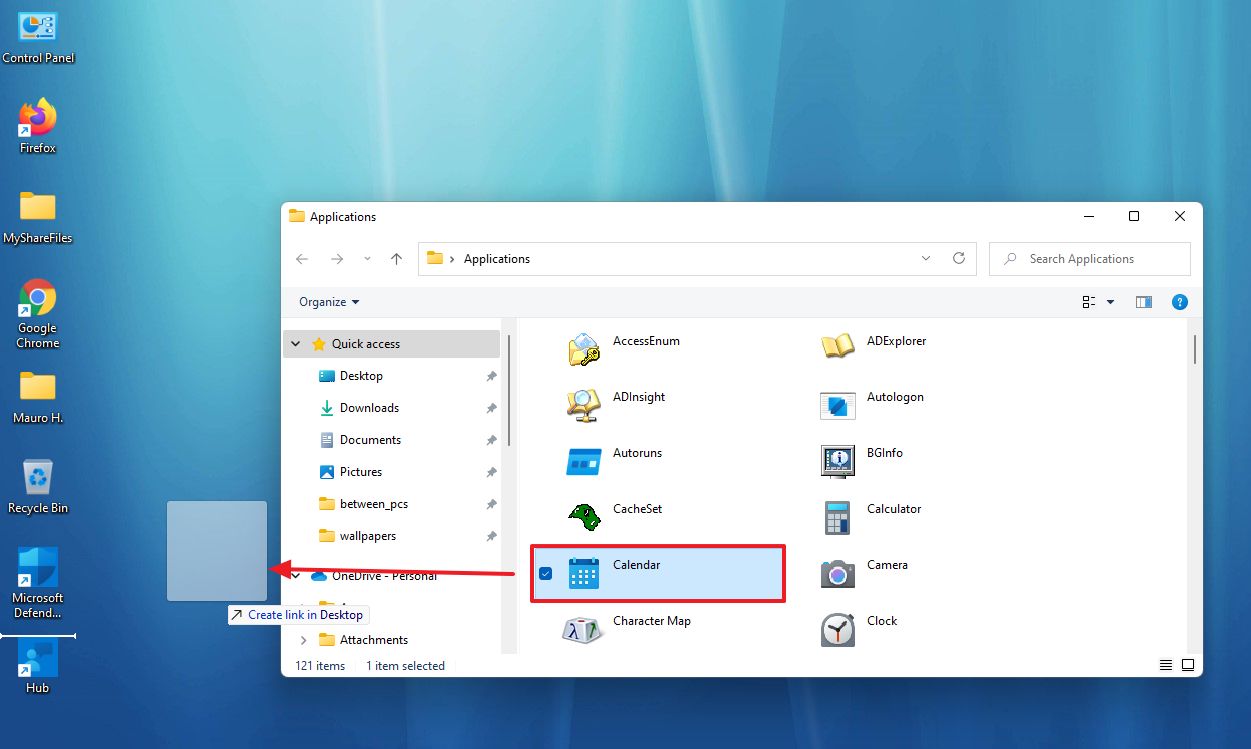 Source: Windows Central
 - (Optional) Select the icon, press the F2 key to rename it, and press Enter.
Once you complete the steps, the icons will appear on the desktop.
Remove app icons
To remove any icons from the Applications folder, select it, and click the Delete key.
How to create custom desktop icons on Windows 11
Alternatively, if you know the app’s location, you can create a shortcut to show it on the desktop.
To create a custom desktop icon, use these steps:
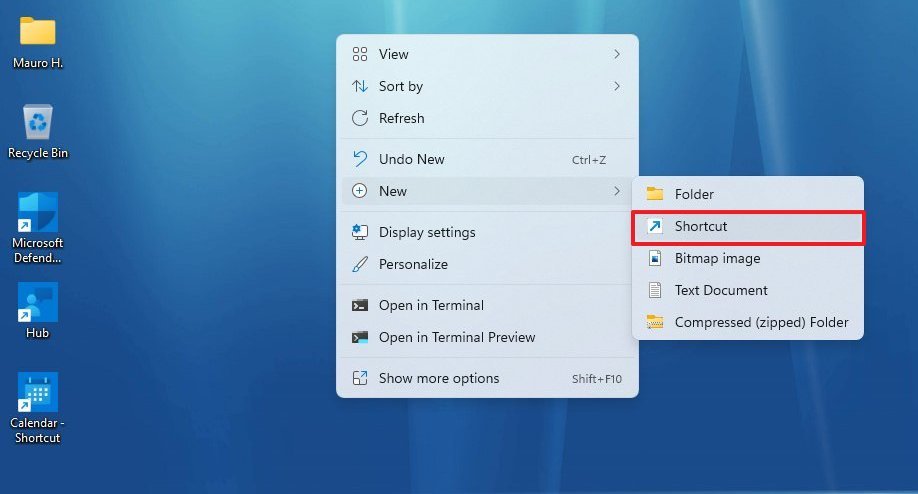
- Right-click on the desktop area.
-
Select the “New” submenu and choose the Shortcut option.

 Source: Windows Central
 -
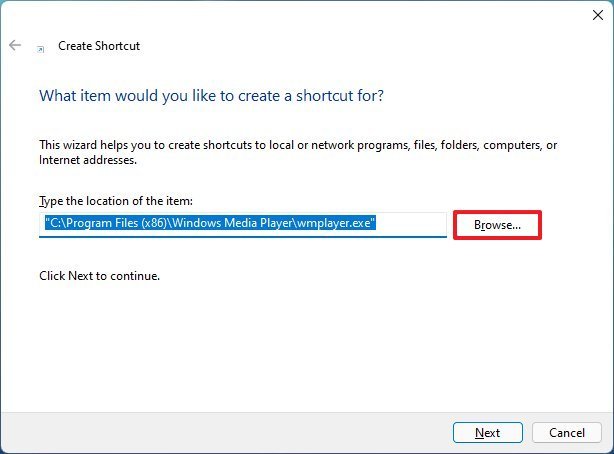
Click the Browse button.

 Source: Windows Central
 -
Navigate to the application folder location.
Quick tip: Legacy x86 apps will be located in
C:Program Files (x86), and x64 apps will be insideC:Program Files. - Select the main executable (.exe) for the application. (Usually, the .exe file has the icon of the app.)
- Click the OK button.
- Click the Next button.
-
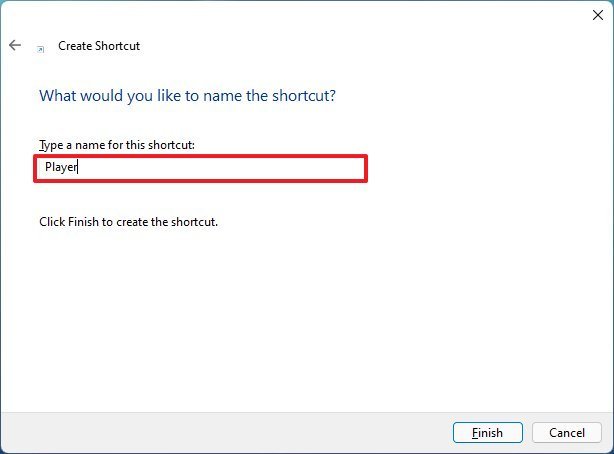
Confirm a name for the shortcut.
 Source: Windows Central
 - Click the Finish button.
After you complete the steps, the custom icon will show on the desktop.
Remove app icons
To remove any icons from the Applications folder, select it, and click the Delete key.
More Windows resources
For more helpful articles, coverage, and answers to common questions about Windows 10 and Windows 11, visit the following resources:

Review: WWE 2K22 is a big step forward for the series
The WWE 2K franchise has been away for nearly two years now, with developer Visual Concepts deciding to take 2021 off in an attempt to produce a more solid game. The result was a success, as WWE 2K22 still has some flaws, but is a major step forward.


