On Windows 11, if you have multiple hard drives, you can combine them into a single large volume to avoid fragmenting your data manually across those drives.
You can accomplish this configuration in multiple ways using the legacy Disk Management tool or the modern Settings app. If you want to use Disk Management, you can use the “Spanned” or “Striped” feature when creating a new volume. Both options offer similar functionality but use different methods to write data to the hard drive.
In the Settings app approach, you will use the “Storage Spaces” feature to configure two or more drives into a logical unit. Using this solution, you can use the “Simple” or “Parity” features, which are the most comparable to the “Spanned” and “Striped” options. However, while the “Simple” option doesn’t provide data protection, the “Parity” feature offers data loss protection in case of a drive failure since it writes data with parity information.
If you plan to use one of these features, I strongly recommend having a reliable file backup in place to recover your data in case of hardware failure or data corruption.
In this how-to guide, I will explain how to create a single large drive out of multiple secondary drives connected to your Windows 11 computer.
How to span volume across drives using Disk Management
To combine multiple drives into a single large volume through Disk Management, use these steps:
- Open Start.
- Search for Disk Management and click the top result (Create and format hard disk) to open the app.
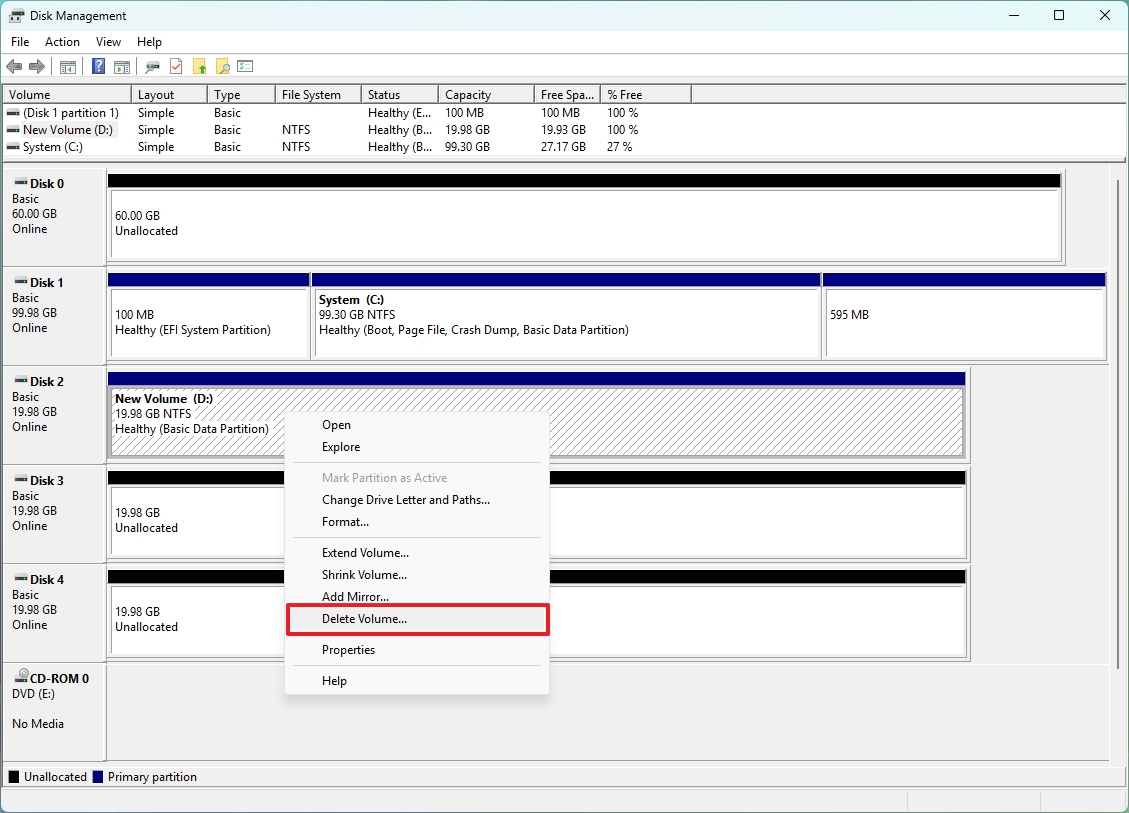
- Right-click the drive volume and select the Delete volume option (if applicable).
- Click Yes to confirm the deletion of the current volume and the data.
- Repeat steps 3 and 4 on the drives you want to combine.
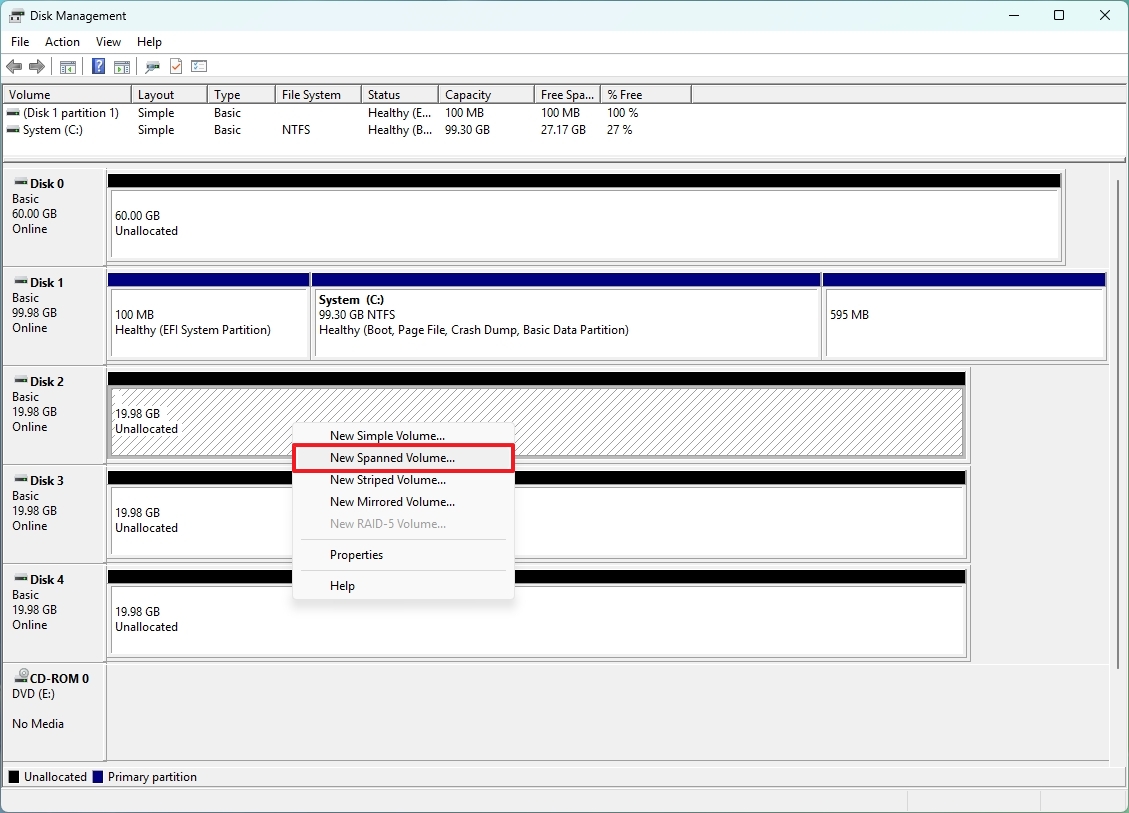
- Right-click on the unallocated space for one of the drives and choose the “New Spanned Volume” or the “New Striped Volume” option.
- Click the Next button.
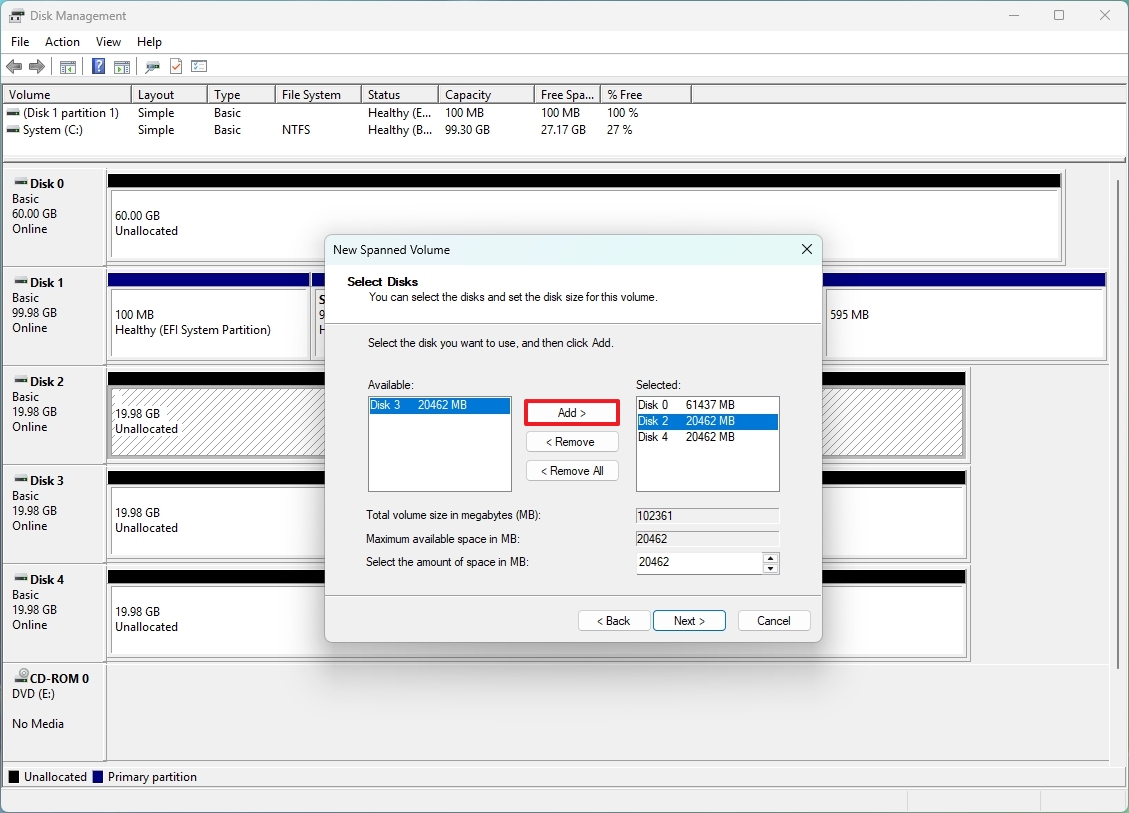
- Choose the drives to include in this process and click the Add button. (You can only add one drive at a time.)
- Click the Next button.
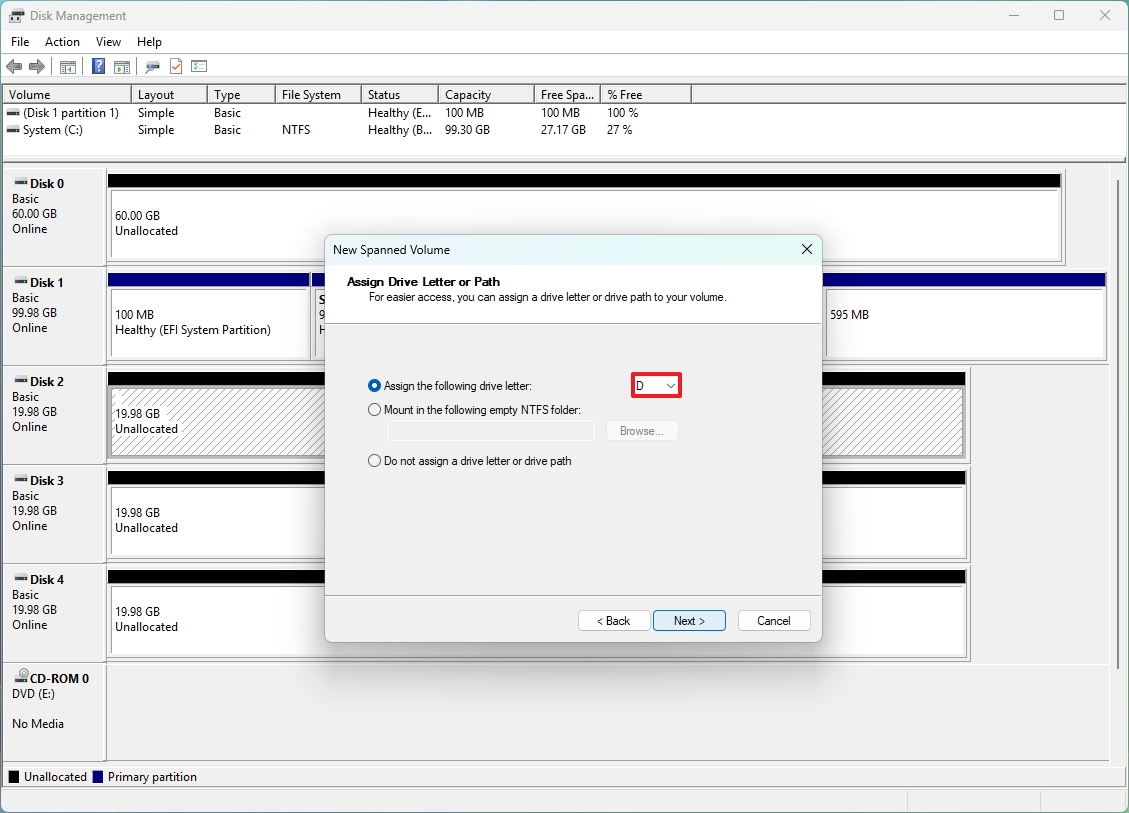
- Select a drive letter in the “Assign the following drive letter” setting.
- Click the Next button.
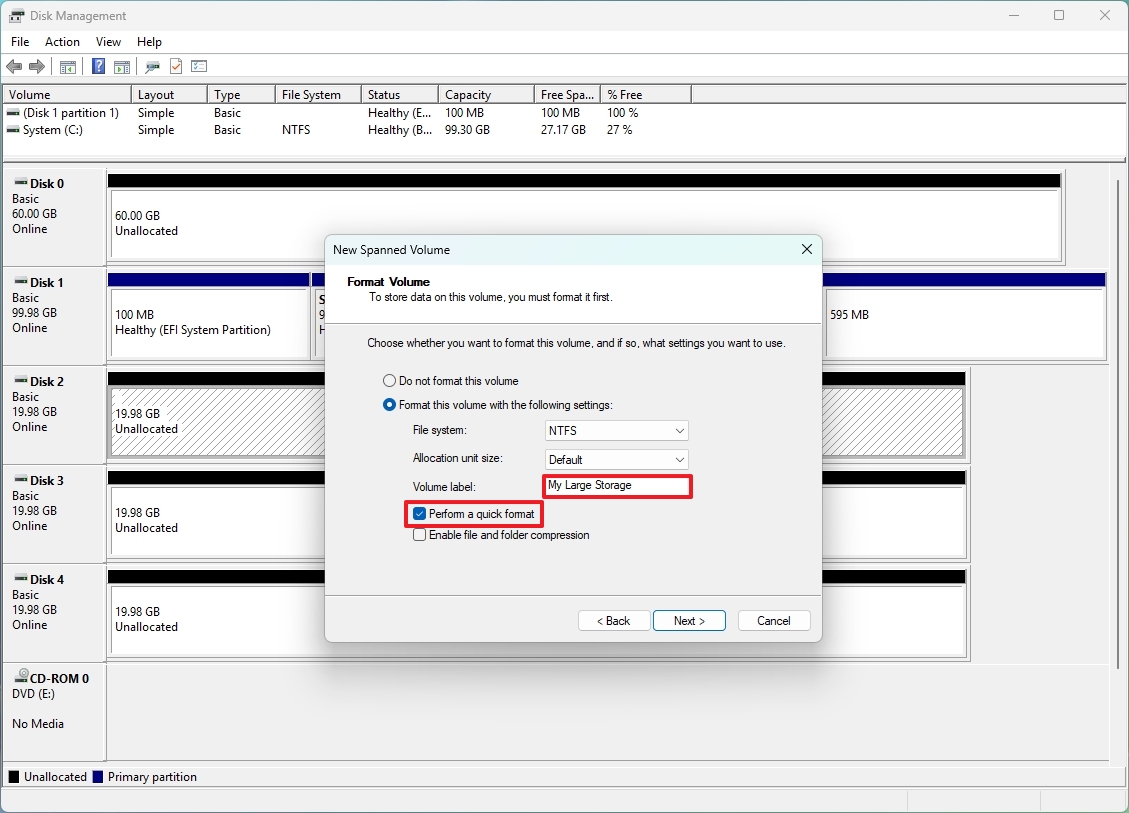
- Use the default file system and allocation unit size.
- Confirm a label for the drive.
- Check the “Perform a quick format” option.
- Click the Next button.
Once you complete the steps, the system will create a large volume combining the selected drives.
The “New Spanned Volume” option writes files sequentially on each drive, meaning that if a drive fails, the data on that drive is lost. However, the data on the other drives will remain accessible.
On the other hand, the “New Striped Volume” option distributes the data across the different drives, improving read and write performance. However, if a drive fails, the entire volume will be inaccessible. Also, using either of these options, you will need two or more drives.
It’s worth noting that this feature doesn’t replace a RAID ( Redundant Array of Independent Disks) controller, which provides a similar solution but offers data redundancy and better performance.
Extend volume already with data
If the drive already has a partition with data, you can still extend the volume using other hard drives, and here’s how:
- Open Start.
- Search for Disk Management and click the top result (Create and format hard disk) to open the app.
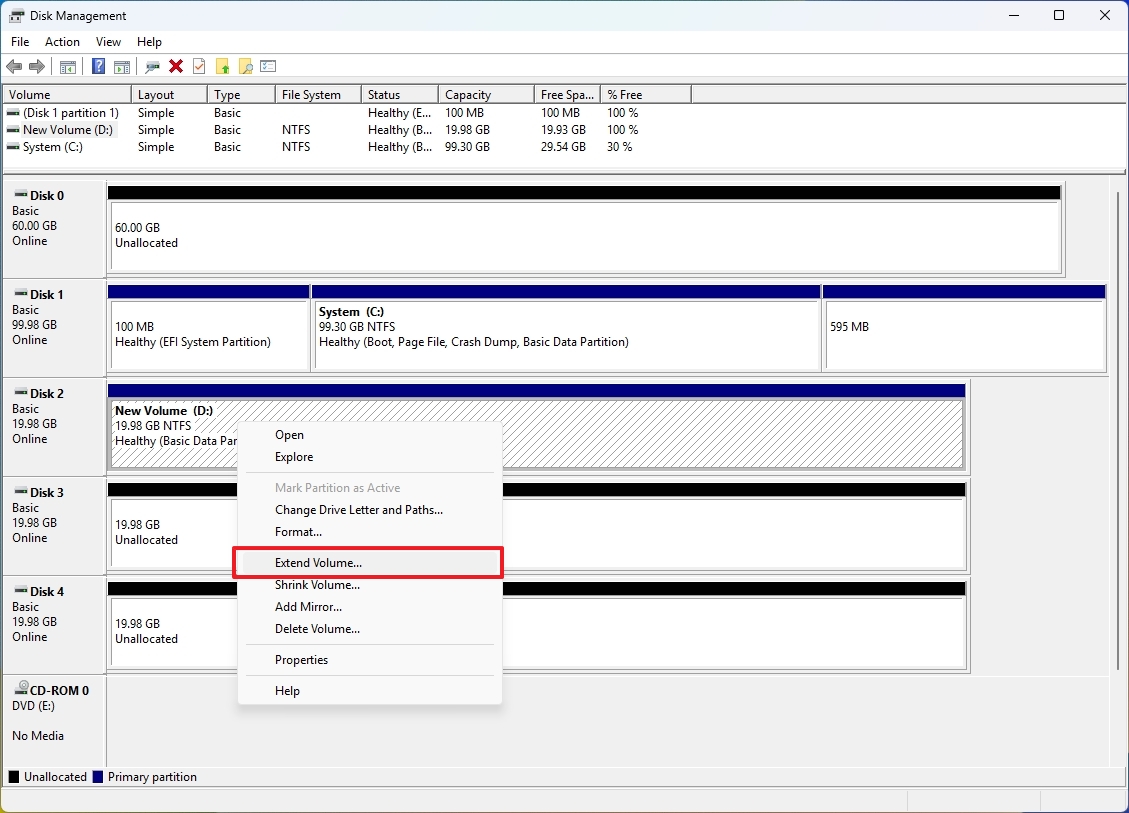
- Right-click the drive volume and select the Extend Volume option.
- Click the Next button.
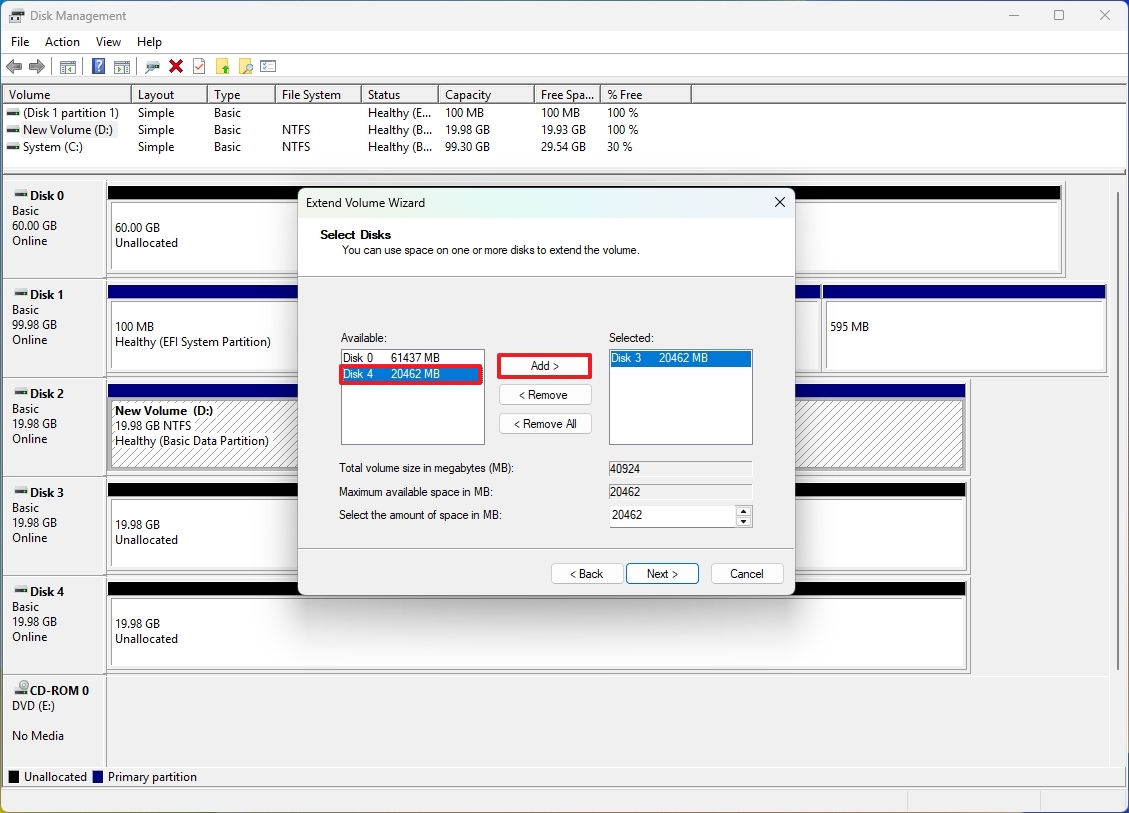
- Choose the drives to include in this process and click the Add button. (You can only add one drive at a time.)
- Click the Next button.
- Click the Finish button.
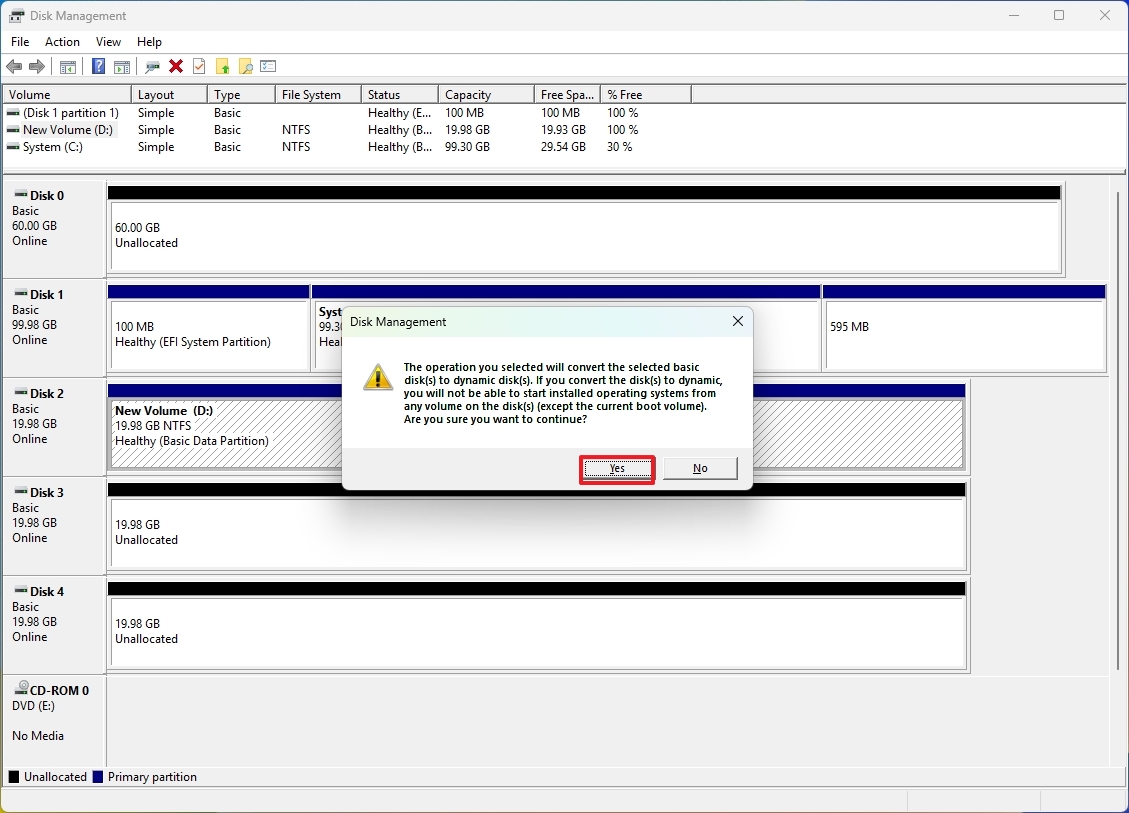
- Click the Yes button to convert the drives to dynamic disks.
After you complete the steps, the volume will extend to the drives you selected without wiping out the data already on the drive.
Although this is a non-destructive process, I still recommend you create a backup of the data before proceeding.
How to span volume across drives using Settings
To combine multiple drives into a single large volume through the Settings app, use these steps:
- Open Settings.
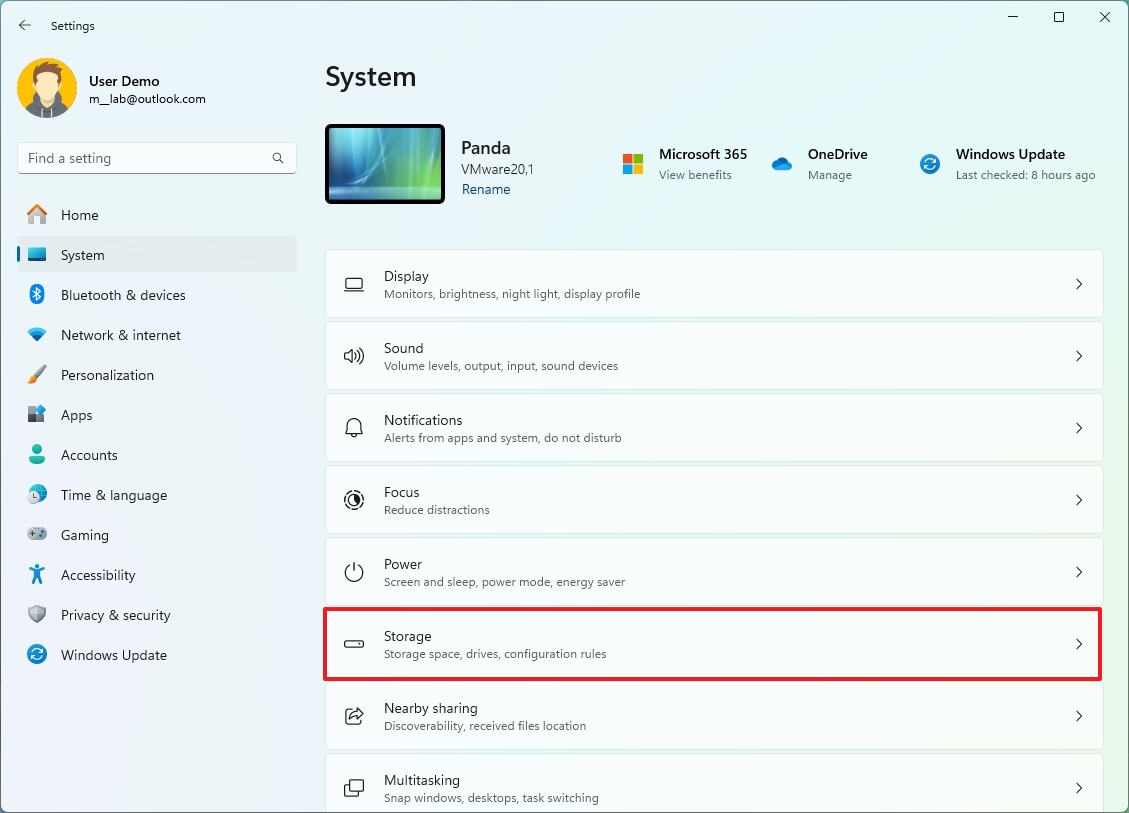
- Click on System.
- Click the Storage page on the right side.
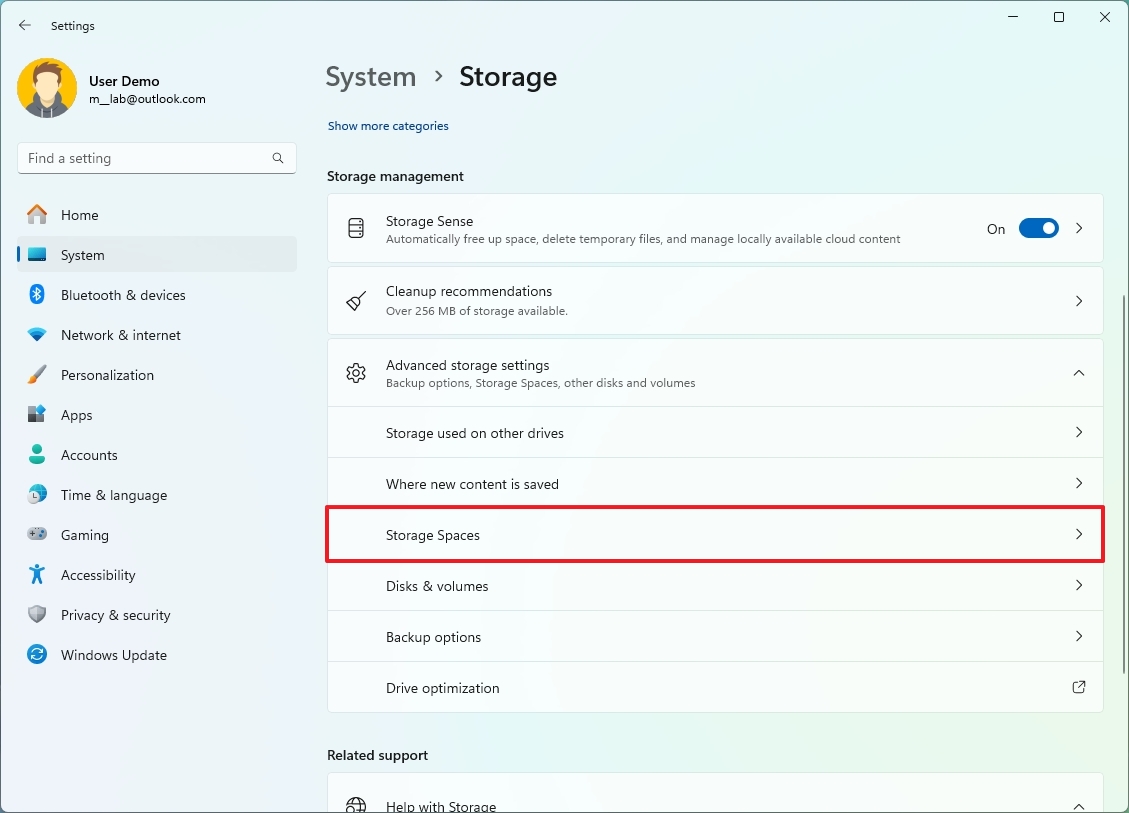
- Click on “Advanced storage settings” under the “Storage management” section.
- Click the Storage Spaces setting.
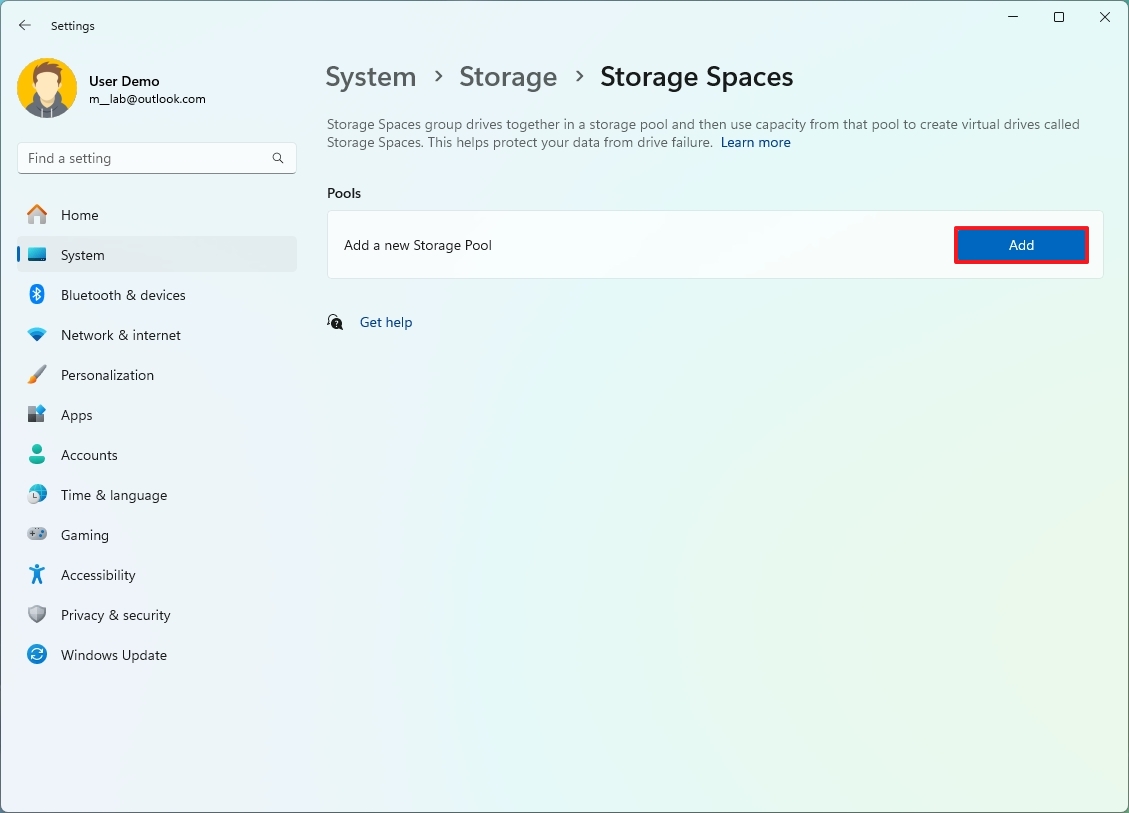
- Click the Add button under the “Pools” section.
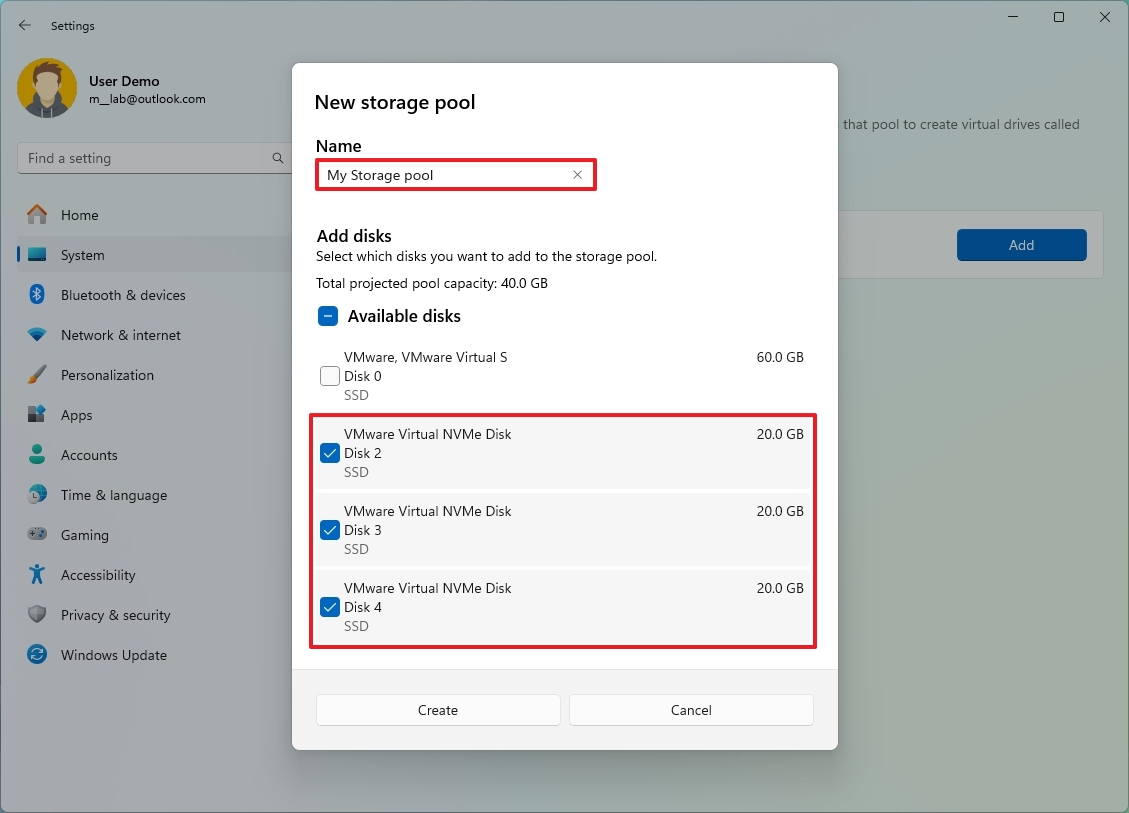
- Confirm a name for the pool, such as “My Storage Pool.”
- Select the drives you want to combine into a single volume.
- Click the Create button.
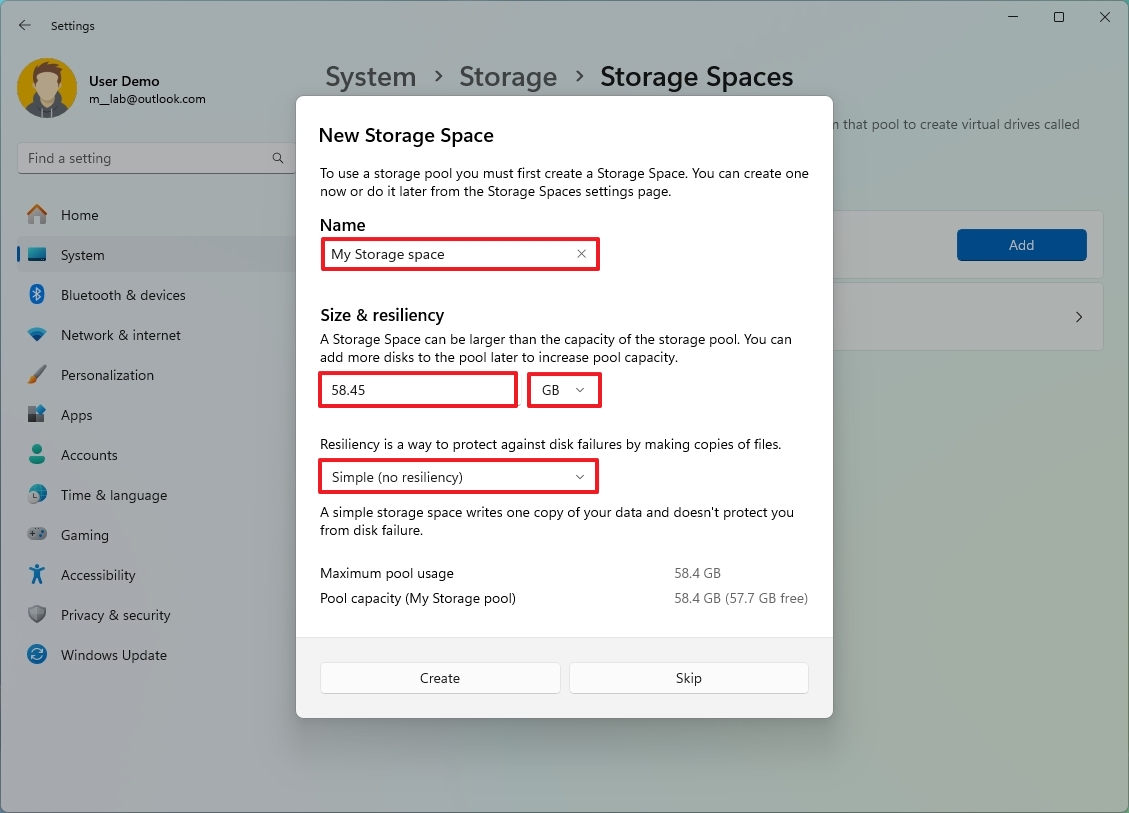
- Confirm a name for the space, such as “My Storage Space.”
- Use the default (total) capacity in the “Size & resiliency” setting.
- Choose the “Simple (no resiliency)” (or the Parity) option.
- Click the Create button.
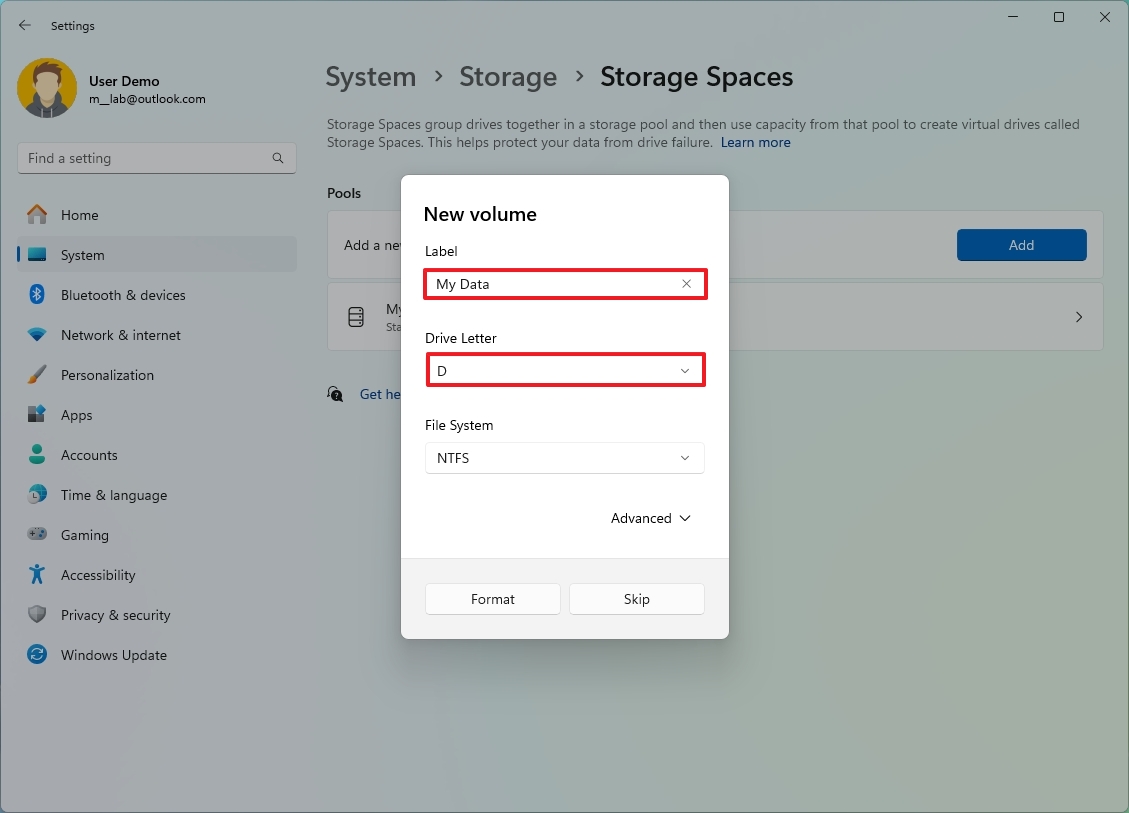
- Confirm a label for the volume.
- Select a drive letter.
- Choose the NTFS option for the file system.
- Click the Format button.
After you complete the steps, the Storage Spaces feature will generate a large volume combining the drives and using the selected resiliency.
When using the “Storage Spaces” feature, the “Simple” option combines the drives and creates a large volume that the system will recognize as a single drive. However, this option doesn’t protect your data from hardware failure.
On the other hand, the “Parity” option requires at least three drives, and it writes your data with parity information across the other drives. If one of the drives fails, you can replace it, and the system will be able to regenerate the data.
Storage Spaces can be considered an alternative solution to RAID technology, even though it may work a little differently. For example, while both technologies can combine multiple physical drives into a single logical unit, the RAID solution offers hardware and software implementations. It’s a fixed configuration after the setup and can be complex to manage.
The Storage Spaces solution is a software-only implementation, but it’s more flexible, allowing for dynamic changes after setup and easier to manage. However, the hardware RAID solution can offer more performance than Storage Spaces.
You can only use these instructions on secondary drives. This approach won’t work on the boot drive. If you want to use redundancy on the drive where the operating system resides, you will be better off using a RAID solution. Usually, motherboards for desktop computers come with some sort of RAID solution. You can always check with your manufacturer for more information. (This example shows the RAID compatibility on Asus motherboards.)
More resources
For more helpful articles, coverage, and answers to common questions about Windows 10 and Windows 11, visit the following resources:


