Summary
- Removing EXIF data from images can help maintain your privacy.
- The easiest way to do it on Windows 11 is to right-click the file, go to Properties > Details, and then click “Remove Properties and Personal Information.”
- You can also do this with the Photos app, or batch-remove EXIF data using PowerShell.
When you take a photo with your phone or another device, your device stores EXIF data (like the camera model and the photo location) with the photo. Removing this data protects your privacy, and I’ll show you how to do that on Windows 11.
Remove EXIF Data Using File Explorer
One way to remove EXIF data from images on Windows 11 is by using File Explorer. You choose the photo to delete the data from and the tool gets it done for you.
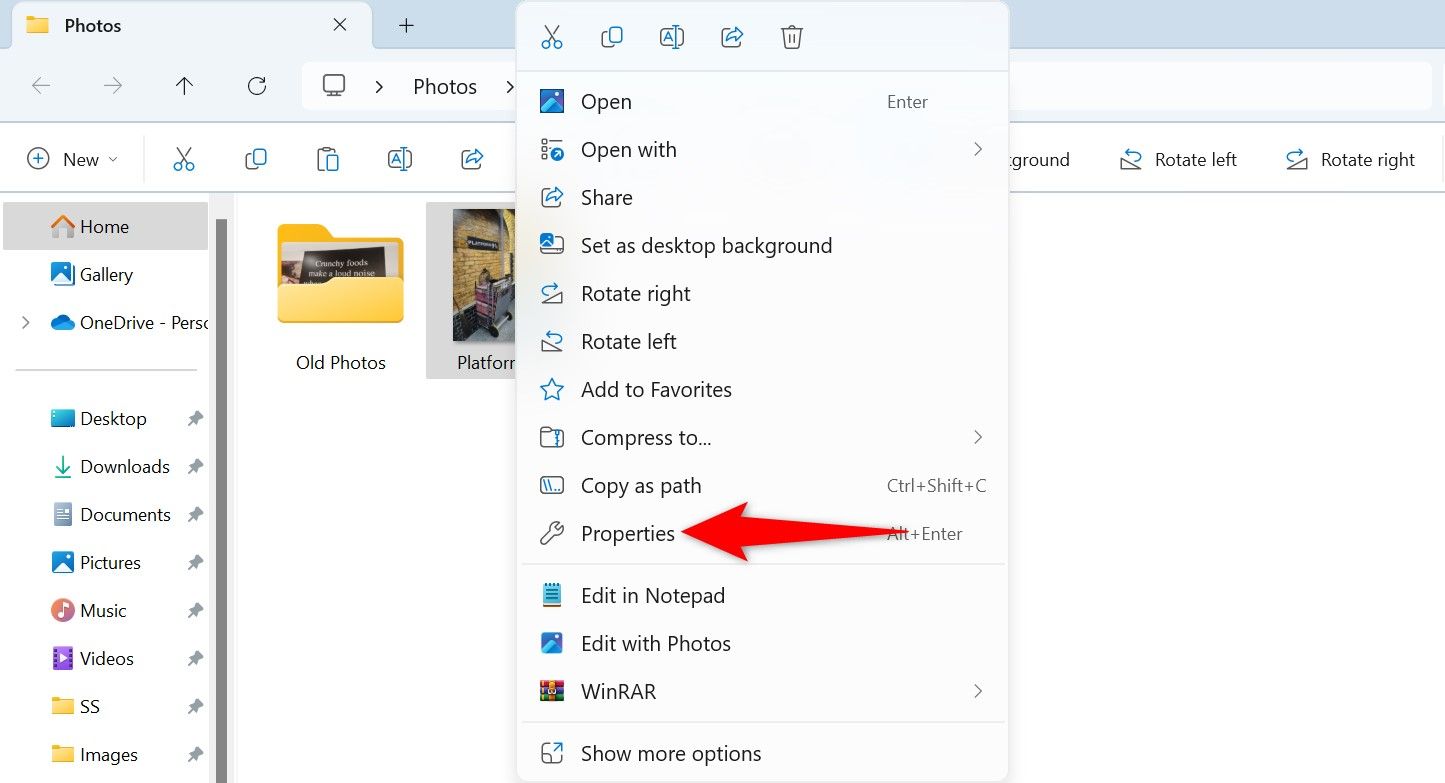
To start, launch File Explorer (press Windows+E) and find your photo. Right-click the photo and choose “Properties.”
On the Properties window, open the “Details” tab. At the bottom, click “Remove Properties and Personal Information.”
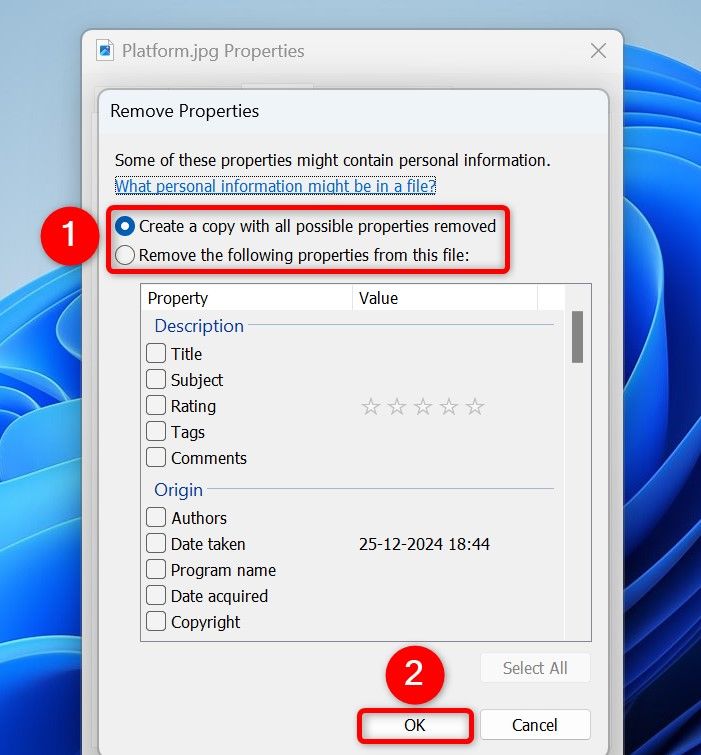
You’ll see the Remove Properties window. Here, to remove all the metadata from your photo, choose “Create a Copy With All Possible Properties Removed.” To only remove select metadata items, activate “Remove the Following Properties From This File” and select the items to delete.
Then, choose “OK.”
File Explorer will remove all or selected properties from your photo.
To check if the EXIF data is indeed removed, right-click the photo, choose “Properties,” and access the “Details” tab.
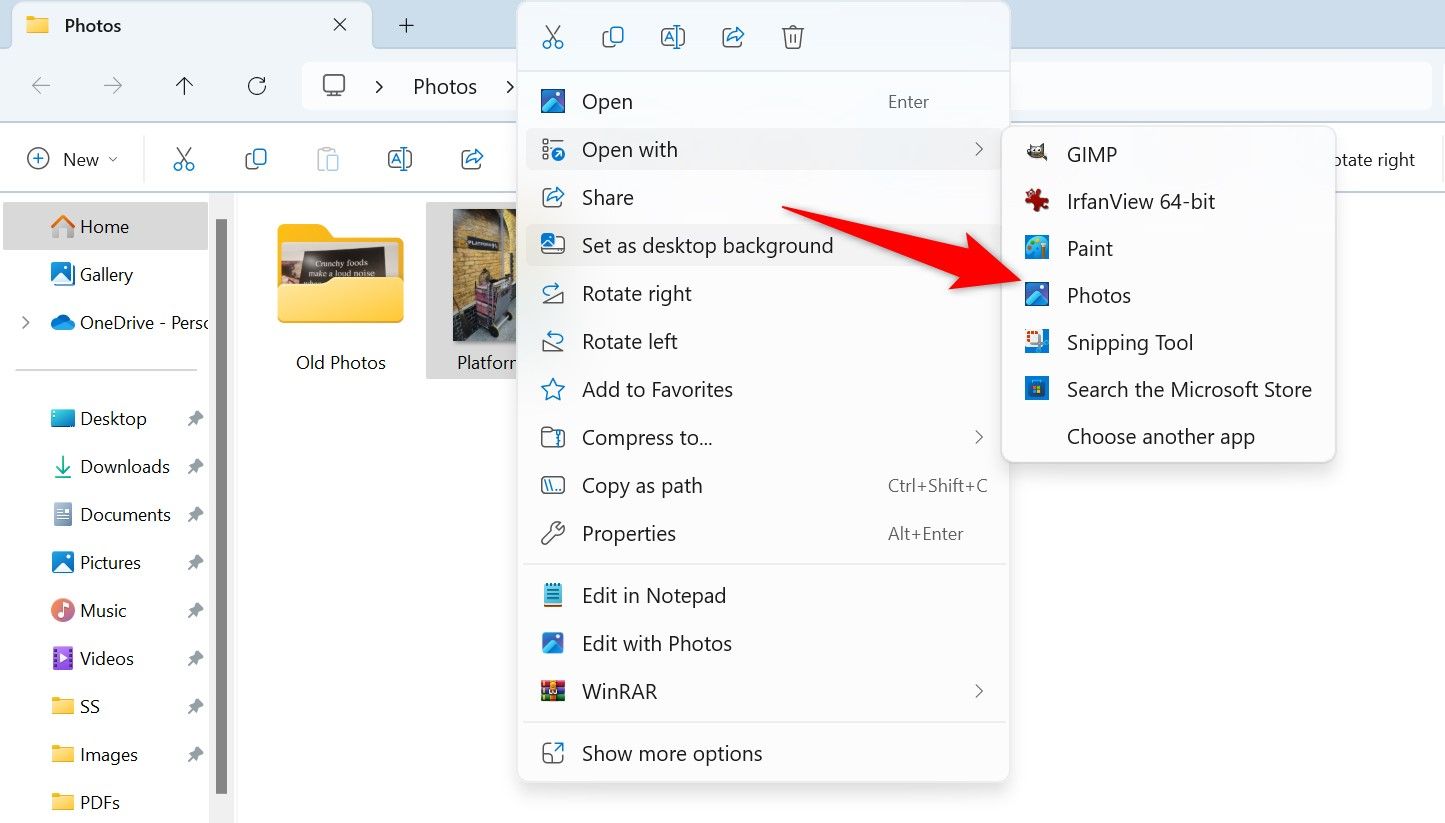
Another way to remove some EXIF data from your images is by using the built-in Photos app. To use it, open File Explorer (press Windows+E), find your photo, right-click it, and choose Open With > Photos. Alternatively, launch the Photos app, browse your pictures folder, and select your photo.
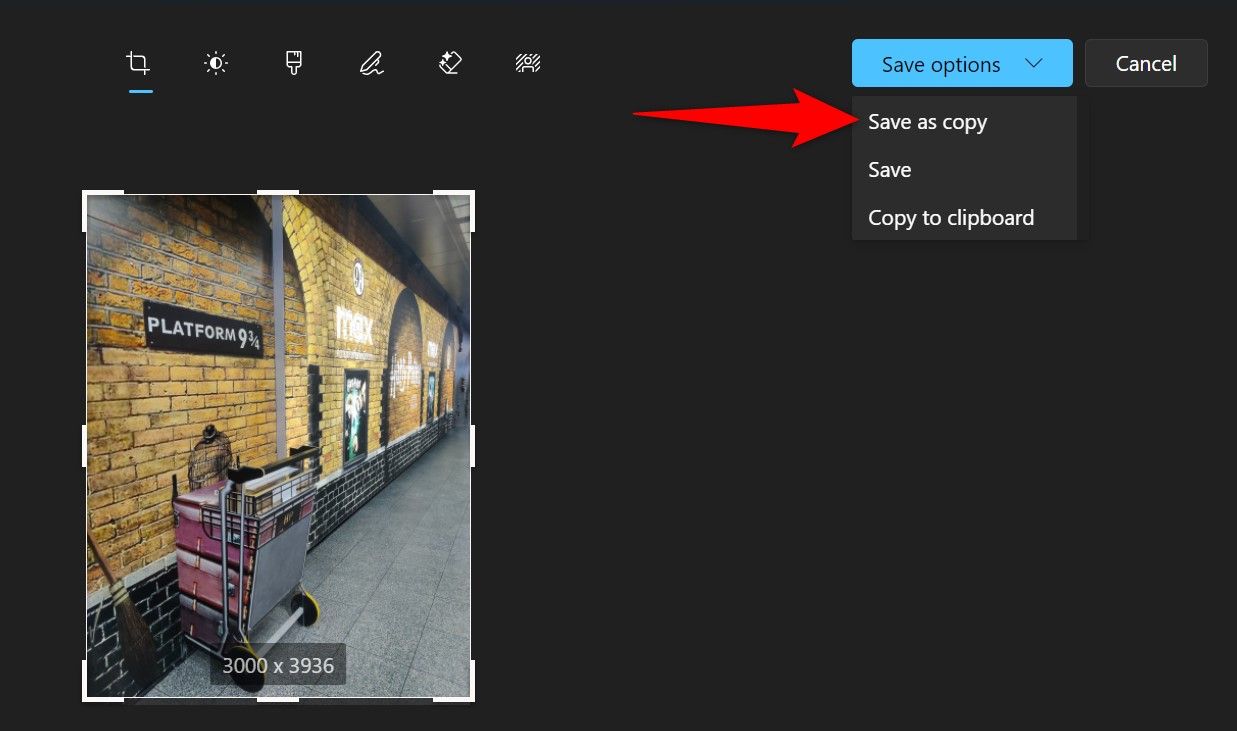
In Photos, from the top-left corner, select “Edit.” On the editing screen, make a minor change to your photo, such as adjusting the brightness or cropping the photo. Then, in the top-right corner, click “Save Options” and choose “Save as Copy.”
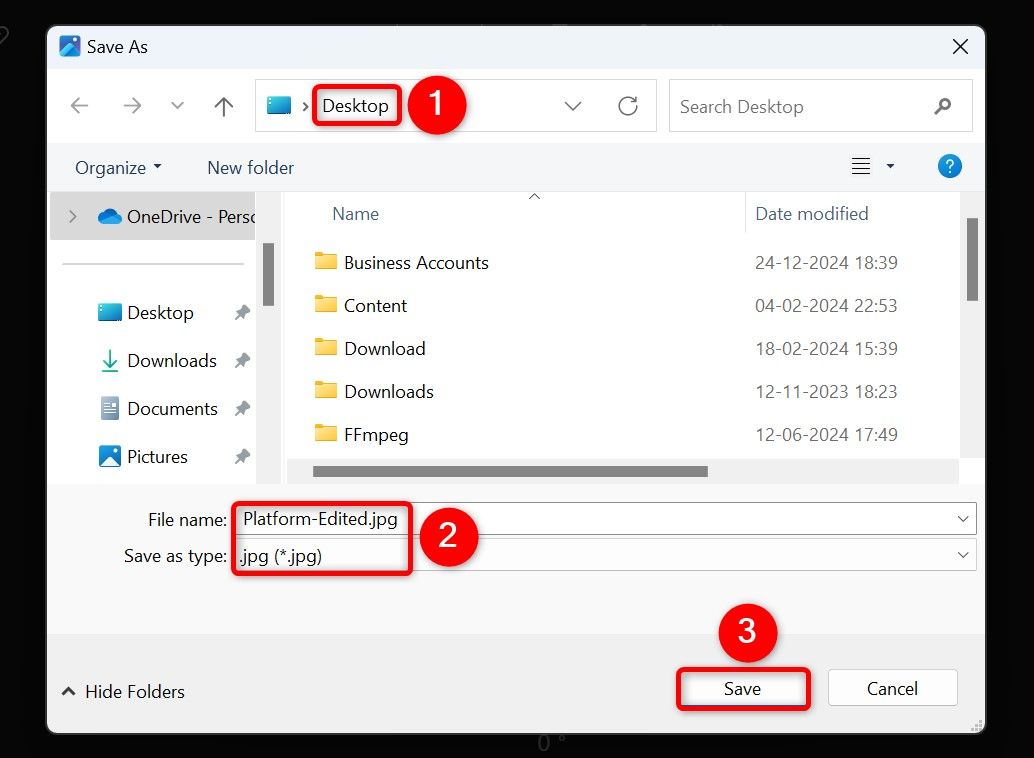
On the Save As window, select the folder in which you want to save the edited photo. Select the “File Name” field and type a name for the photo. Choose a photo format from the “Save as Type” drop-down menu. Then, click “Save.”
Photos has saved a copy of your image removing many metadata items from it.
Batch Remove EXIF Data From Images With PowerShell
If you want to remove EXIF data from several photos at once, use a batch-process method. You can use PowerShell with a free third-party tool called ExifTool to clear metadata from many images at once.
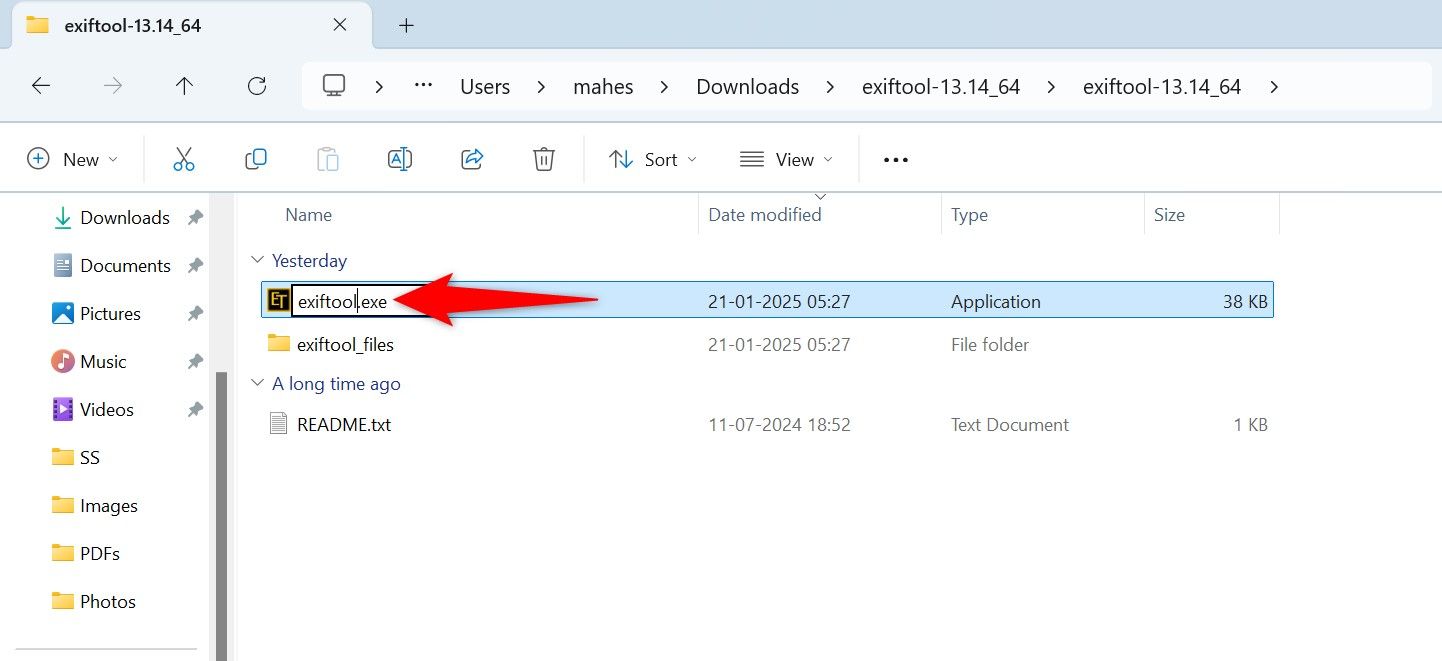
To do that, launch the ExifTool site and download and extract the tool on your PC. Open the extracted folder and rename “exiftool(-k).exe” to “exiftool.exe.” Note the path to this folder from File Explorer’s address bar.
Open Windows Search (press Windows+S), type PowerShell, and select “Run as Administrator.” Choose “Yes” in the User Account Control prompt.
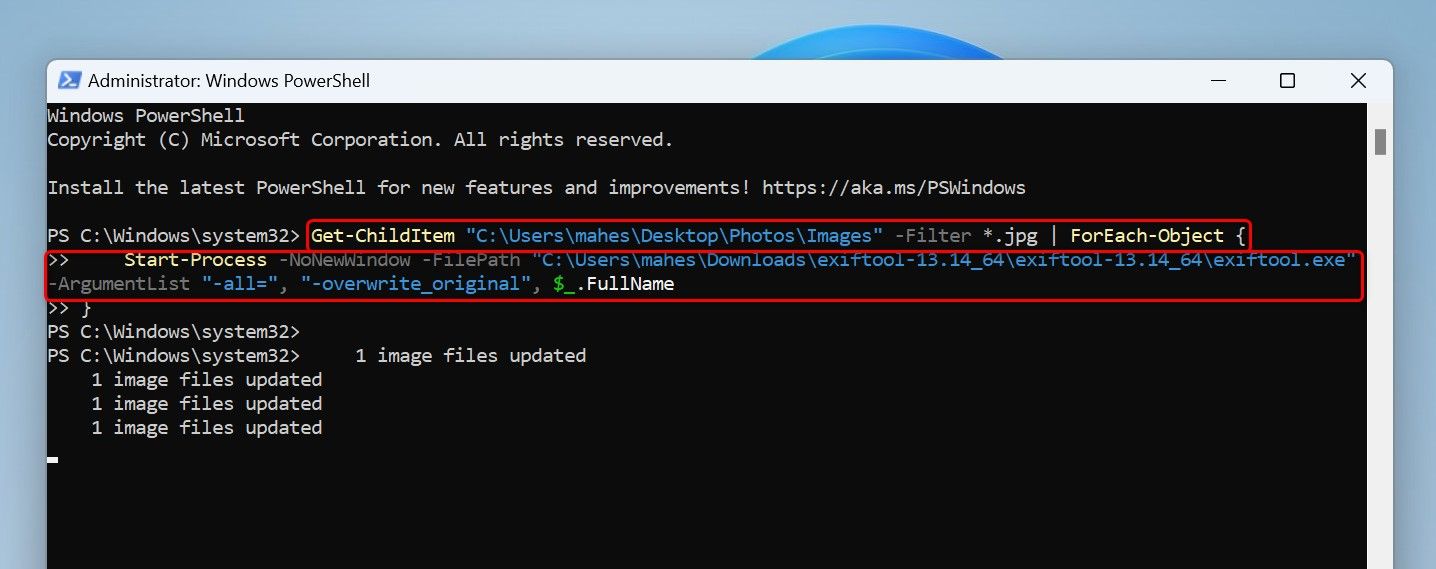
In PowerShell, type the following script. Replace “ImagePath” with the full path to the folder containing your images. Replace “ExifTool” with the full path you noted earlier. The path must end in exiftool.exe. Replace “jpg” with the format of your image files. Then, press Enter.
        Get-ChildItem "ImagePath" -Filter *.jpg | ForEach-Object {
Start-Process -NoNewWindow -FilePath "ExifTool" -ArgumentList "-all=", "-overwrite_original", $_.FullName
}
PowerShell will begin removing EXIF data from your images, and you’ll see the current progress on the screen. When the process is done, close PowerShell.
You can use a free third-party app like IrfanView to remove EXIF data from your photos. IrfanView has been around for many years, and this app allows you to view, convert, optimize, and clear metadata from your pictures.
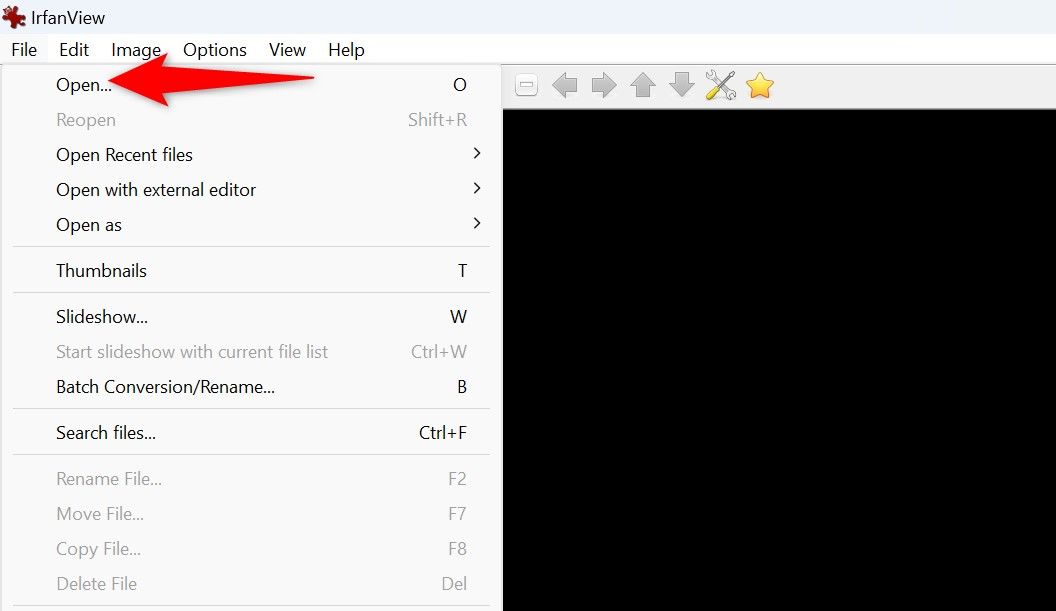
To use it, launch the IrfanView site and download and install the app on your PC. Then, open the app, select File > Open (or press O), and select your image.
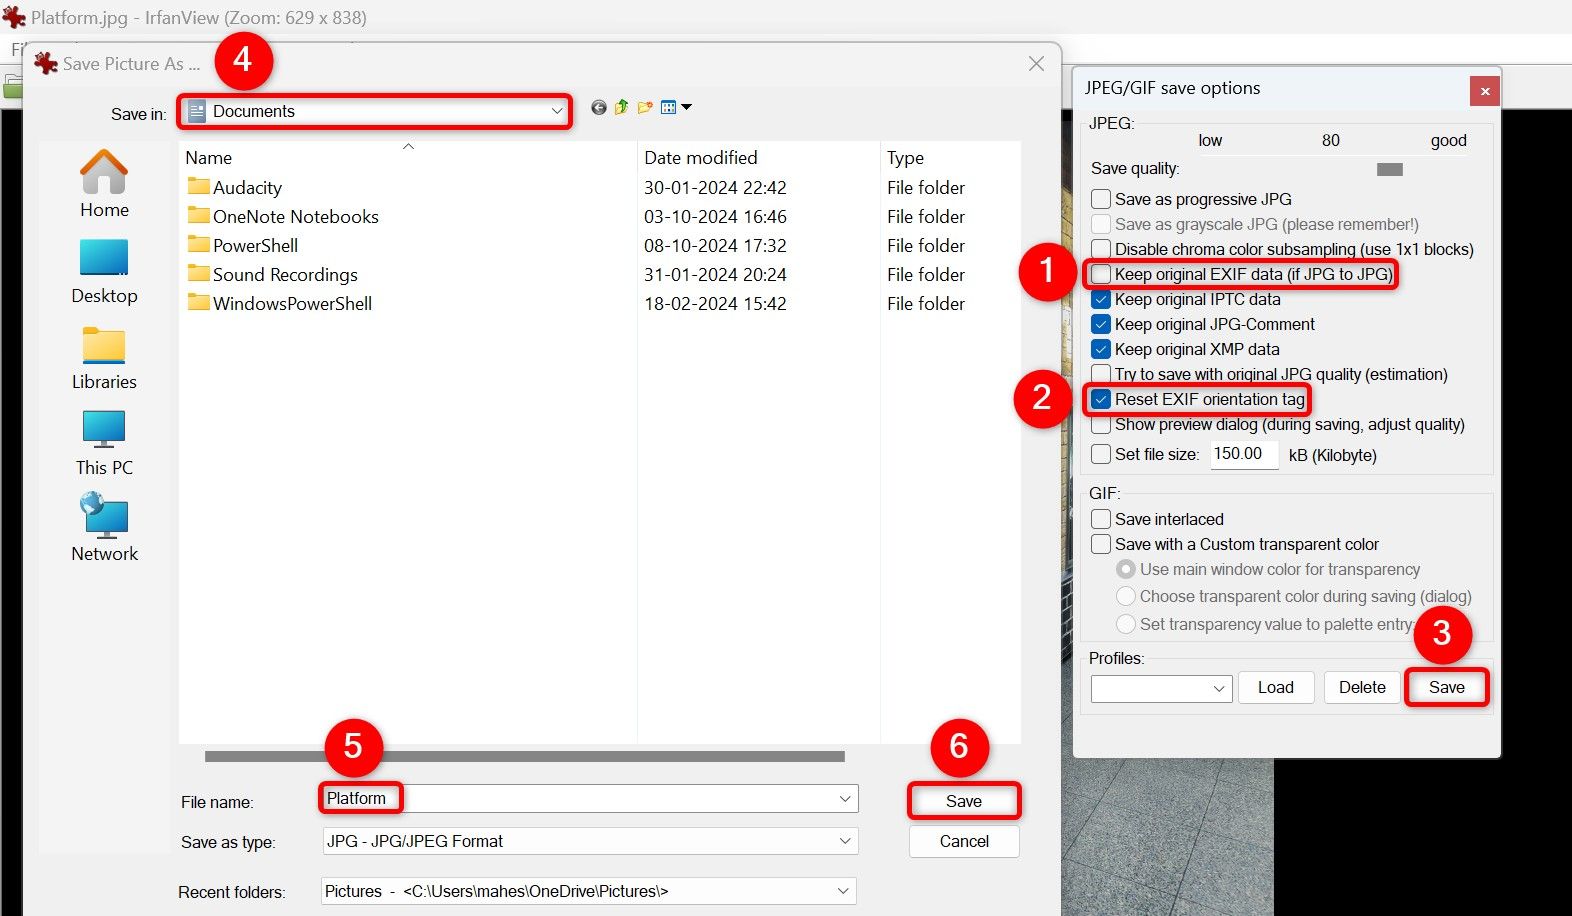
When your image opens, from the app’s menu bar, choose File > Save As (or press S). On the Save Options window, disable the “Keep Original EXIF Data” option and enable “Reset EXIF Orientation Tag.” Then, choose “Save.”
On the Save Picture As window, select the folder in which you want to save the photo. Click the “File Name” field and type a name for the photo. Then, choose “Save.”
The app has saved a copy of your photo with no EXIF data in it.
Use a Website to Remove EXIF Data From Images
If you don’t want to install or use a desktop app to strip off EXIF data, you can use a web-based app. There are many sites that let you remove metadata from your photos.
I don’t recommend using this method for any sensitive photos, as you’re exposing your photos to an online service.
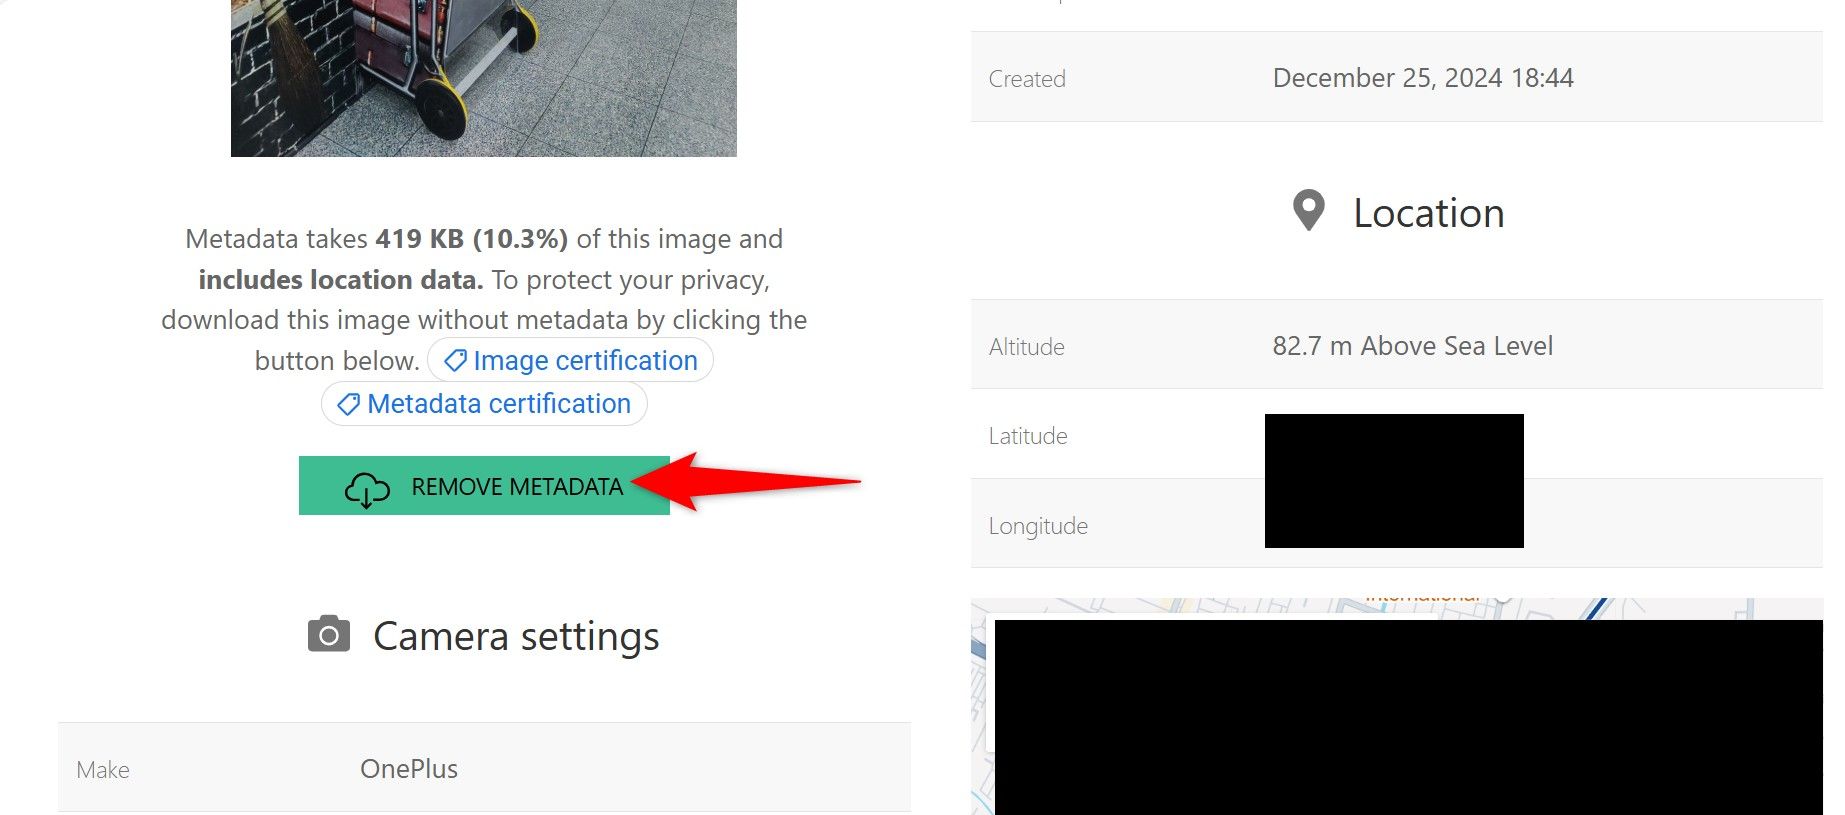
One of these web-based tools is Jimpl. To use it, launch the Jimpl site and drag and drop your photo on the site to upload it. You’ll see your photo’s EXIF data on the site. Remove this data by clicking “Remove Metadata.”
Jimpl will remove the metadata from your photo and save the resulting photo to your PC. The photo download will happen automatically, and the site will delete your photo after 24 hours.
Tip: Prevent Your Phone From Adding Location Data to Photos
The best way not to have location data in your photos is by preventing your iPhone or Android phone from adding that detail to your photos in the first place. You can configure a setting option to do that.
If you use an Android phone, the steps to disable location data addition vary by the device model and the camera app. On most phones, though, you’ll launch the Camera app, tap the three dots in the top-right corner, choose “Settings,” and disable “Store Location Data.”
On an iPhone, you can prevent the Camera app from accessing your location data. To do that, launch Settings > Privacy & Security > Location Services > Camera and select “Never.”
And that’s how you not let anyone find more details about you, your camera, and your location from your photos on Windows 11. Follow other online privacy tips as well to protect yourself online.


