

If you have a computer running Windows 11, the day will come when you may have to upgrade the hard drive because it’s running out of space or reaching the end of its lifespan (usually three to five years). The recommended option would be to replace the drive and perform a clean installation, but if you must keep the same installation, you can move the current setup to the new drive.
Regardless of the reason, you can complete this process using the built-in Backup and Restore feature available on Windows 11.
The process is straightforward. First, you need to create a system image backup, and then you would make a USB bootable media to access the recovery environment. Finally, you would replace the hard drive and restore the system image to the computer, and in the final step, you would reconfigure the system partitions as necessary.
In this how-to guide, I’ll outline the steps to move your current Windows 11 setup to a new drive.
How to create a system image on Windows 11
To create a full backup of the entire installation of Windows 11, use these steps:
- Open Start.
- Search for Control Panel and click the top result to open the app.
- Click on System and Security.
- Click the “Backup and Restore” setting.
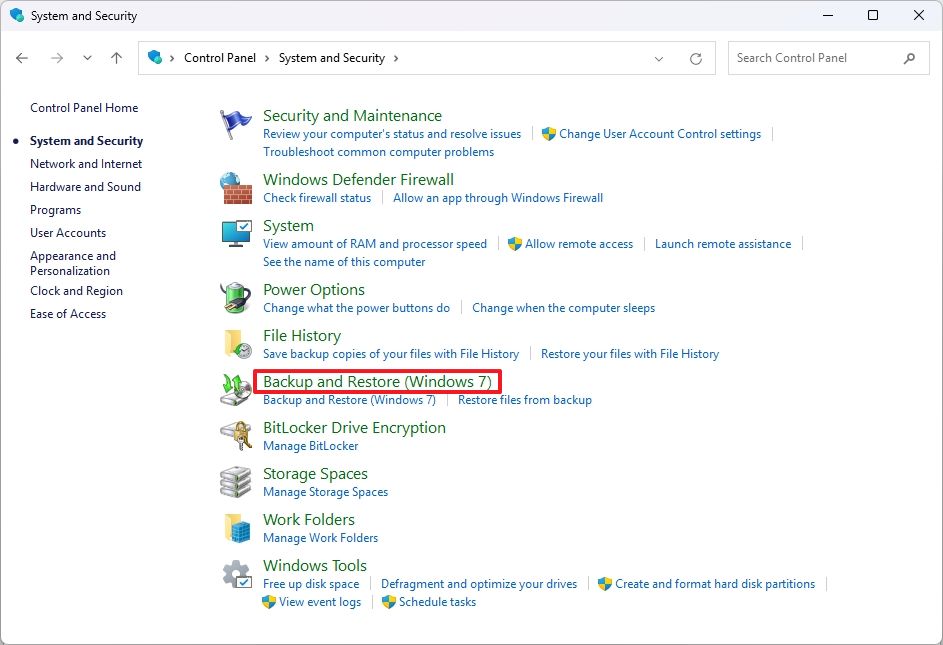
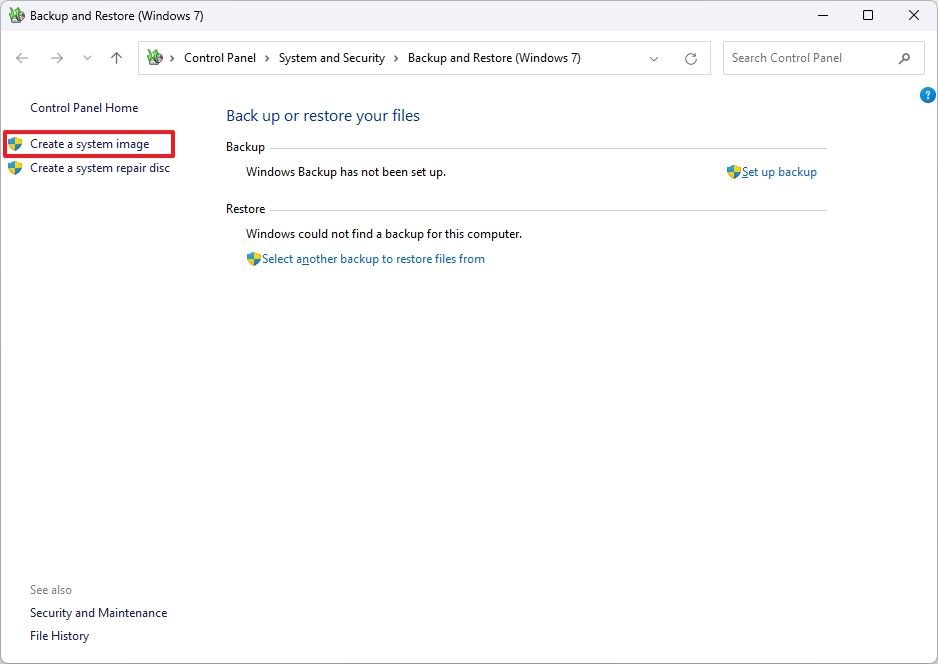
- Click the “Create a system image” option from the bottom-left corner.
- Select the “On a hard disk” option.
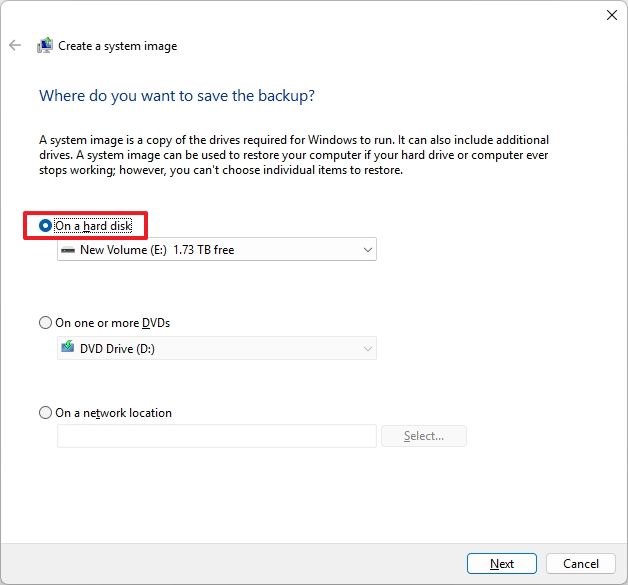
- Use the “On a hard disk” drop-down menu and select the Windows 11 full backup destination.
- Click the Next button.
- (Optional) Select any additional drives to include in the backup.
- Click the Next button.
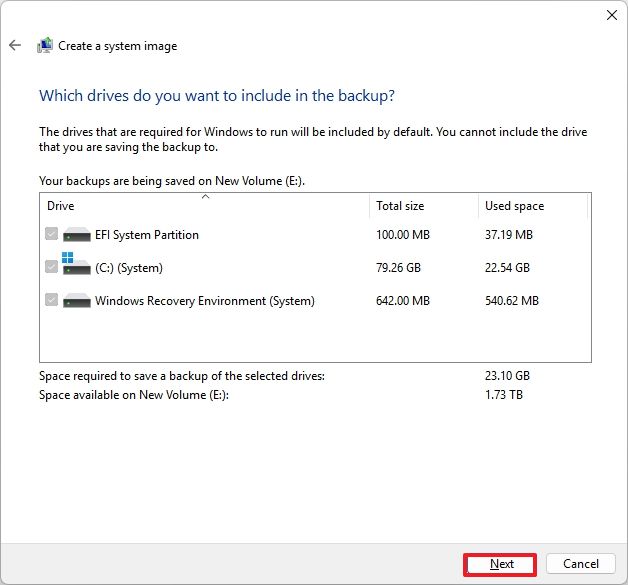
- Click the Start backup button.
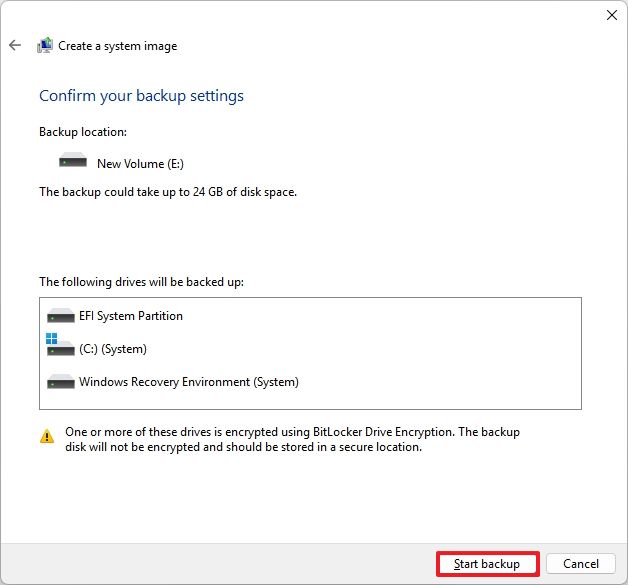
- Click the No button.
- Quick note: You’ll also receive a prompt to create a system repair disc, but you can skip it since you can use a USB installation media to access the recovery settings.
- Click the Close button.
Once you complete the steps, the tool will create a backup of the entire installation, including programs, settings, and apps.
You can now proceed with the steps to create a USB flash drive with the installation files for the operating system.
How to create USB recoverable media on Windows 11
To create a USB bootable media to access the recovery environment on Windows 11, use these steps:
- Open the Windows 11 download page.
- Click the Download now button to save the file on the device under the “Create Windows 11 Installation Media” section.
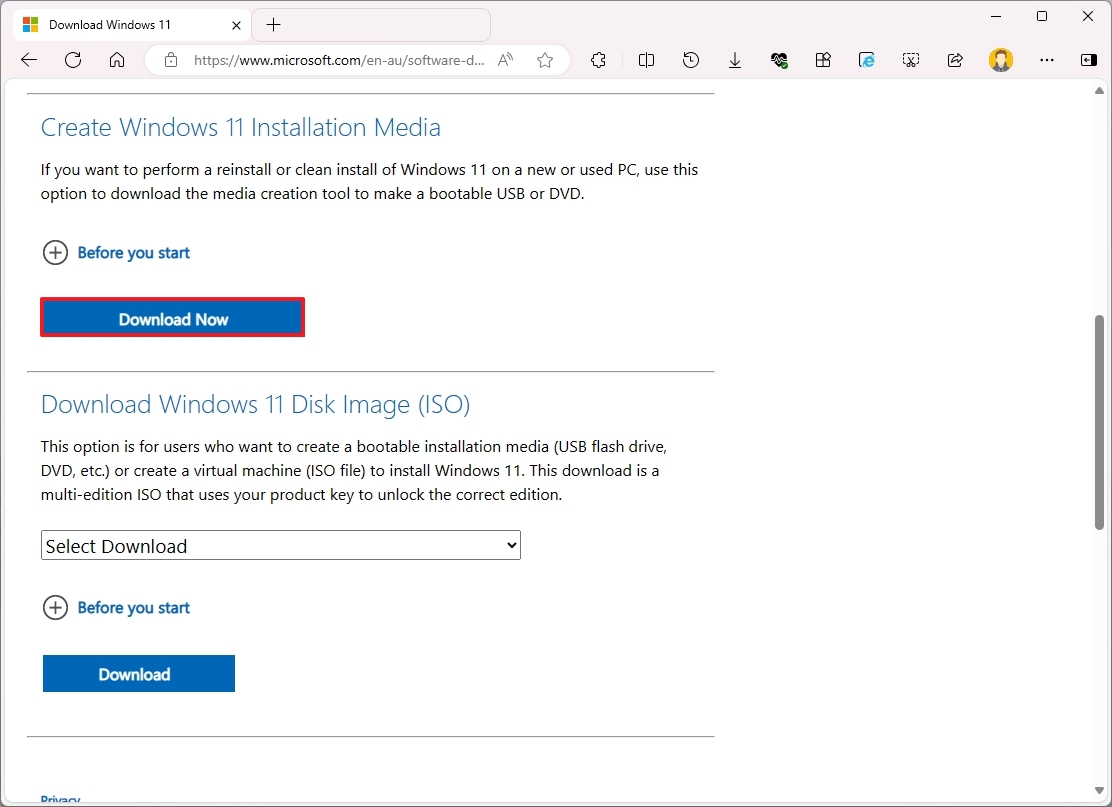
- Double-click the MediaCreationTool.exe file to launch the tool.
- Click the Accept button to agree to the terms.
- (Optional) Clear the “Use the recommended options for this PC” option.
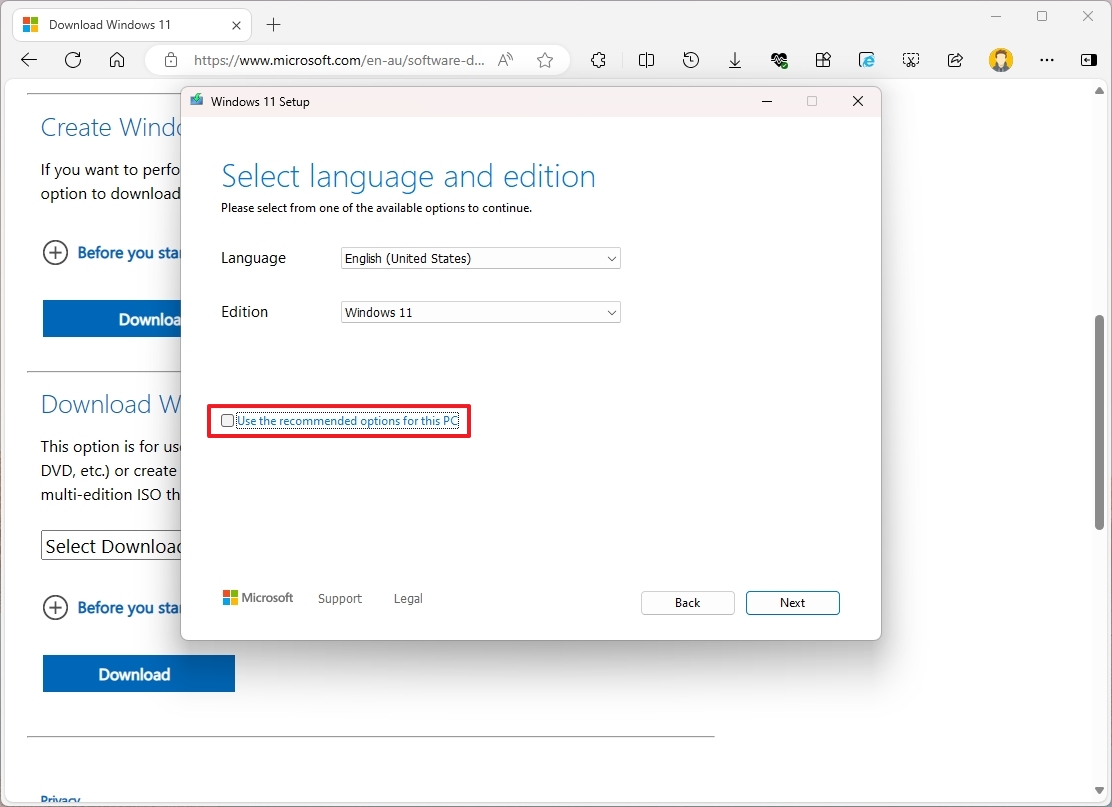
- Select the correct language and edition of Windows 11.
- Click the Next button.
- Select the “USB flash drive” option.
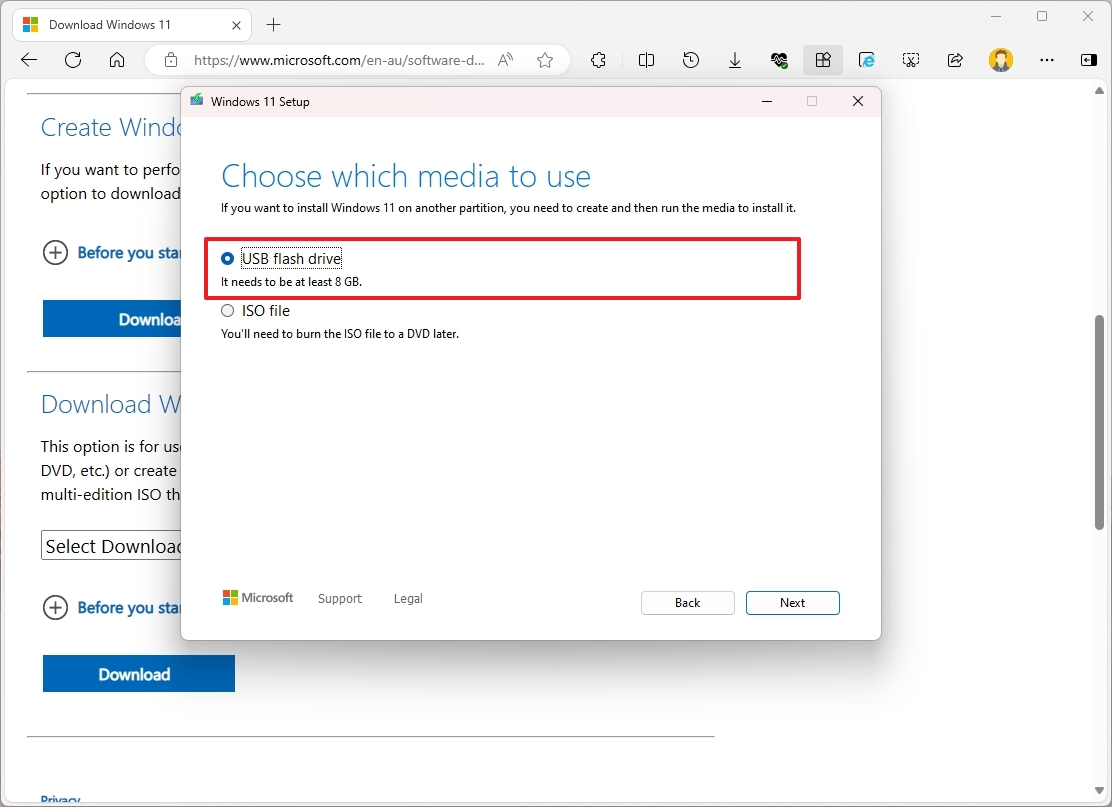
- Click the Next button.
- Select the removable storage from the list.
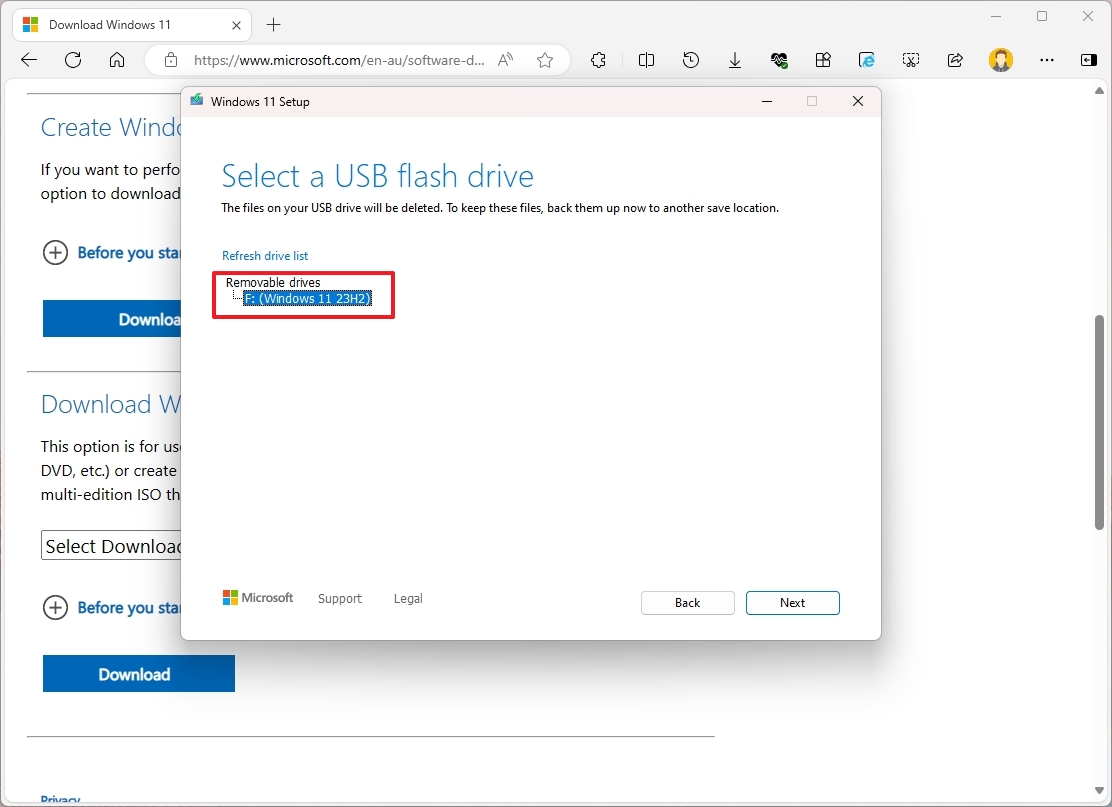
- Quick tip: If the device is not on the list, click the “Refresh drive list” option to make it available.
- Click the Next button.
- Click the Finish button.
After you complete the steps, the tool will erase and create a recovery media that you can use to restore the system image backup on the new drive.
How to replace the drive on your Windows 11 computer
At this point, you can open your computer case or laptop to replace the hard drive. The steps to perform this task will be different on every computer. As a result, it’s strongly recommended that you check with your computer manufacturer for specific instructions to complete this task.
Usually, the process goes like this:
- Power down the computer and unplug any cables.
- Remove the cover of the laptop or desktop computer.
- Carefully find the hard drive, which, depending on the device, could be a traditional Hard Disk Drive (HDD), Solid-State Drive (SSD), or NVM Express (NVMe).
- Confirm how the drive is attached.
- Quick note: If it’s an HDD or SSD, it will have power and data cables. If it’s an NVMe drive, it’ll be screwed directly into the motherboard inside of a M.2 slot.
- Disconnect any data and power cables (if applicable).
- Remove the screws or make use of the latch to free the drive from the motherboard.
- Remove the old hard drive.
- Install the new hard drive.
- Remember to reconnect any cables as necessary.
- Close the computer case or laptop.
Once you complete the steps, the new drive replacements will be installed on your computer, but it’ll be empty, without an operating system.
You can now proceed with the steps to restore the previous installation in the new drive.
How to transfer Windows 11 installation to a new drive
To restore your previous installation from a system image backup, use these steps:
- Start the computer.
- On the USB bootable drive startup prompt, press any key to continue.
- Quick tip: If the computer does not start in the Windows Setup wizard, you will need to access the Unified Extensible Firmware Interface (UEFI) to change the boot order settings. However, since these steps are different per manufacturer and device model, it is recommended to check your manufacturer support website for more specific details.
- On the “Windows Setup” page, click the Next button.
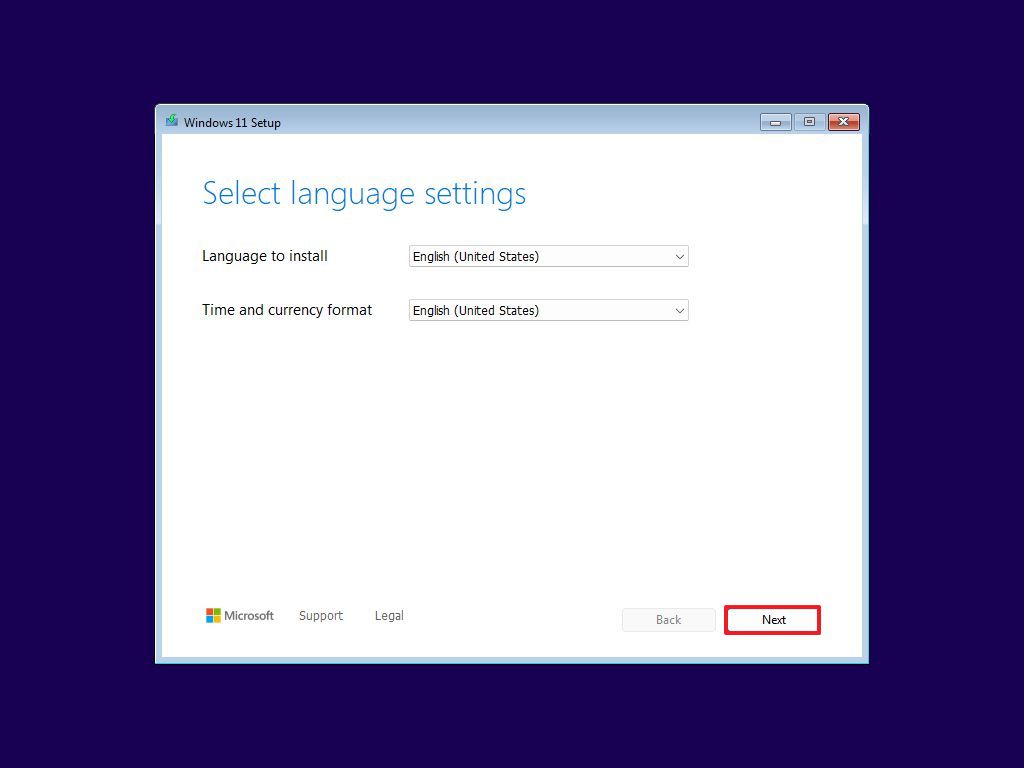
- Click the Next button again.
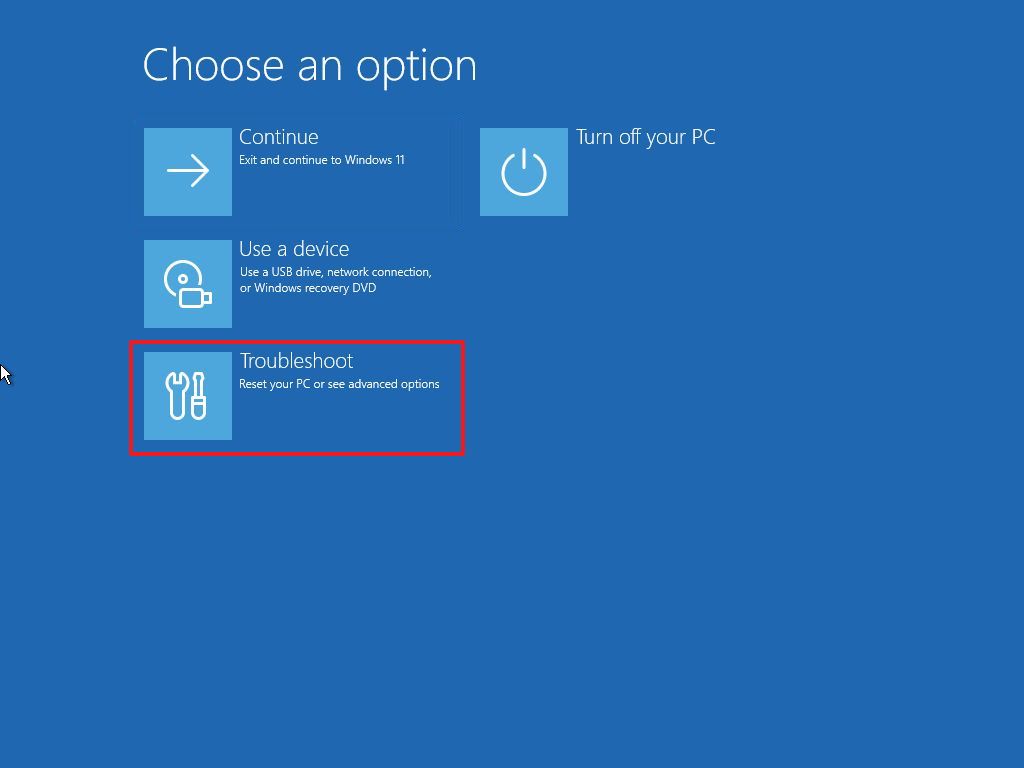
- Select the “Repair my PC” option.
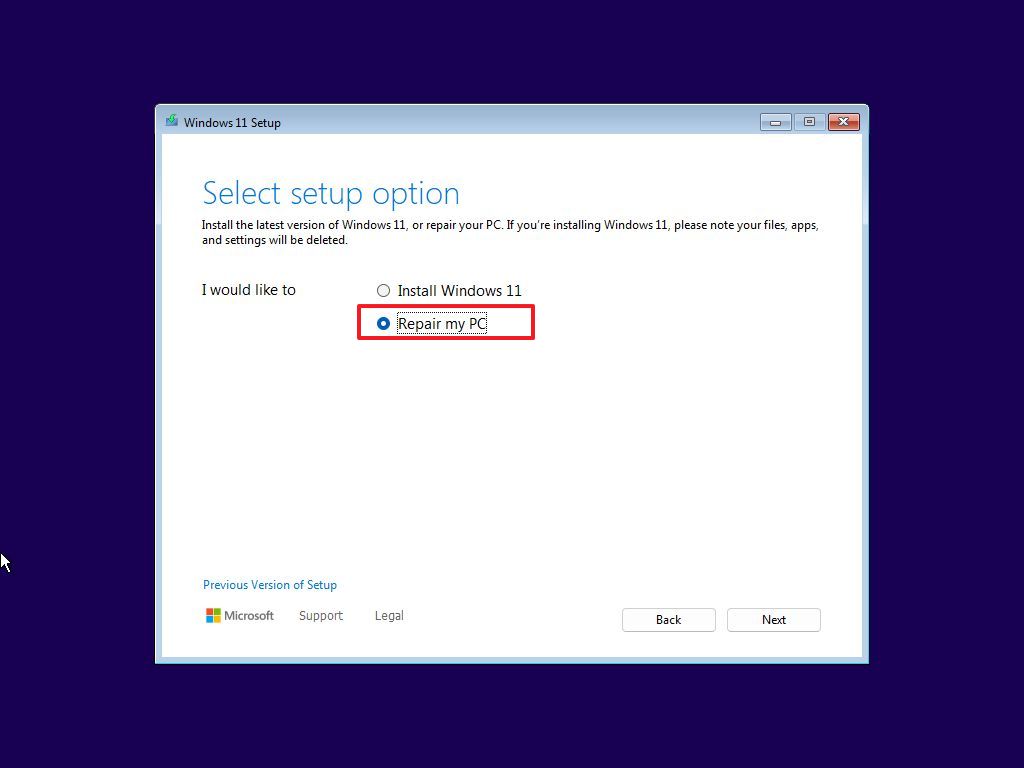
- Click the Next button.
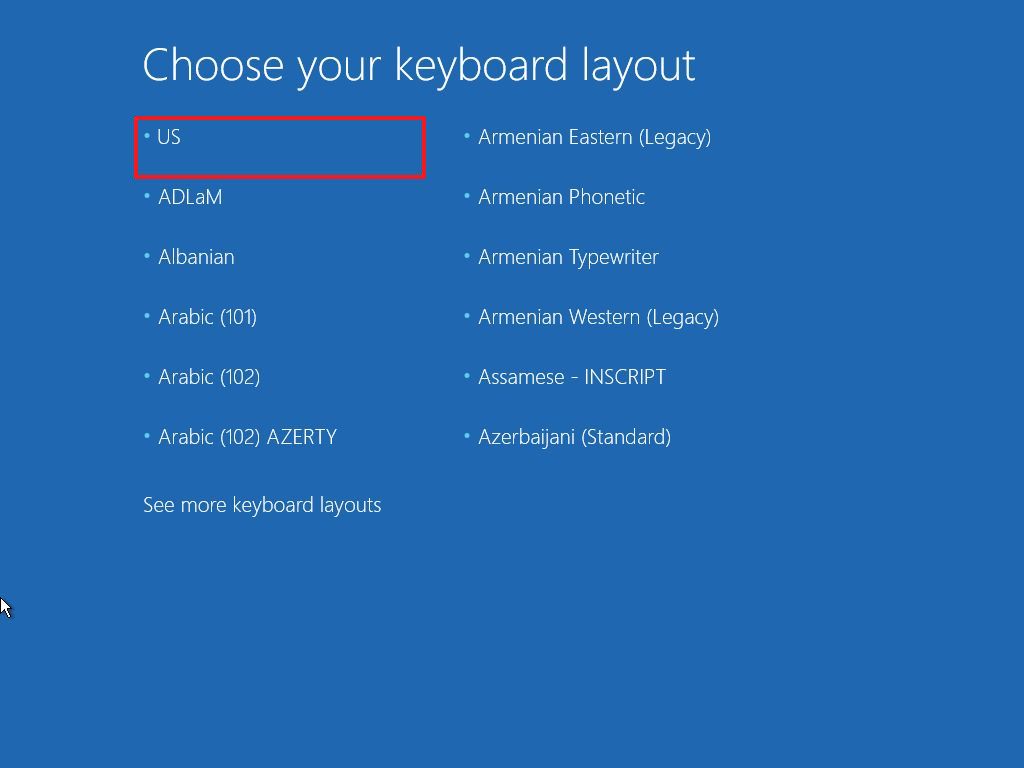
- Select the WinRE language (if applicable).
- Click on Troubleshoot.
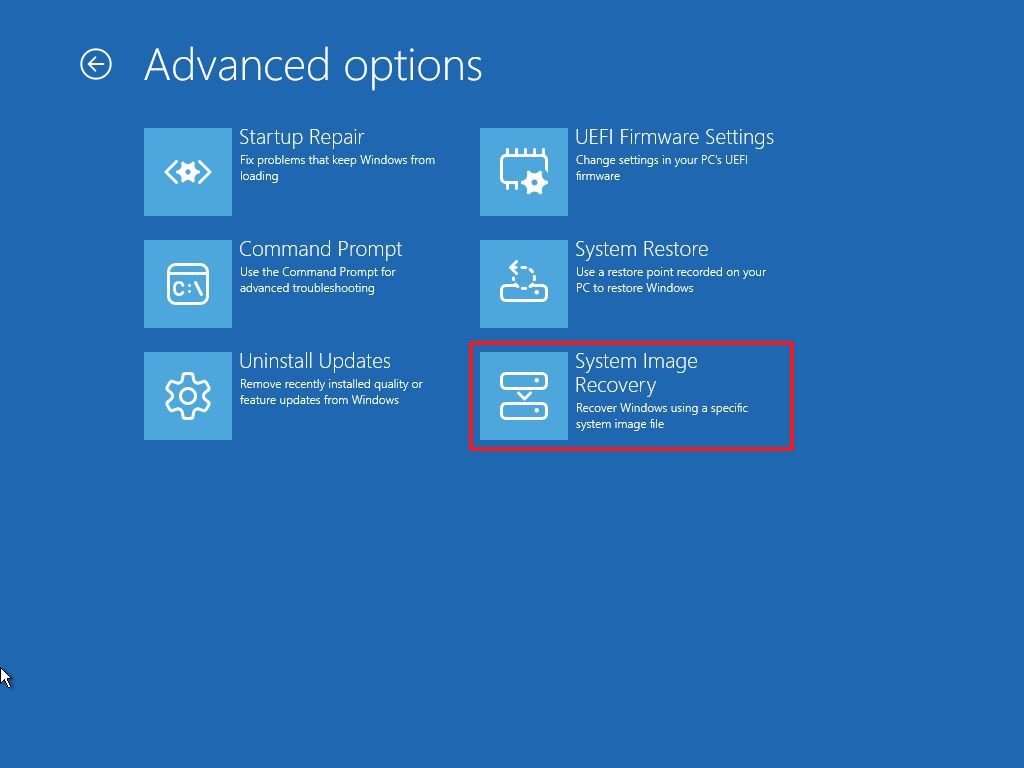
- Click the “System Image Recovery” option.
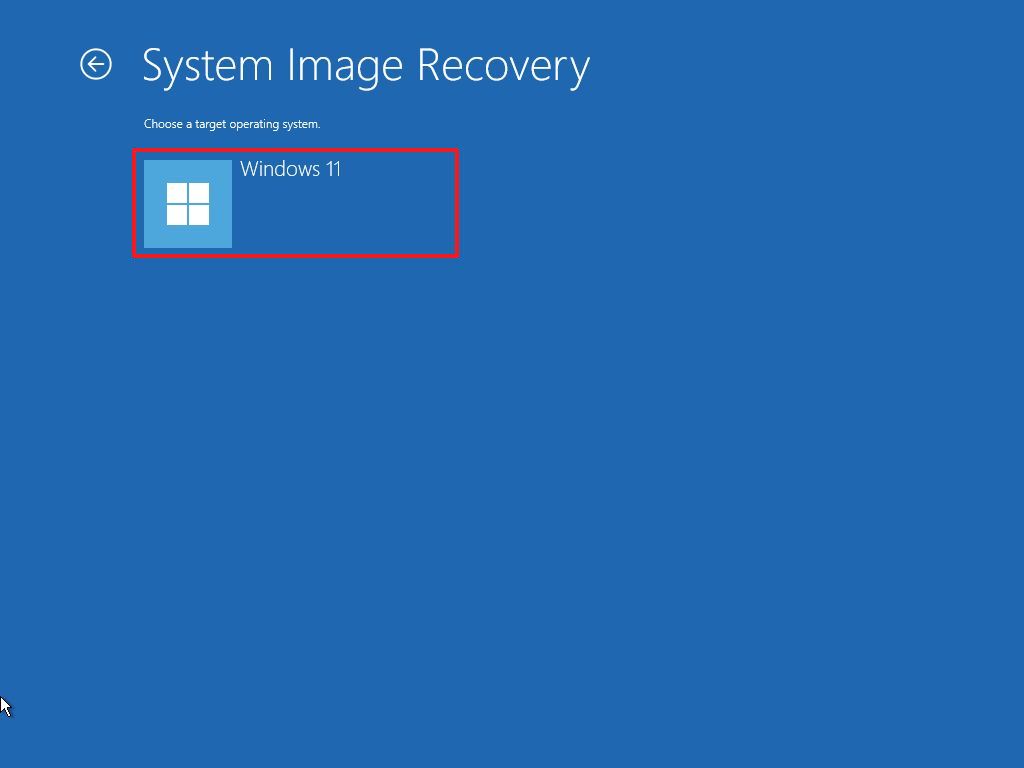
- Click on the Windows 11 operating system option.
- Select the “Use the latest available system image” option to transfer the most
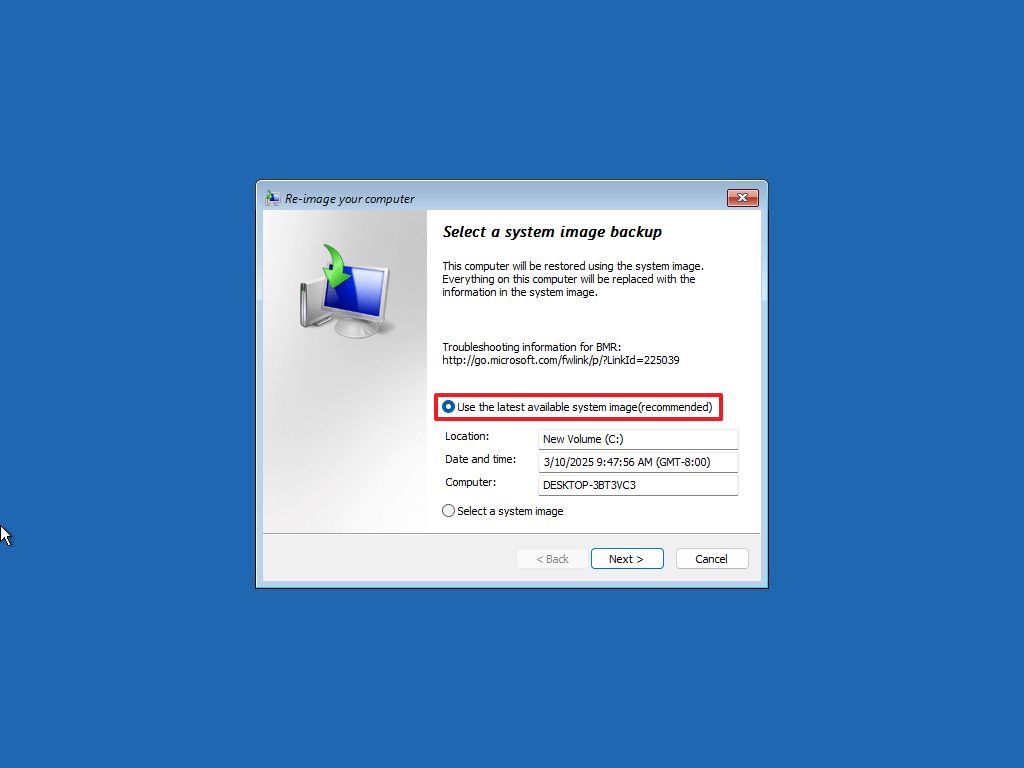
- Click the Next button.
- Click the Next button again.
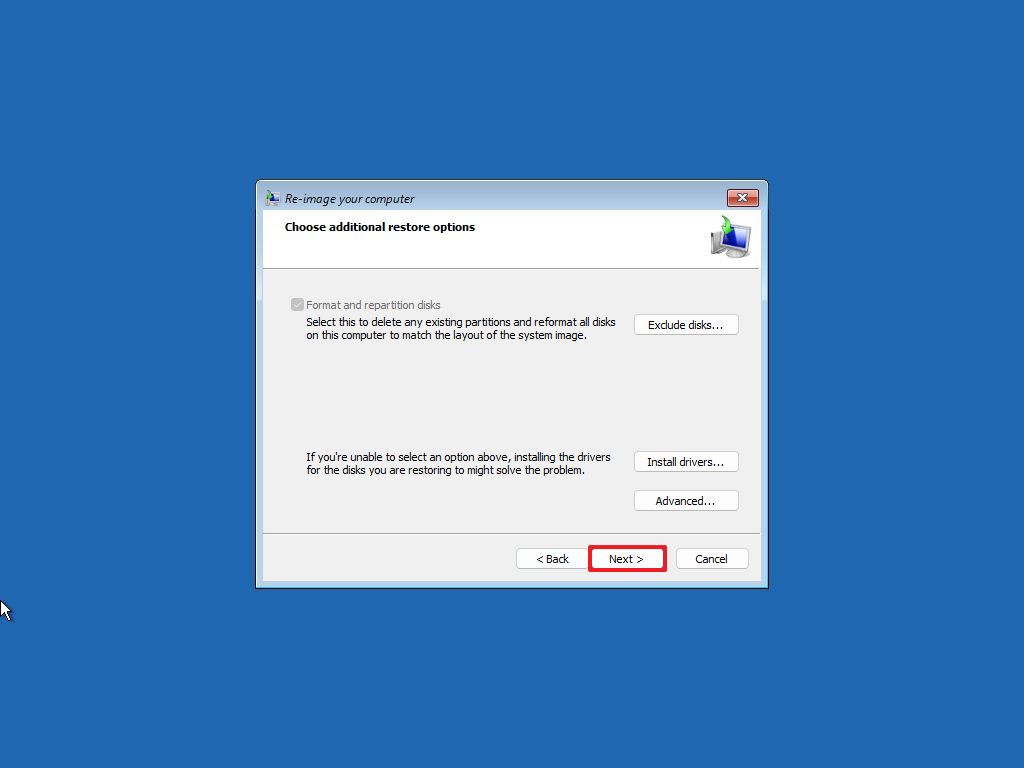
- Click the Finish button.
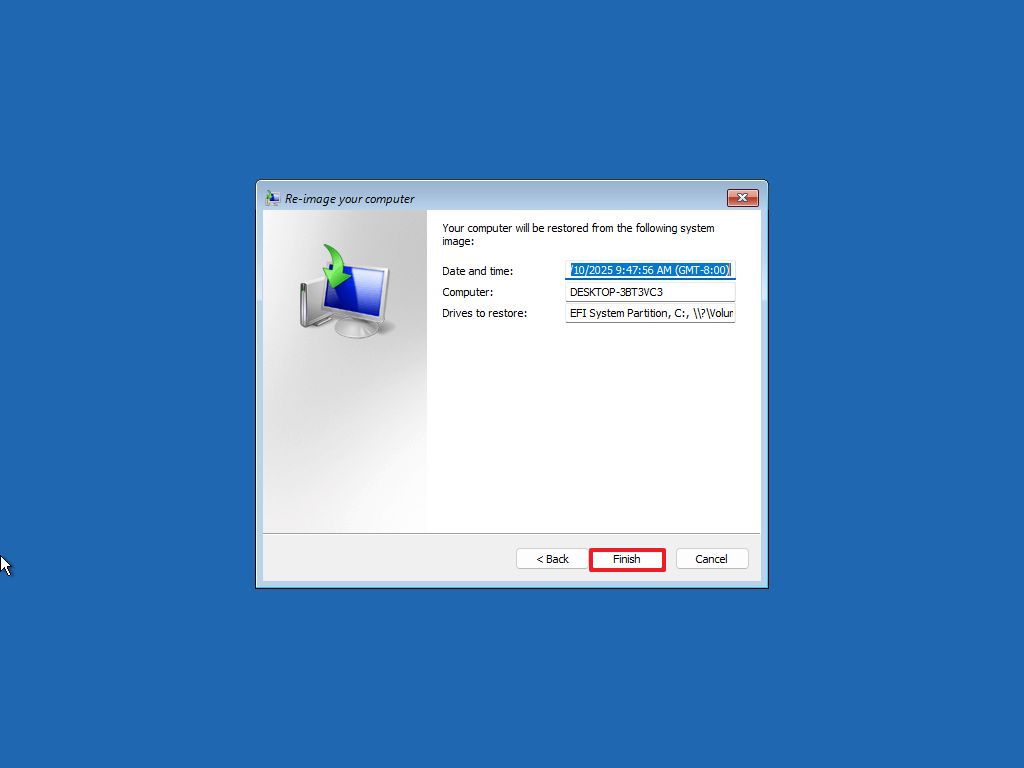
- Click the Yes button to confirm the deletion of the new drive.
- Click the OK button to confirm that BitLocker has been disabled on the new drive (if applicable).
- Click the Restart now button.
After you complete the steps, the tool will restore the old installation of Windows 11 on the new hard drive.
After the computer restarts, the system will require you to create a new PIN for your account to sign in to your account. At this point, you only need to follow the on-screen directions.
If you were using BitLocker, encryption would continue to be enabled, but you would have to restart the device one more time to resume the feature.
How to reconfigure partition after recovery on Windows 11
Although you can use the built-in backup tool to move the Windows 11 installation to a new drive, this process will restore the same partition layout as the old drive.
As a result, if you’re using a bigger hard drive, the storage will have some leftover unallocated space.
The problem is that the recovery partition is configured by design at the end of the partition with the operating system, making it impossible to extend the partition to use the unallocated space.
In this case, you have two options. You can use another partition with the remaining steps to store files and specific applications. Or, you will have to delete the recovery partition, expand the installation drive to use the unallocated space, and recreate the recovery partition.
Create a data partition
To create a partition with the remaining space, use these steps:
- Open Settings.
- Click on System.
- Click the Storage page on the right side.

- Click on Advanced storage settings under the “Storage management” section.
- Click the “Disks & volumes” setting.
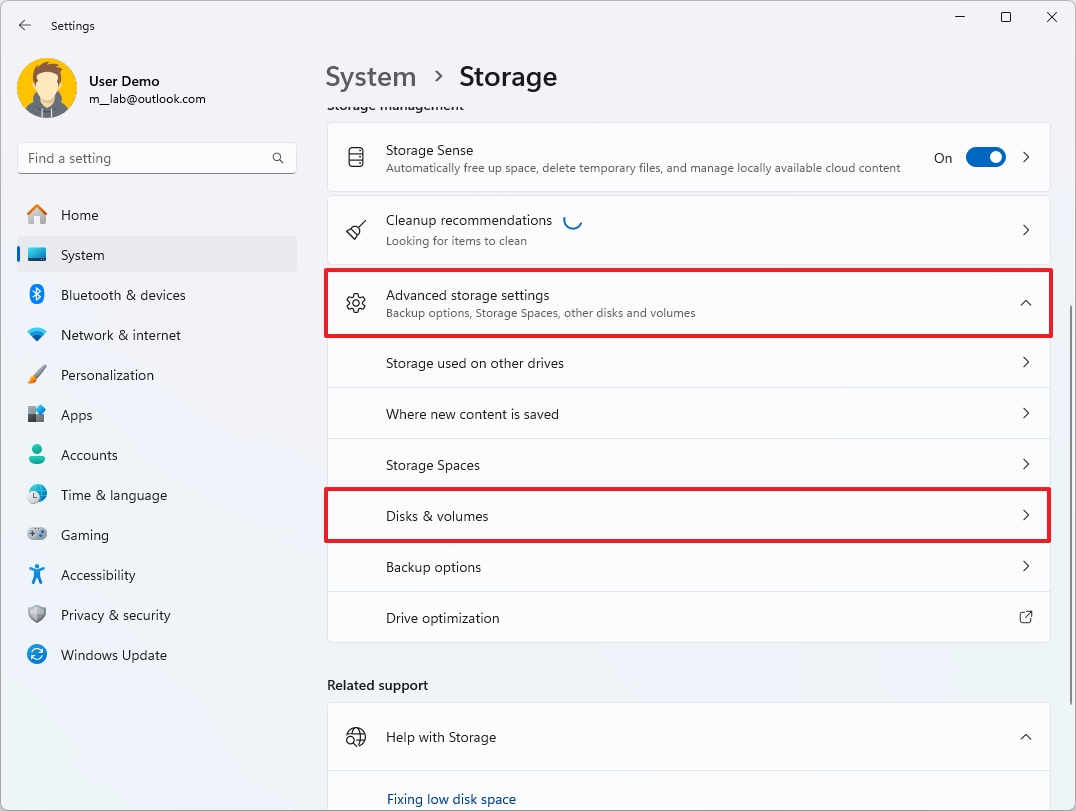
- Select the drive to create a new volume.
- Select the Unallocated space, click the Create volume button, and choose the “Create Simple Volume” option.
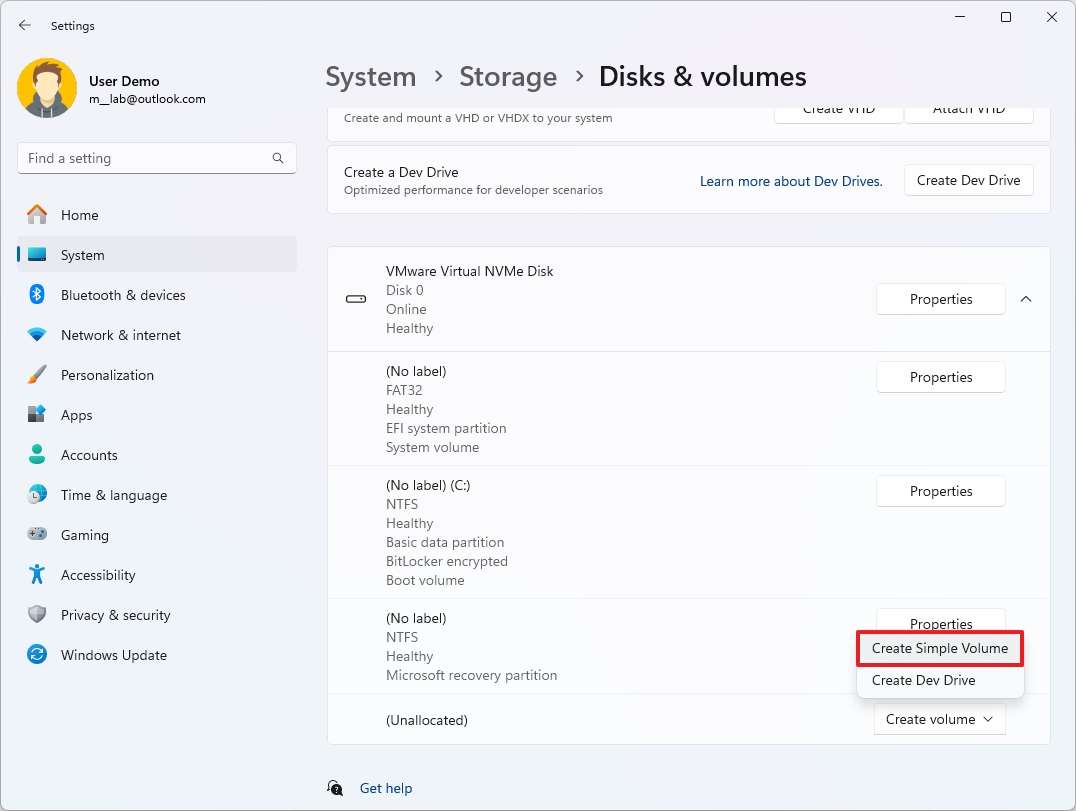
- Confirm a drive label in the “Label” field.
- Select the drive letter with the “Drive letter” drop-down menu.
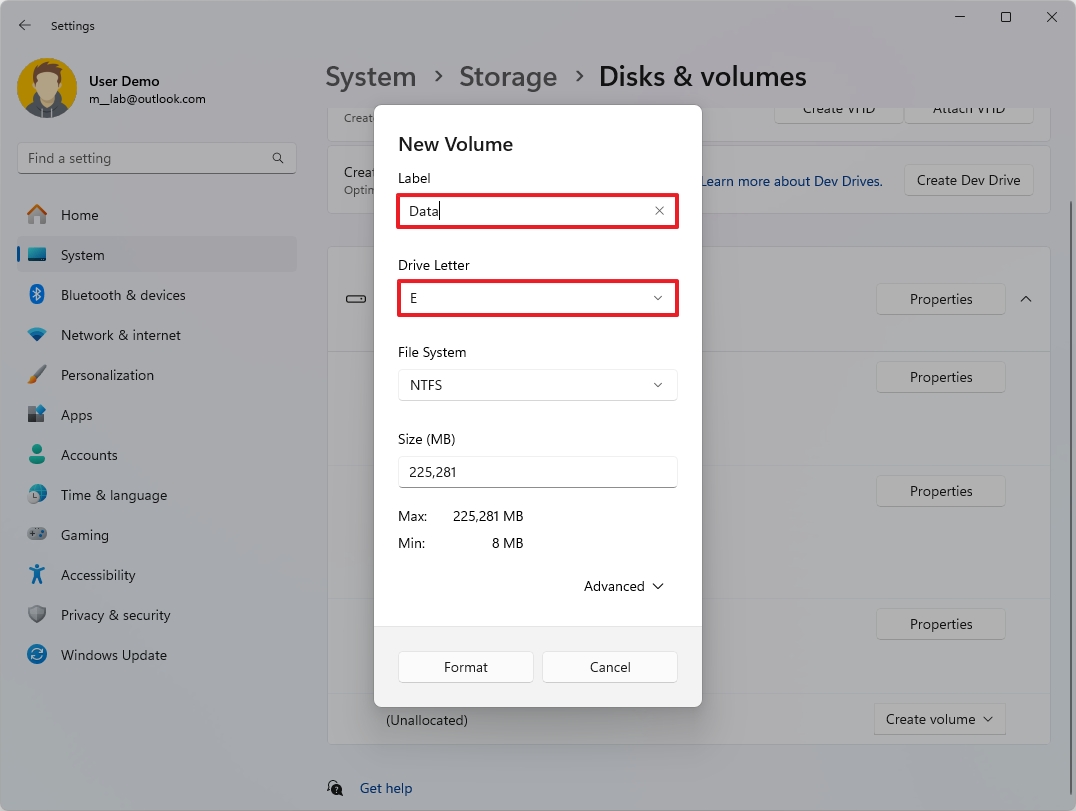
- Select the NTFS option with the “File System” drop-down menu.
- Click the Format button.
Once you complete the steps, you will end up with a new drive to store files.
Expand the setup partition
If you want to increase the installation drive’s size with the unallocated space, you’ll have to delete the recovery partition, expand the Windows 11 setup drive, and recreate the recovery partition at the end of the drive.
This can be a tedious process for many users. As a result, the best approach would be to create a new partition to store data using the unallocated space and then transfer your files to the new partition.
If you want to proceed with these instructions, it’s recommened to create a full backup of your computer before proceeding.
Also, you will have to disable BitLocker before proceeding from Settings > System > Privacy & security and turning off the “Device Encryption” toggle switch.
To extend the setup partition on Windows 11, use these steps:
- Open Start.
- Search for Command Prompt, right-click the top result, and select the Run as administrator option.
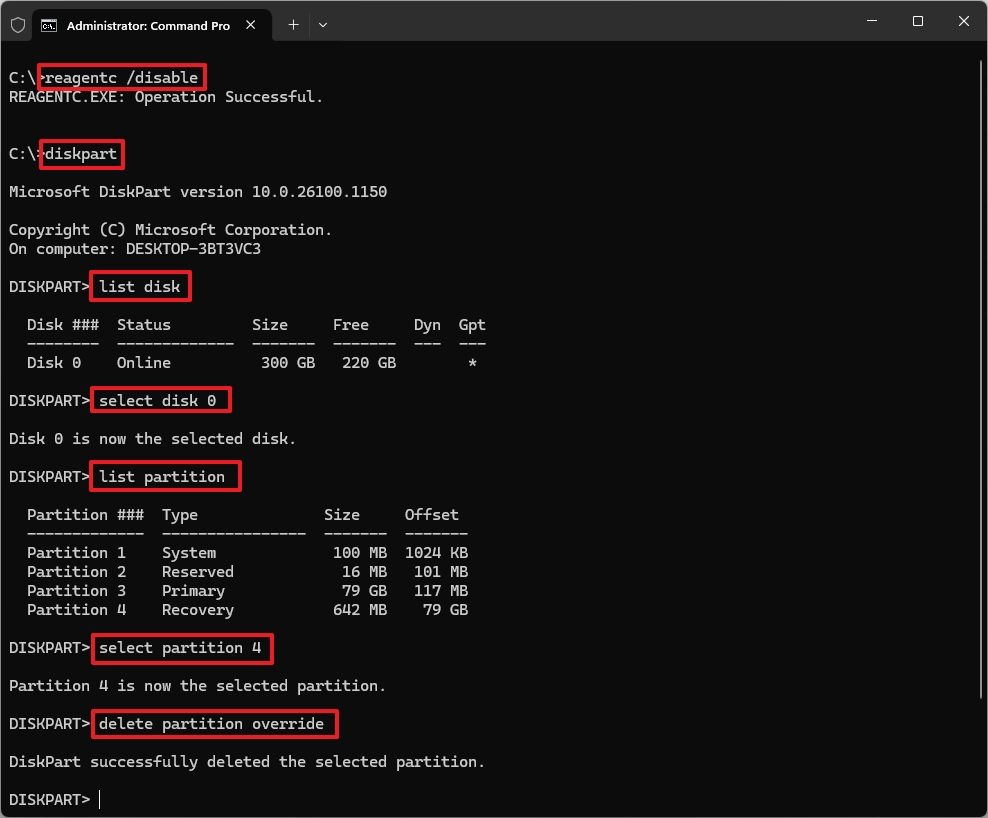
- Type the following command to disable the Windows Recovery Environment and move the “winre.wim” file from the “Recovery Partition” to the “Recovery” folder inside the current Windows 11 installation and press Enter: reagentc /disable
- Type the following command to run the DiskPart tool and press Enter: diskpart
- Type the following command to show the available disk and press Enter: list disk
- Type the following command to select the system drive and press Enter: select disk 0
- Type the following command to view the partitions on the drive and press Enter: list partition
- Type the following command to select the current partition for recovery and press Enter: select partition X
In the command, replace “X” with the correct number for the Recovery Partition on your installation.
- Type the following command to delete the recovery partition and press Enter: delete partition override
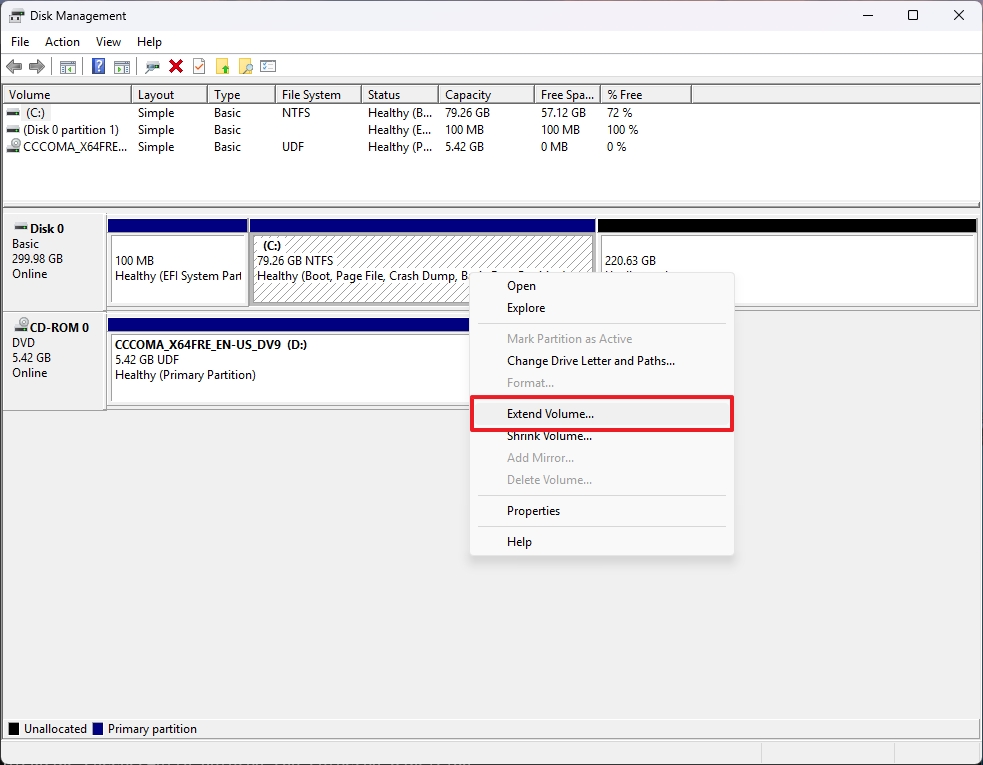
- Open Start.
- Search for Disk Management and click the top result to open the app.
- Right-click the (C:) drive and choose the “Extend volume” option.
- Click the Next button.
- Subtract “1024” MB (1GB) for the total amount of space to extend the main partition.
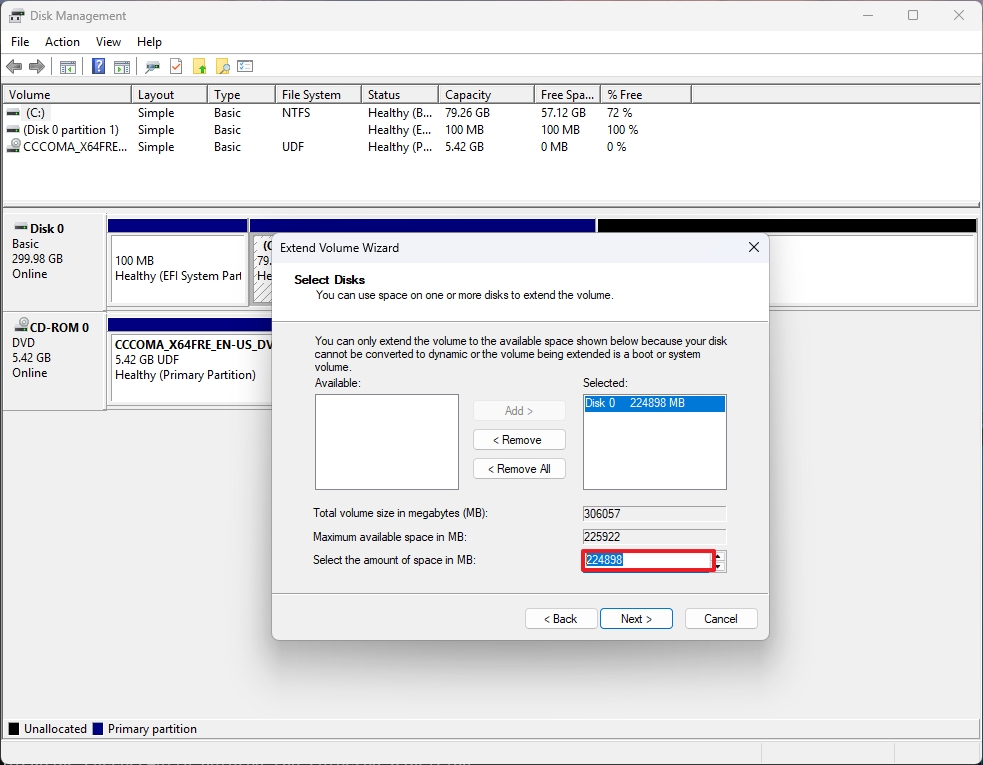
- Quick note: The 1GB of unallocated space will be used for the new Recovery Partition.
- Click the Next button.
- Click the Finish button.
- In Command Prompt, type the following command to create a new partition for the recovery environment and press Enter: create partition primary
- Type the following command to format the partition with the NTFS file system and press Enter: format fs=ntfs quick
- Type the following command to set the new partition as the Recovery Partition and press Enter: set id=de94bba4-06d1-4d40-a16a-bfd50179d6ac override
- Type the following command to set the attribute to prevent users from deleting this partition and press Enter: gpt attributes=0x8000000000000001
- Type the following command to exit from the DiskPart tool and press Enter: exit

- Type the following command to enable the Windows Recovery Partition and to copy the “winre.wim” from the “Recovery” folder to the “Recovery Partition” and press Enter: reagentc /enable
- Type the following command to check the state of the Windows Recovery Environment and press Enter: reagentc /info
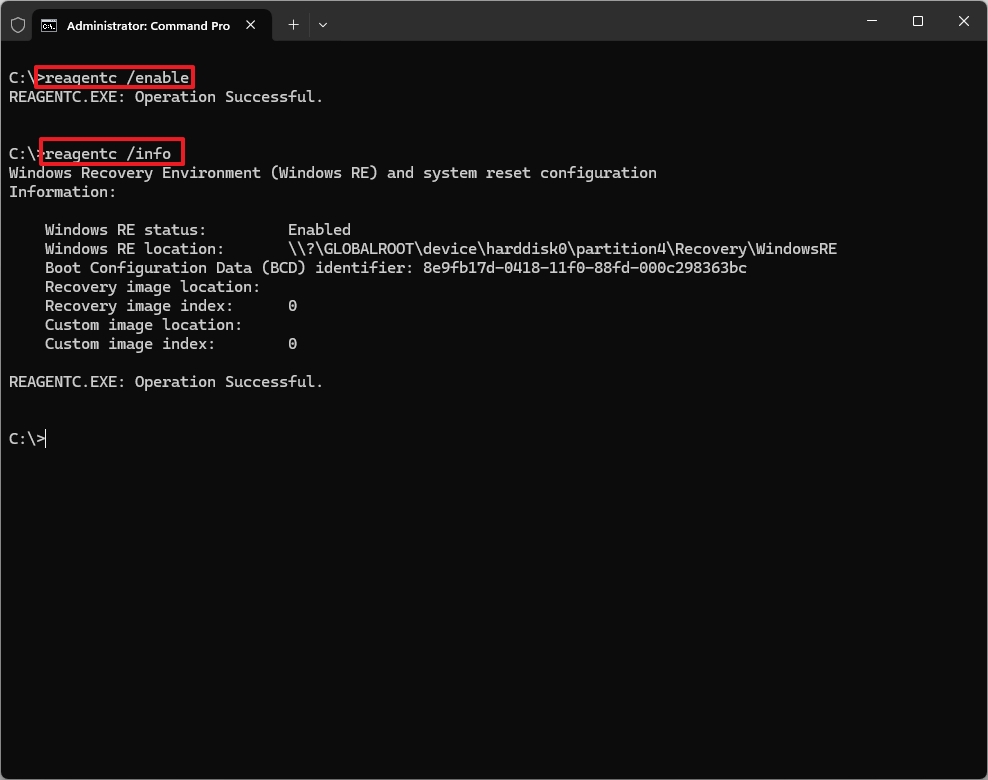
Once you complete the steps, the new Recovery Partition will be created at the end of the drive, and the output of the last step should show that WinRE is enabled.
Finally, remember to re-enable BitLocker from Settings > System > Privacy & security and turn on the “Device Encryption” toggle switch.
More resources
Find in-depth guides, troubleshooting tips, and the latest updates on Windows 11 and 10 here:


