Apple’s iPhone 14 lineup brings a pretty significant change for customers in the U.S. For the first time, you won’t find any room for a physical SIM card in your new iPhone. Instead, you’ll need to provision your line using an eSIM.
Don’t let this scare you, though. When properly implemented, eSIM technology is much easier than fussing with physical SIM cards, and the good news is that Apple has made sure that all the major U.S. carriers are ready to embrace this new feature on the iPhone 14. Moving to an eSIM on your new iPhone is easier than ever.
Note that only iPhone 14 models sold in the U.S. require that you move to an eSIM since they no longer have a physical SIM card slot. If you’re purchasing your iPhone 14 outside of the U.S., you’ll still get a physical SIM card slot and two internal eSIM cards. You can continue using your physical SIM card in that case, but if you’d like to switch to eSIM instead, the instructions below may still work as long as your carrier supports the necessary eSIM features. You can find a helpful list of which carriers support which eSIM features on Apple’s support pages.
How to transfer your SIM from your old iPhone using eSIM Quick Transfer
If you’re a customer of AT&T, T-Mobile, Verizon, C Spire, or U.S. Cellular, you can transfer your phone number directly from your old iPhone to your new iPhone 14 during setup in a matter of seconds, all without the need to contact your carrier.
Step 1: Make sure your current iPhone is near your new iPhone 14.
Step 2: Swipe up from the welcome screen to begin setting up your new iPhone 14.
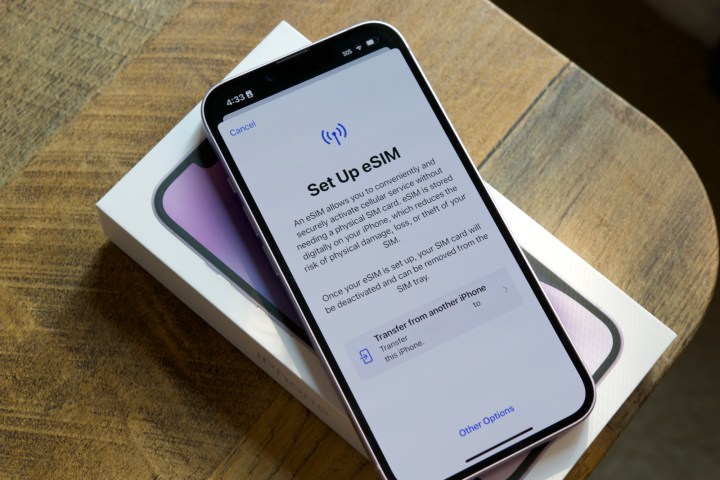
Step 3: Follow the setup process until you reach the Set up eSIM screen.
Joe Maring/Digital Trends
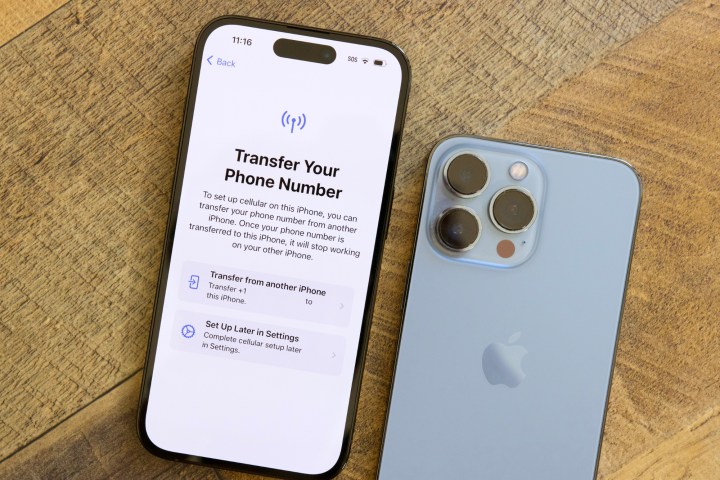
Step 4: Tap Transfer from another iPhone.
Joe Maring/Digital Trends
Step 5: If you have more than one line configured, select the line you want to transfer to your new iPhone. You can only transfer a single line during the initial setup. You can transfer the second line later from the Settings app.
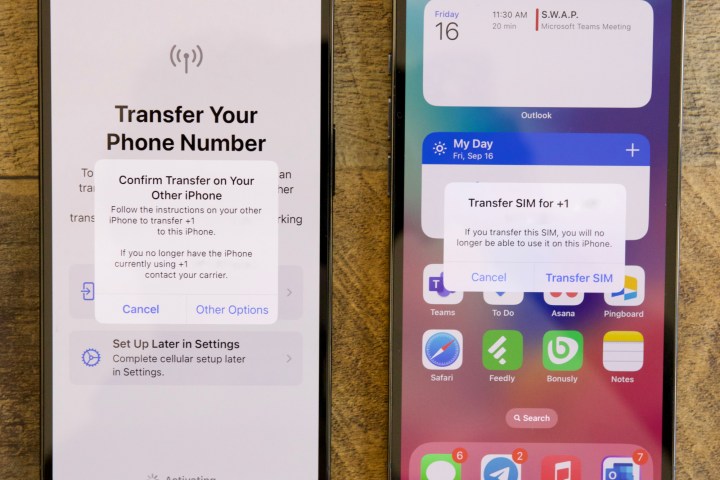
Step 6: When prompted, tap Transfer number on the iPhone 14.
Joe Maring/Digital Trends
Step 7: Select Transfer SIM from the message that appears on your old iPhone. Depending on your carrier’s settings, you may also be shown a six-digit verification code on your new iPhone 14 that will need to be entered on your old iPhone.
Joe Maring/Digital Trends
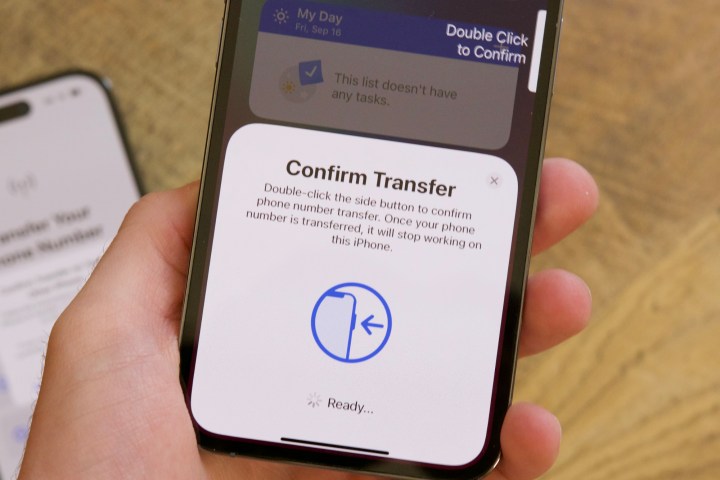
Step 8: Double-click the side button on your old iPhone to confirm the transfer.
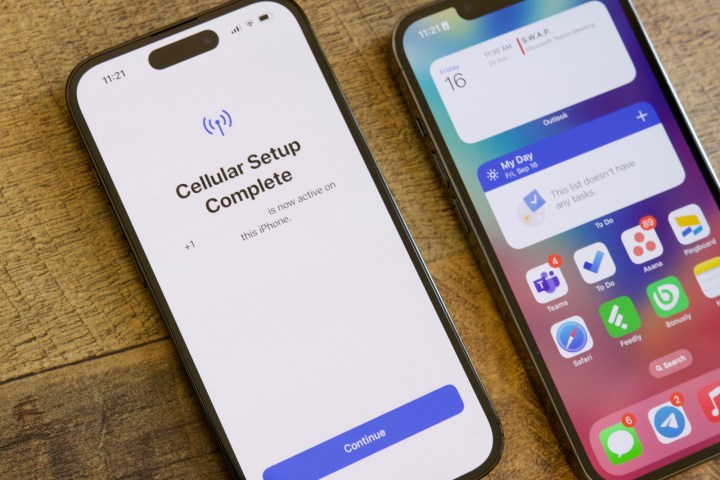
Your new iPhone 14 should show a status message indicating that it’s activating your eSIM, followed by connecting to the cellular network.
Joe Maring/Digital Trends
Step 9: When this completes, tap Continue on the iPhone 14 to proceed with the rest of the new iPhone setup process.
How to activate your eSIM using carrier activation
If you purchased your iPhone 14 directly from your carrier rather than Apple or another retailer, it may be ready to go with a new eSIM right out of the box. Note that you’ll need access to a Wi-Fi network so that your iPhone can contact your carrier’s activation servers to automatically provision your eSIM.
U.S. mobile providers that support Apple’s Carrier Activation feature include AT&T, Verizon, and T-Mobile, as well as Boost Mobile, Cellcom, Credo Mobile, C Spire, FirstNet, H2O Wireless, Spectrum Mobile, Straight Talk, Strata, Tracfone, US Cellular, and Xfinity Mobile.
Step 1: Swipe up from the welcome screen to begin setting up your new iPhone 14.
Apple
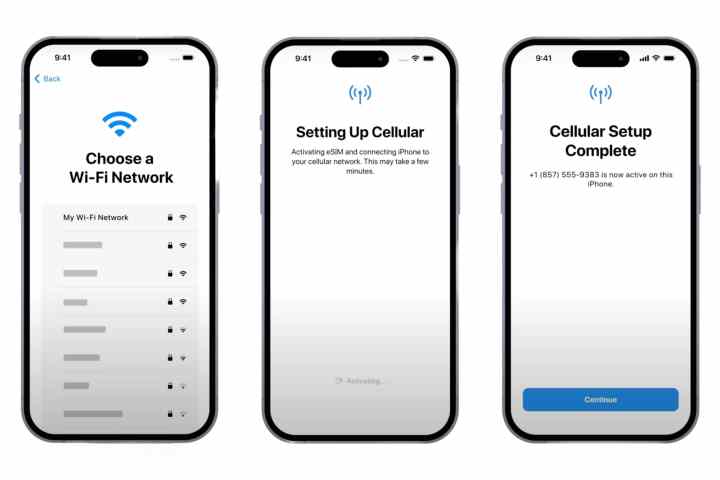
Step 2: When prompted, choose a Wi-Fi network to connect to and enter the Wi-Fi password.
Step 3: Wait for the iPhone 14 activation process to complete.
Step 4: Select Continue when the “Cellular Setup Complete” message appears.
Jesse Hollington / Andrew Martonik / Digital Trends
How to set up your eSIM using other methods
Quick Transfer and Carrier Activation are by far the easiest way to get an eSIM up and running on your iPhone 14, but sadly, only 15 U.S. carriers support one or both of those features. Thankfully, all is not lost if your carrier isn’t on that list. There are 25 other U.S. carriers that support eSIM technology, but you’ll have to jump through a few more hoops to get an eSIM set up with them.
The specific steps will vary depending on which carrier you’re using, but they normally involve contacting the carrier directly to obtain the necessary information. Some carriers have their own apps to streamline this process, while others will require you to enter the information directly. In the latter case, your eSIM activation information is typically provided as a QR code that you can obtain by visiting a carrier store or, in some cases, even in the customer account portal on your carrier’s website. Once you have that QR code, you can scan it with your iPhone camera during the setup process to get your eSIM up and running.
Step 1: Swipe up from the welcome screen to begin setting up your new iPhone 14.
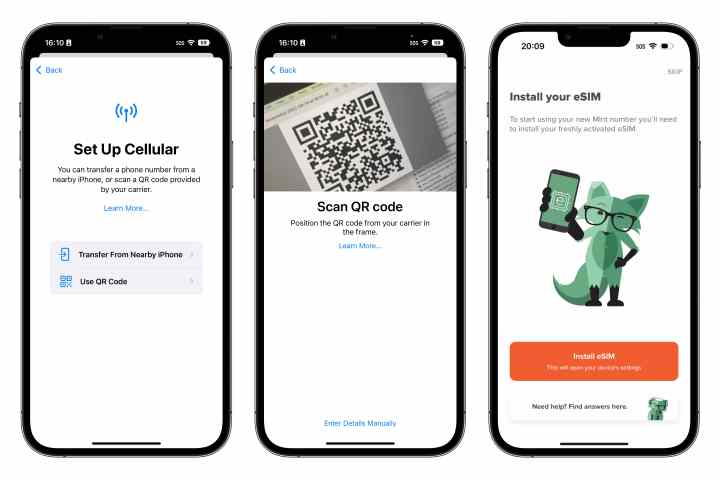
Step 2: Follow the setup process until you reach the Set up cellular screen.
Step 3: Select Use QR code.
Step 4: Follow the instructions to point your iPhone camera at the QR code. You can do this using a printed code or directly from a second screen such as your old iPhone or tablet or computer.
Step 5: Wait for the iPhone 14 eSIM activation process to complete.
Step 6: Select Continue when the “Cellular Setup Complete” message appears.
The steps above will help you move your primary line from a physical SIM or eSIM on your old iPhone to an eSIM on your new iPhone 14. However, the iPhone 14 also has an additional eSIM to support a second phone line. If you have a second line on your old iPhone or want to set one up, you can do that later through the Settings app. Check out our guide on how to set up and use a second line on an iPhone with an eSIM for more information.
Editors’ Recommendations


