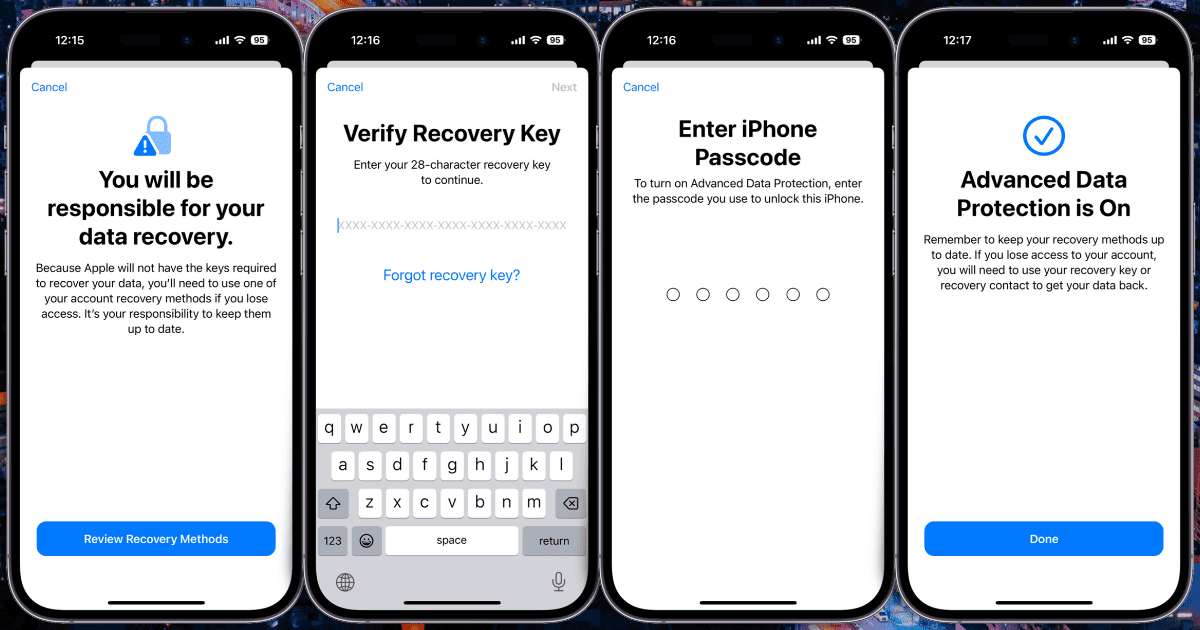
Apple offers industry-leading data security and protection, and keeps improving on that. To truly ensure your data is secure, though, whether it’s on your device or stored in iCloud, there’s a feature you need to set up. Turning on Apple’s Advanced Data Protection for iCloud will help make sure everything you have in iCloud that can be end-to-end encrypted actually is. Here’s how to get that set up.
Before Enabling Advanced Data Protection, Consider Recovery
One of the key things to remember about Apple’s Advanced Data Protection feature is that once you set it up, only you can recover your data if you lose a device or forget your password. Apple will no longer hold the encryption keys for your iCloud backups.
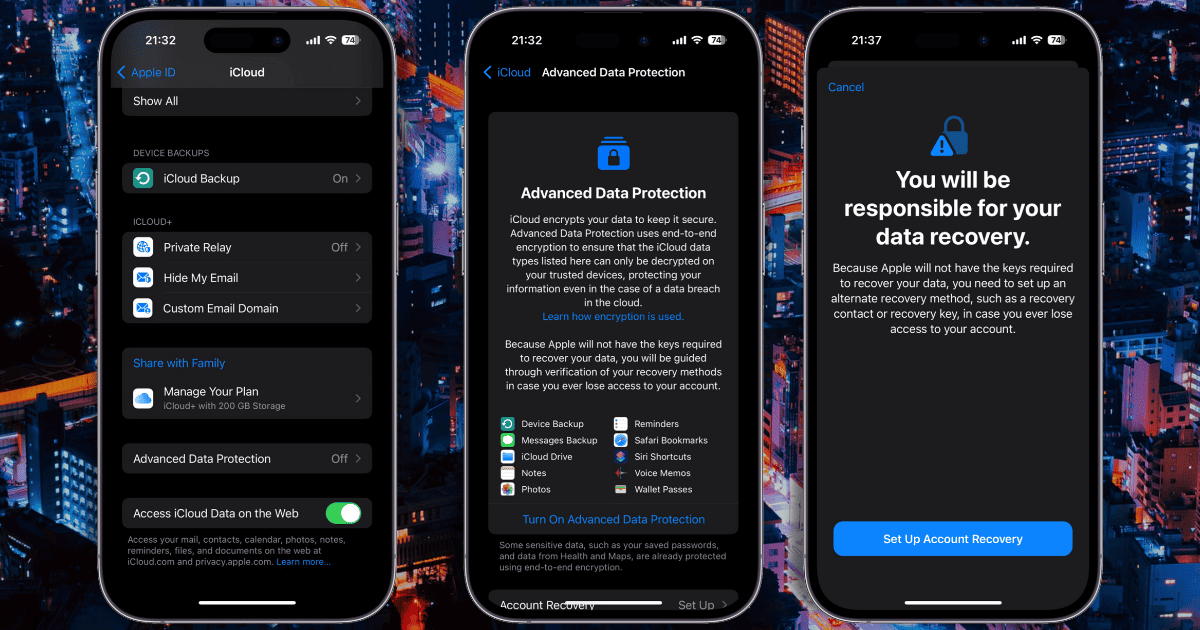
The best way to turn on Advanced Data Protection is on your iPhone, through Settings > Your Apple ID > iCloud > Advanced Data Protection. Before you can turn it on, though, you’ll need to have Account Recovery set up. Not to worry, iOS will walk you through that.
At the bottom of the Advanced Data Protection page, tap on Account Recovery. Your iPhone will warn you, “You will be responsible for your data recovery.” Next you can set up your recovery method or methods. Tap Set Up Account Recovery.
Recovery Contacts and Recovery Keys
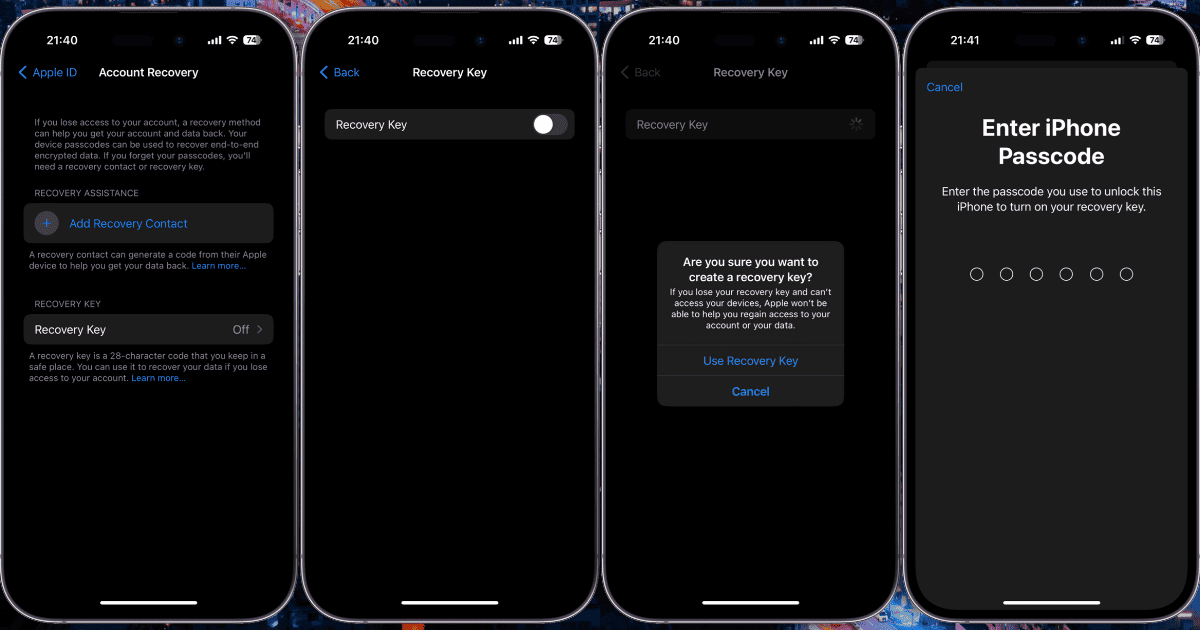
Here, you can choose to add a recovery contact, someone you trust who will be able to generate a code on their own Apple device to help get your data back. You can also generate a Recovery Key.
The Recovery Key is a 28-character code you keep in a safe place. Should you ever need to recover your iCloud data, for example after forgetting your password, you’ll need this code.
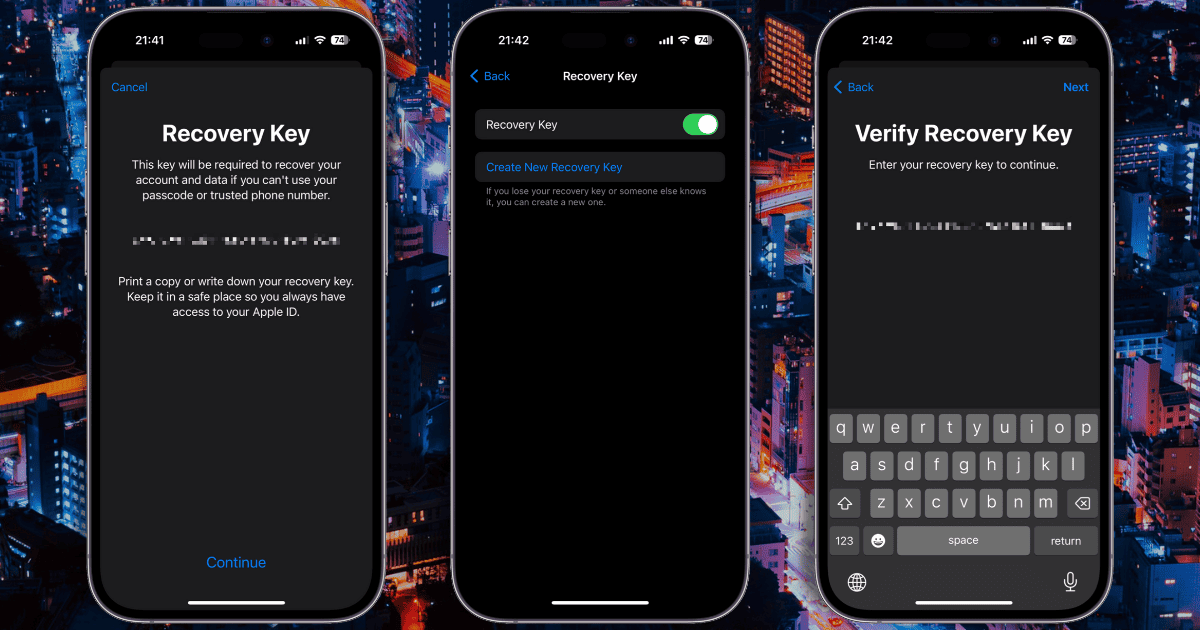
To set up a Recovery Key, tap the Recovery Key field here. On the next page, toggle Recovery Key on. Your iPhone will then guide you through creating your Recovery Key.
It is vital that you make note of your Recovery Key. Store a copy of it in a secure location you’ll still have access to if you forget your Apple ID password. For example, you might write it down or store it in a password manager.
Once this step is done, you can proceed with switching on Advanced Data Protection on iCloud.
Turning on iCloud Advanced Data Protection
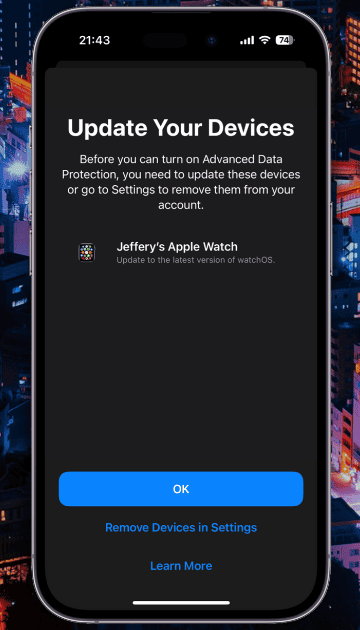
Now you can return to the main Advanced Data Protection page to turn the feature on. All of your devices linked to your Apple ID will need to be running the latest operating system version, though. If any aren’t, your iPhone will tell you which ones need to be updated or removed from your account.
Once that’s all squared away, your iPhone will guide you through a few more verification screens. Along the way, you’ll be asked to verify your Recovery Key. Finally, you’ll need to enter the passcode you use to unlock your iPhone. Finally, you should see a confirmation that Advanced Data Protection is turned on.
Later, should you decide you want to turn Advanced Data Protection off, this is easy to do. Simply go to Settings > Your Apple ID > iCloud > Advanced Data Protection. Tap Turn Off Advanced Data Protection and follow the instructions.
What’s End-to-End Encrypted With Advanced Data Protection?
Once you turn on the feature, everything that can be encrypted end-to-end is. As previously mentioned, this means the encryption keys for these data stores won’t be kept on Apple’s servers.
Three categories of your data simply cannot be end-to-end encrypted. These are iCloud Mail, Contacts and Calendars. In the case of your iCloud Mail, it cannot be end-to-end encrypted because of a need to interoperate with the global email system. That being said, all of Apple’s native email clients support S/MIME for message encryption.
Contacts and calendars are built upon industry standards, CalDAV and CardDAV, that don’t support end-to-end encryption.
The following categories of data previously weren’t end-to-end encrypted but now can be:
- iCloud Backup (including device and Messages backup)
- iCloud Drive
- Photos
- Notes
- Reminders
- Safari Bookmarks
- Siri Shortcuts
- Voice Memos
- Wallet Passes
You can learn more about how Apple’s iCloud data protection works from the latest iCloud data security overview support article.


