

The MSI GE66 Raider gaming laptop is a powerful option for anyone who needs 15.6 inches of gaming glory on the move. It’s rather pricey, especially when you start adding extra memory and storage, but you can save some money by taking RAM matters into your own hands. If you’d like to upgrade the DDR4 RAM inside, we have everything you need to know right here to get the job done.
Hardware to get the job done
How to upgrade RAM in your MSI GE66 Raider
Note: Before beginning any upgrades on a PC, it’s a good idea to back up your data in the unlikely event something should go wrong. You’ll also want to ensure you’re not working in a static-filled environment since it can cause damage to a PC’s internal hardware. A quality toolkit from iFixit will have everything you need to get the job done.
The MSI GE66 Raider is a powerful gaming laptop that is configurable with some truly impressive hardware. If you happen to find a model with everything you need but just doesn’t have quite enough RAM, fret not. The laptop’s bottom is removable, giving you full access to two SODIMM RAM slots for upgrading.
Something like Corsair’s Vengeance DDR4-2933MHz RAM is going to offer an excellent price-to-performance ratio for your GE66 Raider. Two 16GB sticks for a total of 32GB is about $125, which is in most cases a lot less expensive than configuring a model from the factory.
Once your new RAM has arrived, and you’re ready to upgrade, clear off a well-lit workspace and power down your laptop. Time to get started on the following steps.
-
Unscrew the 11 fasteners on the laptop’s bottom using a Phillips-head screwdriver. These screws back out completely, so be sure you have a safe spot to keep them.

 Source: Windows Central
 -
Pry up the bottom panel with a pry tool. Starting at one corner (or loose spot) and working your way around slowly should help prevent damage to the panel. Completely remove the panel.
 Source: Windows Central
 -
Pull back the heat shield on the first RAM module.
 Source: Windows Central
 -
Remove the metal clips on either side of the first RAM module. Just slide them off the sides of the RAM, and the stick should pop up and remain at an angle.
 Source: Windows Central
 -
Pull the RAM out of the slot.
 Source: Windows Central
 -
Insert the new RAM module into the slot at about a 30-degree angle. It is keyed and will only fit one way.
 Source: Windows Central
 -
Press down on the RAM until the side clips click into place. Repeat steps 3 to 7 if you’re replacing both RAM modules.
 Source: Windows Central
 -
Press the heat shield back into place.
 Source: Windows Central
 -
Replace the bottom panel of the laptop. Start by applying pressure in one corner and work your way around.
 Source: Windows Central
 -
Screw in the 11 fasteners on the bottom of the laptop.
 Source: Windows Central


You can now turn on your MSI GE66 Raider and check to see if the RAM upgrade went according to plan. To quickly check if the new hardware is recognized by the system, run through the proceeding steps.
- Right-click the Start button.
-
Click System.

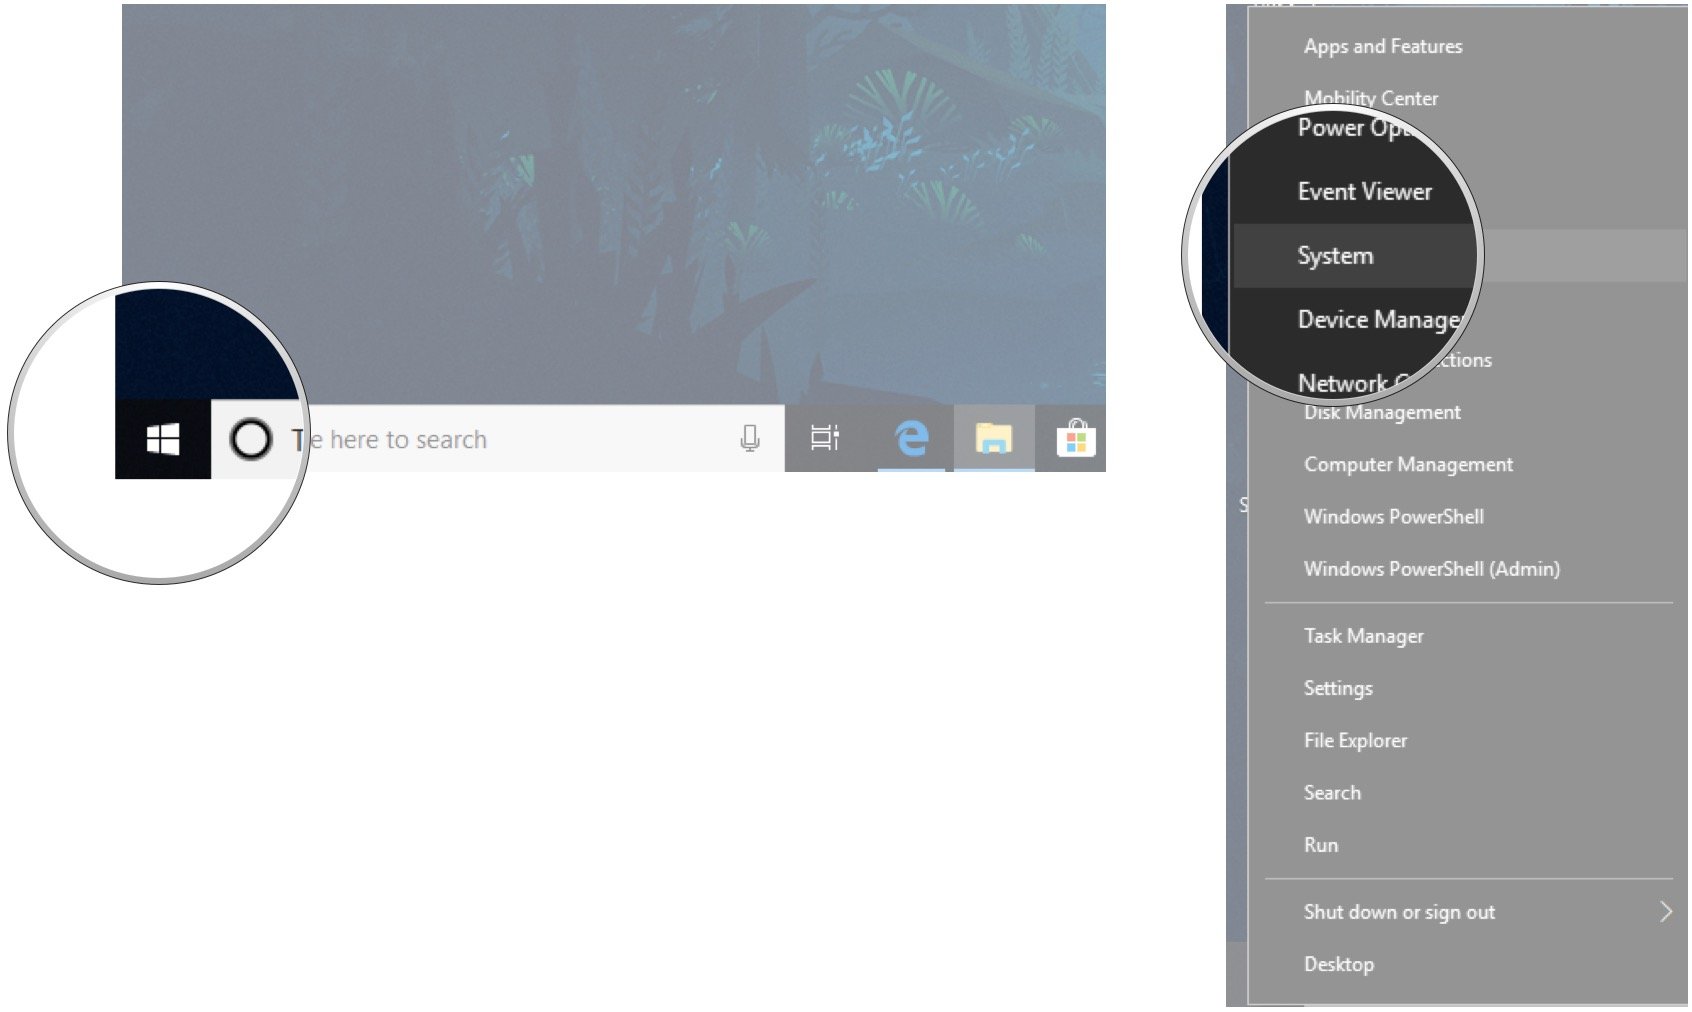

You should now be able to see the total amount of installed RAM in the Device specifications section. As long as it matches the total amount you have installed, your upgrade was a success.
Our top hardware picks
Corsair’s Vengeance SODIMM DDR4 RAM is reliable and affordable. If 32GB isn’t what you need, you can always pick up different sizes to suit your needs. MSI’s GE66 Raider is a high-end 15.6-inch gaming laptop available with some truly impressive hardware options.


