

When I first purchased my Steam Deck, I decided to go with the 64GB version in order to save money. However, I soon realized that being limited on storage space was rather inconvenient. As such, I was excited to upgrade my SSD on the gaming handheld as soon as I could. Thankfully, the upgrade process is pretty easy.
If you’re in the same boat and want to upgrade your Steam Deck SSD, then here are the step-by-step instructions for swapping out the original drive for a new SSD. I’ll also cover suggestions for how to backup your game data and explain how to reinstall SteamOS once the new SSD has been put in place. Let’s get started.
What you need to upgrade Steam Deck SSD
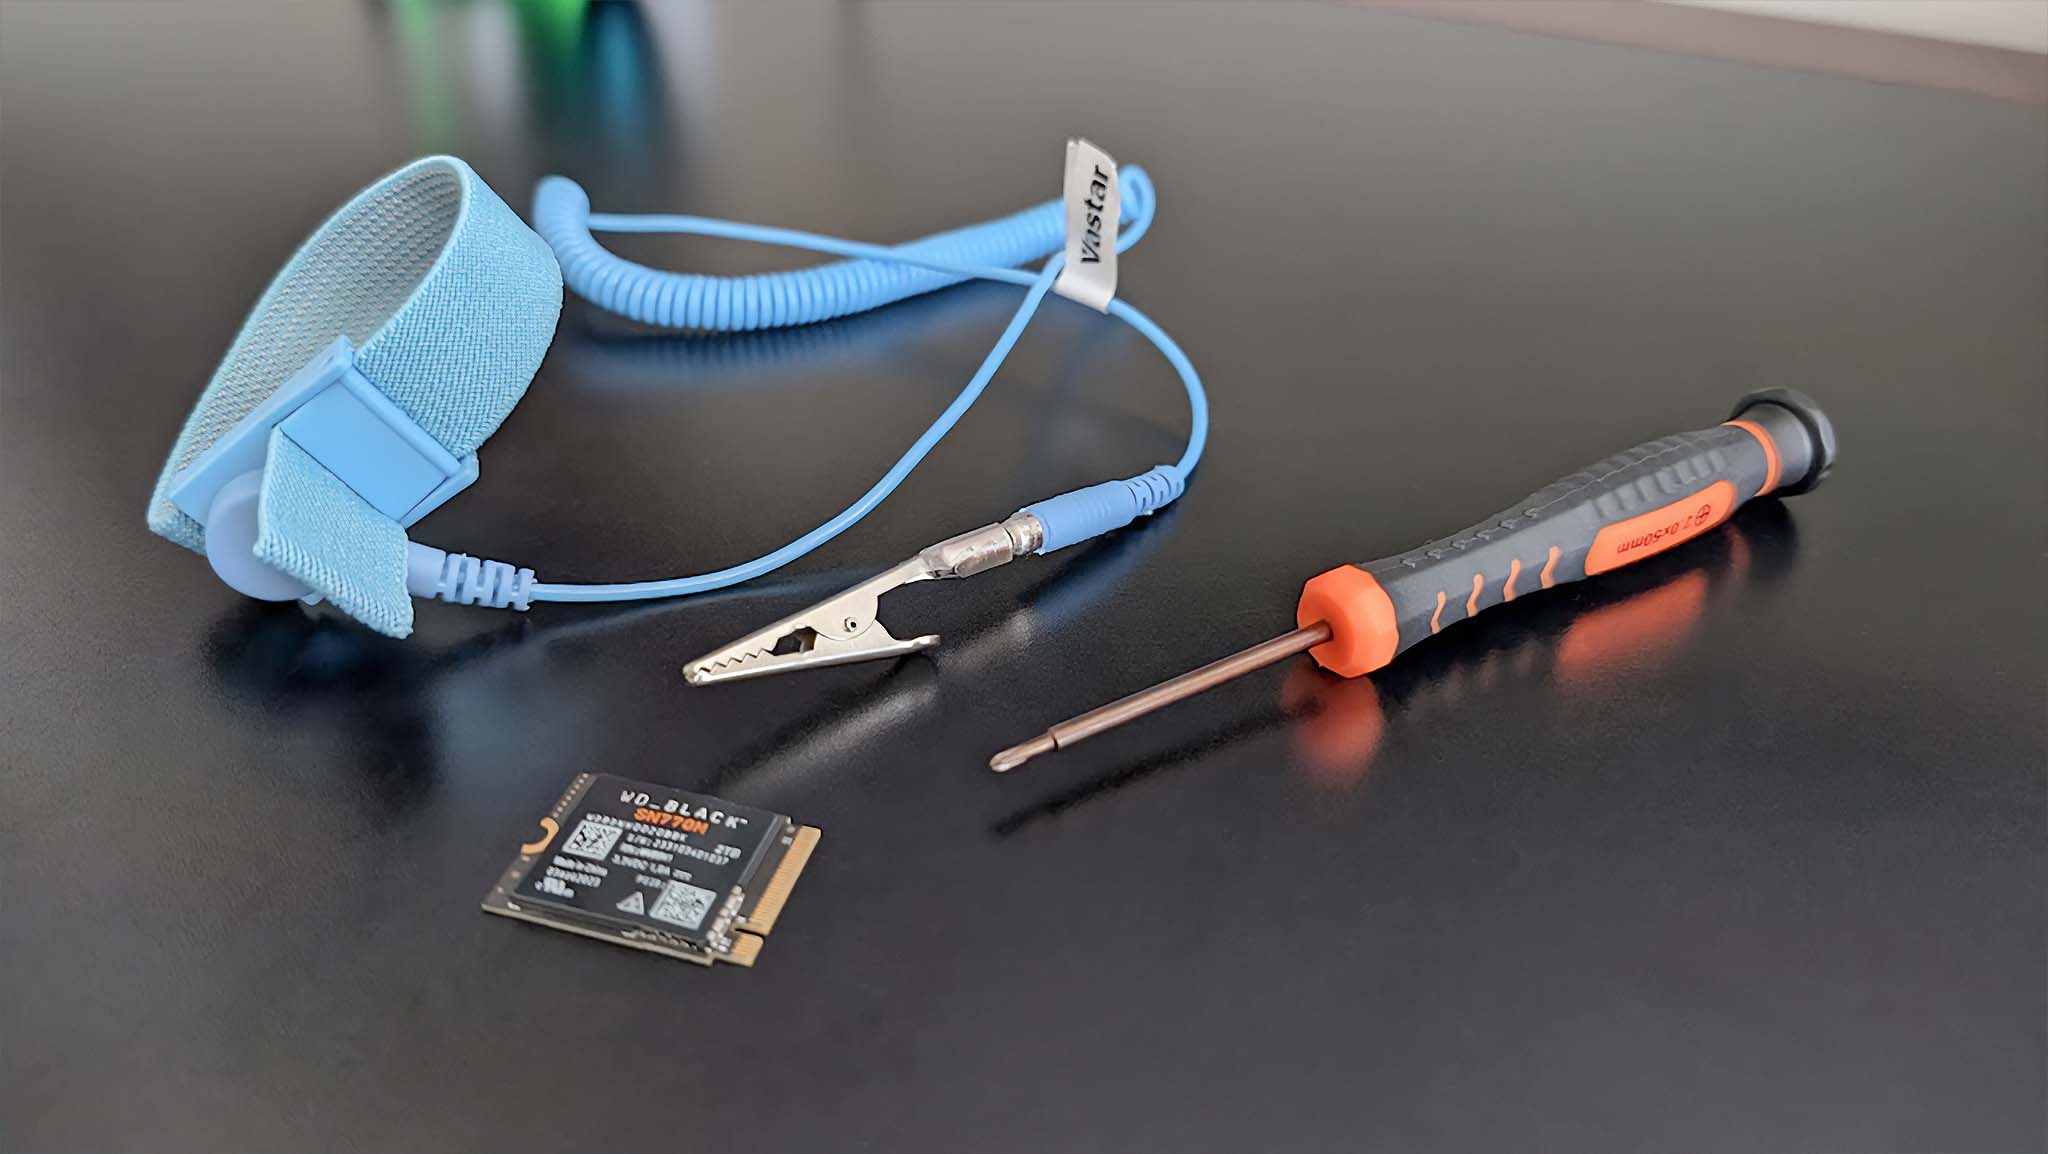
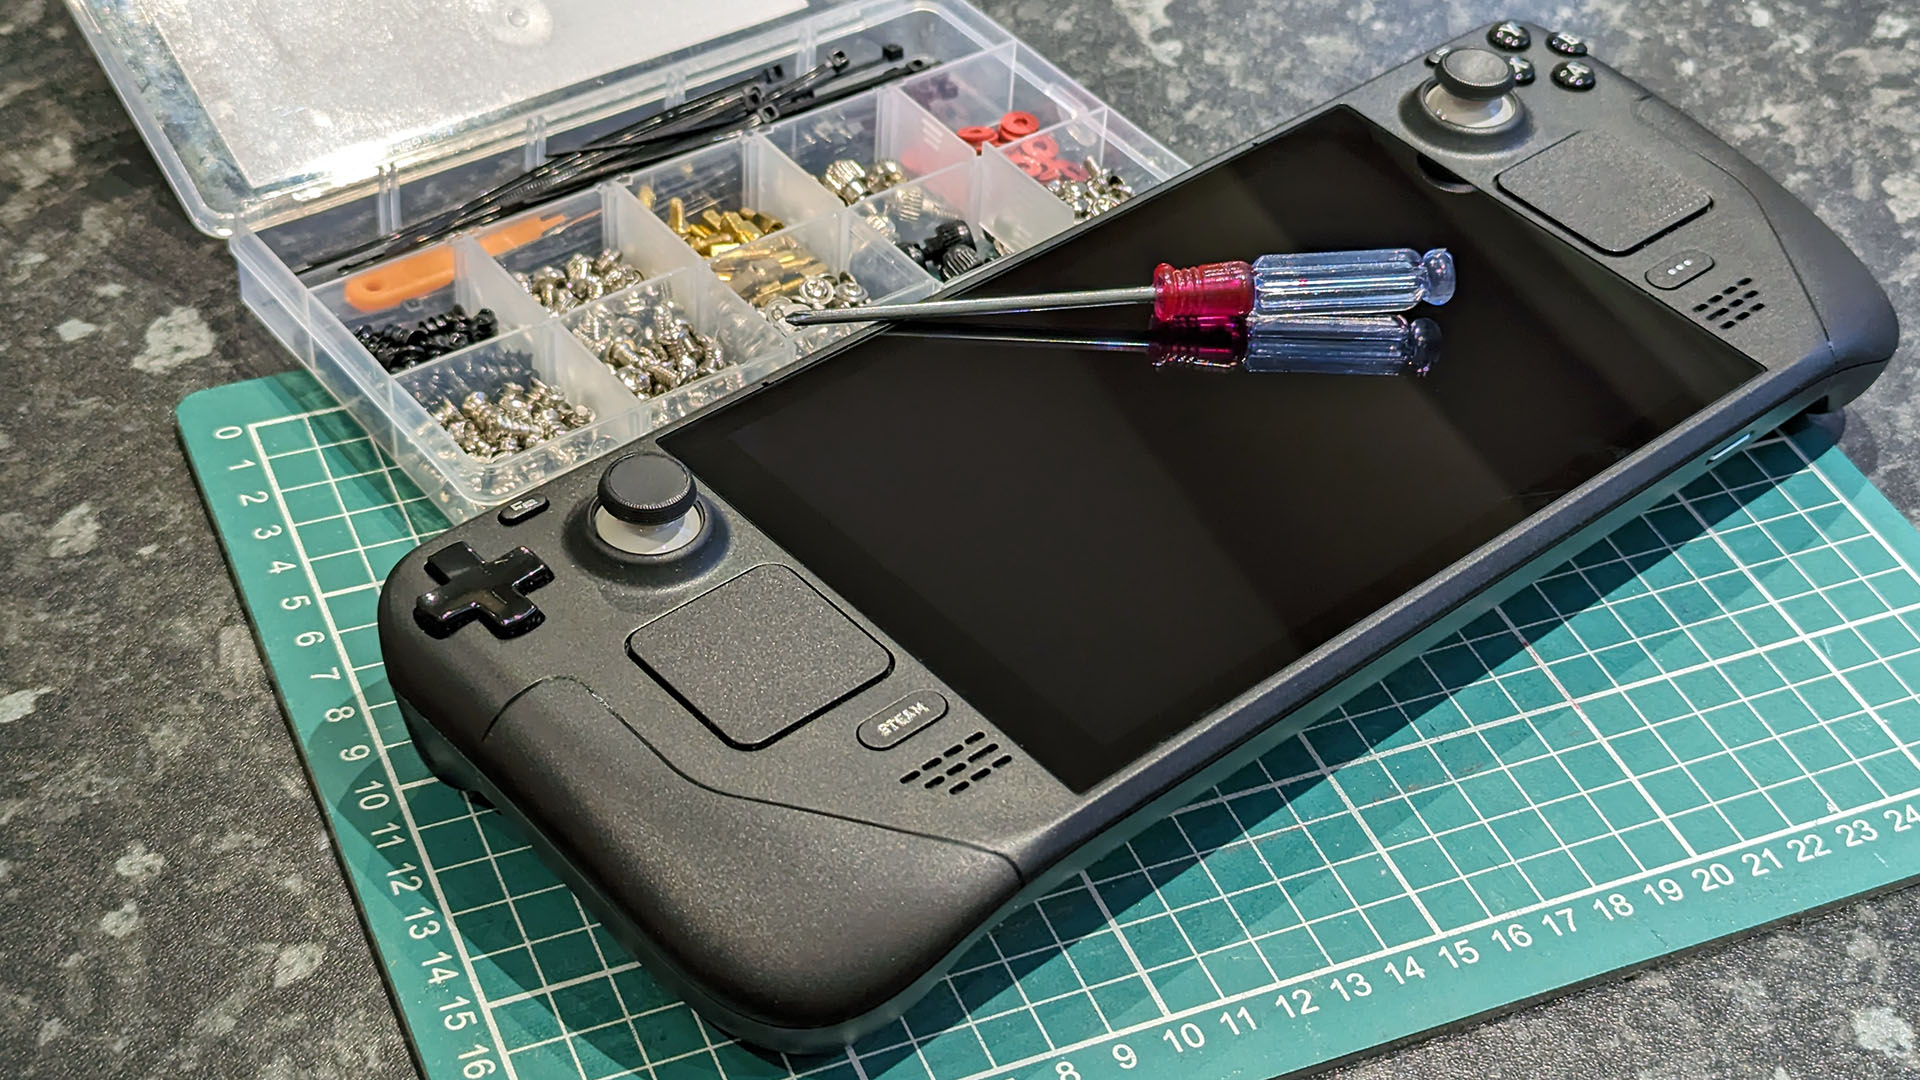
Before you can upgrade your Steam Deck SSD, you’ll need to make sure you have everything you need for the installation process. This includes the SSD itself, a flash drive for reinstalling SteamOS, a tool kit, and a means of grounding yourself so you don’t accidentally damage the device with static shocks.
How to backup Steam Deck SSD
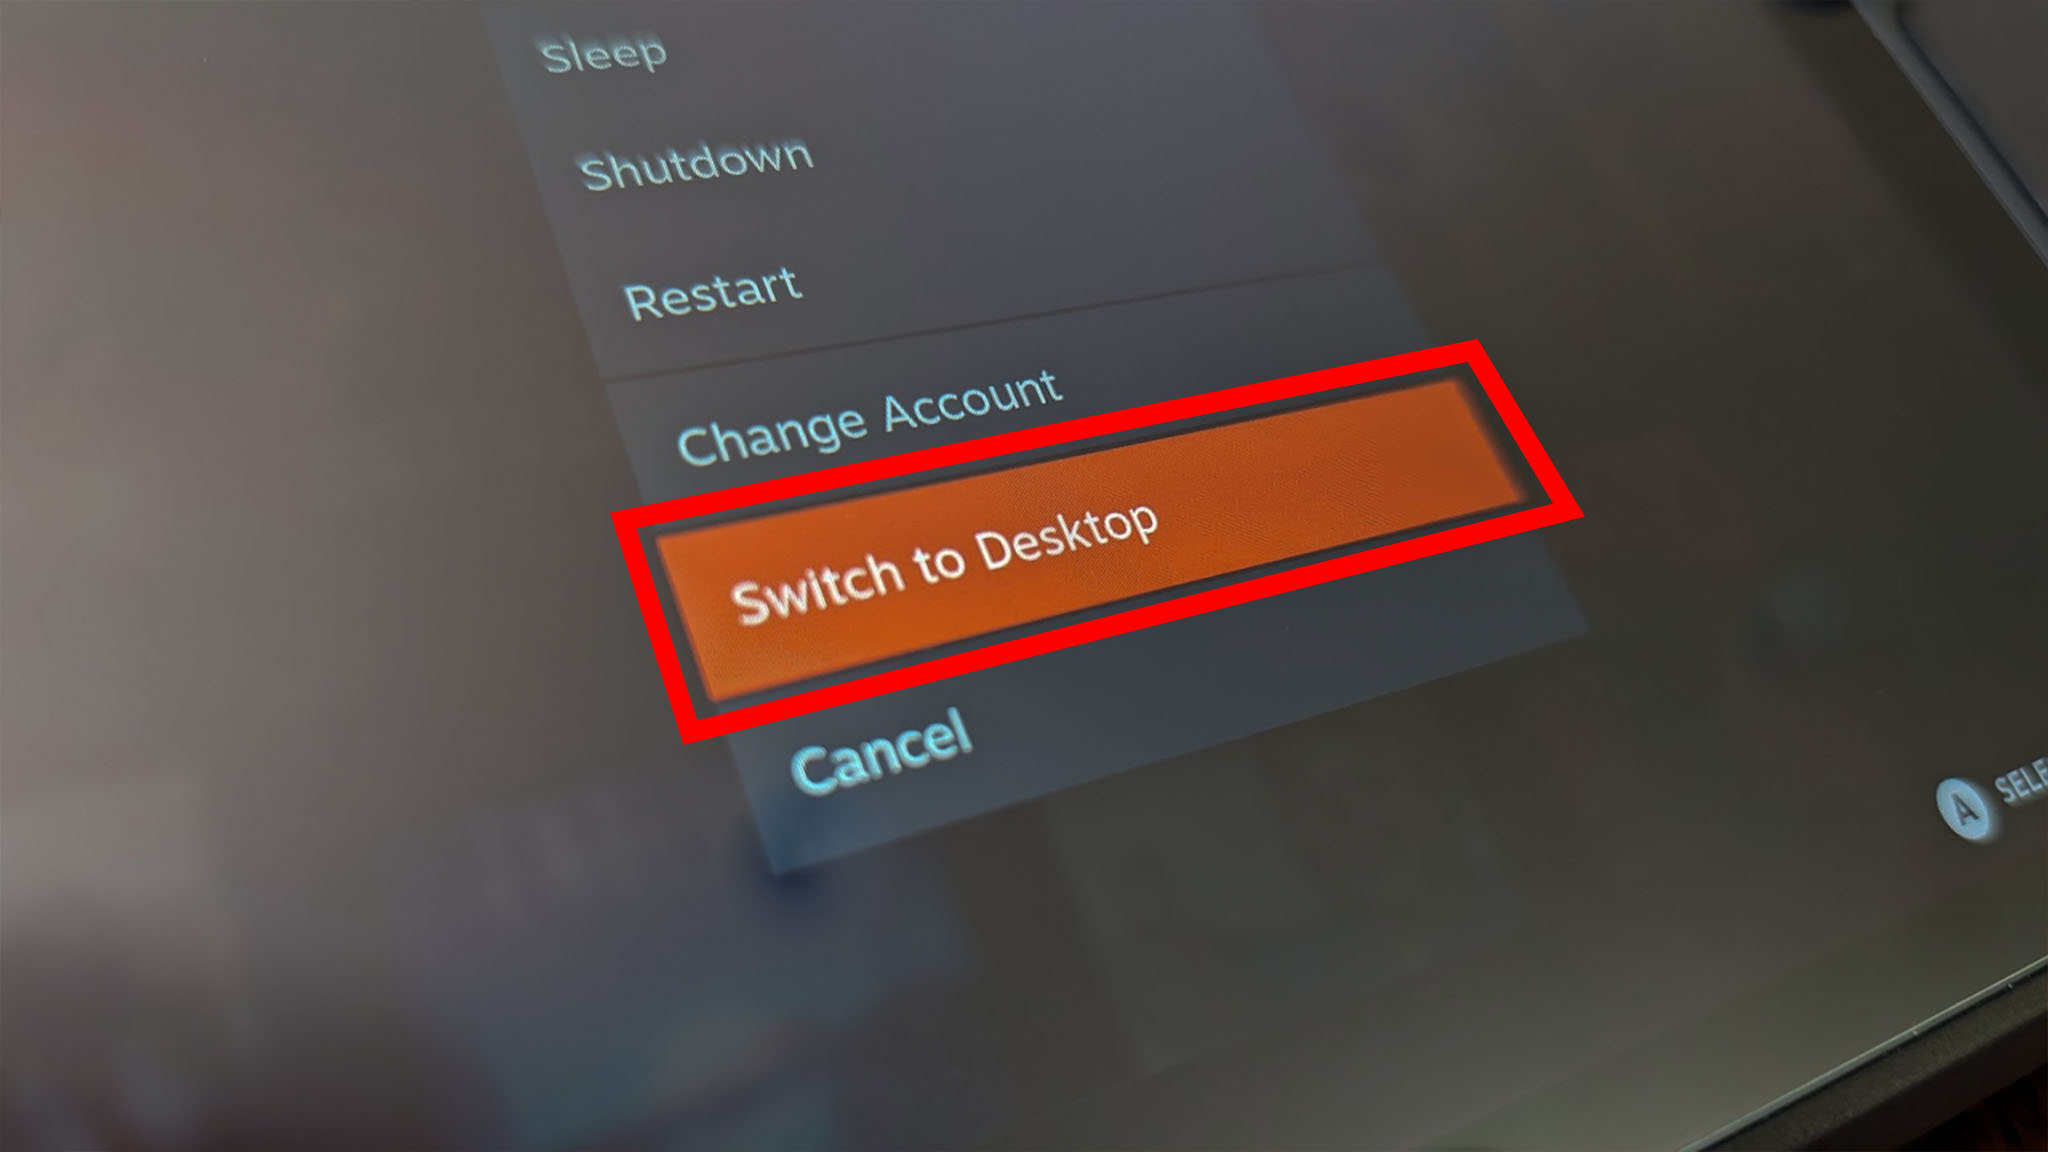
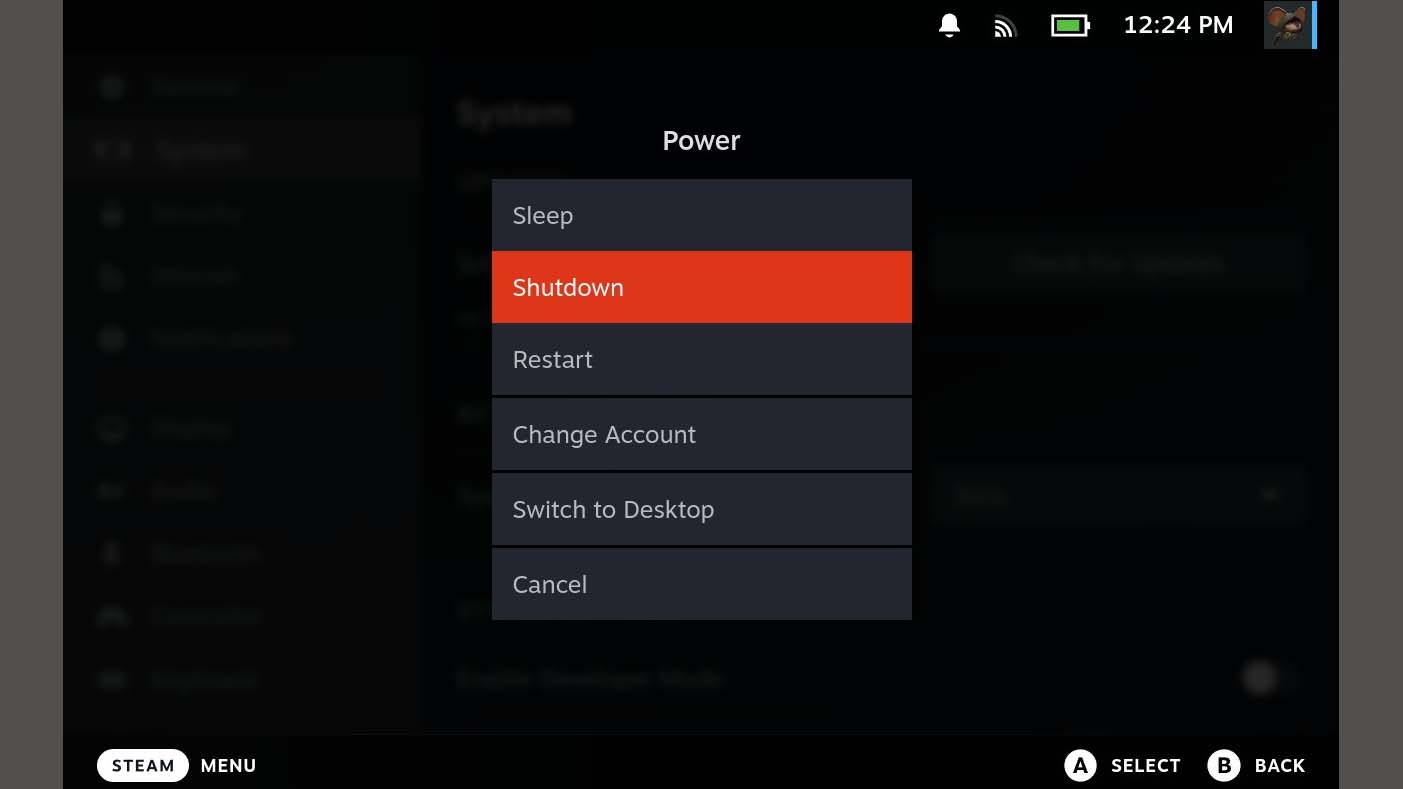
- Press the Steam button → Power → Switch to Desktop.
- If you plan to transfer Steam Deck data to another device, connect the Steam Deck to a desktop, laptop, or SSD via cable.
- Press the Steam Deck icon in the bottom left and tap on the Dolphin file manager.
- From here, transfer all of your Steam Deck data to whatever online cloud storage service you want using a web browser or else transfer the data to a connected storage device.
Pro tip: Google Drive is a good free storage service if your account has the space needed. Otherwise, an SSD works well for this.
How to install a new SSD on Steam Deck
NOTE: There are two possible Steam Deck layouts depending on what version you have — older models have a silver motherboard shield while newer models have a black motherboard backing. This guide will cover what to do for either one.
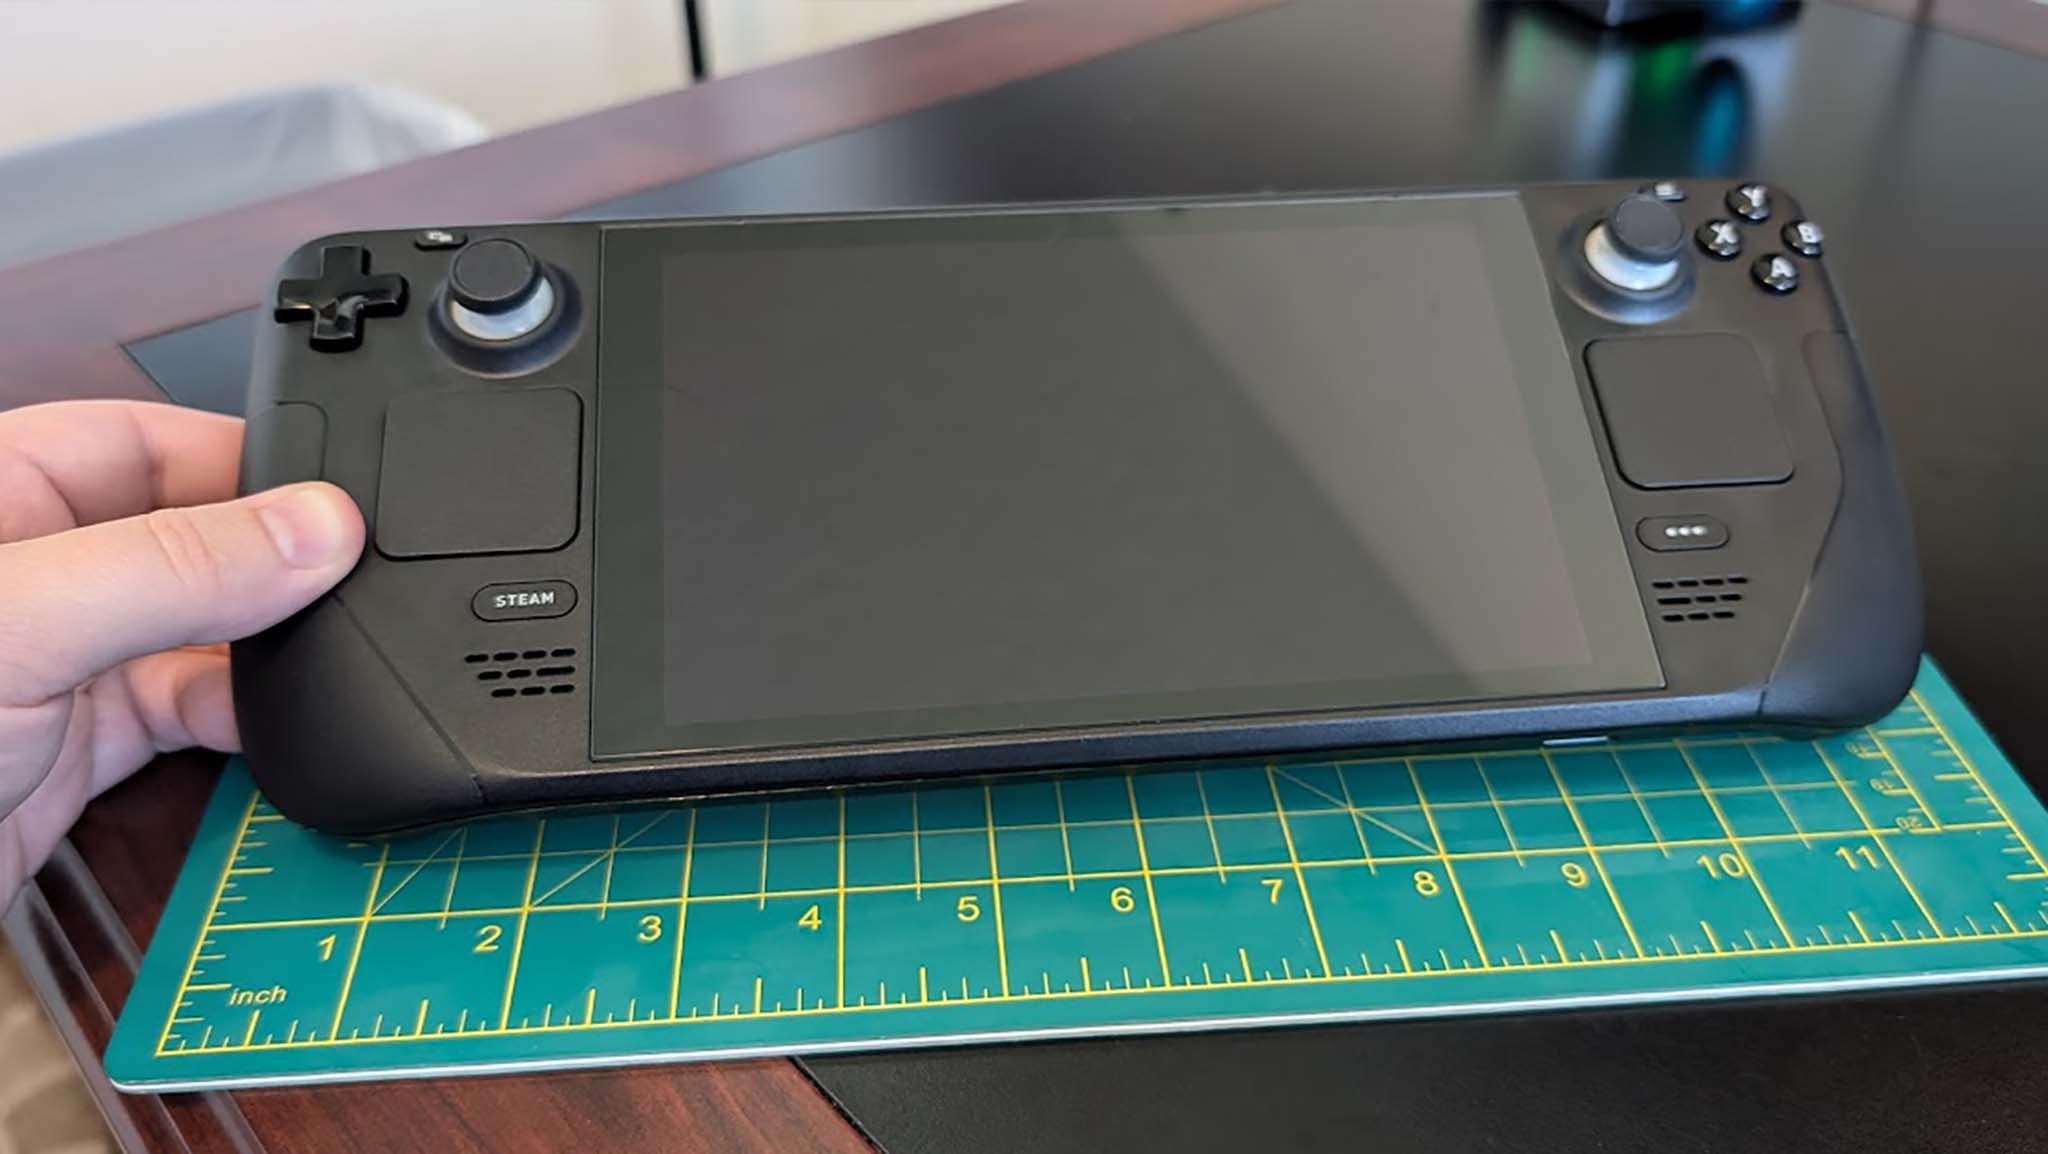
- Lay the Steam Deck down on a clean, dry, and flat surface. If you have cats, go into a room and shut the door so your feline friends don’t play with the loose screws.
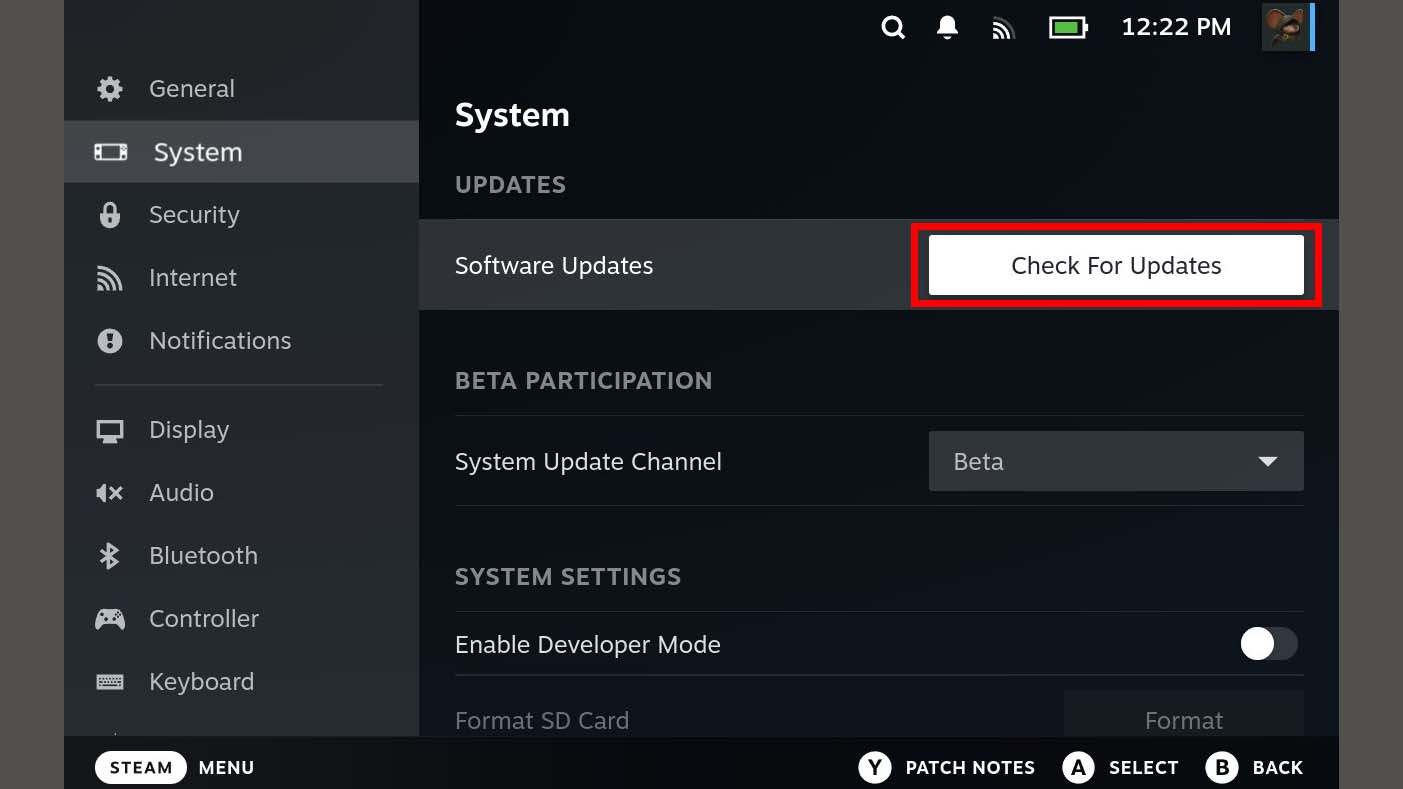
- Make sure the Steam Deck is on the latest update by pressing Steam button → Settings → System → Software Updates → Check For Updates.
- Turn the Steam Deck off completely by pressing Steam button → Power → Shutdown → Confirm. If there is a microSD card, remove the microSD from the Steam Deck now or else it might snap in half when you open the handheld.
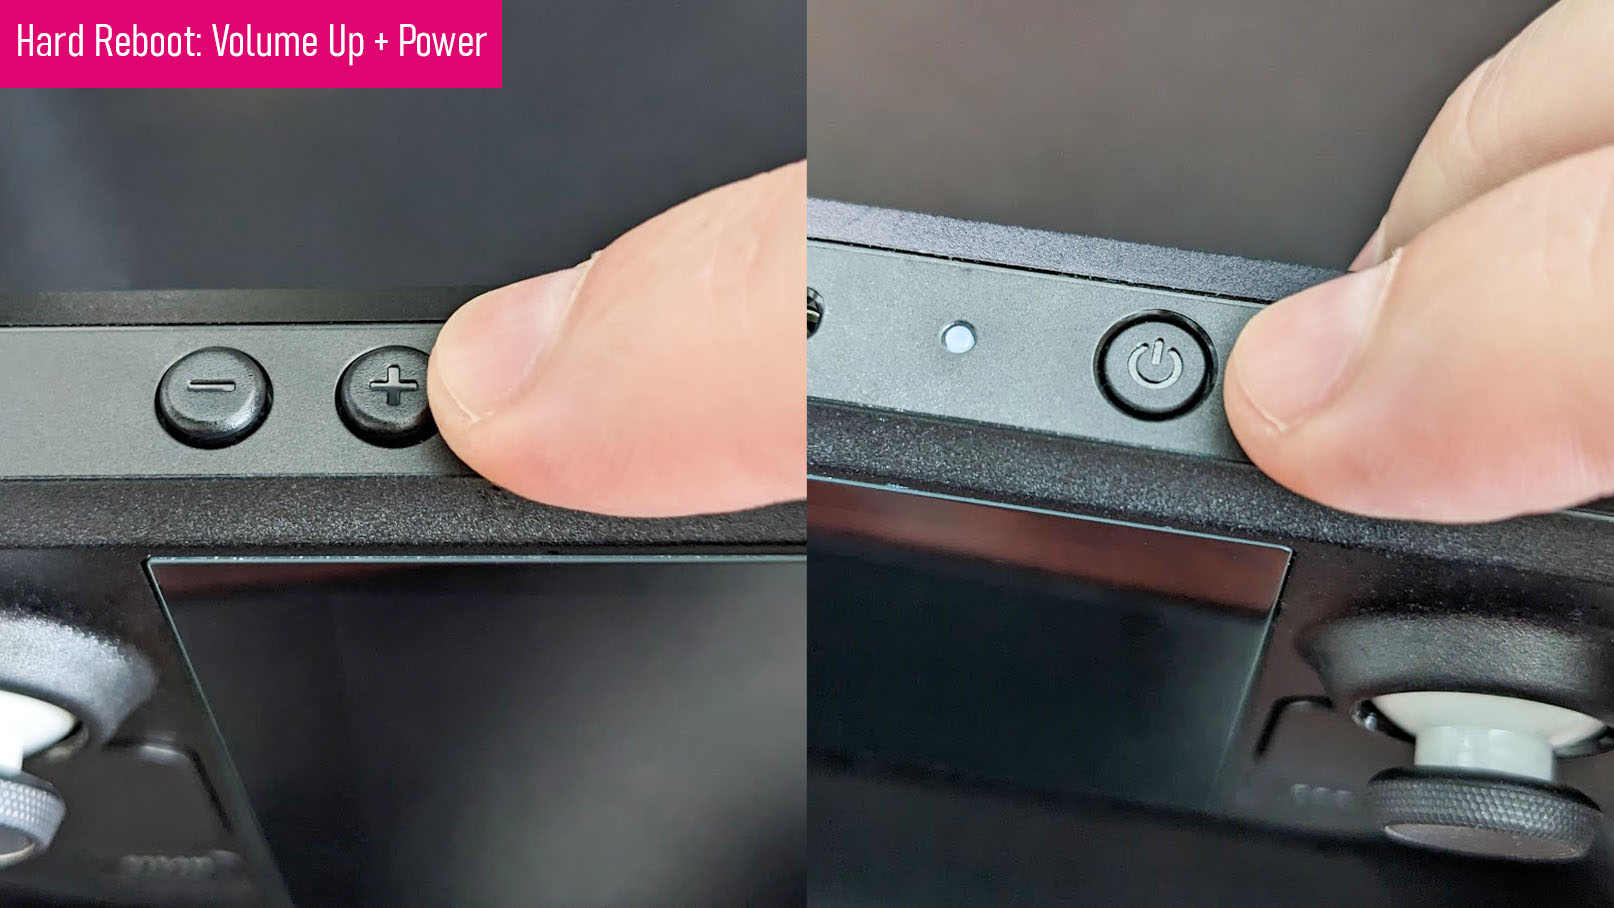
- Hold down the Volume up + Power until you hear a beep. This brings up the BIOS.
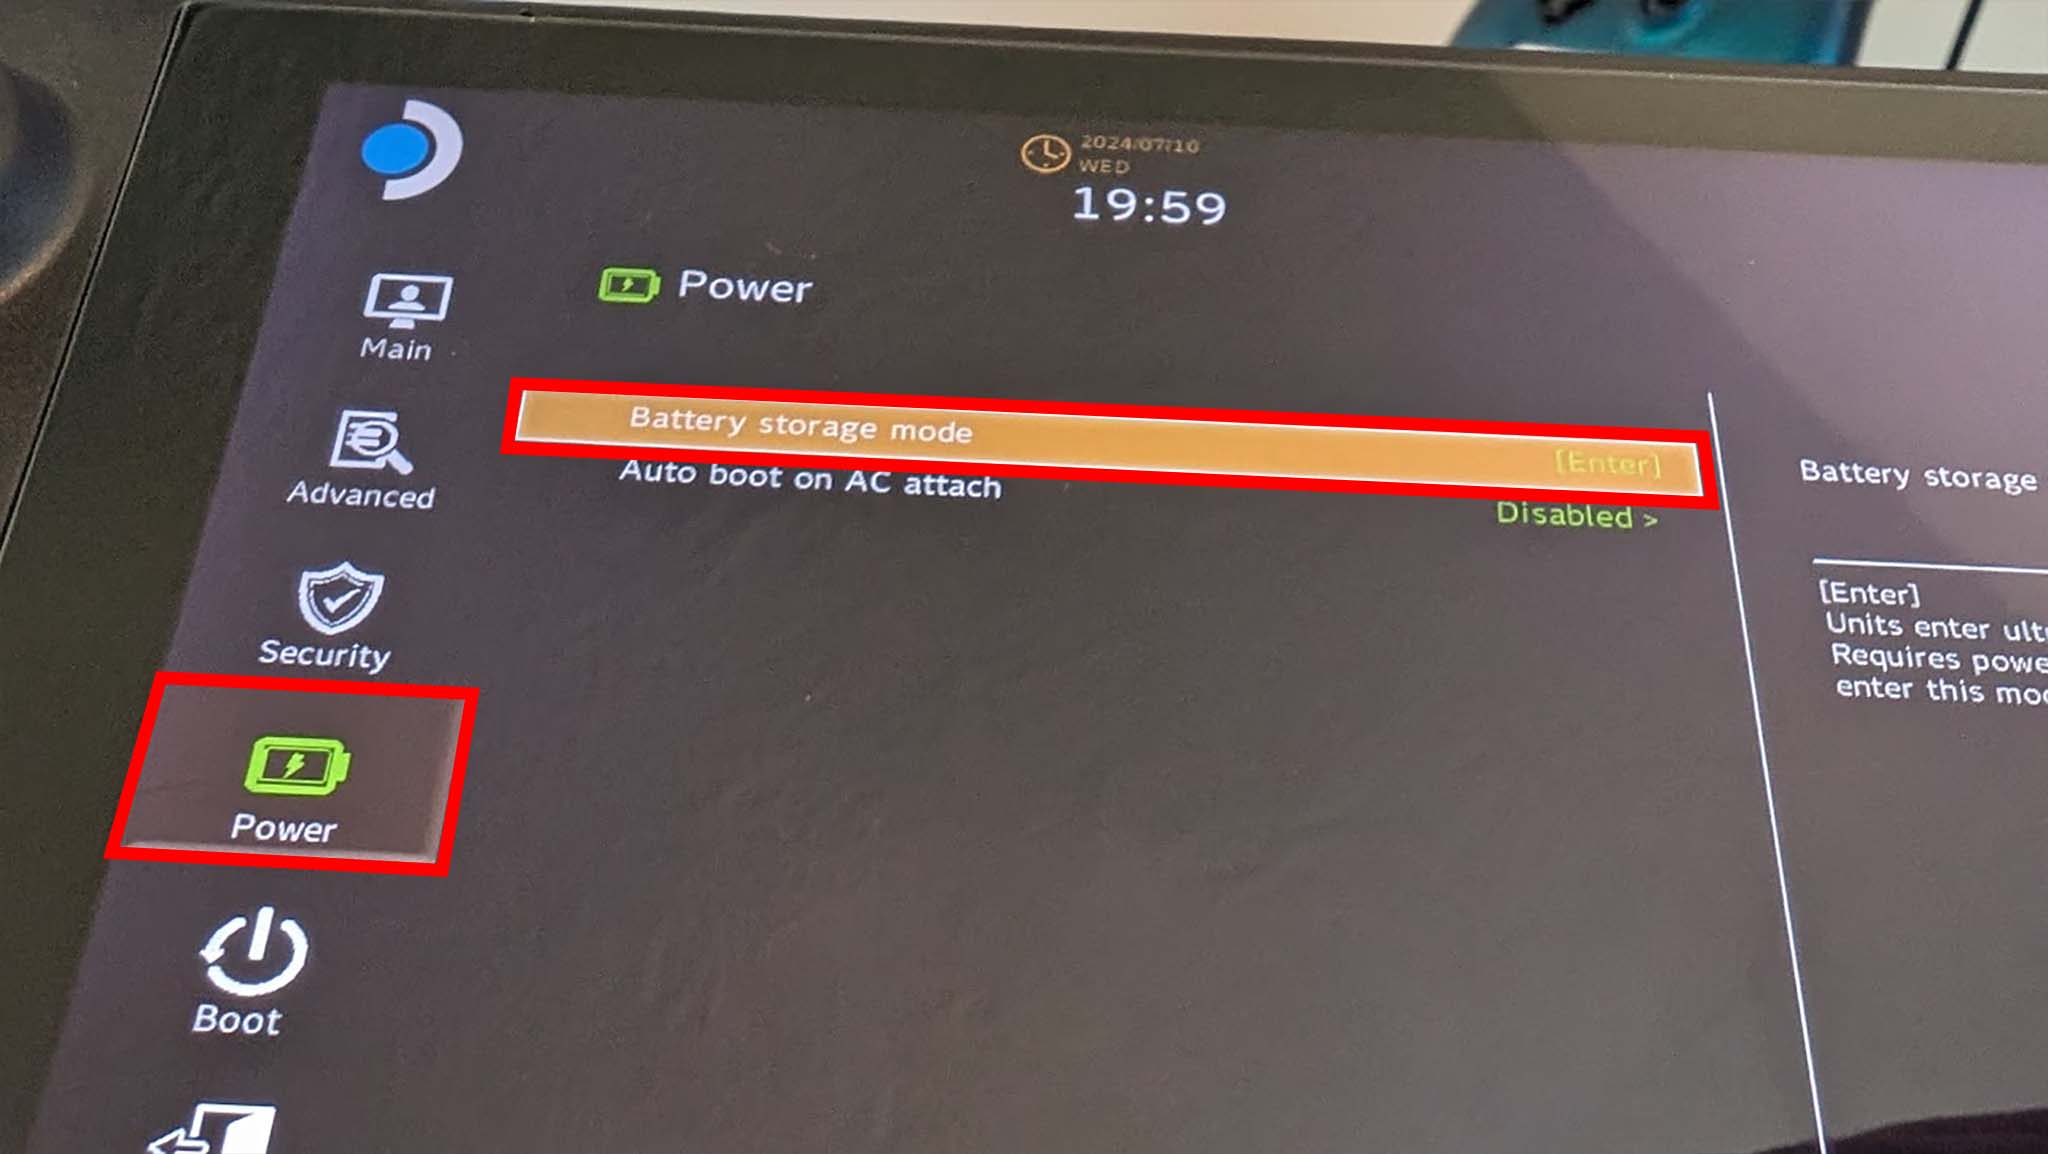
- Select Setup Utility in the bottom right.

- Scroll down to the Power tab, select Battery storage mode, and select Yes.
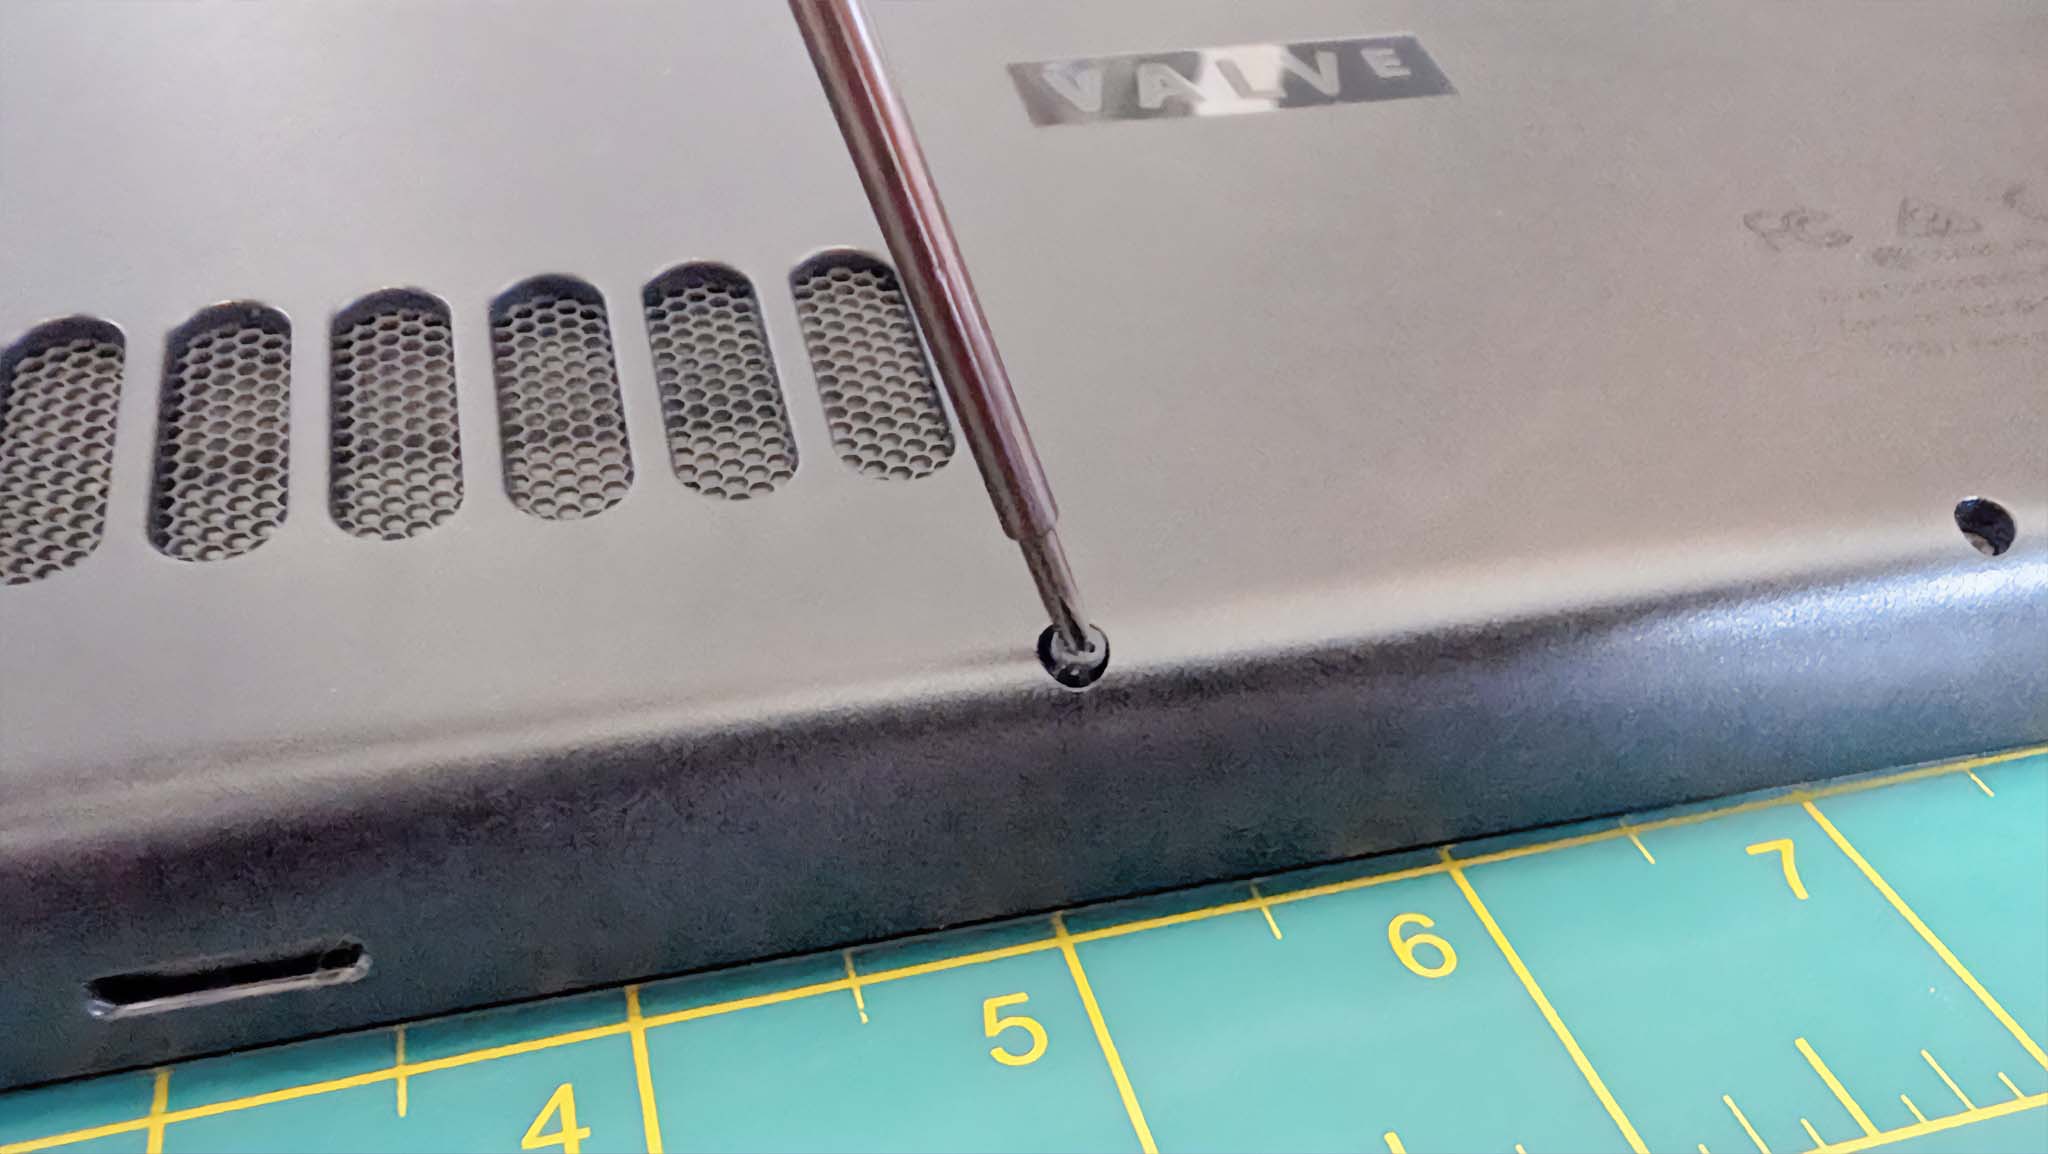
- Use a Philips head to unscrew the eight screws on the backside of the Steam Deck. There are four along the top and four along the bottom. Place them somewhere you won’t lose them.
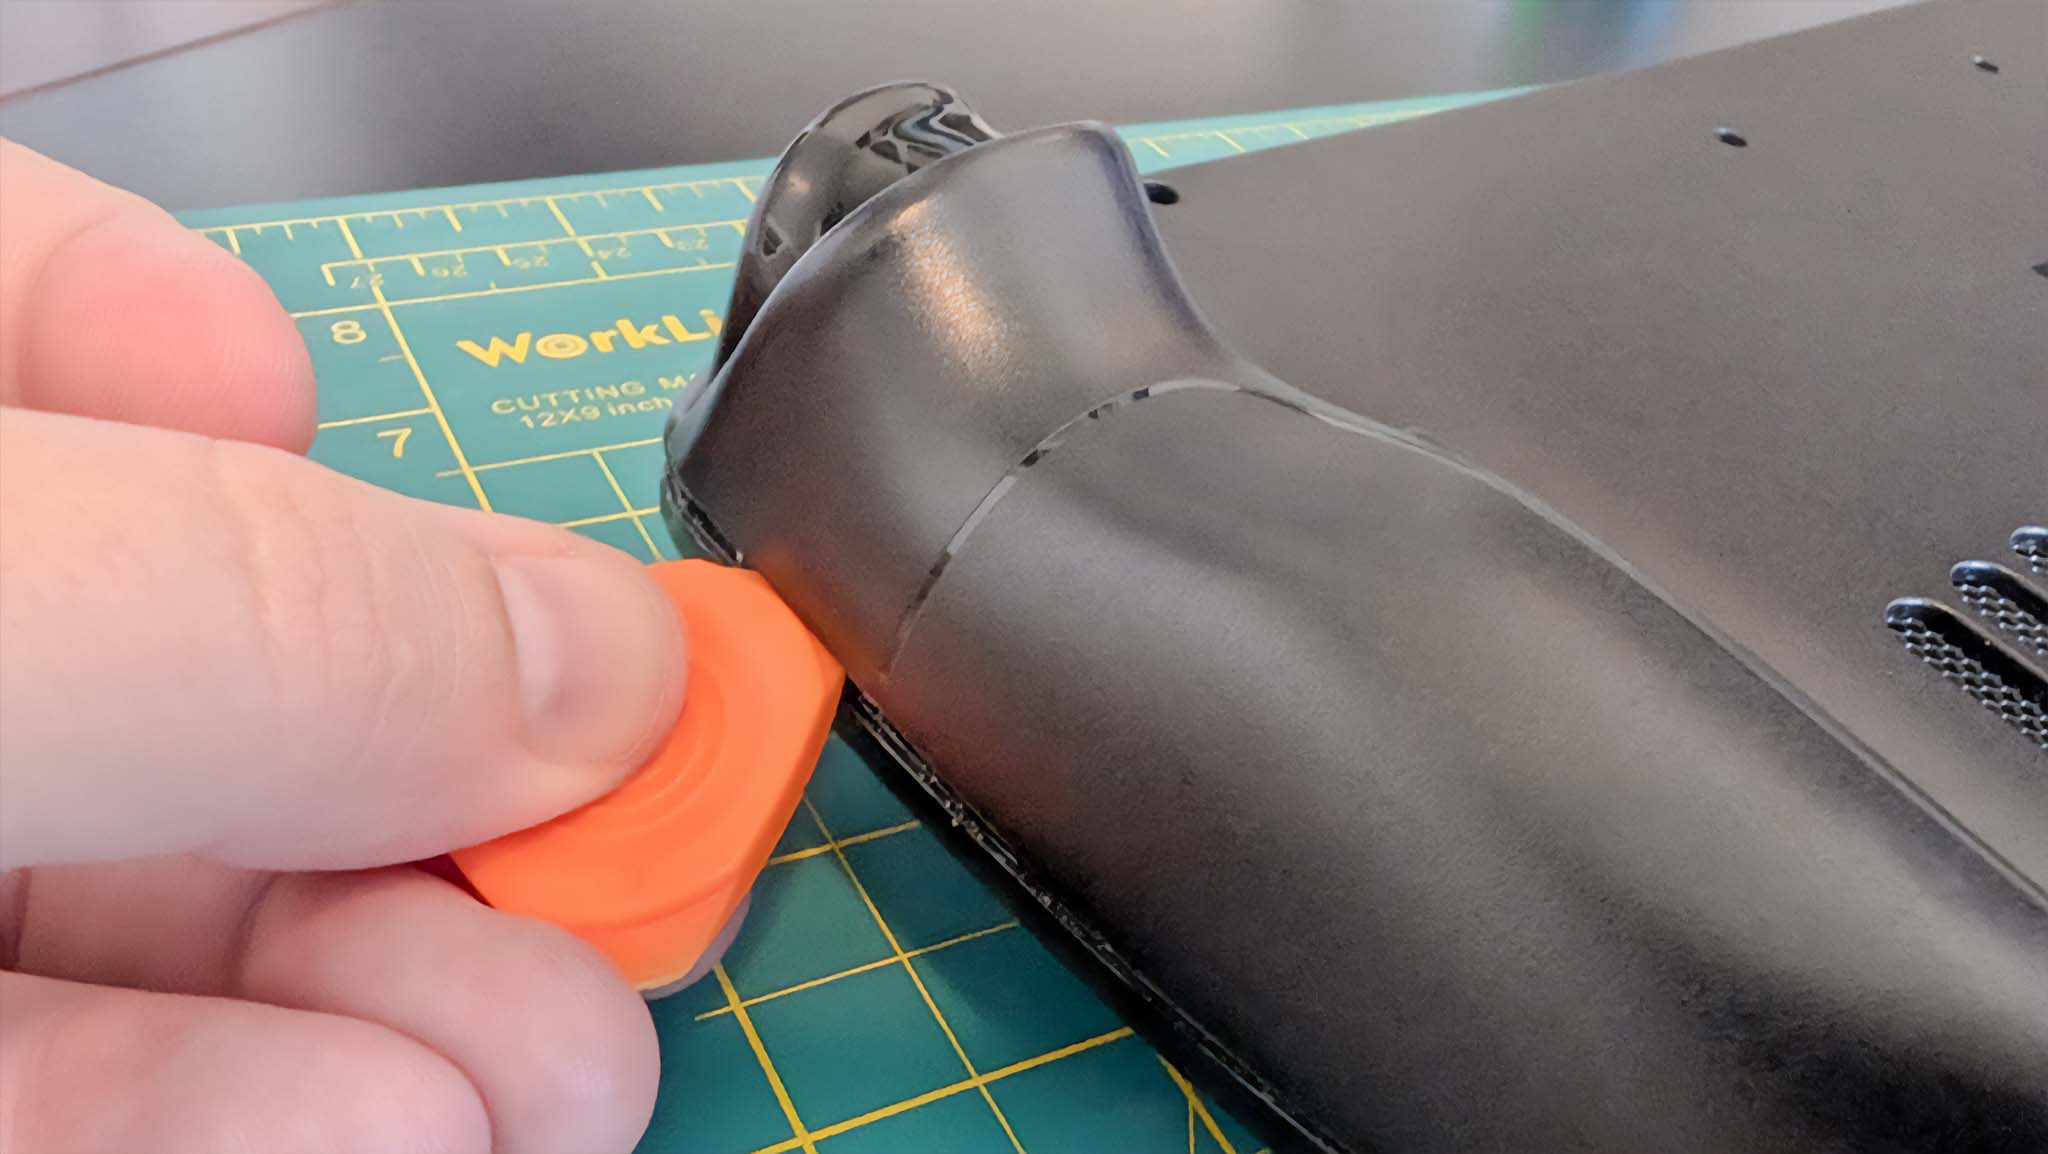
- Slide an opening pick into the side of the casing and carefully remove the back cover. I found it easiest to start a the top of the right grip and work my way around the handheld.
- Before doing anything else, ground yourself to avoid damaging the Steam Deck. I ended up putting on the Vastar wrist-band and securing the metal clasp onto a non-painted metal part of my computer tower frame since the parts on the Steam Deck are super small.
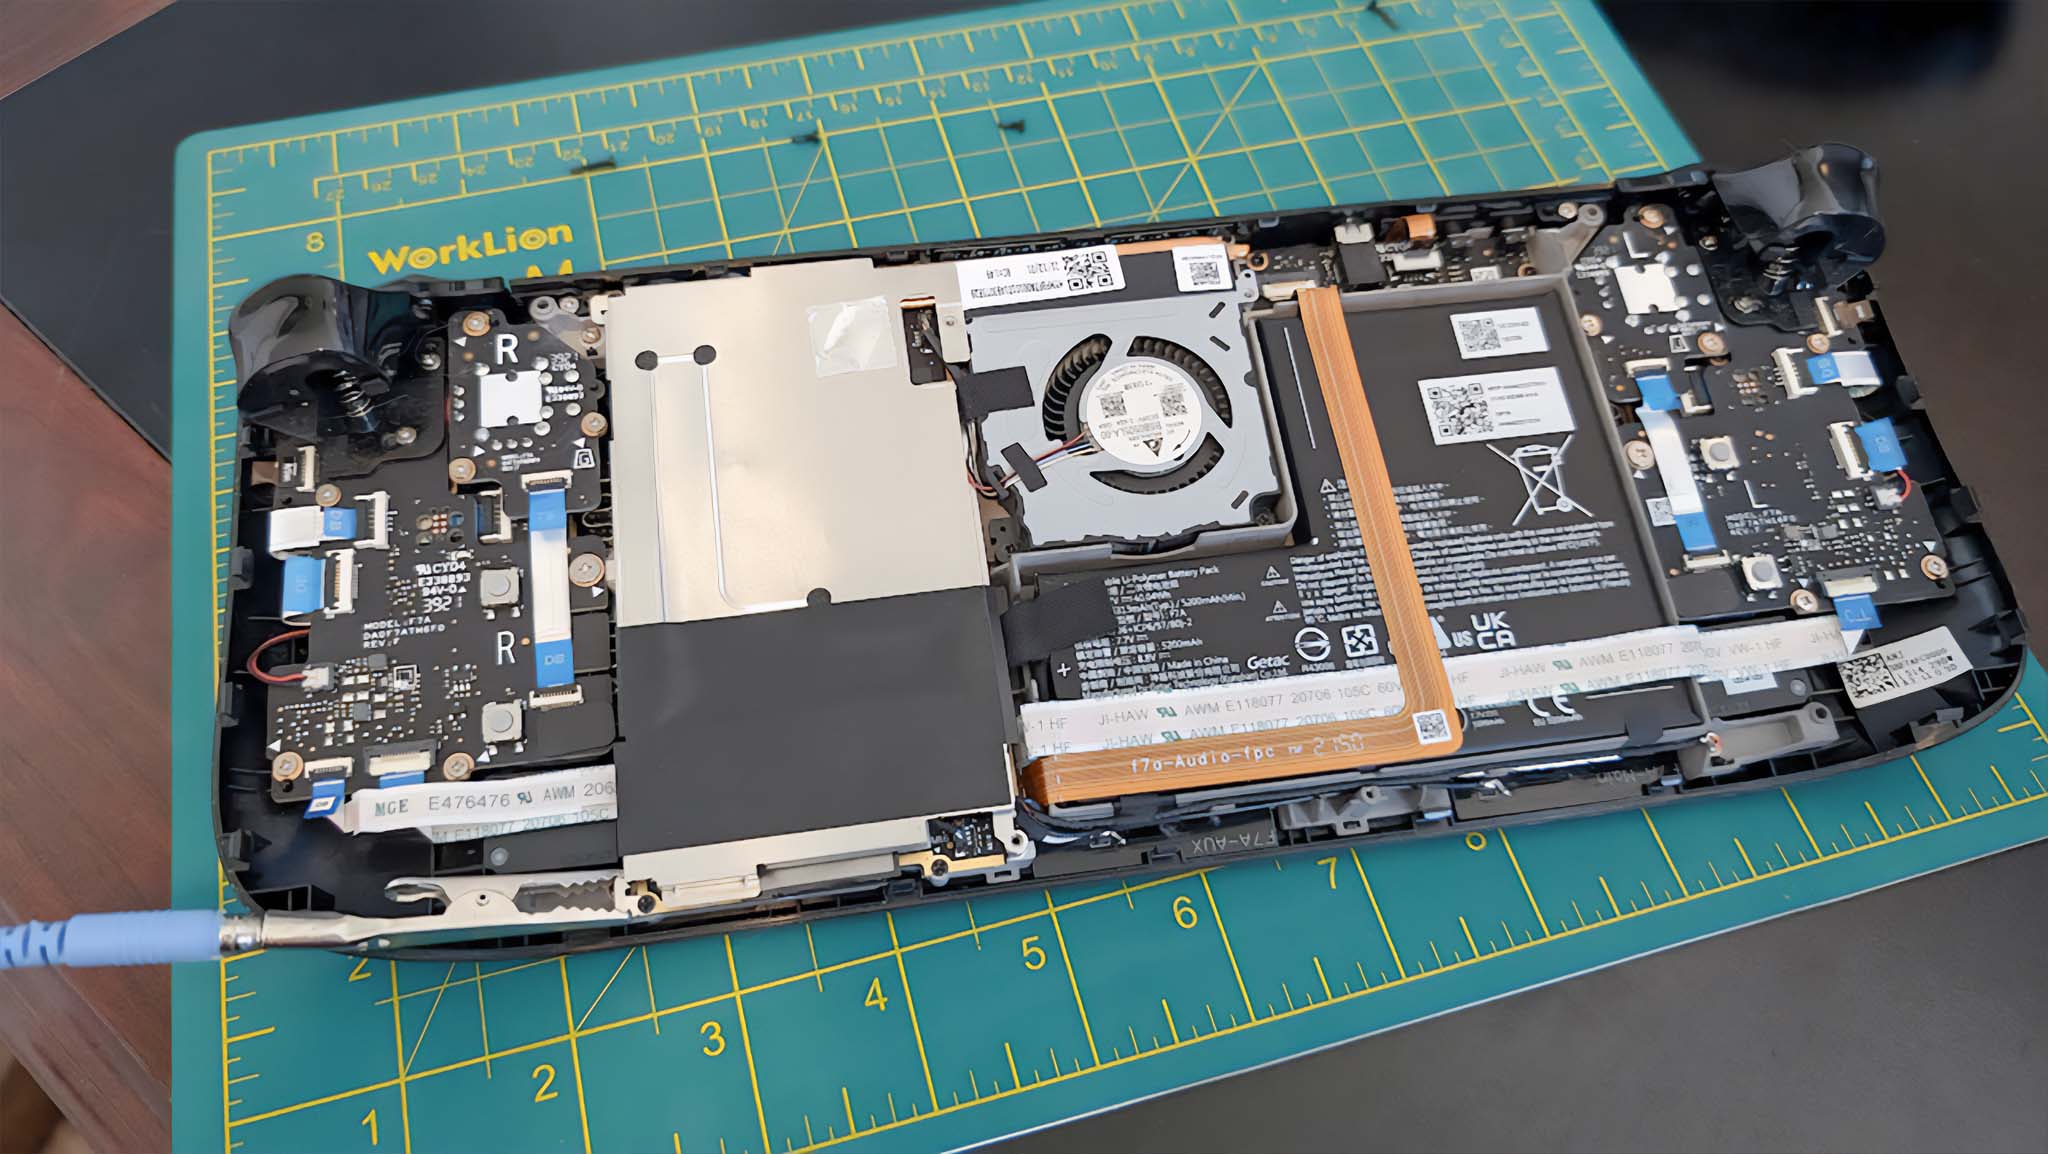
- If your Steam Deck has a black motherboard backing, skip to the next step. Those of you with a silver motherboard backing need to carefully peel back the silver sticker on the top right of the motherboard shield. We’ll need to put this back later, so don’t throw it away.
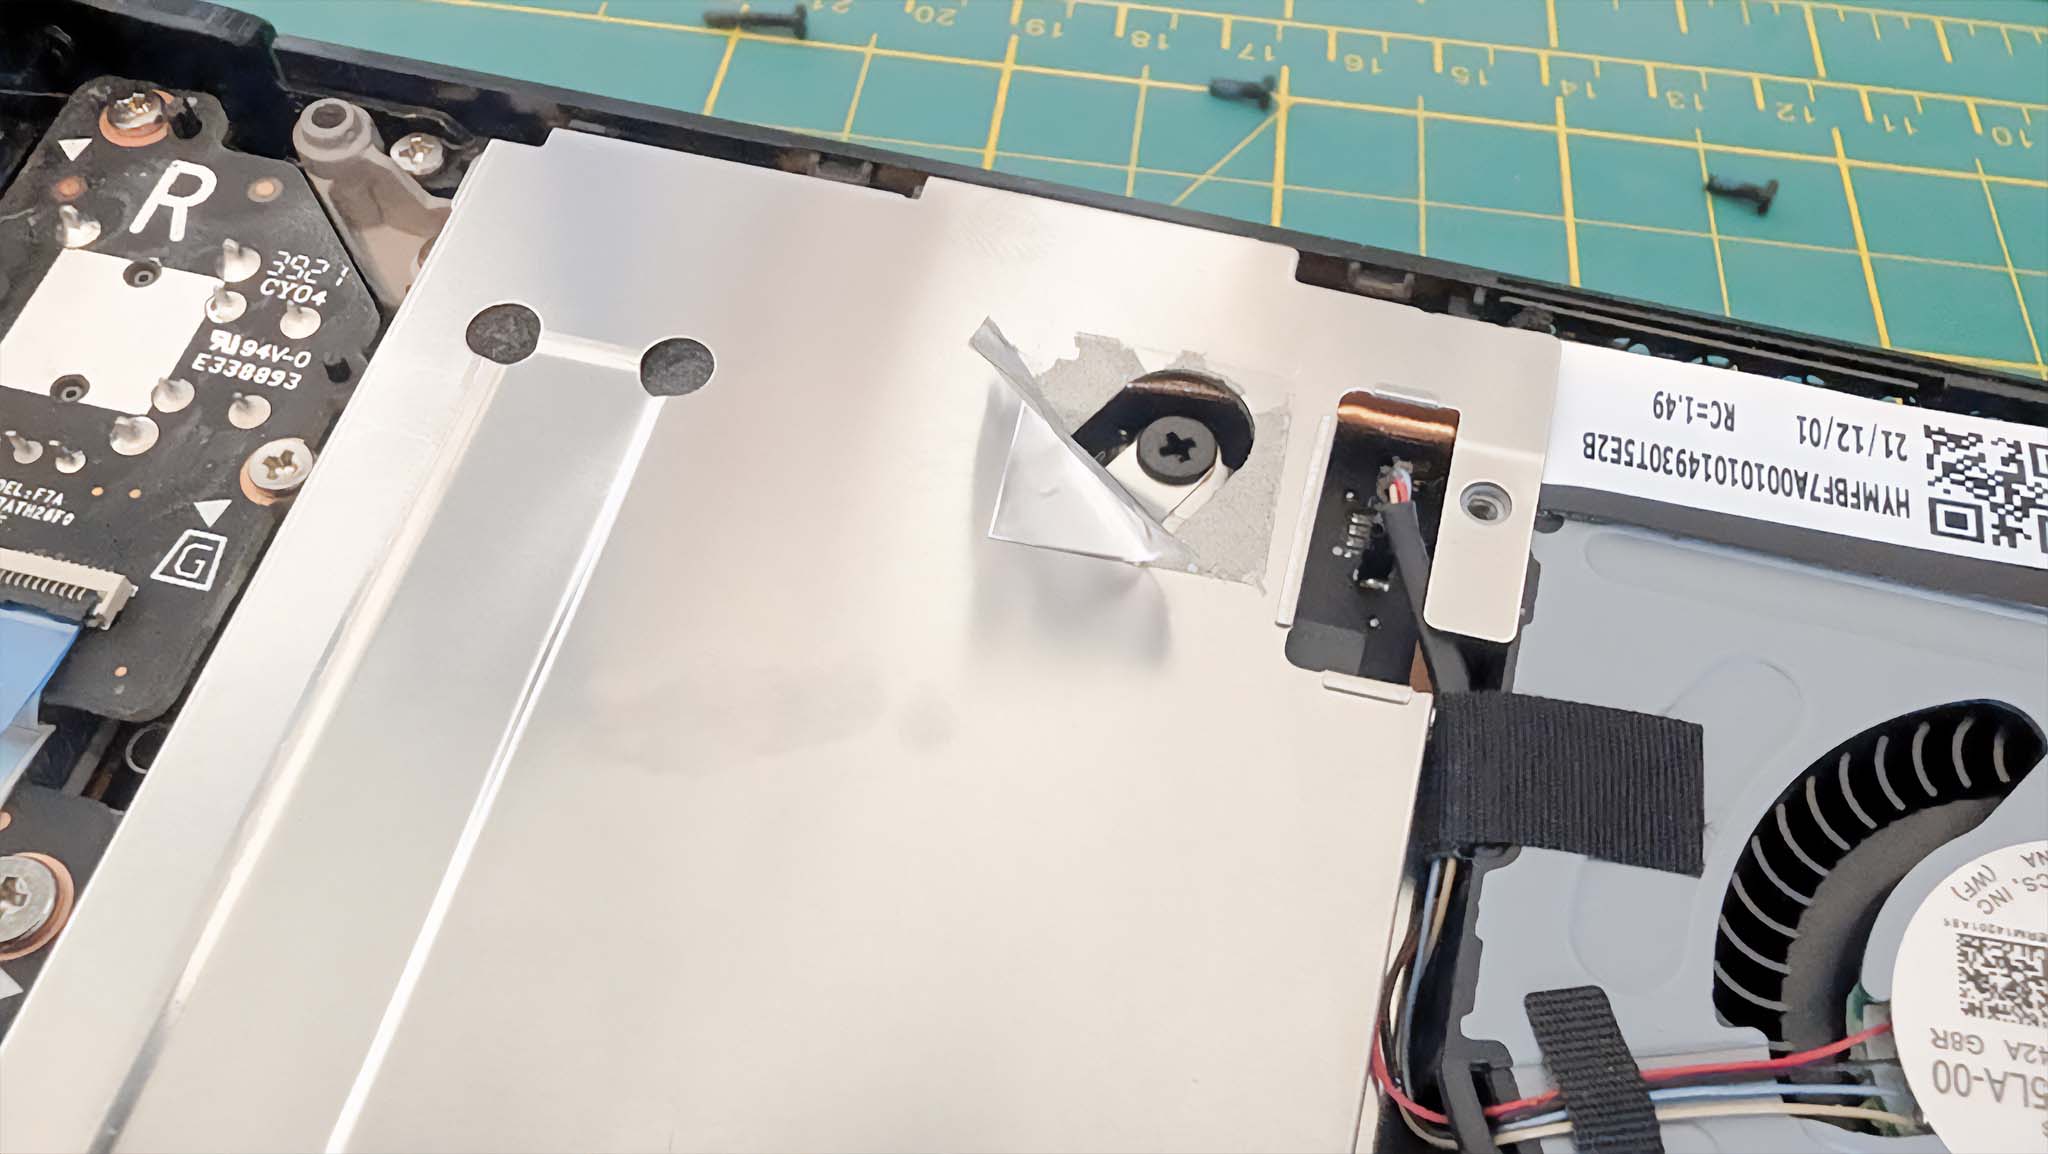
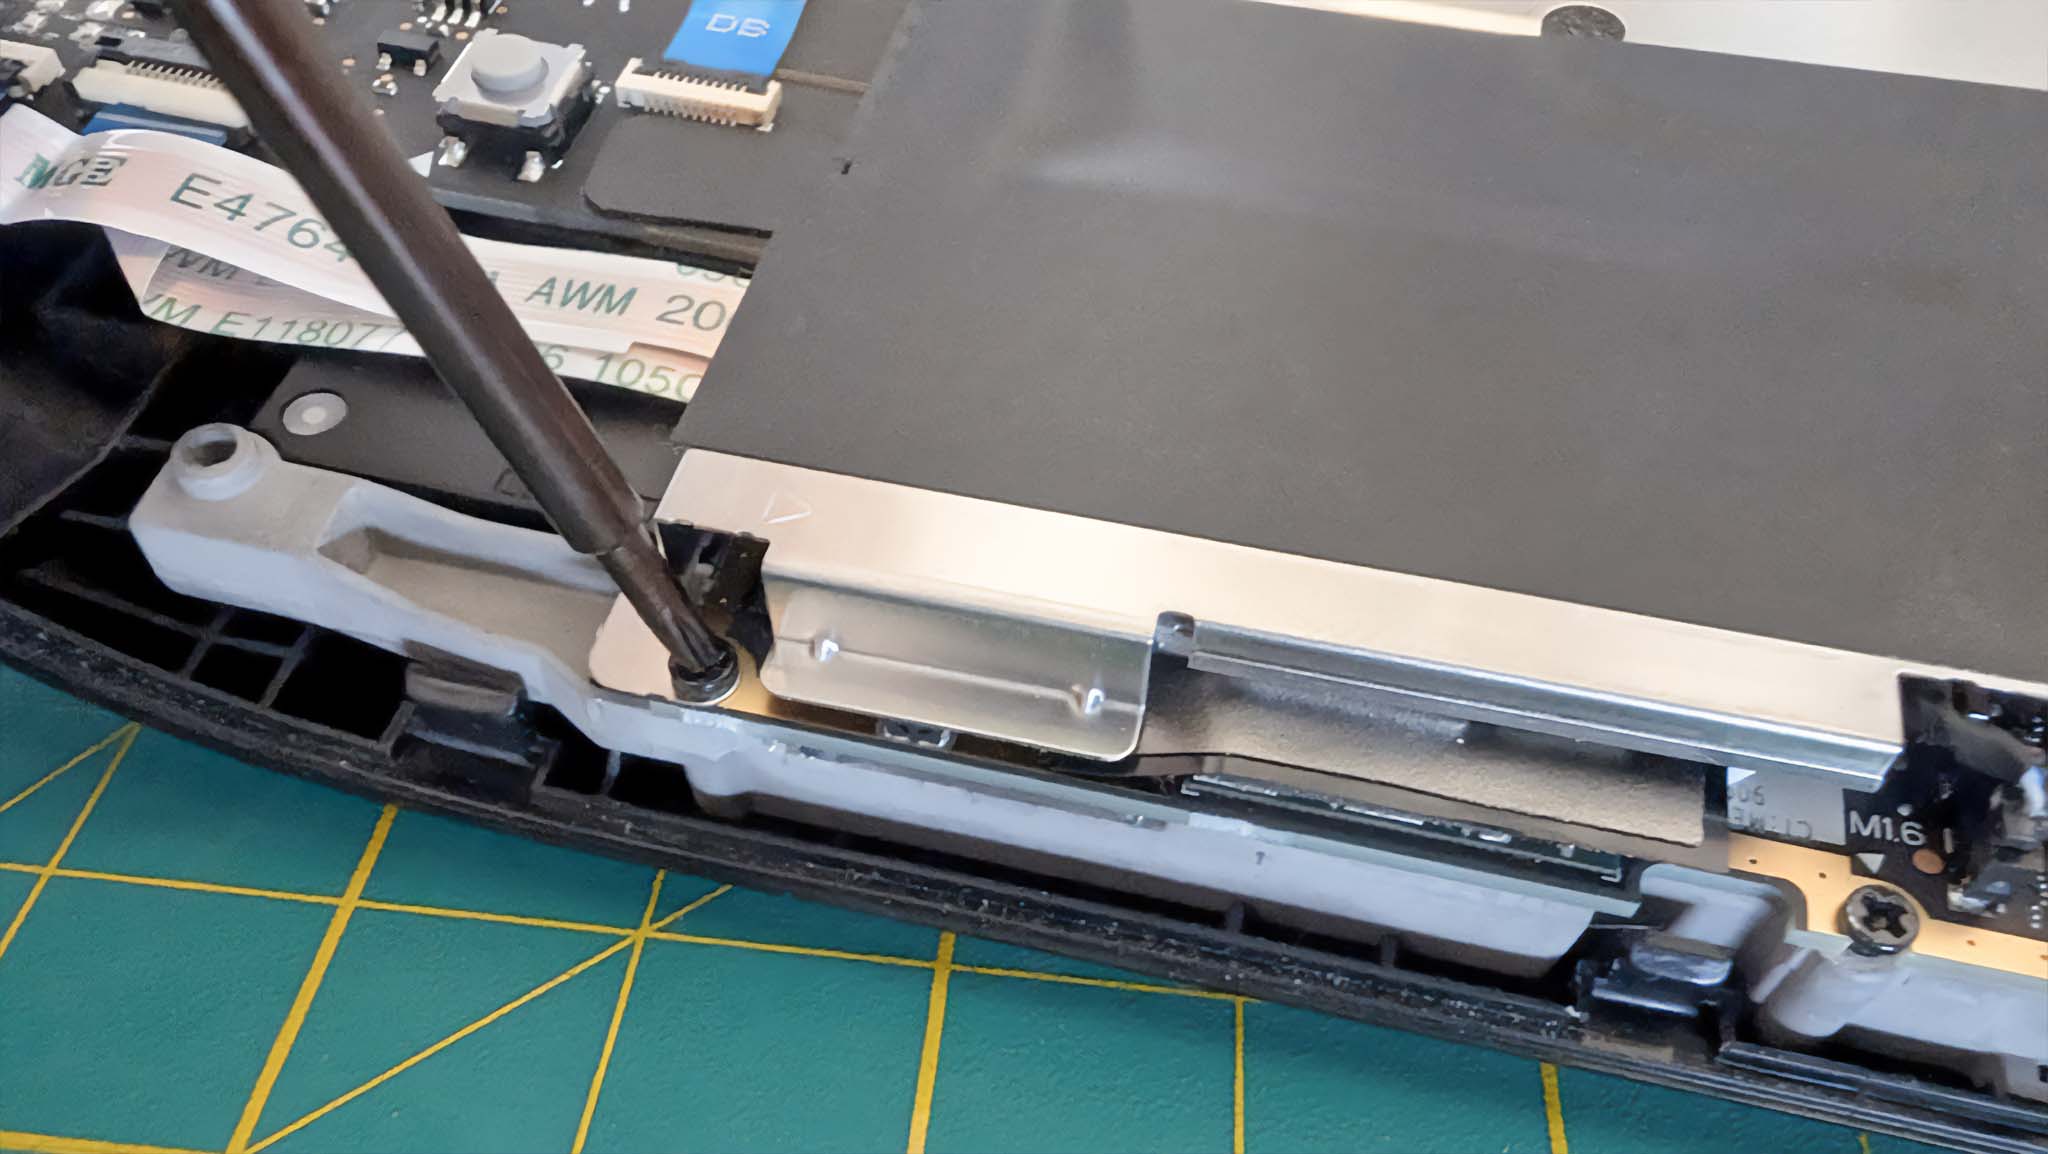
- Next remove the motherboard shield’s three screws — the one you just uncovered as well as the motherboard’s two smaller screws on the bottom and top left side.
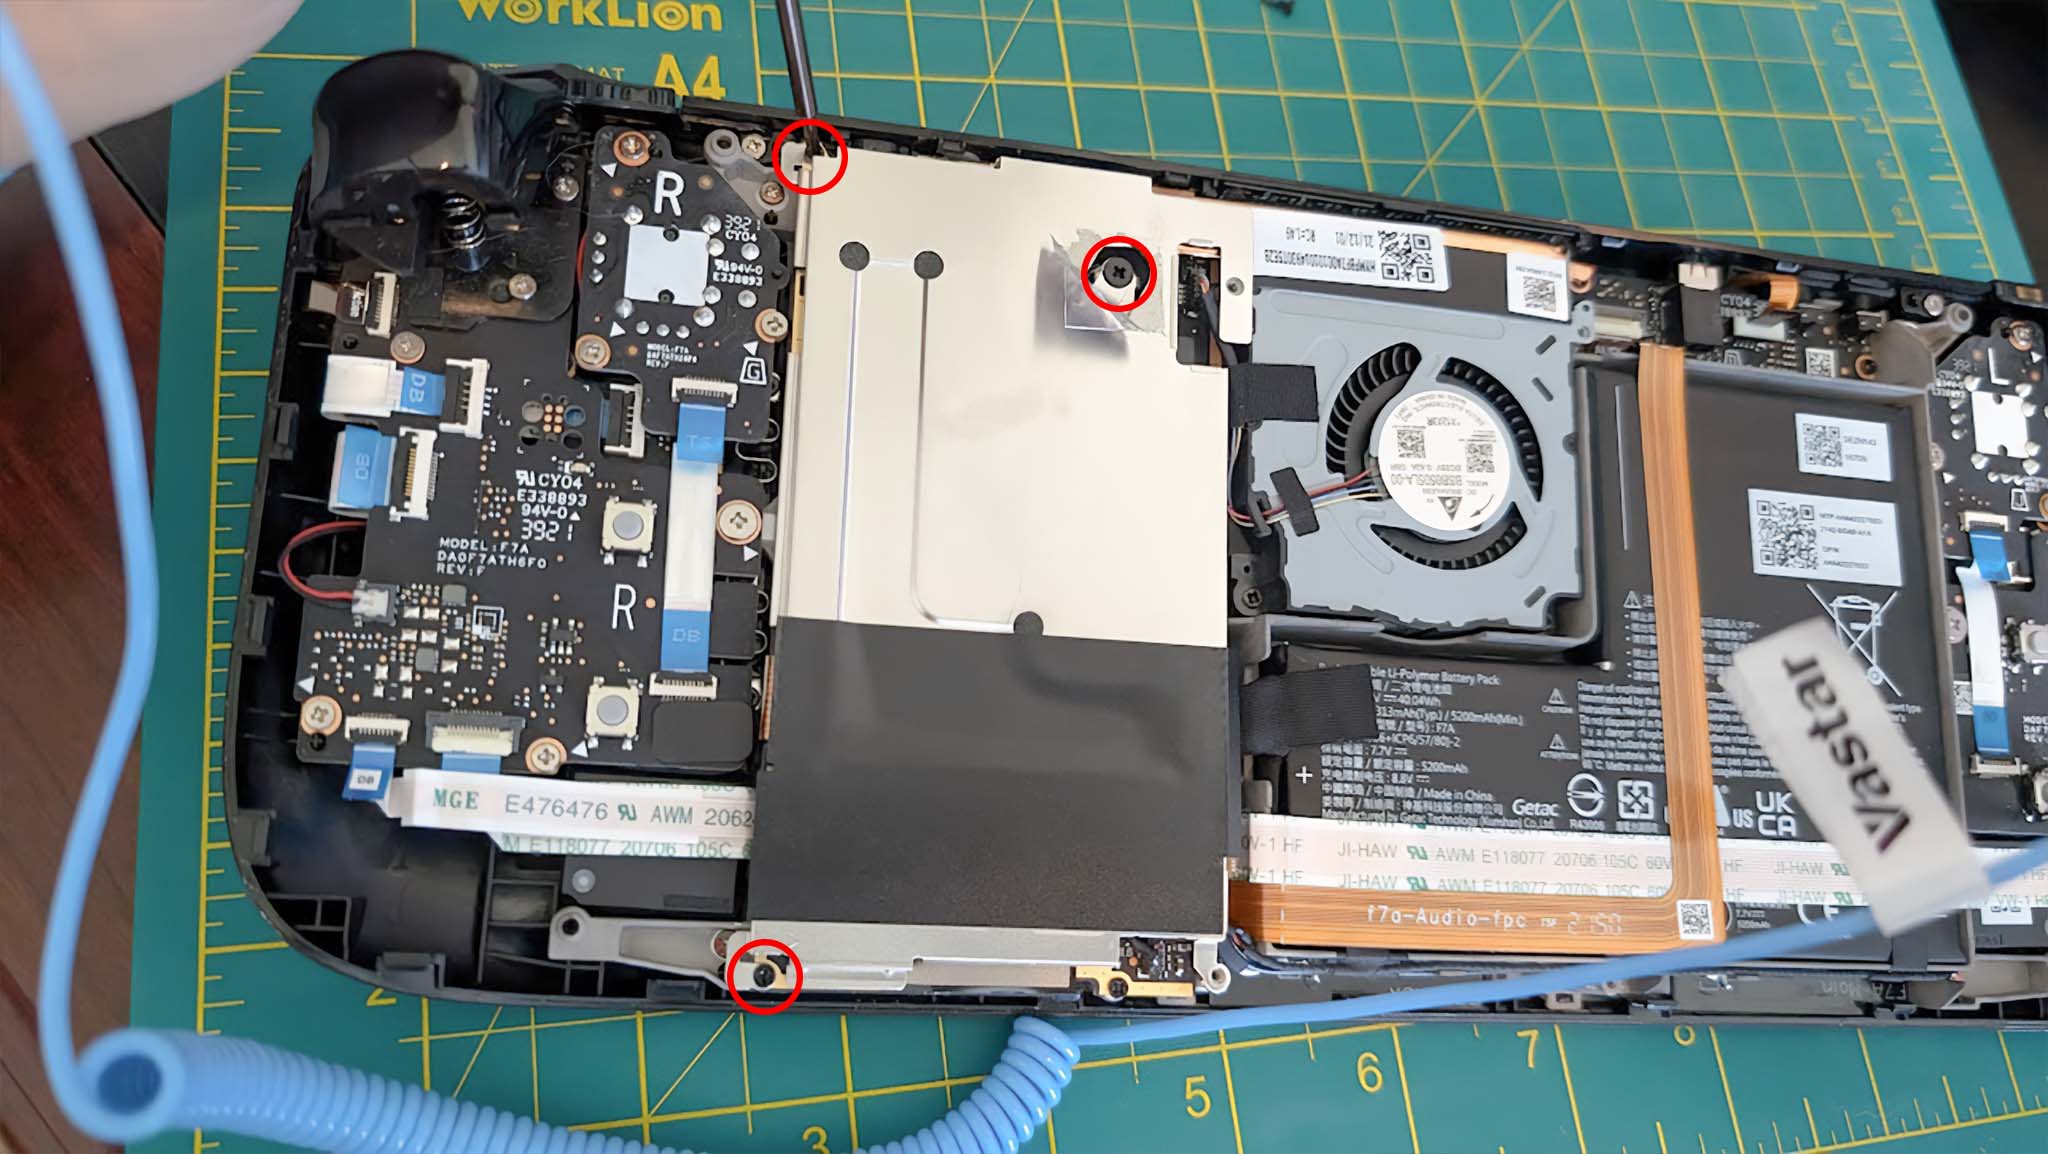
- Gently remove the motherboard shield. You’ll want to place it somewhere safe and clean away from the Steam Deck.
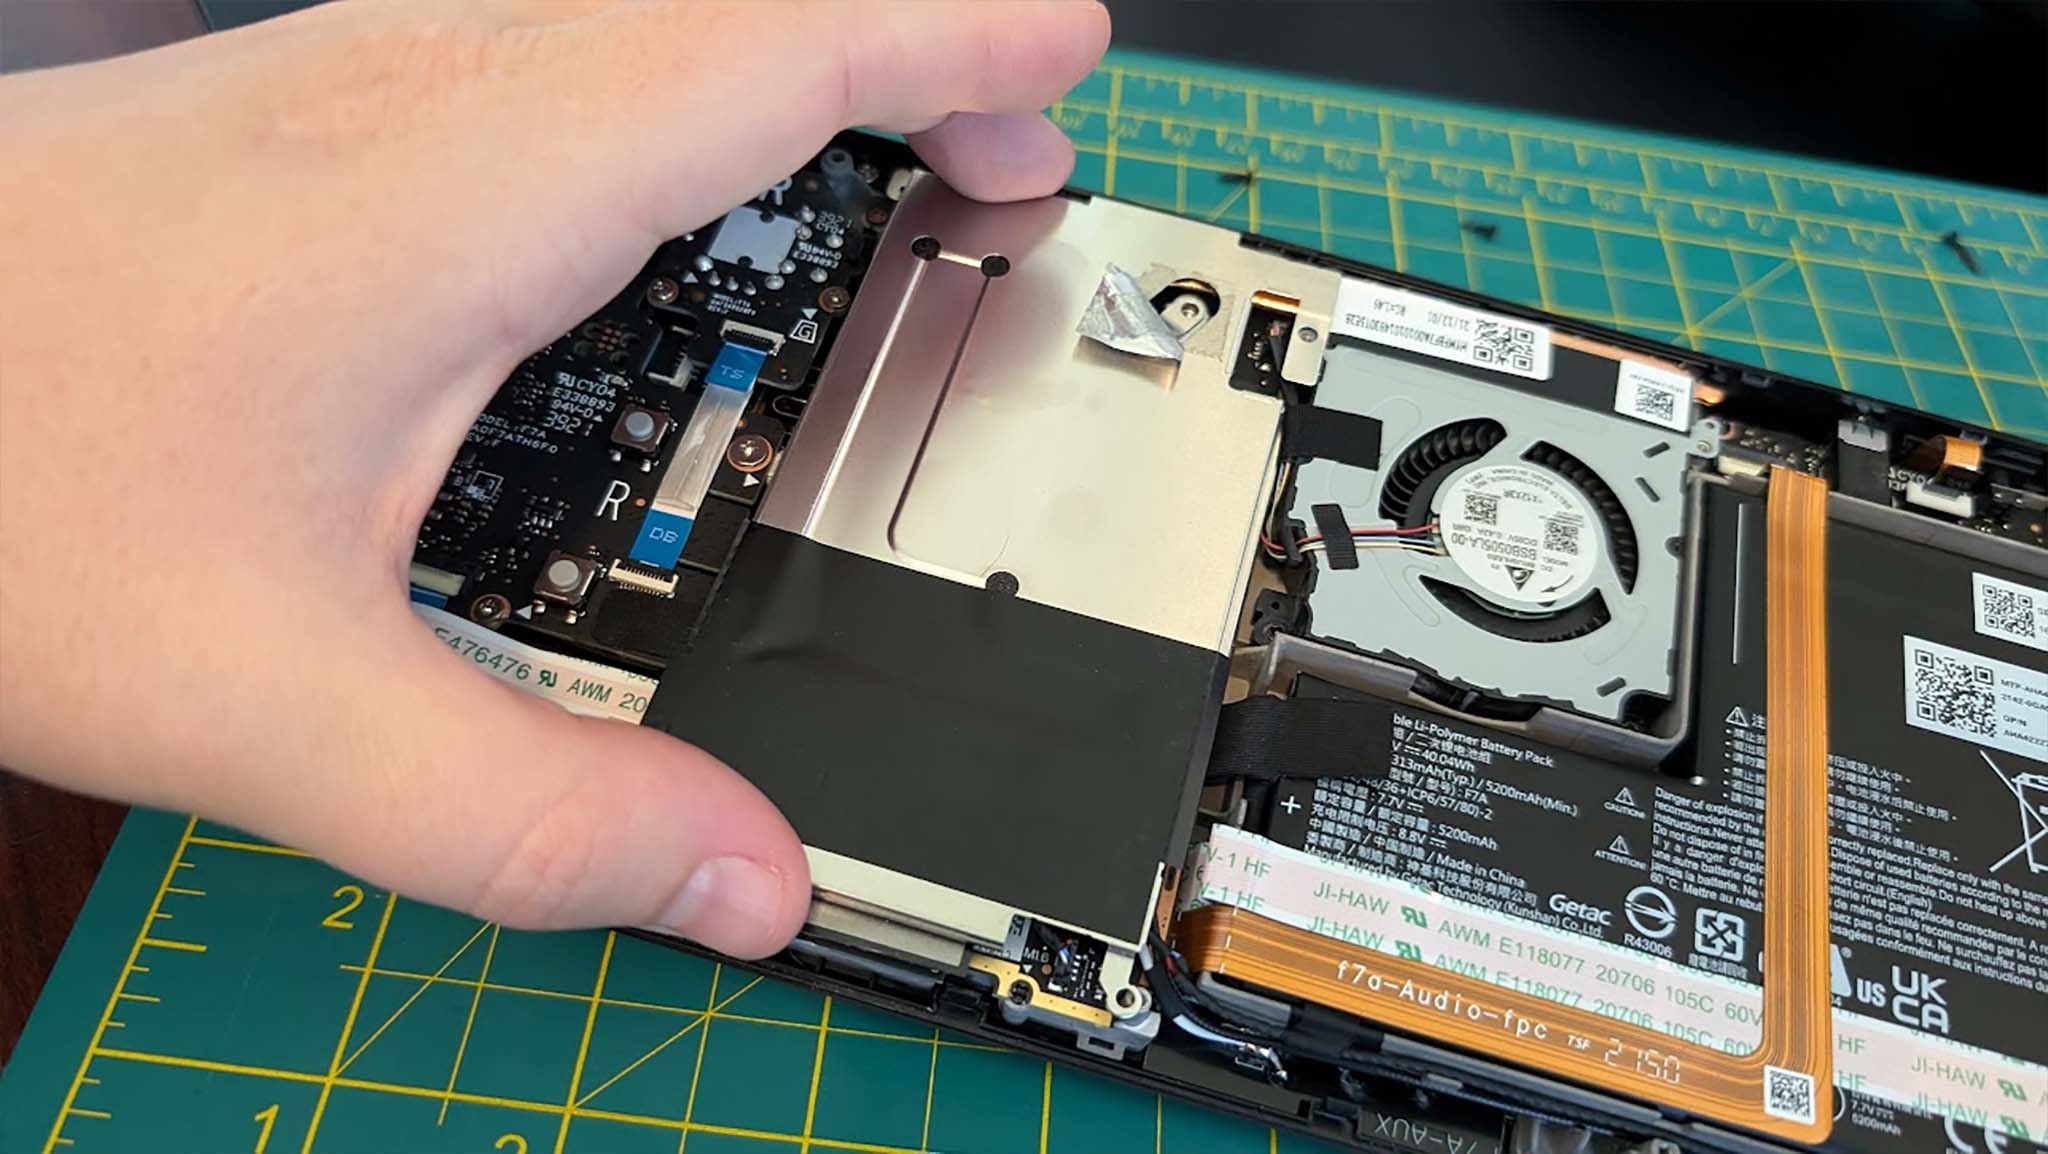
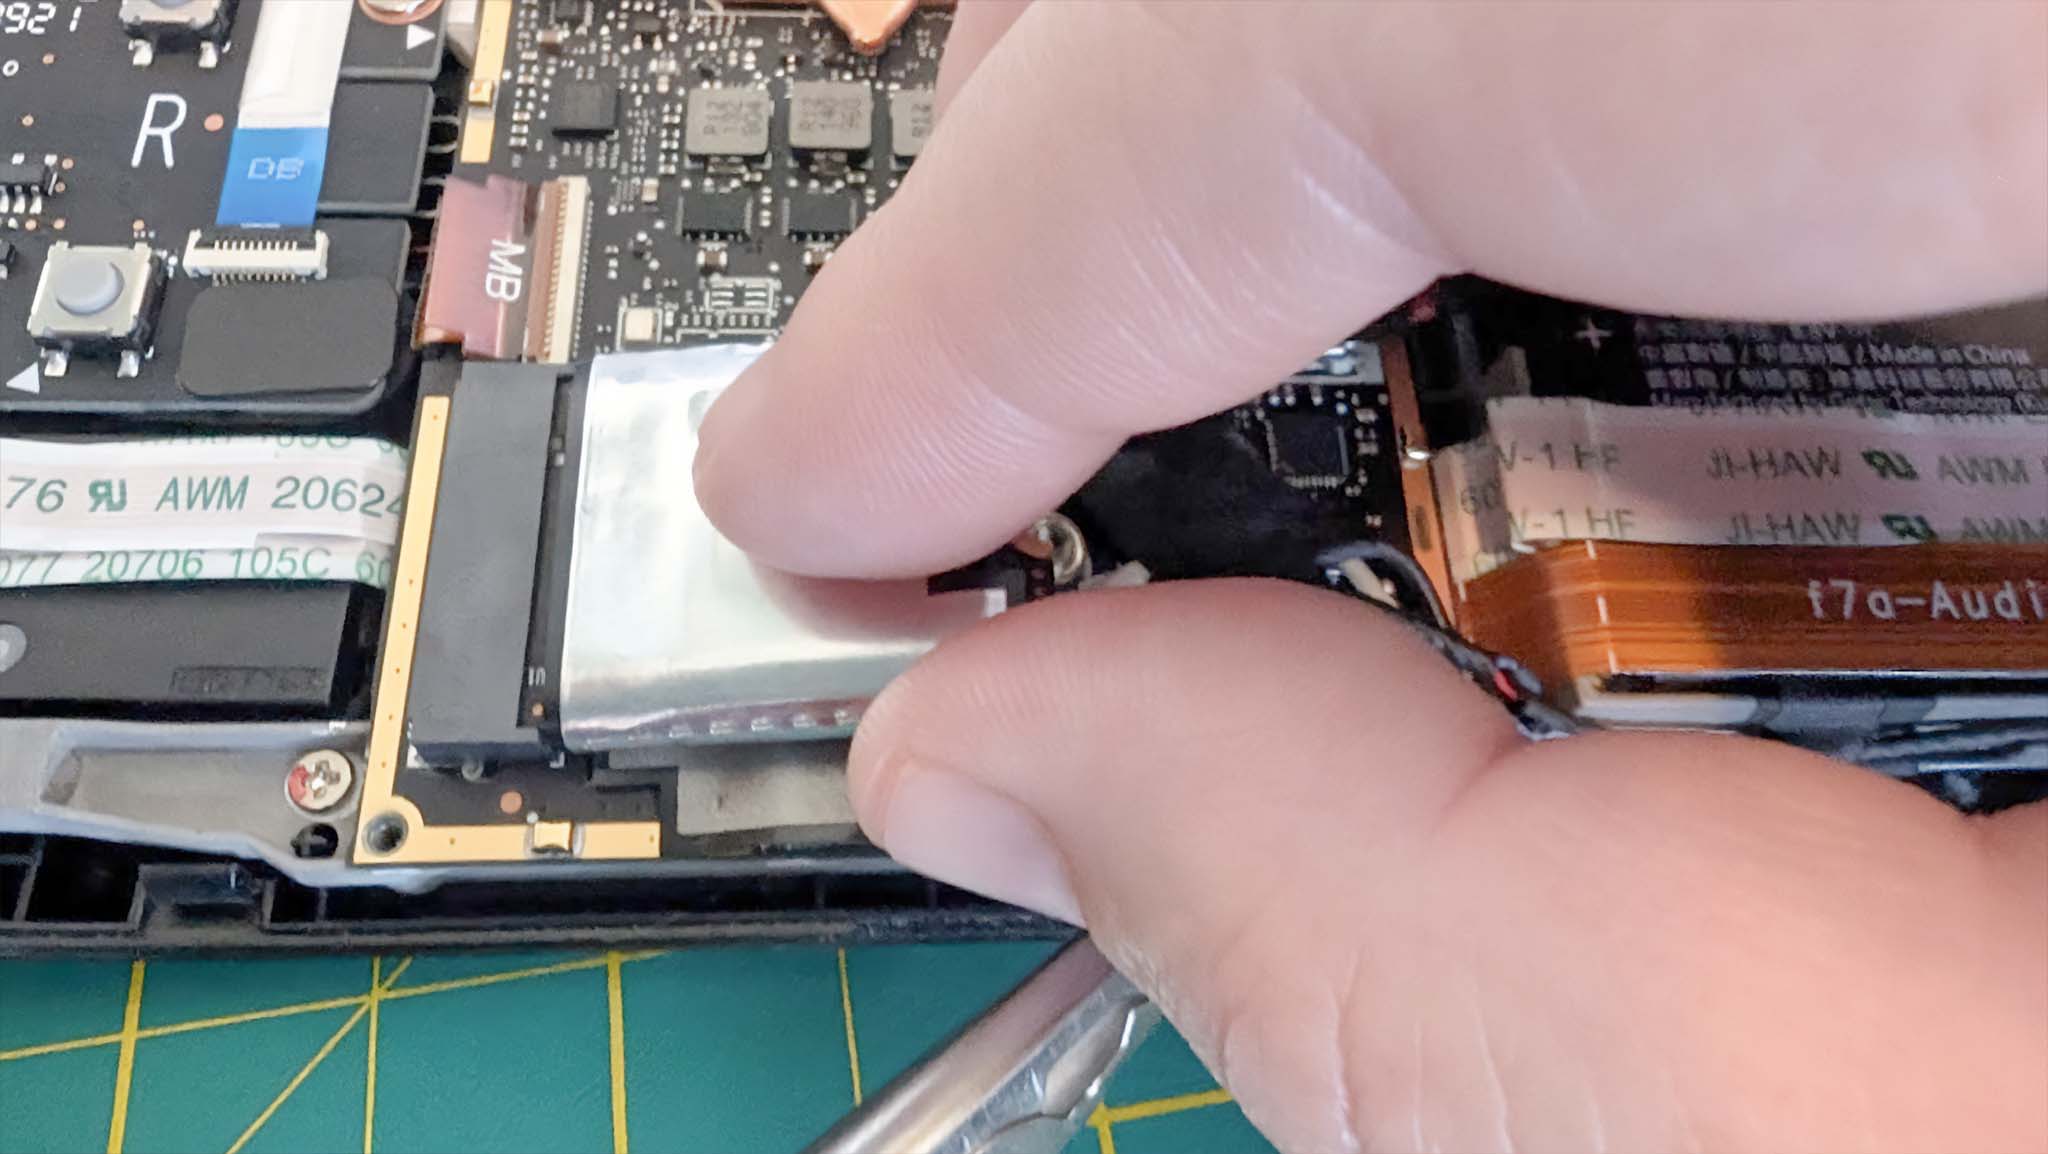
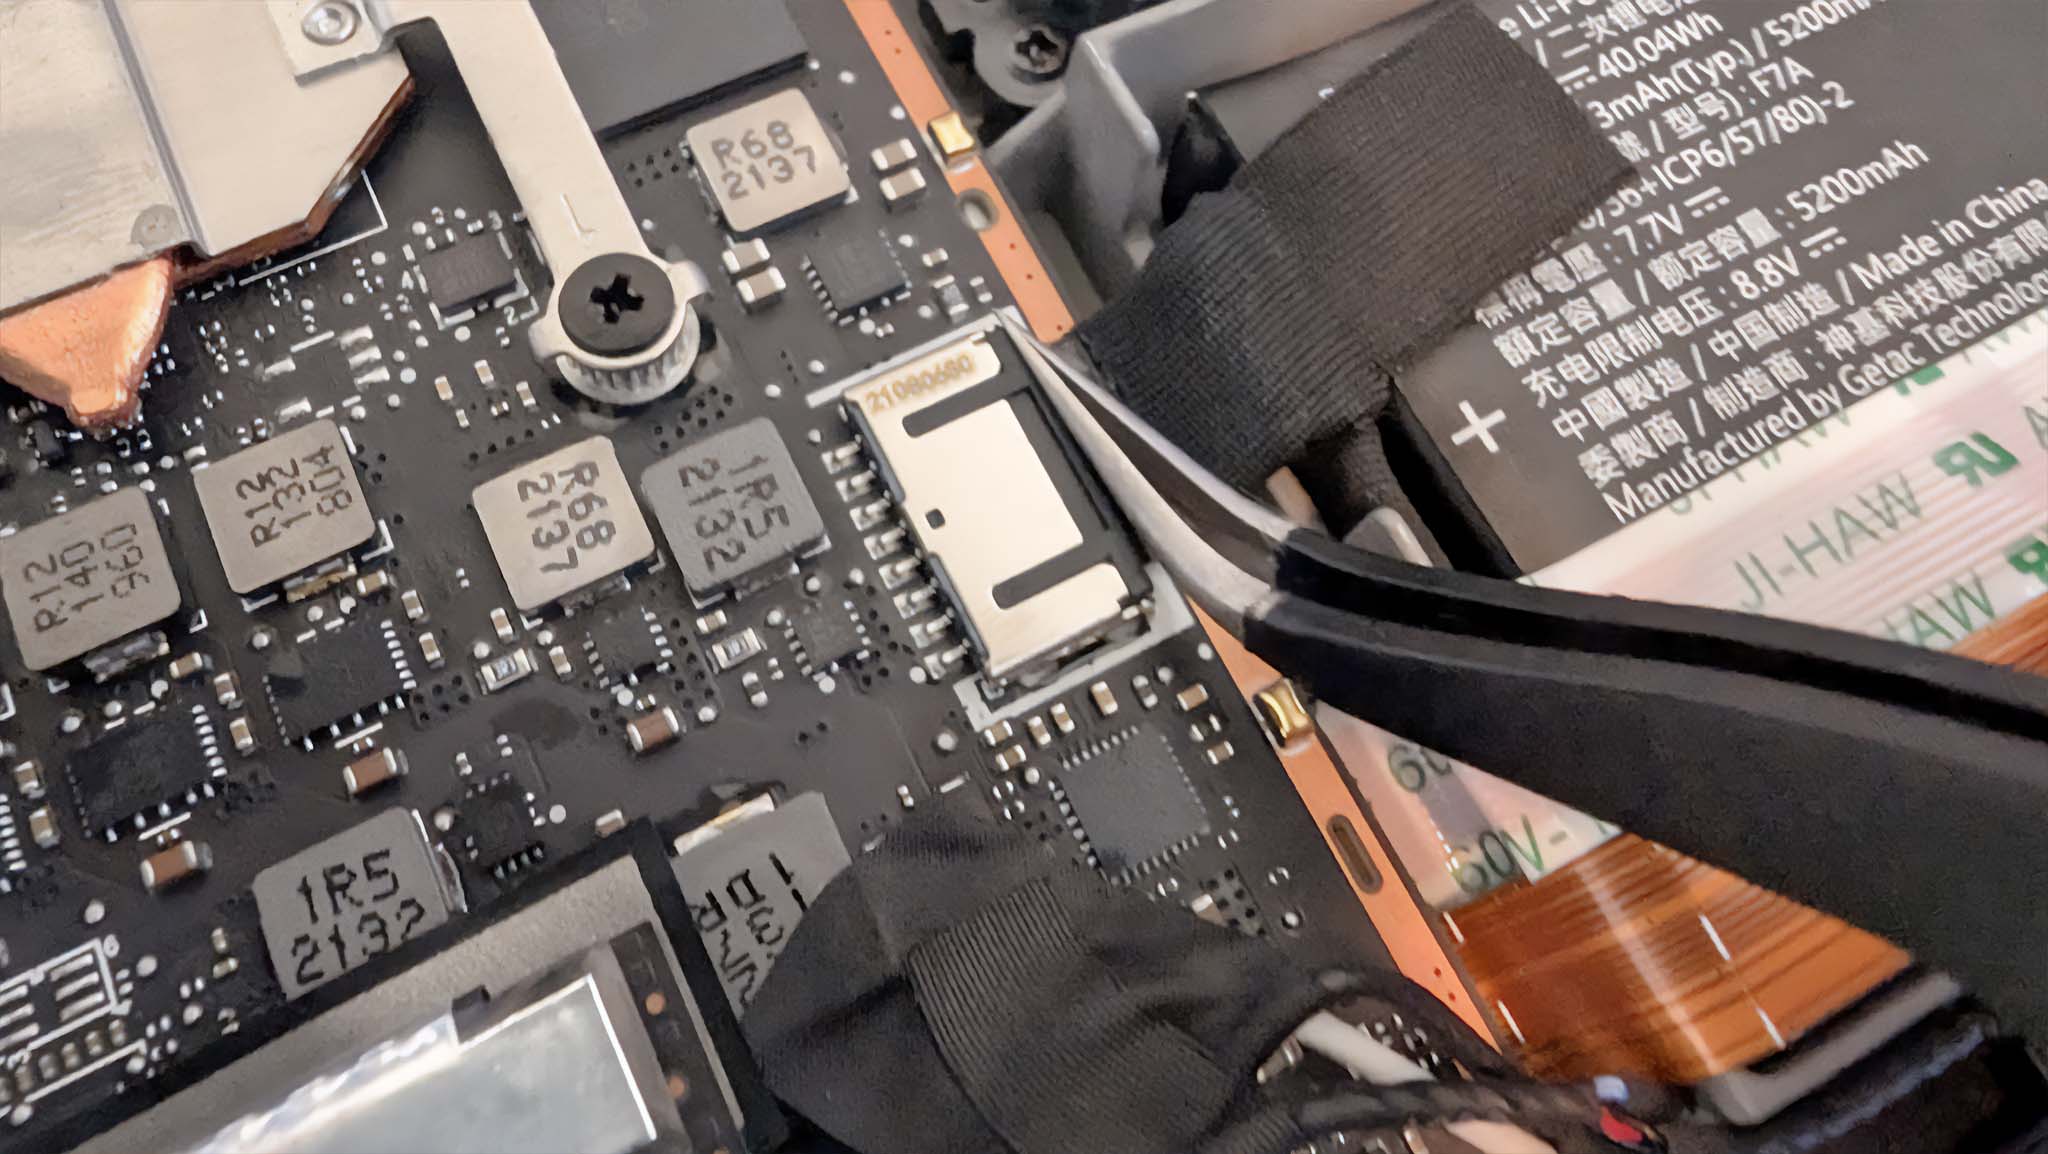
- Carefully grab the fabric pull tab connecting the battery to the motherboard and unplug the battery.
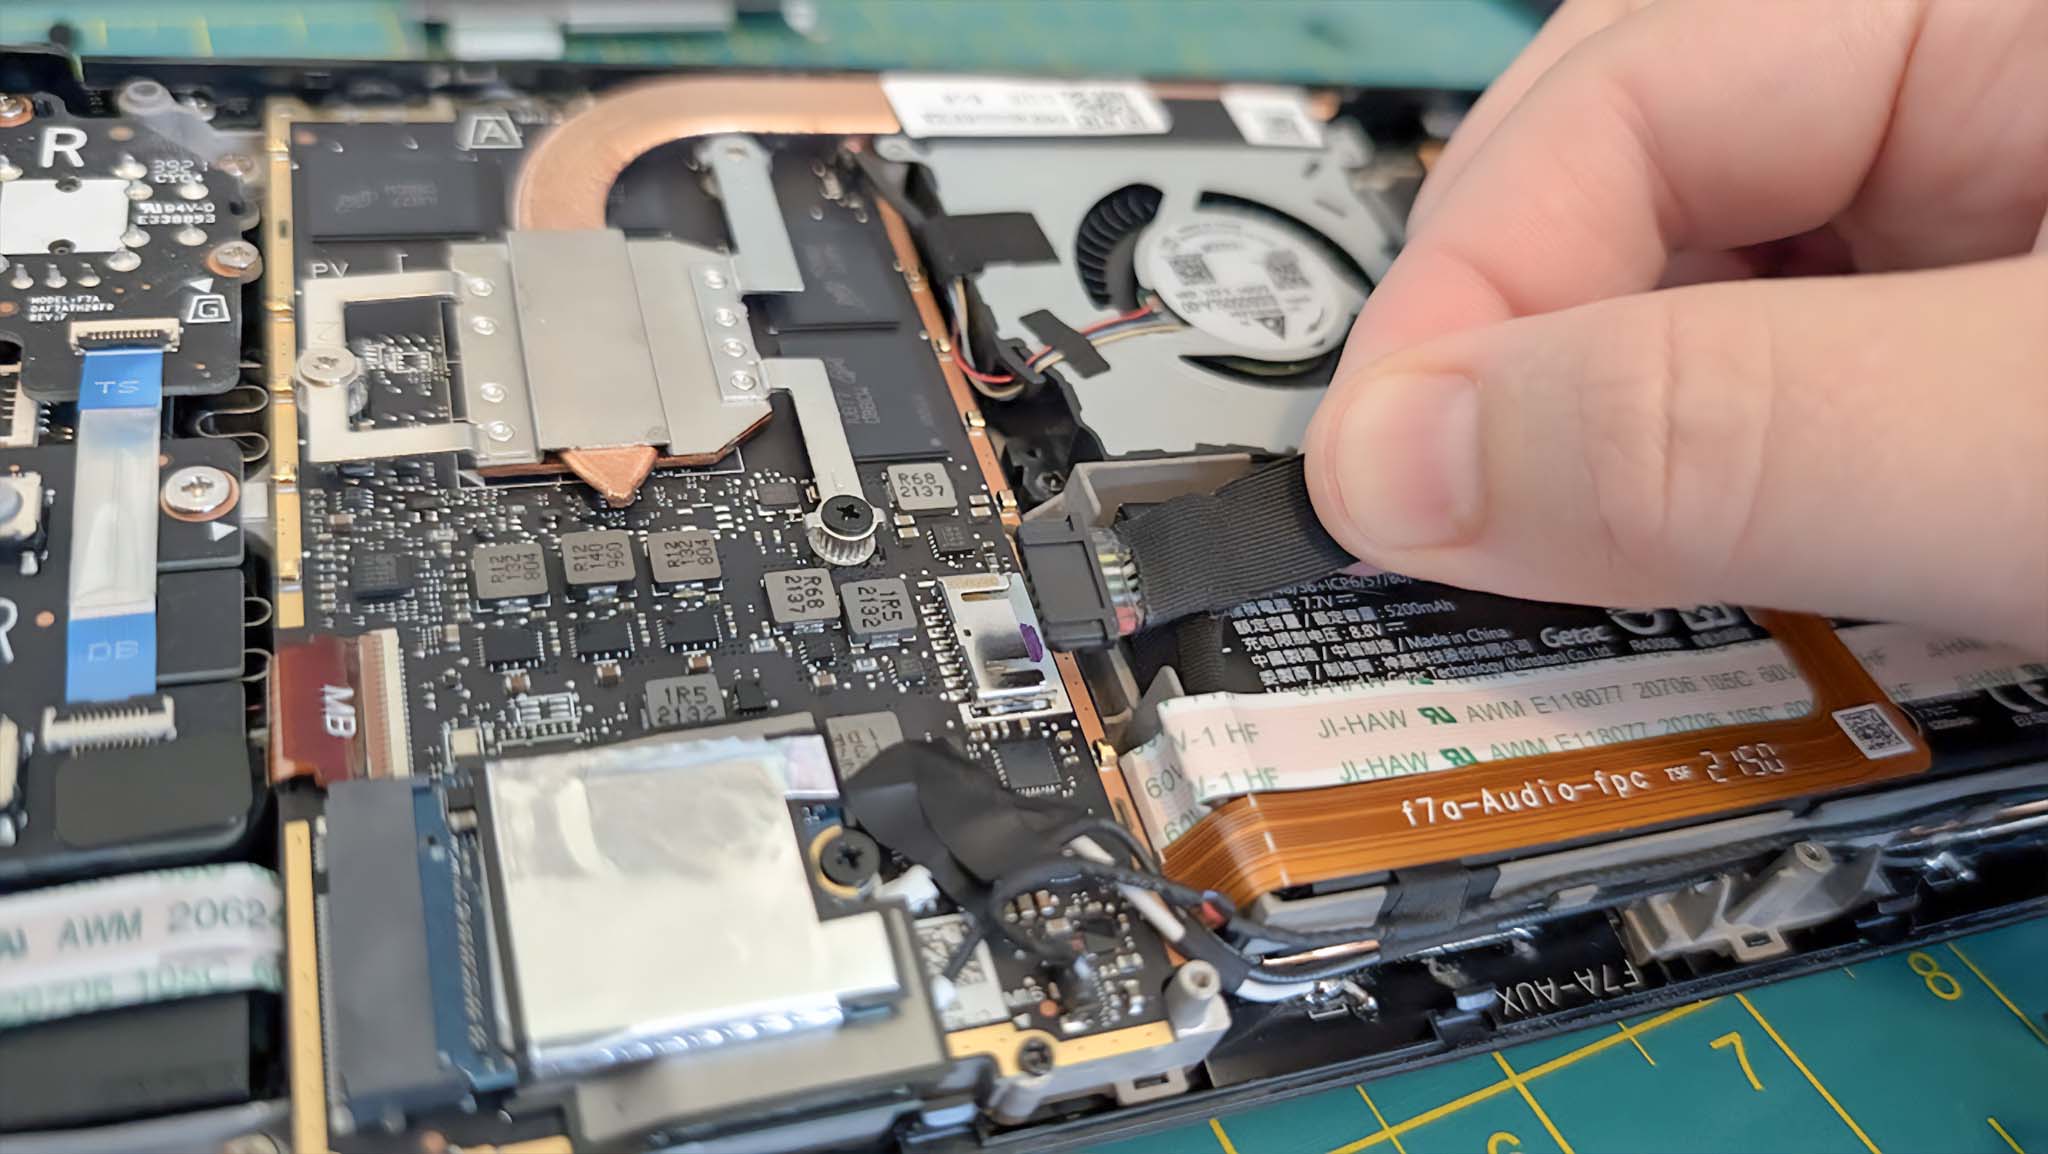
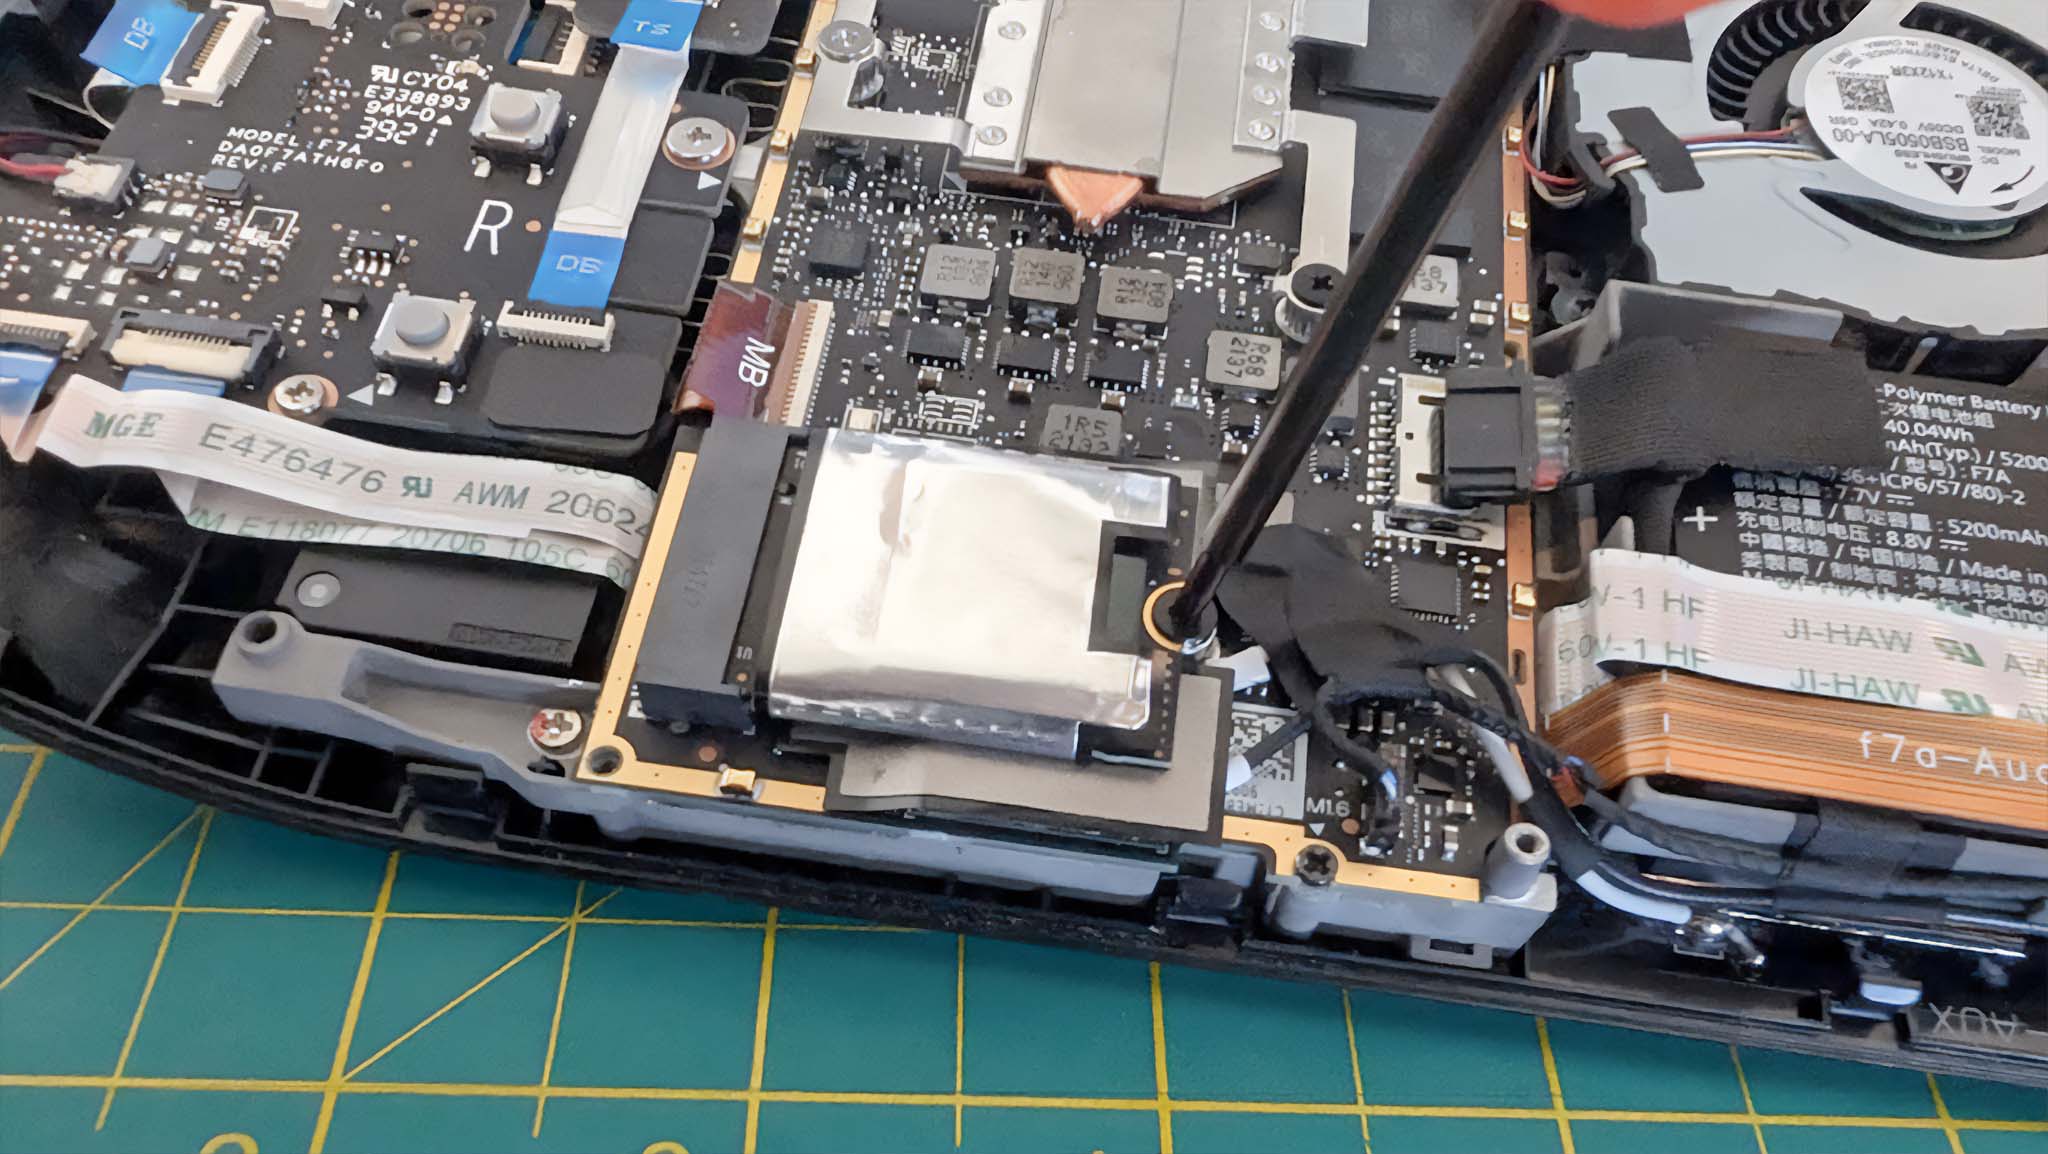
- Now it’s time to remove the screw holding the SSD in place.
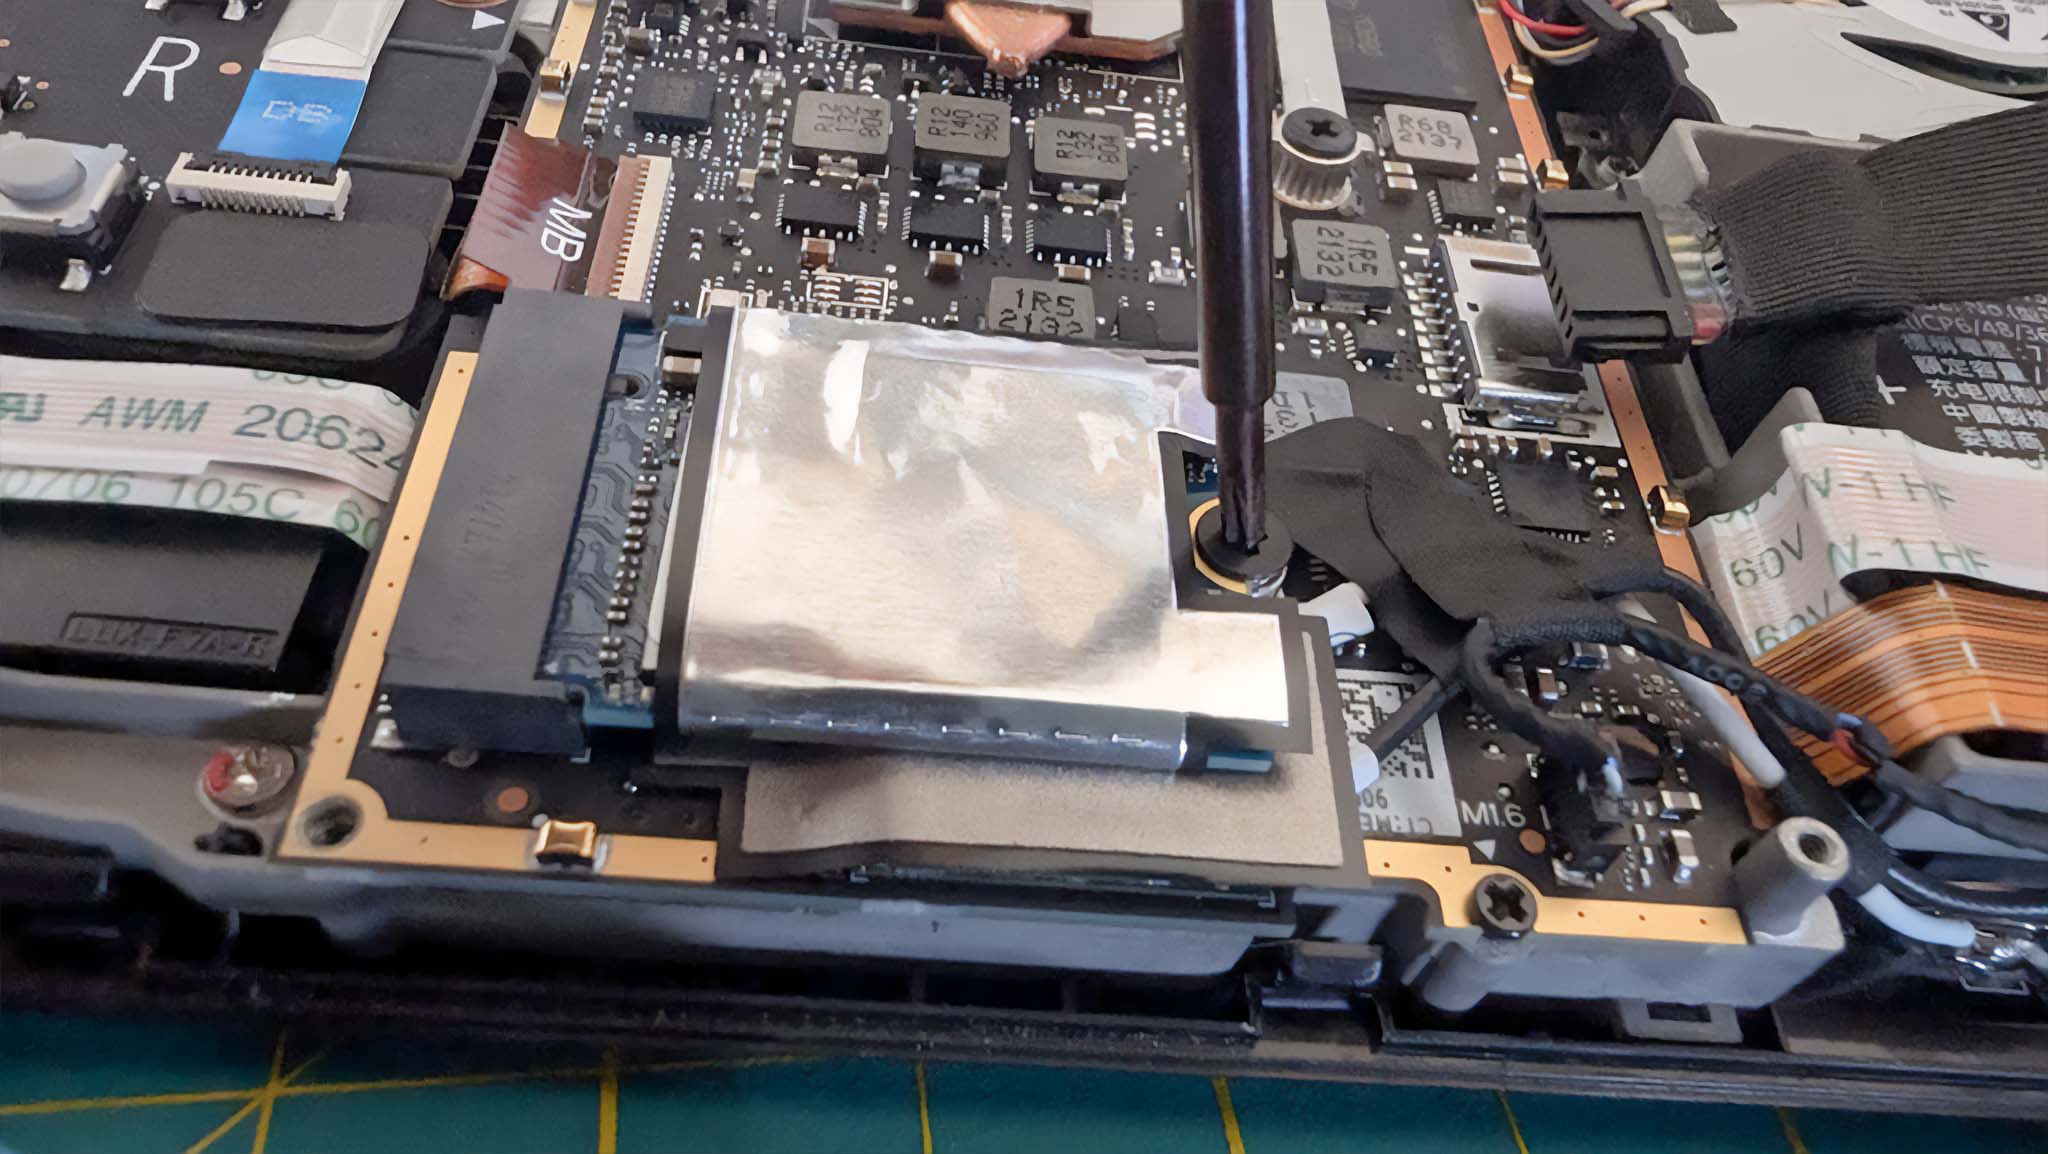
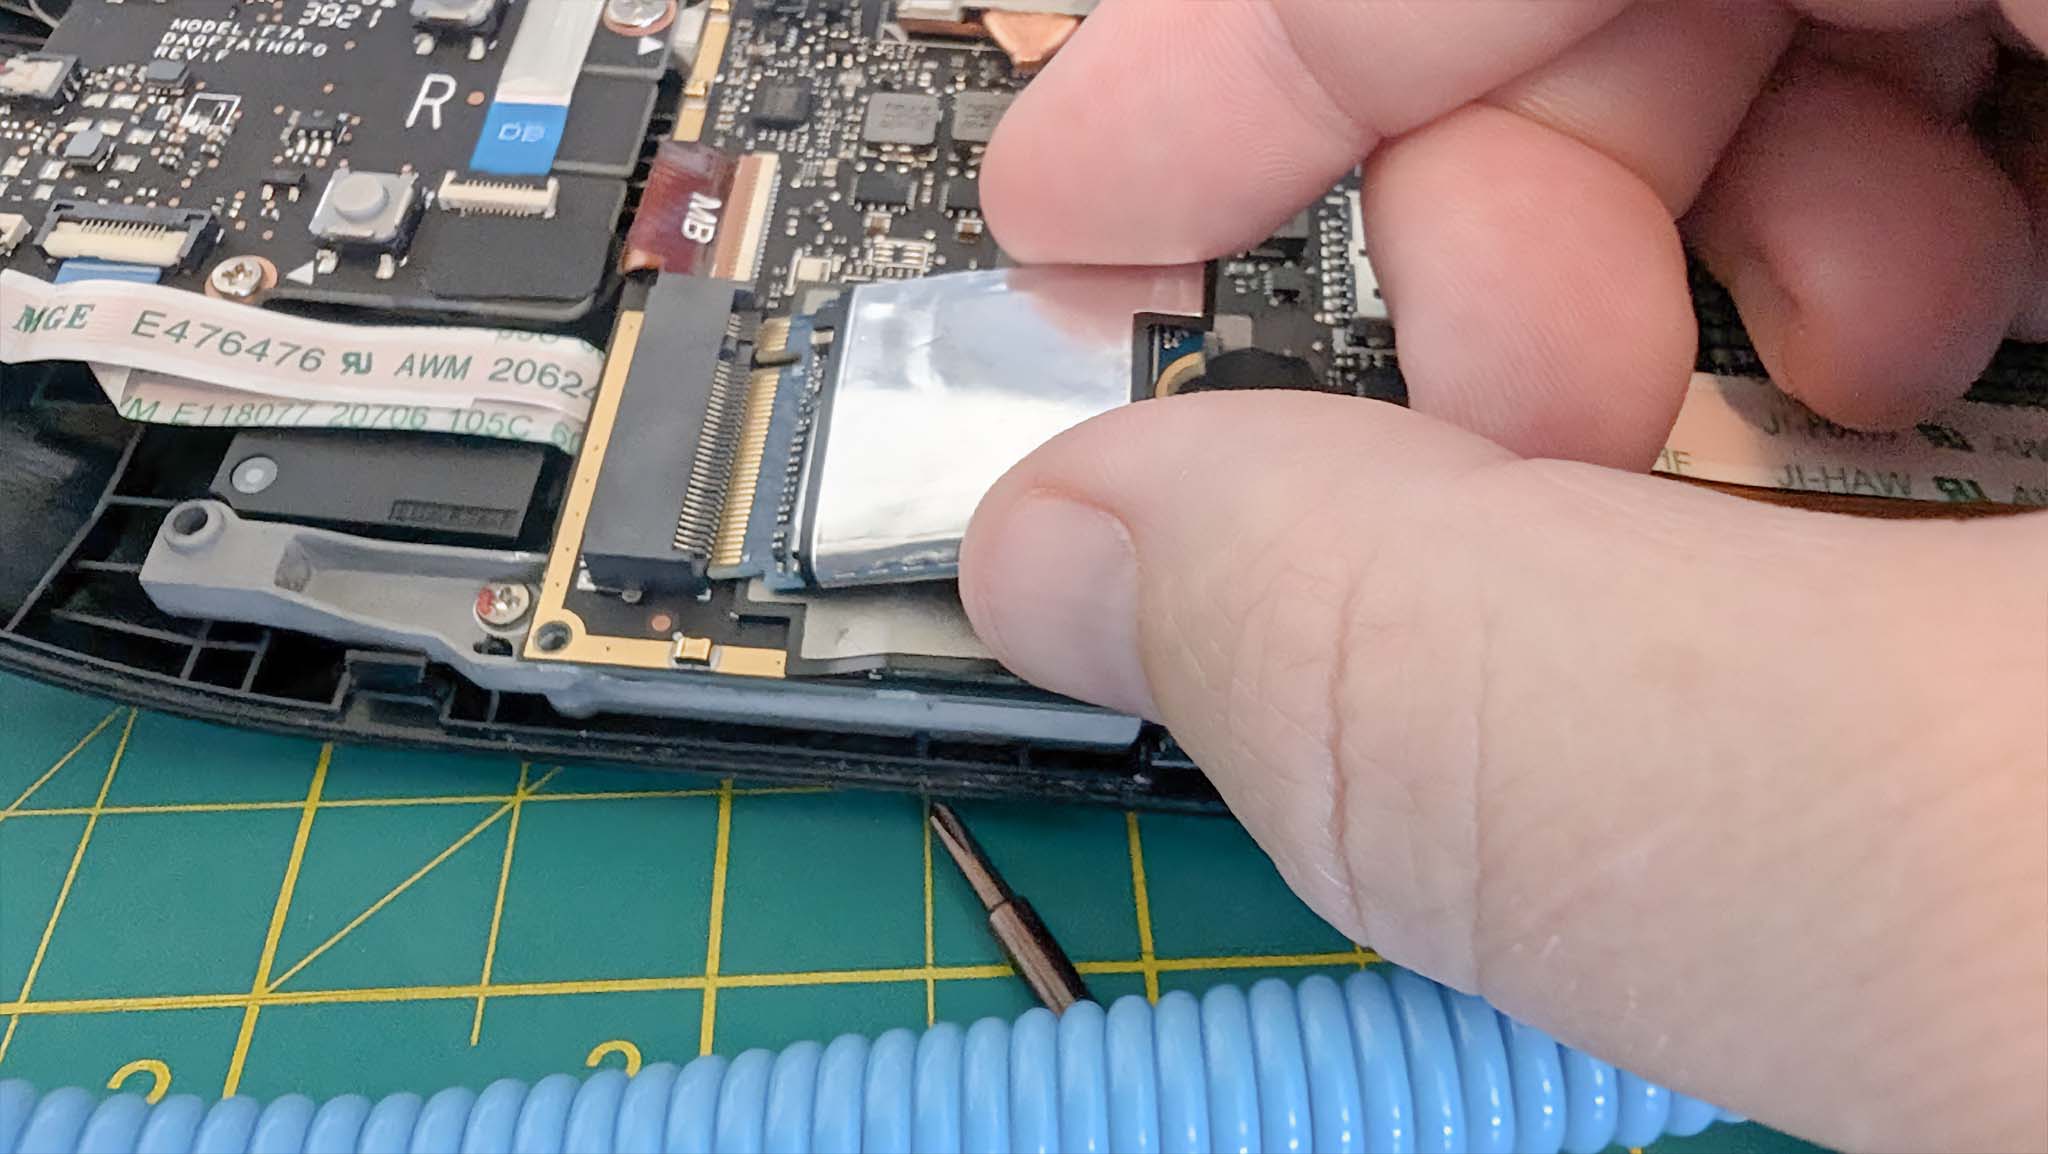
- The SSD will pop up a little. Gently grab the SSD and pull it out of its slot.
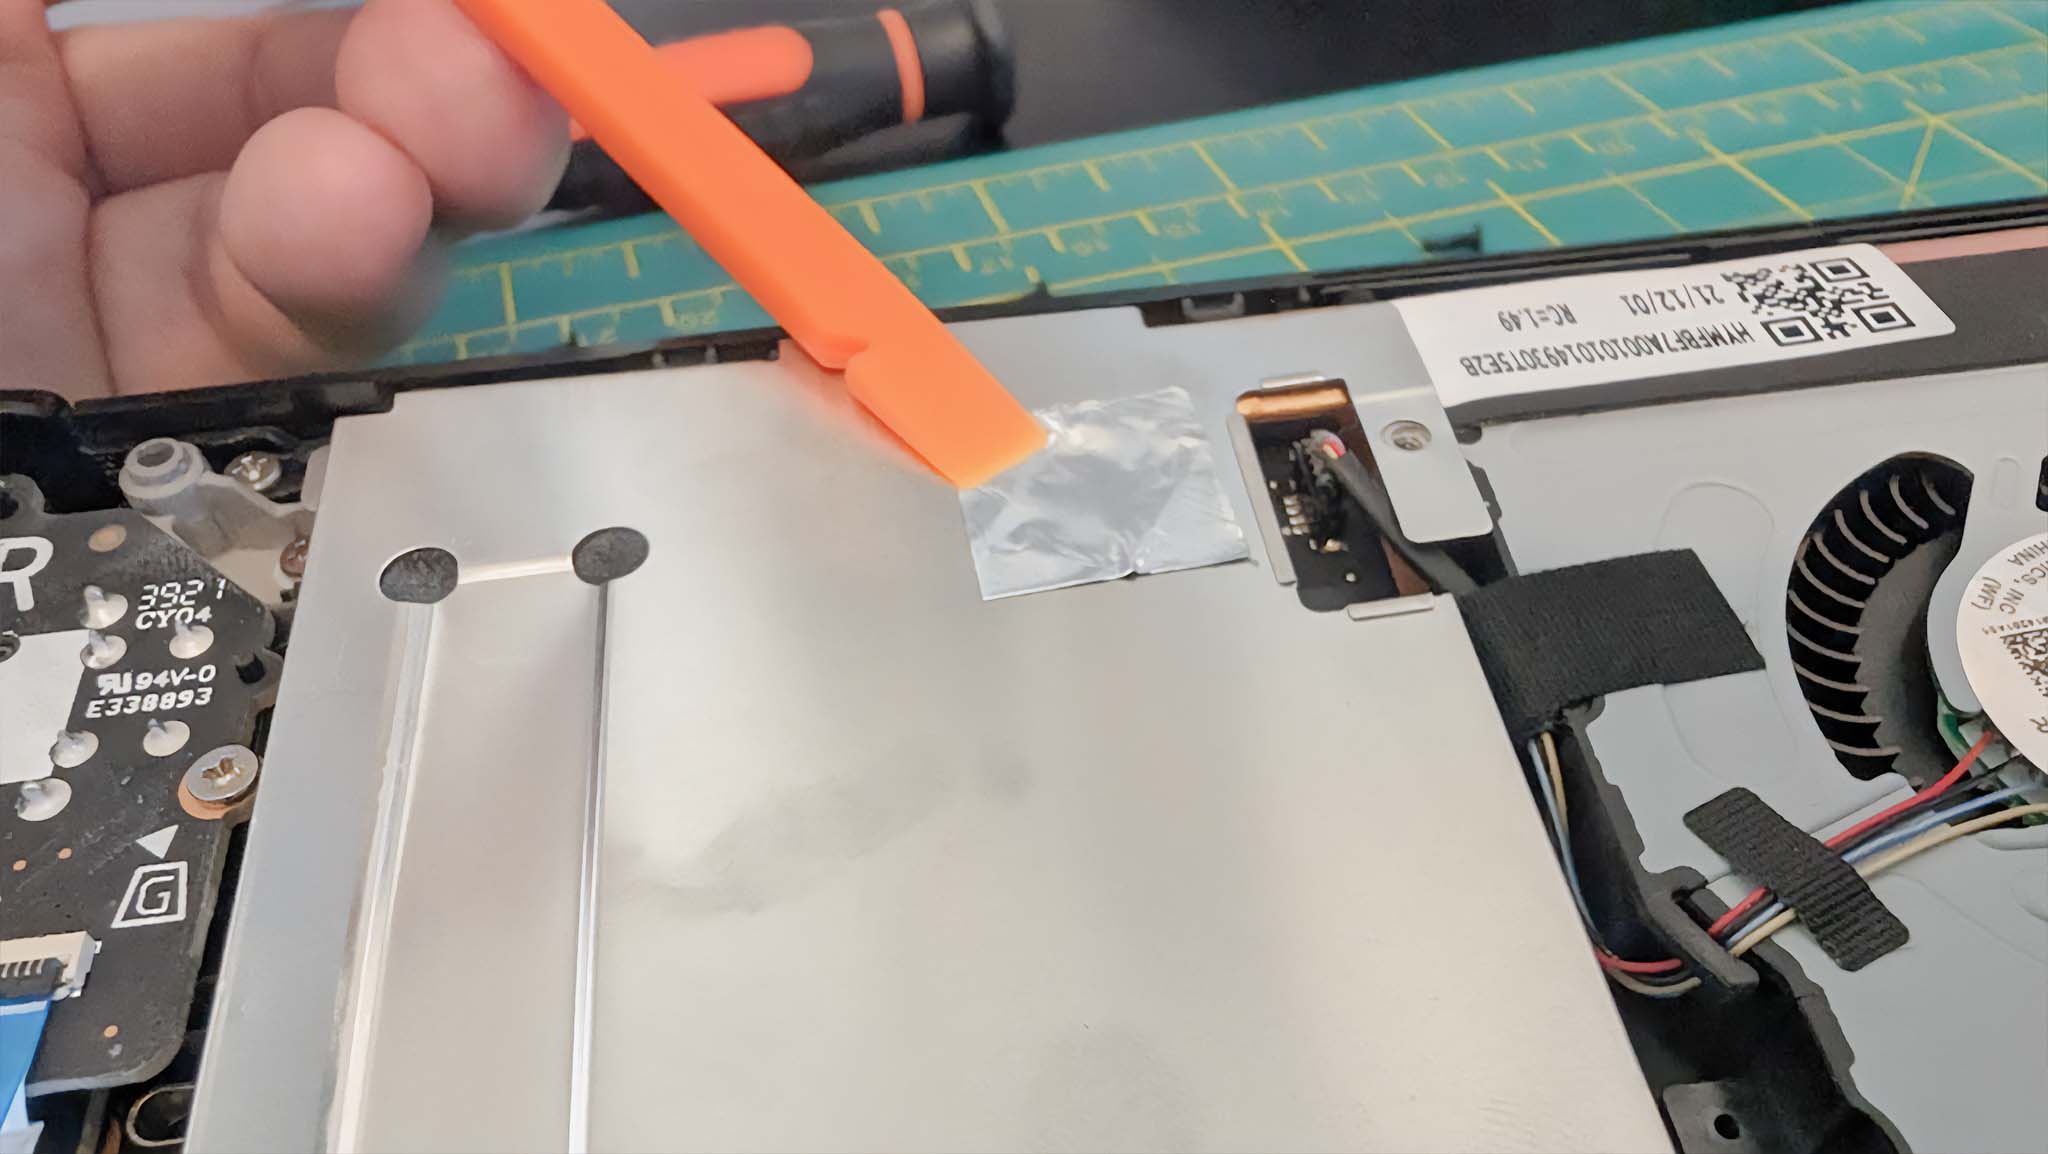
- There is some metallic shielding wrapped around the original SSD that is held in place with adhesive. Since the SN700M replacement SSD doesn’t come with this, we’ll want to transfer the shield to the new SSD. I used a pair of tweezers to gently peel it off and then stick it around the new SSD.
Image 1 of 2

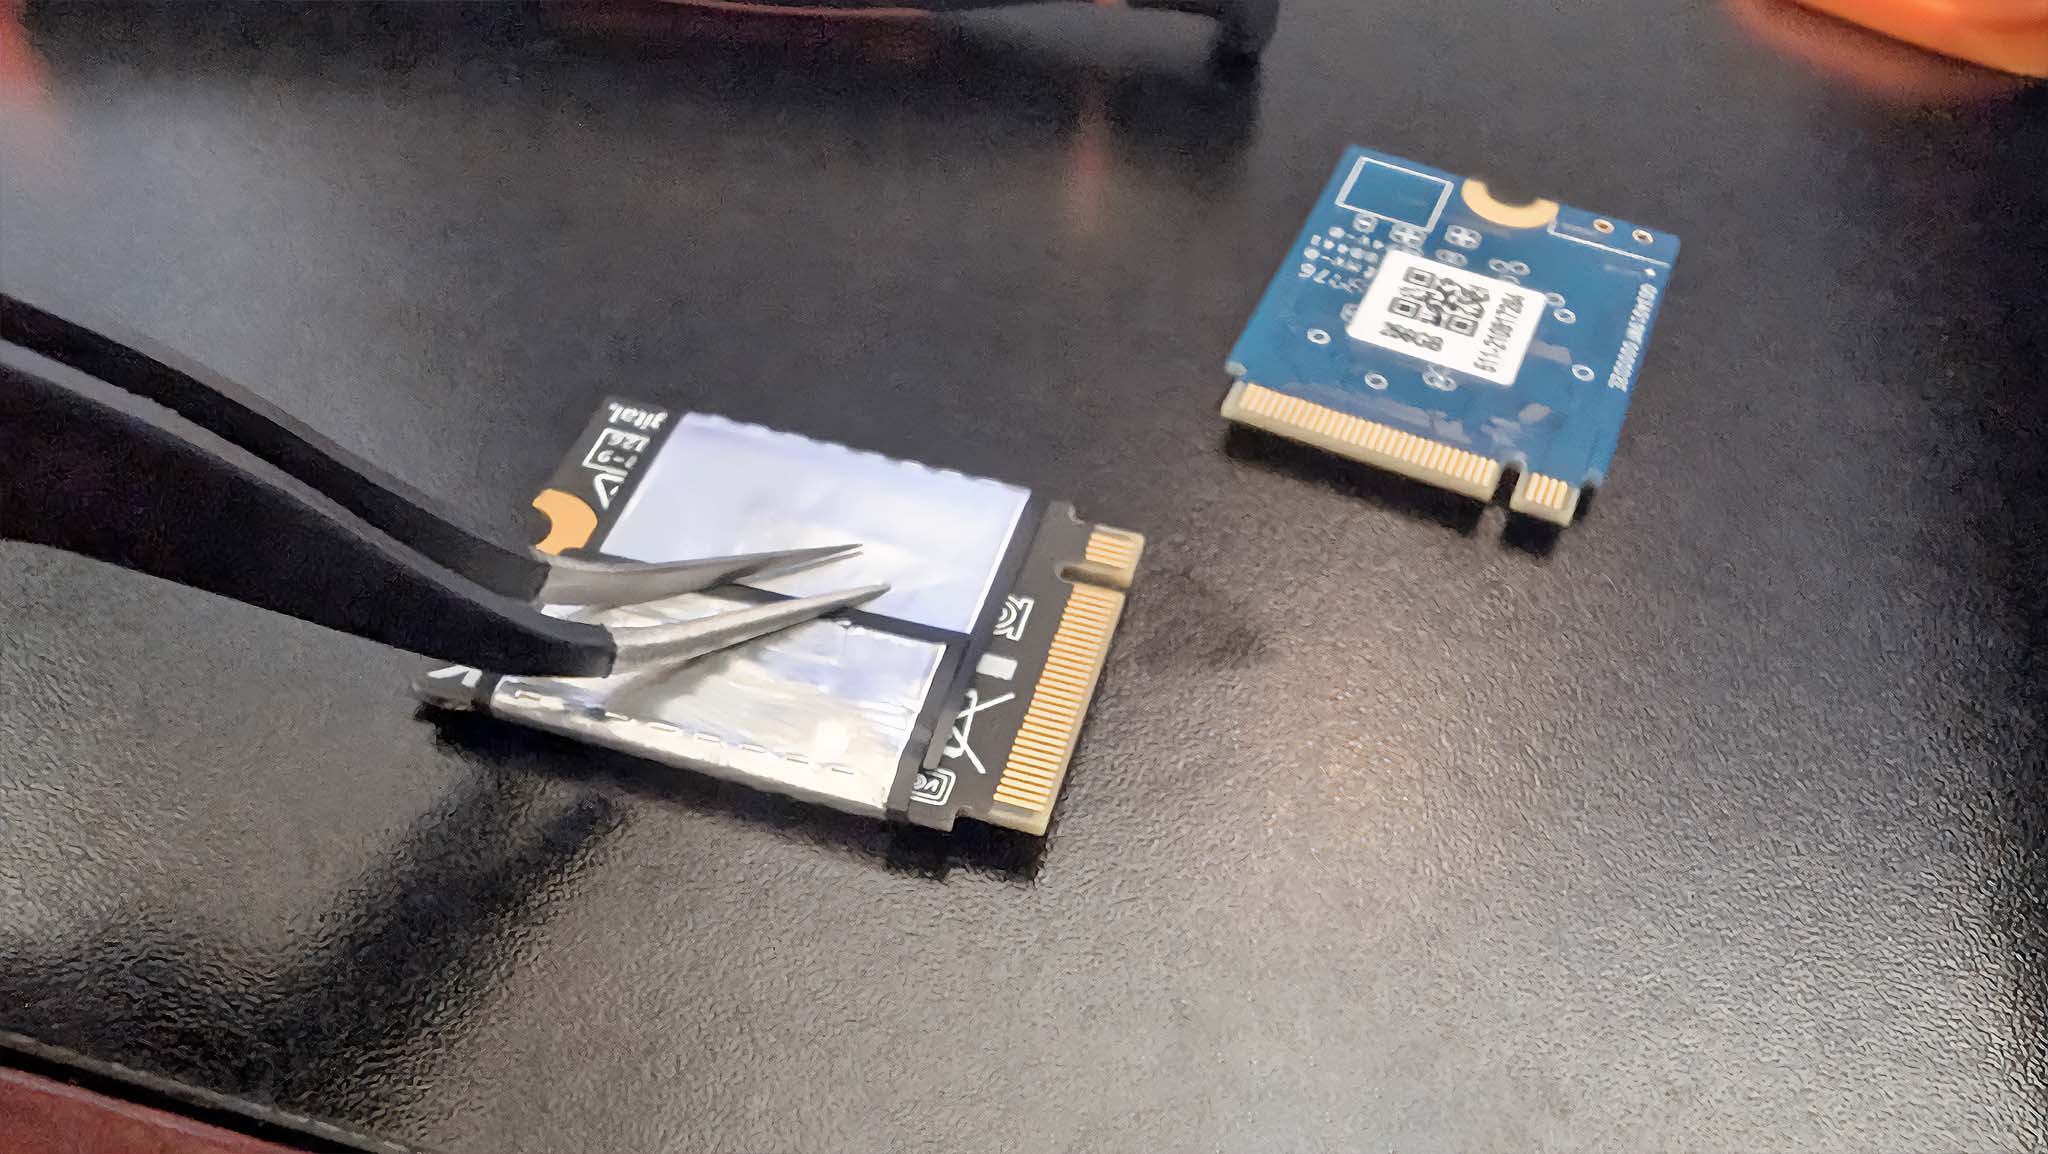
- Slide the new SSD into the SSD slot.
- Secure the new SSD with its screw.
- Now, plug the battery back into place.
- Put the motherboard covering back where it belongs and secure it with its three screws. Make sure the fan cable coming out in the upper right side isn’t getting pinched.
- Smooth out the sticker you previously peeled up.
- Put the back cover back onto the Steam Deck and gently press it into place.

- Finally, return the eight back cover screws to their proper places. Remember, the four longer ones are on the far corners.

Now that these steps have been followed, you now have the new SSD installed in your Steam Deck. However, the gaming handheld doesn’t currently have SteamOS on it. Don’t worry. I’ll cover how to install that in the next section.
How to install SteamOS on your Steam Deck
With the new SSD in place, it’s time to reimage the Steam Deck and get SteamOS installed on it again. Here’s what to do.
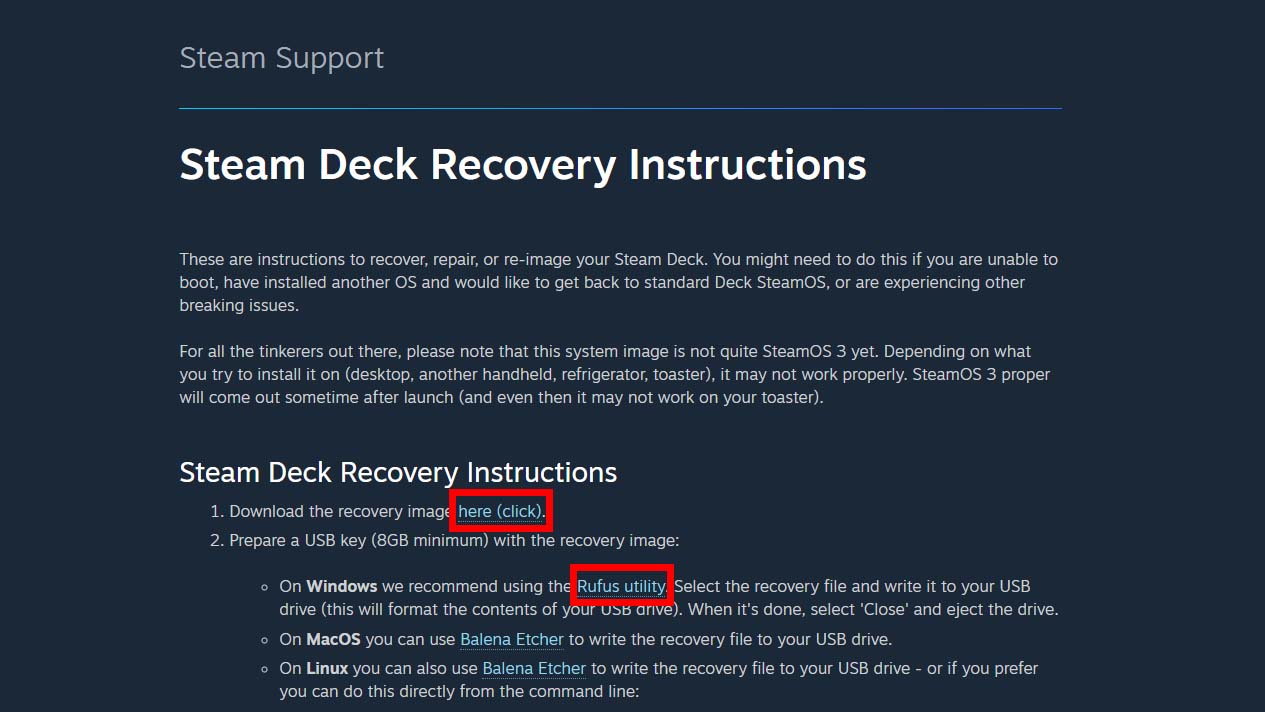
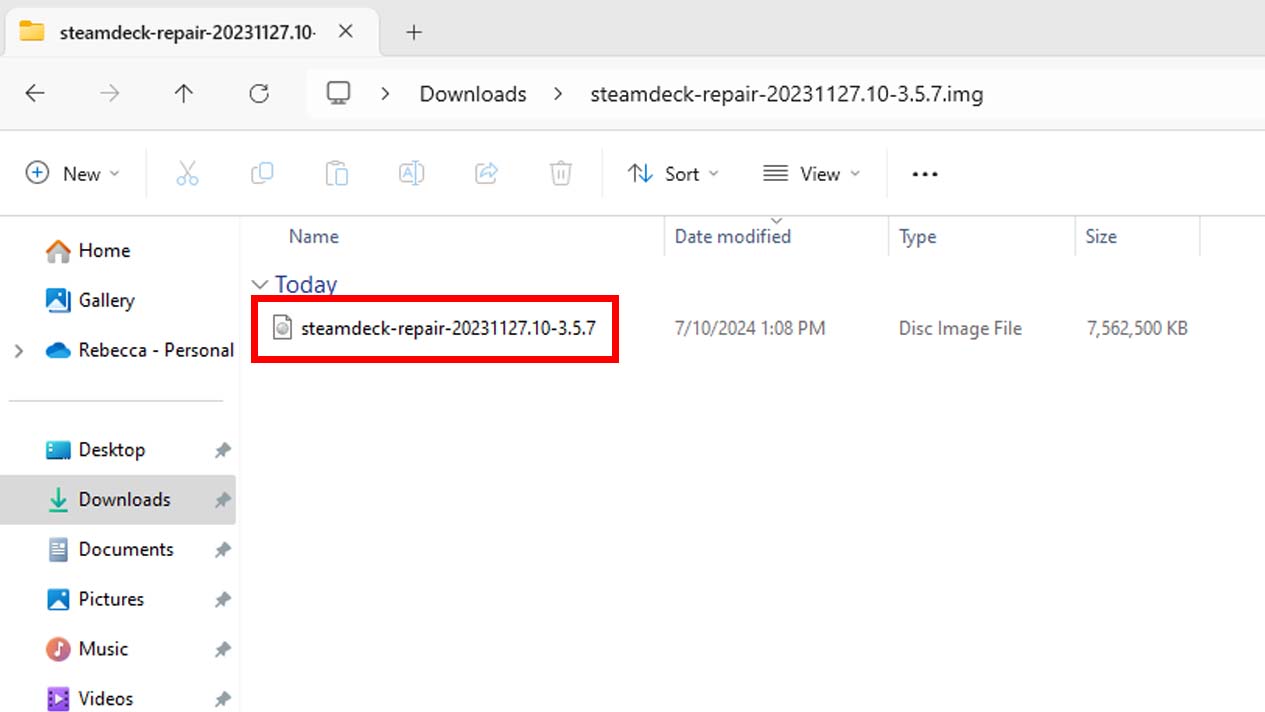
- Go to the Steam Deck recovery page and download both the recovery image and the Rufus Utility.
- When it’s done downloading, right-click on the recovery image file on your computer and select Extract All.
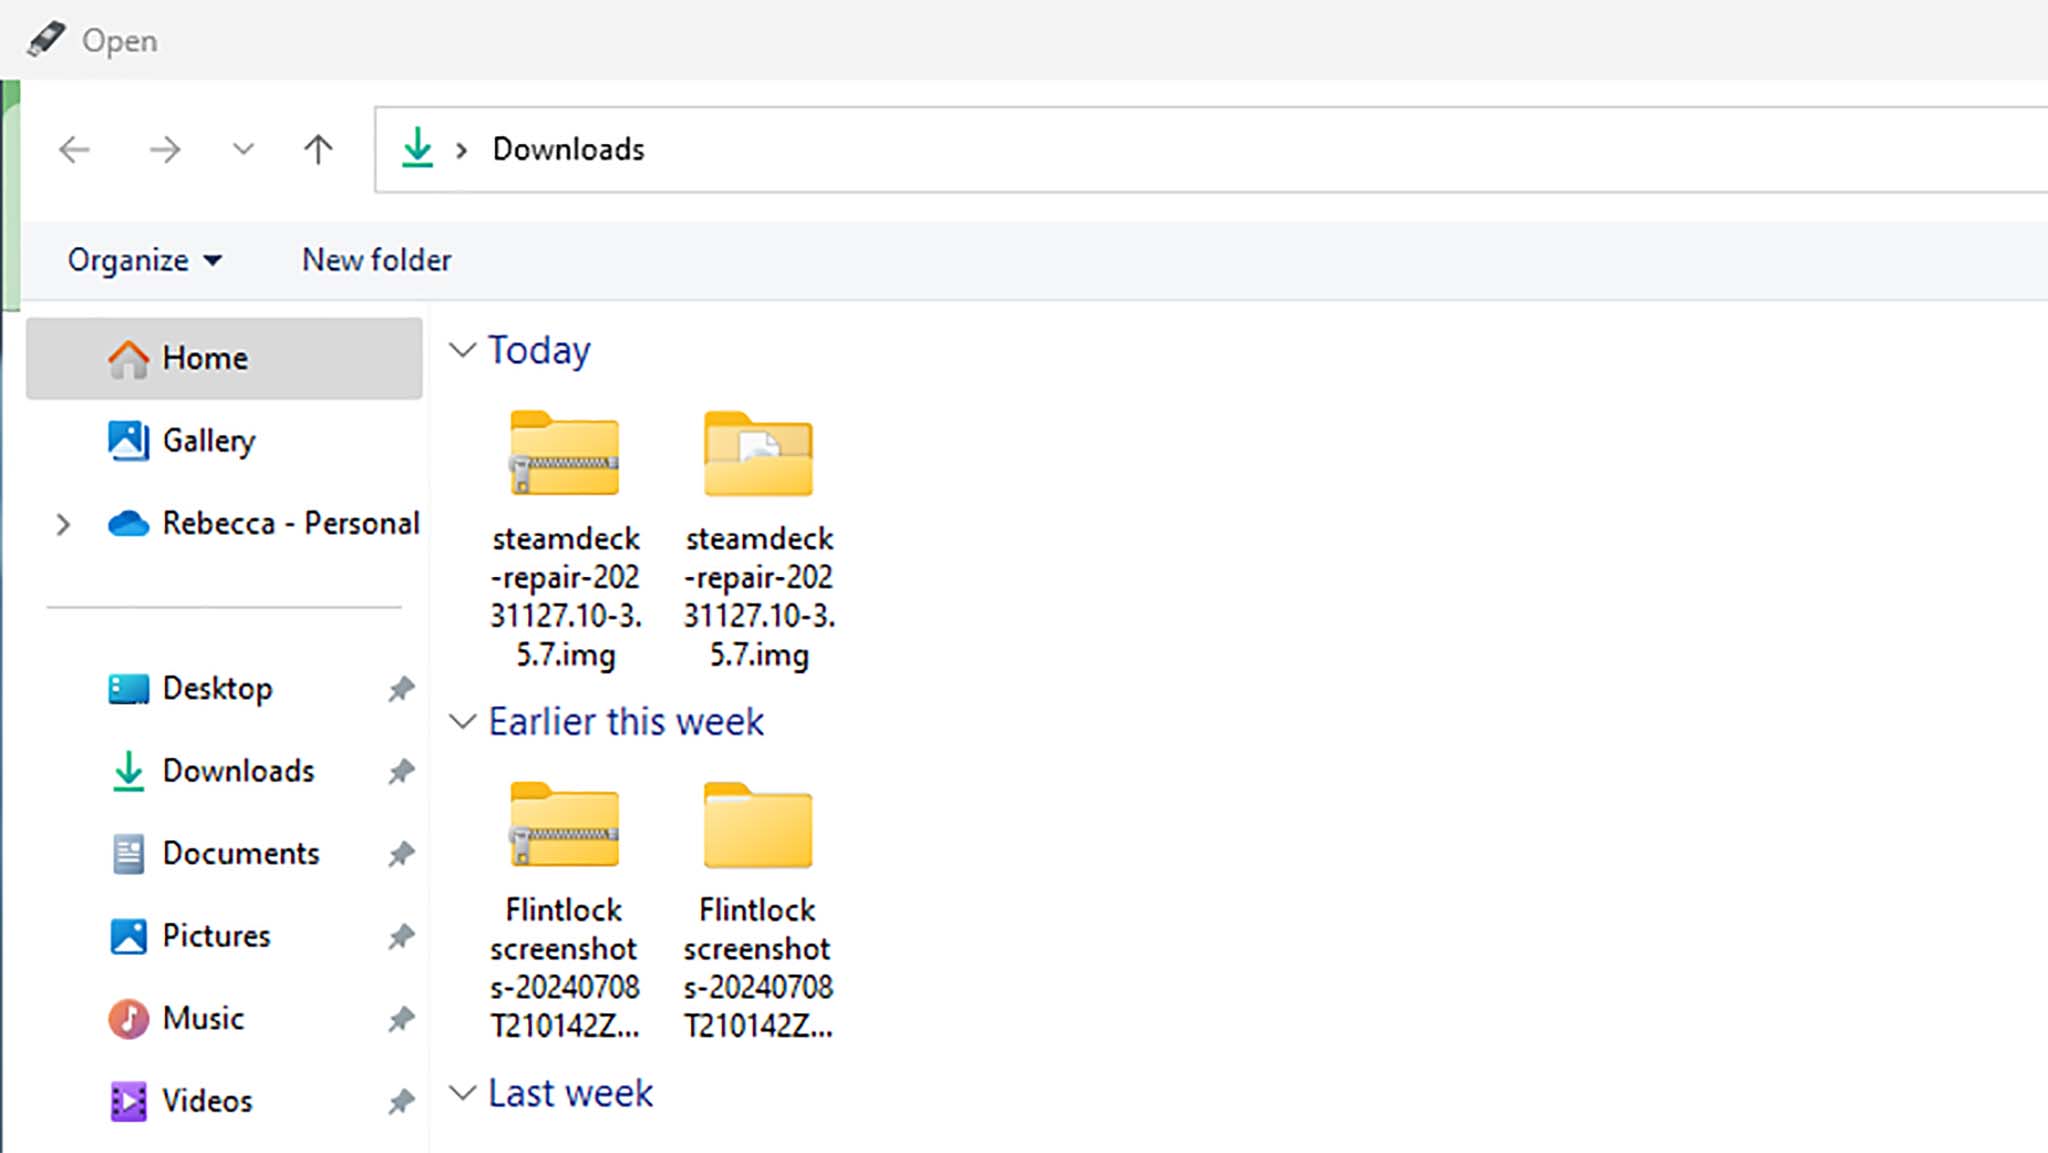
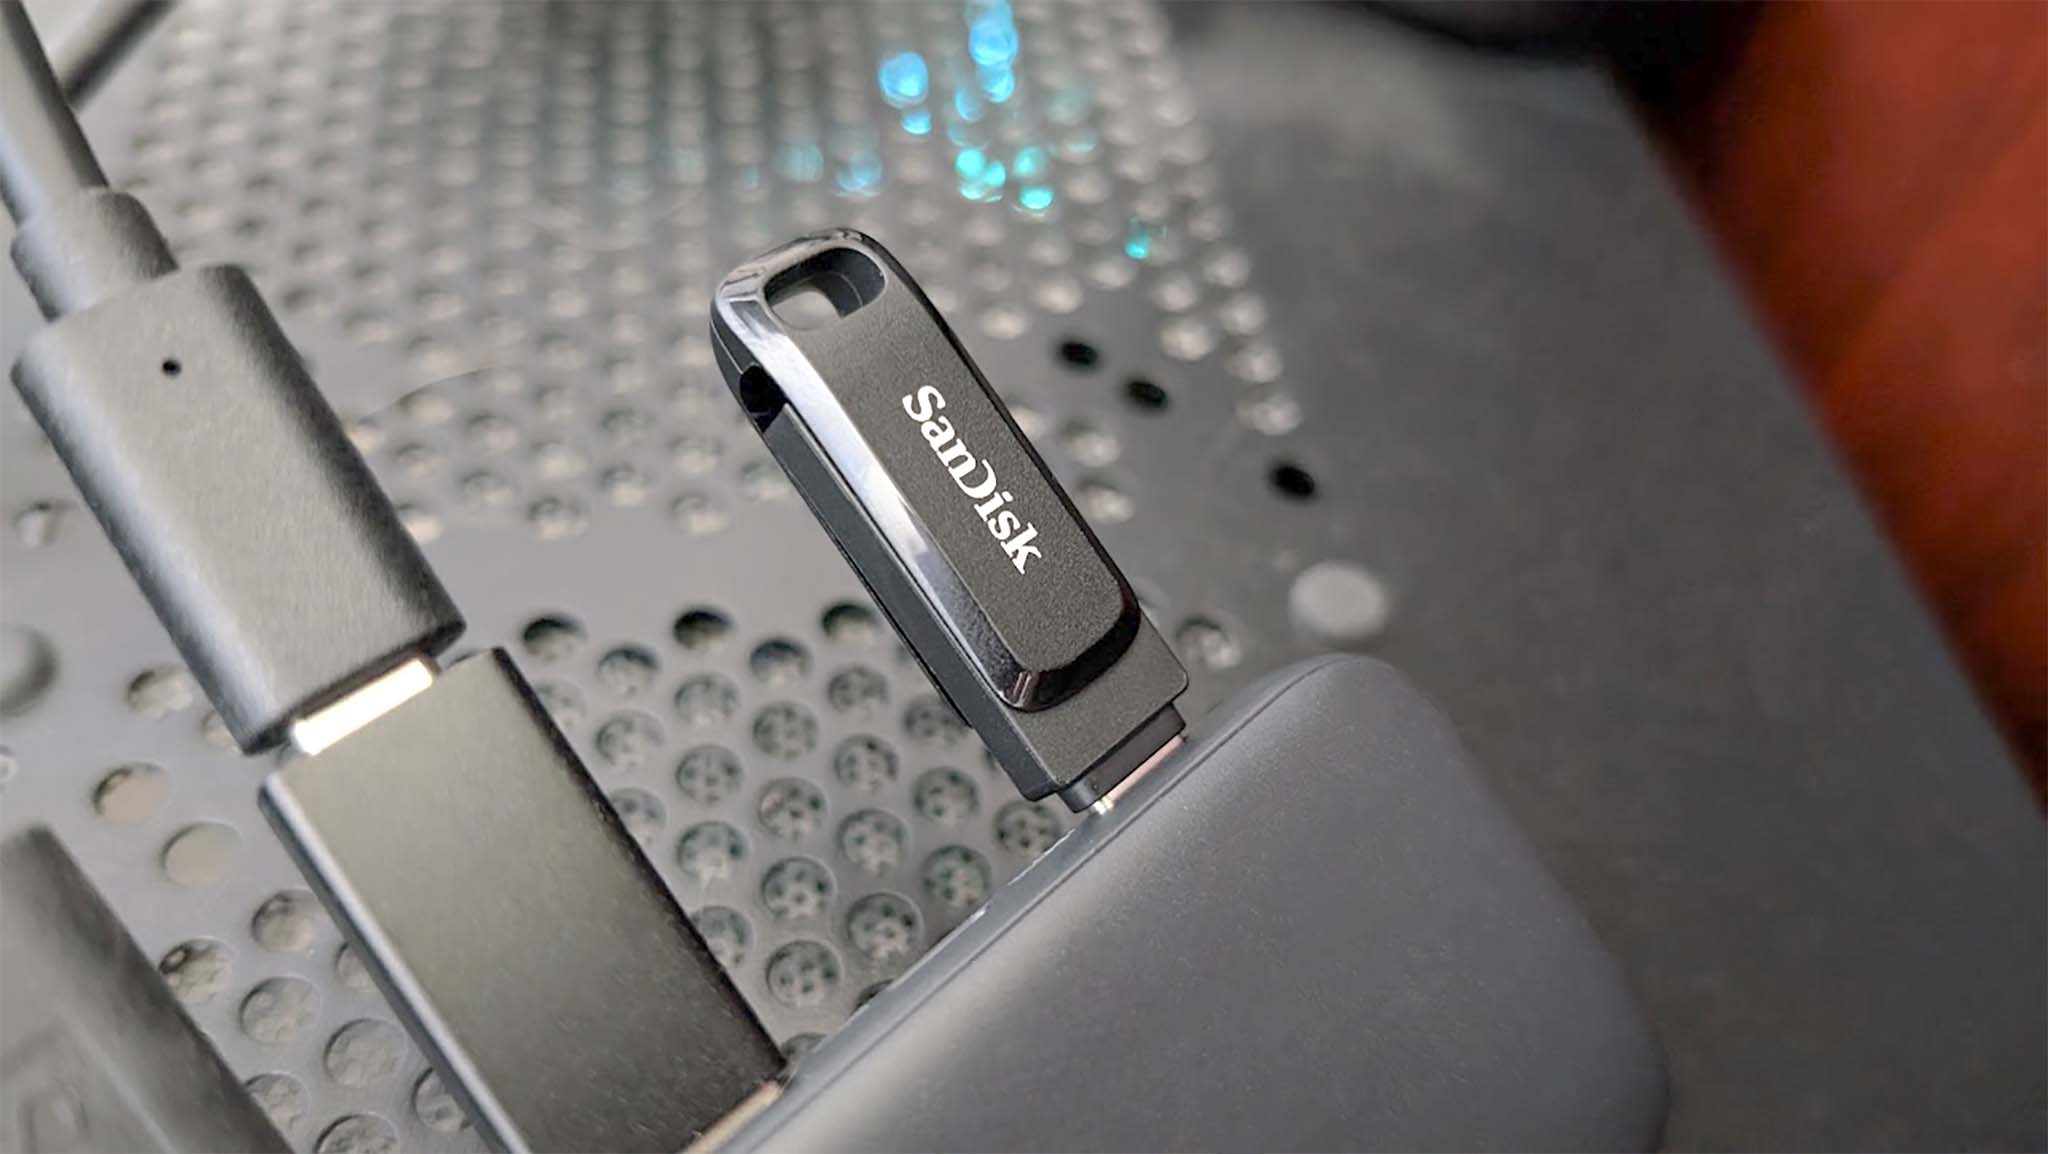
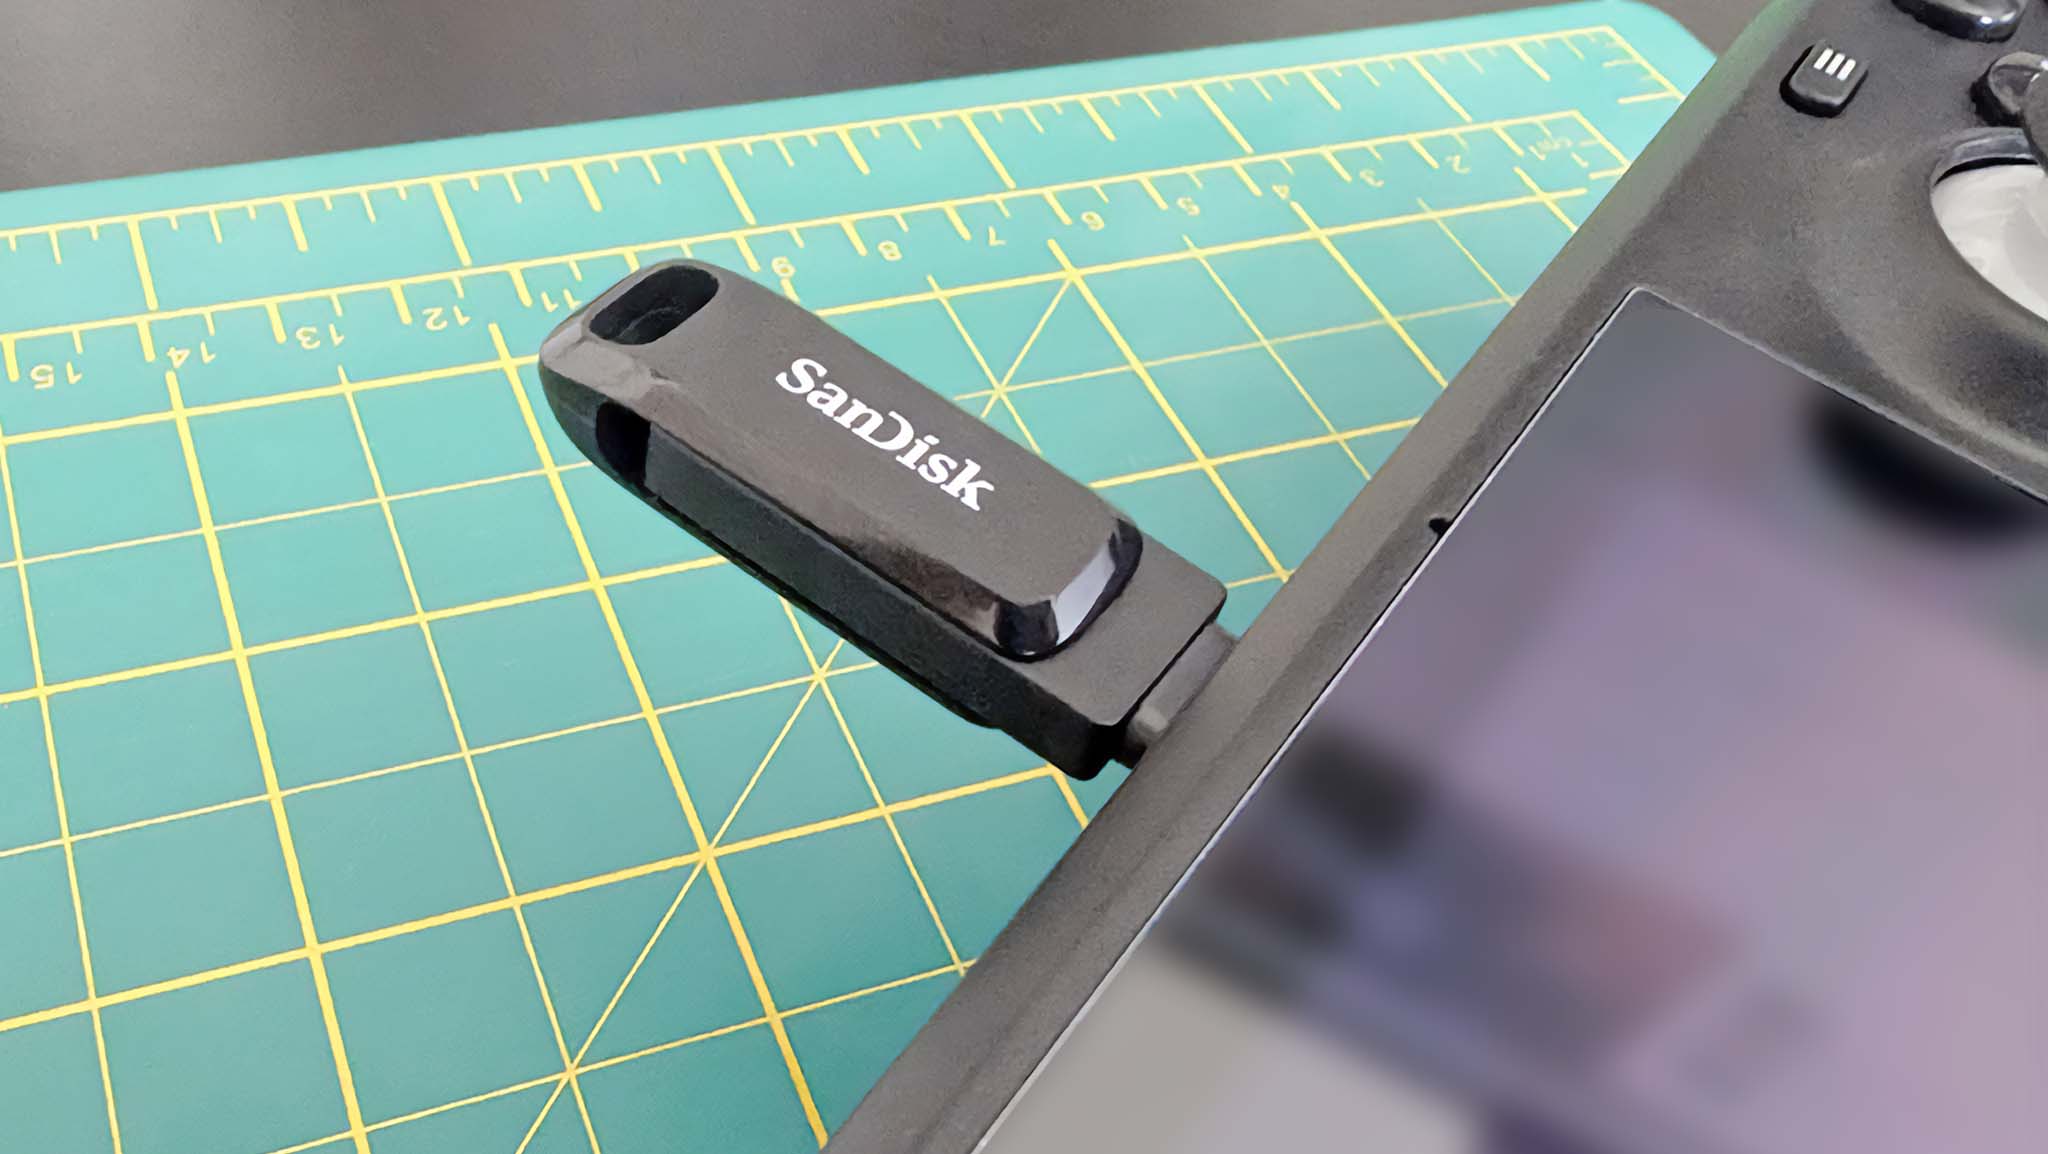
- Plug your thumb drive into your computer.
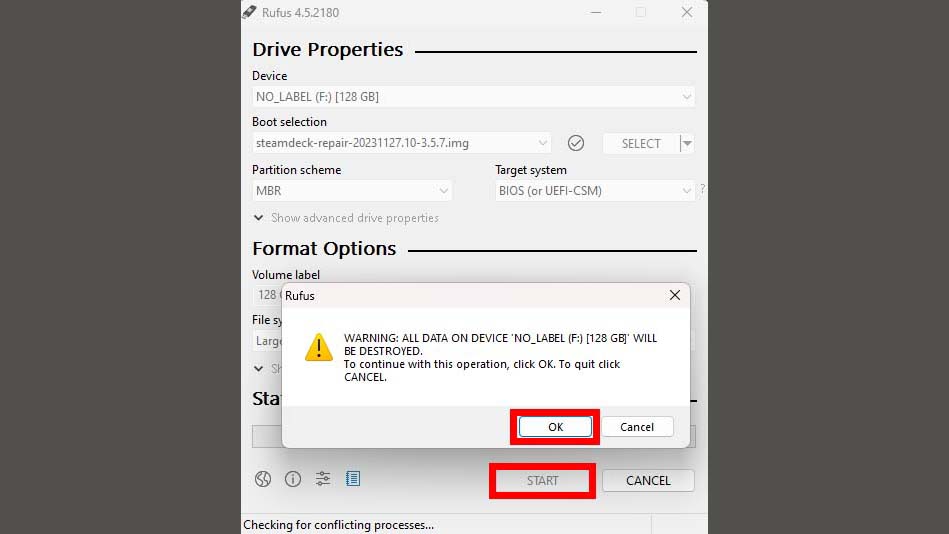
- Next, open Rufus utility. Under Device, make sure your USB flash drive is selected. Under Boot selection, select “Disk or ISO image.” Then press Select. Note that this will erase everything on the selected device, so make sure the thumb drive is selected.
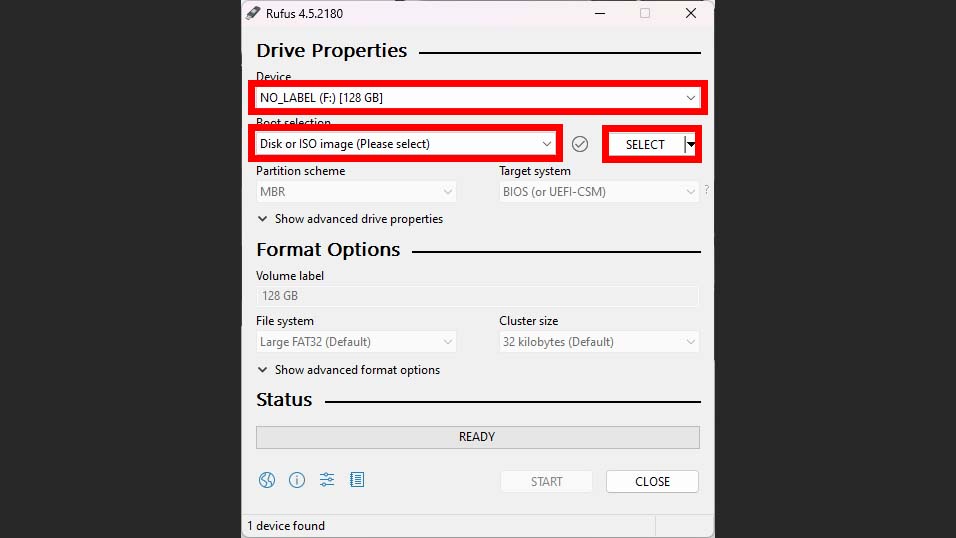
- This will open a window. Navigate to where you downloaded the recovery image and select it.
- This will take you back to Rufus. Press Start and then OK.
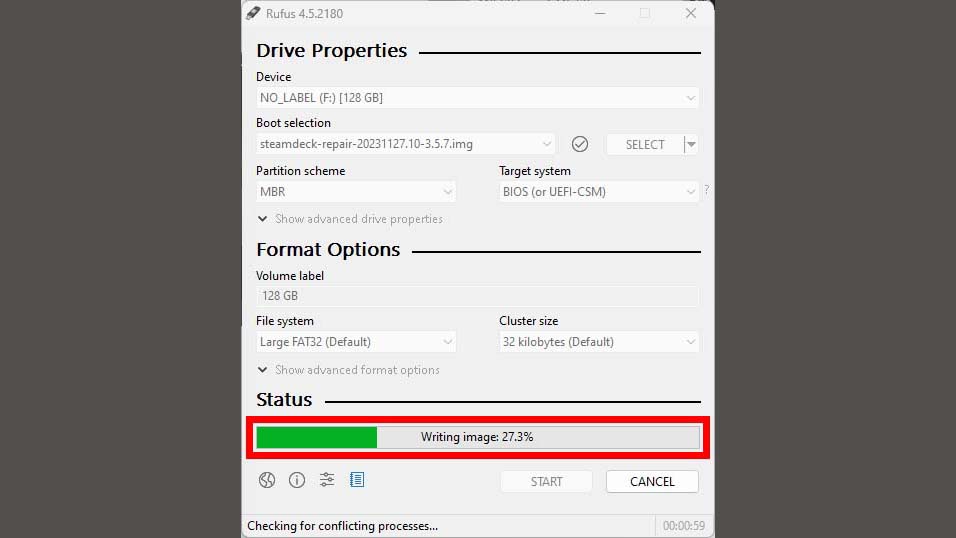
- Wait while Rufus writes the image to the thumb drive.
- Once the process finishes, remove the thumb drive from your computer and plug it into your Steam Deck.
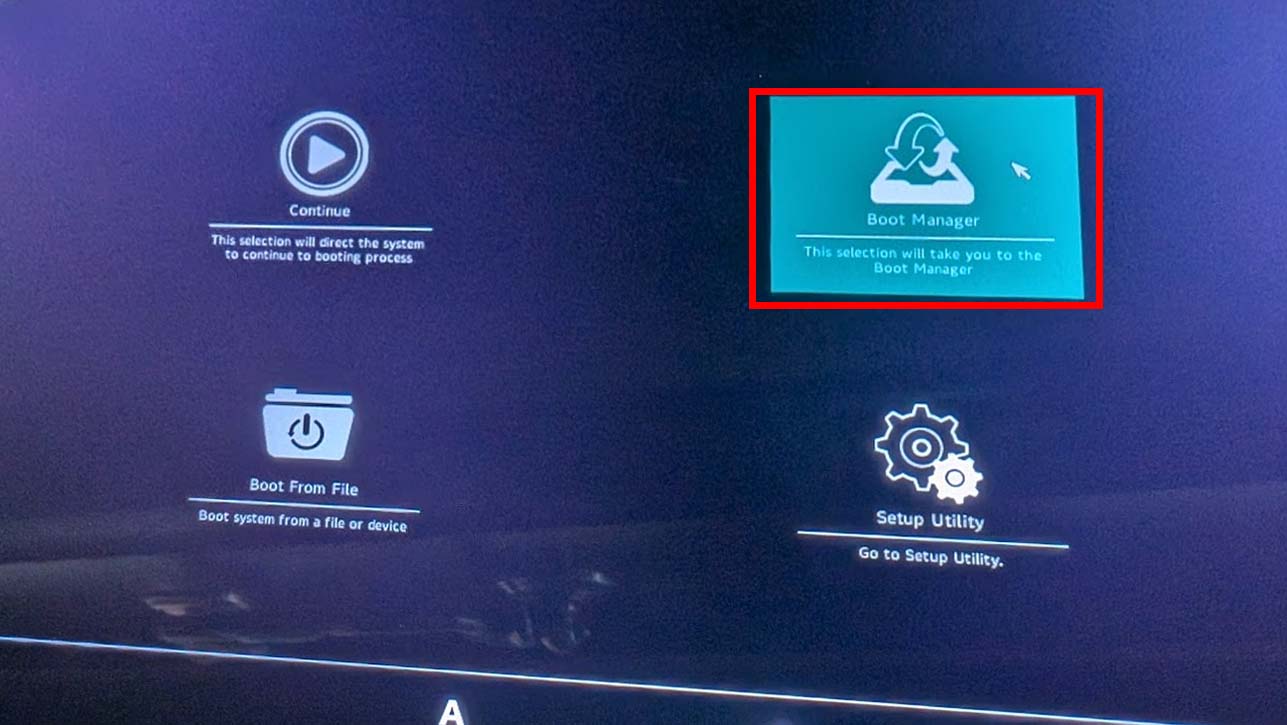
- Turn the Steam Deck on and press the A button to select OK when you see this message.
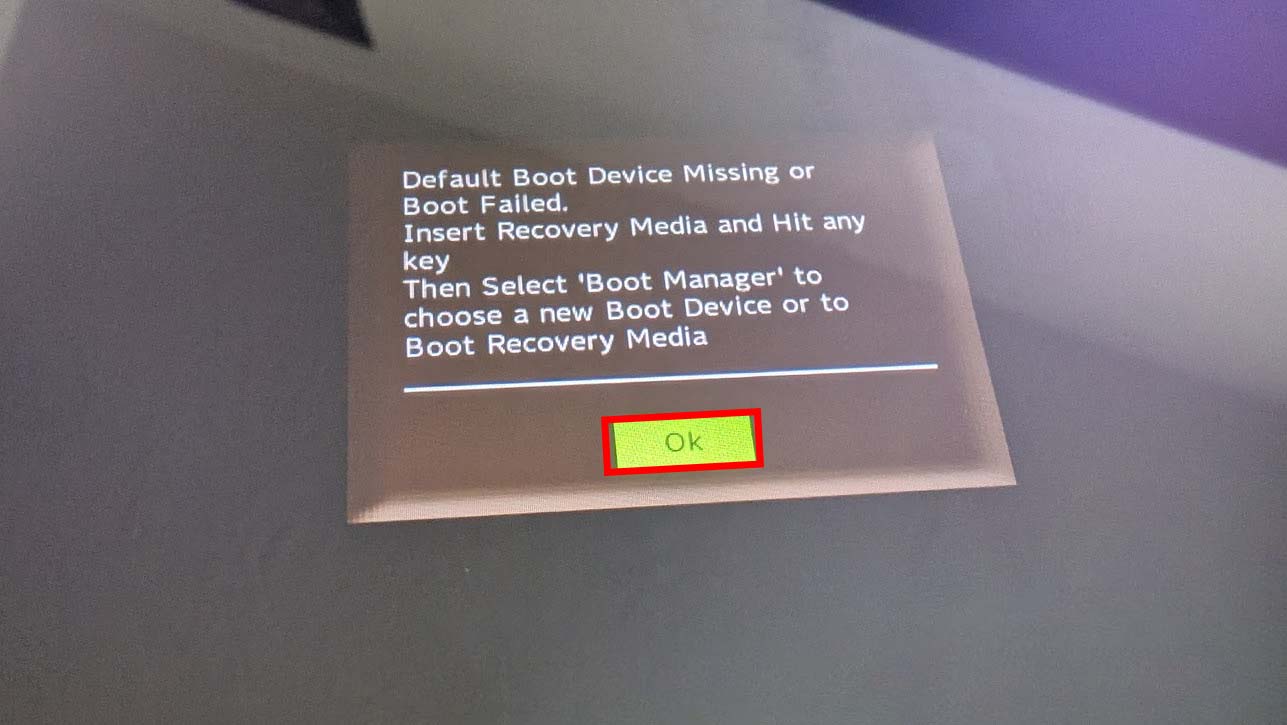
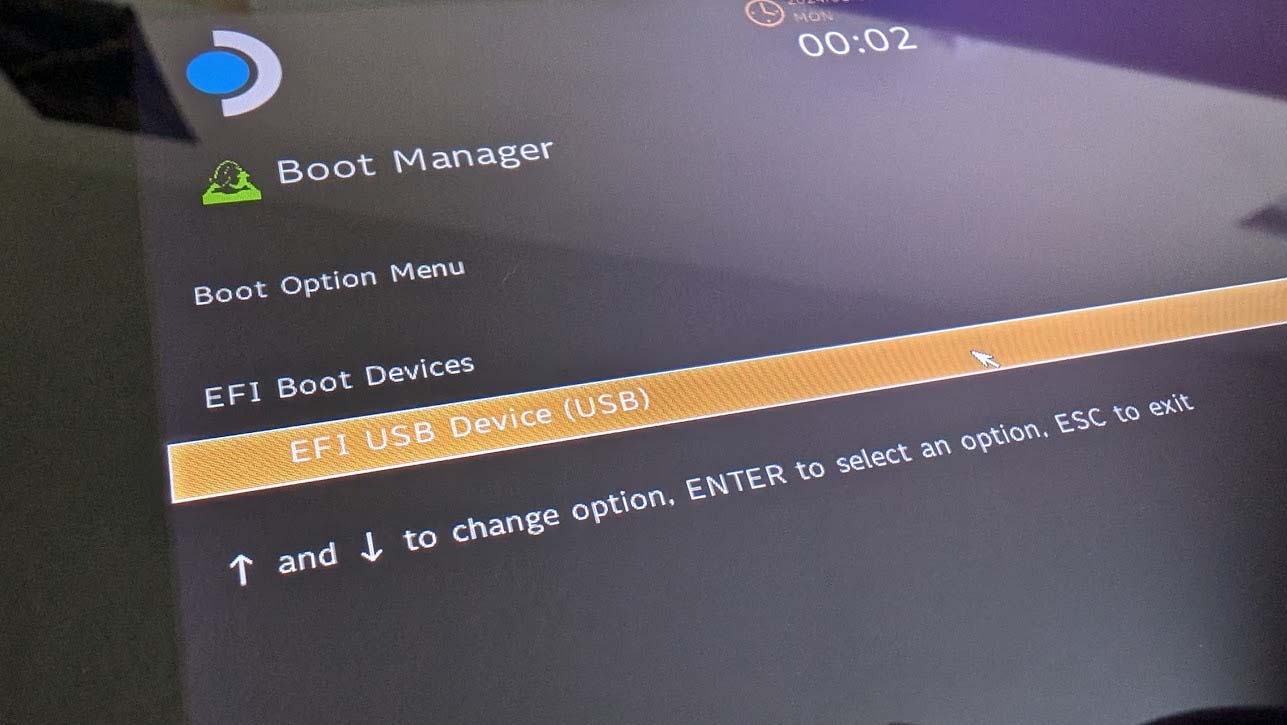
- Select Boot Manager in the upper right corner using the touchpad.
- Next, use the touchpad to select your external flash drive.
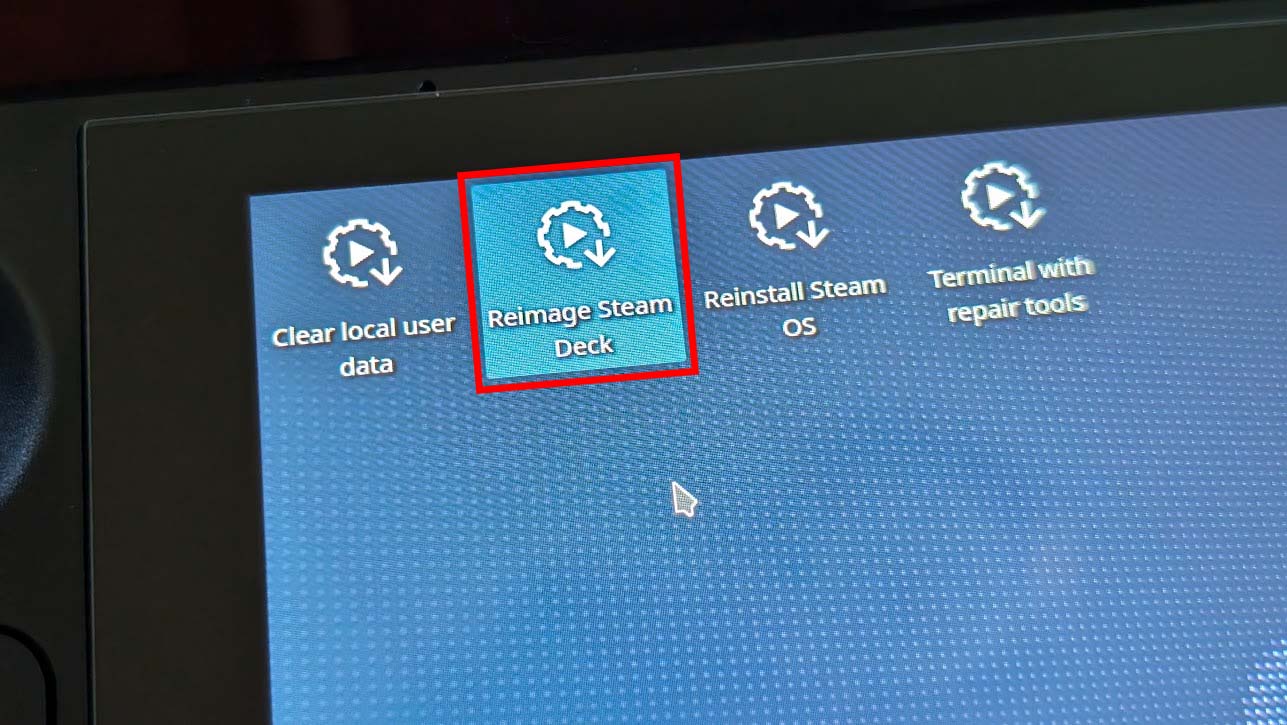
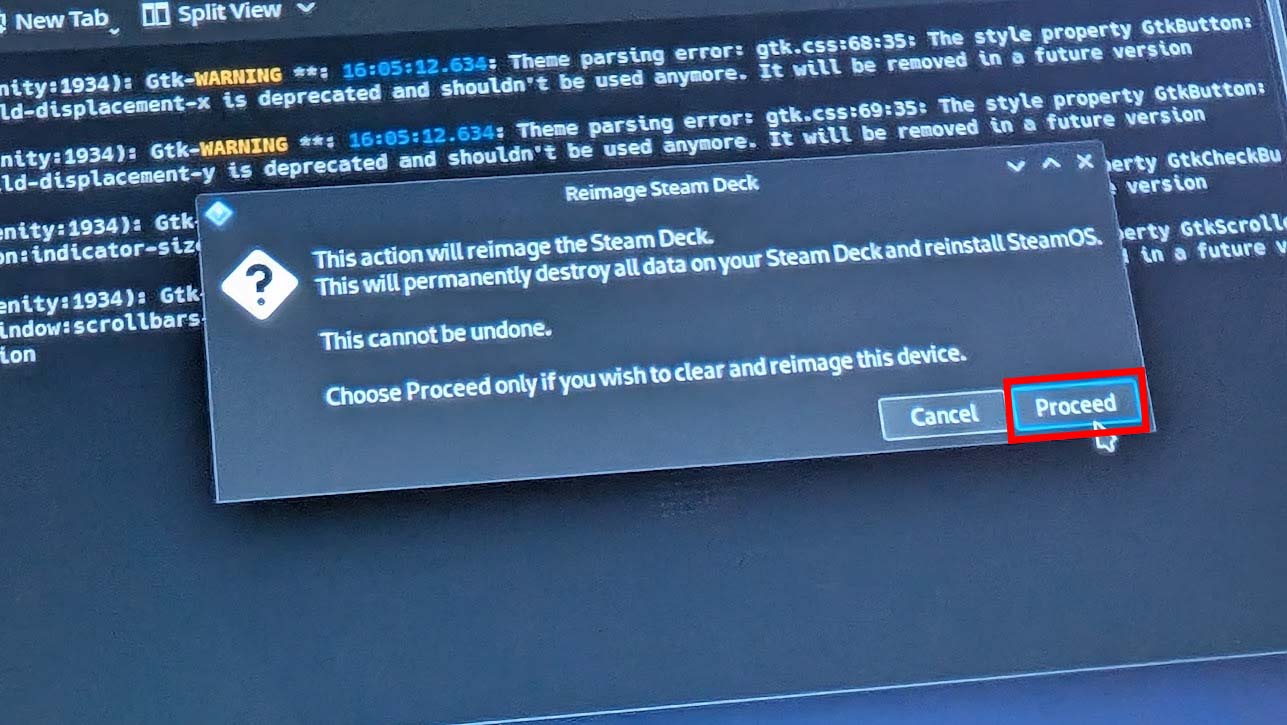
- Select the Reimage Steam Deck icon and then click Proceed. This will wipe the device and initiate the SteamOS installation process. This can take a few moments.
- Once the installation completes, select Proceed and the Steam Deck will reboot.
At this point, the Steam Deck is all ready to go with a shiny new SSD inside of it. Have fun playing your games while (hopefully) having more storage space than you previously did with the old SSD.
How to upgrade Steam Deck SSD FAQ
People undoubtedly have questions when it comes to the Steam Deck’s SSD, so I’ve rounded up the most commonly asked questions and provided answers.
What SSD is compatible with Steam Deck?
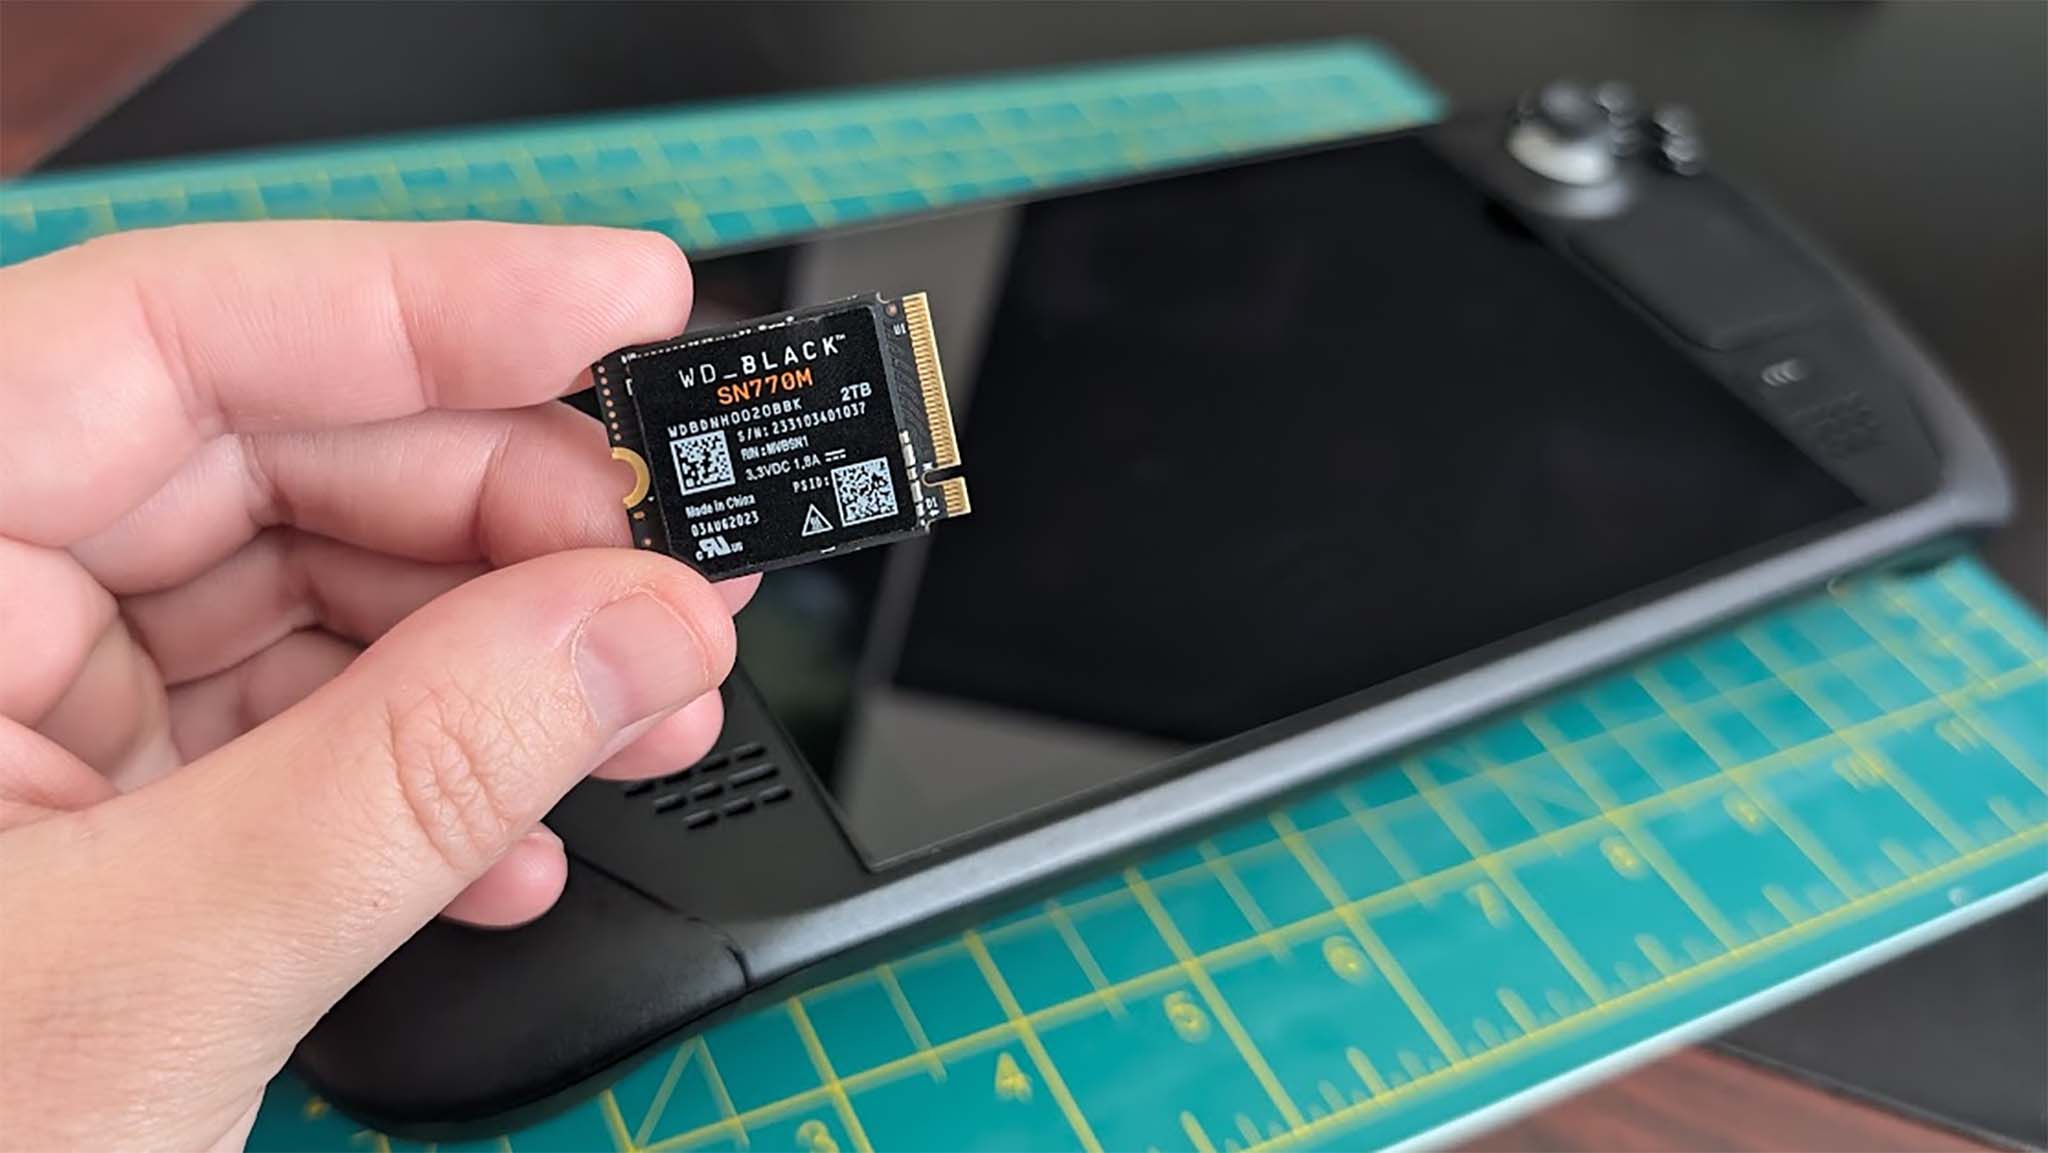
Both the Steam Deck LCD and Steam Deck OLED both have a PCIe 3.0 M.2 NVMe SSD slot, which is ideal for the smaller SSD size. As such, the WD_BLACK SN770M NVMe is an ideal SSD for the Steam Deck and many other gaming handhelds. It’s available in 512GB, 1TB, or 2TB capacities.
Should I backup my Steam Deck before upgrading the SSD?
Yes. It’s a good idea to clone or back up the old Steam Deck SSD before replacing it with an upgrade. That way, your game data for sure won’t be lost.
What size SSD should I put in Steam Deck?
While there are 512GB SSDs out there, you’ll be better served if you go for a 1TB or 2TB SSD. More storage capacity means there is room for more games, which will make it so you don’t have to rearrange your storage space nearly as often.
Enjoy having more storage space on your handheld
Top Steam Deck recommendations
The Steam Deck becomes a lot more convenient to use when you have enough storage space to handle a decent game library right on the device. If you happened to purchase a lower storage capacity option, then it’s nice knowing you have the option to install a larger SSD like the Western Digital SN770M.
Thankfully, the SSD installation process really isn’t that difficult. As long as you take the time to clear a clean space and are gentle when making the swap, you’ll have more storage space in your gaming handheld in no time.
Enjoy being able to download more games locally without having to worry about deleting or otherwise rearranging your data as much.


