

On Windows 11, File History is a legacy feature that can automatically create a backup of your files at specific intervals throughout the day to protect your data from accidental editing, deletion, or damage.
When you configure File History on your computer, by default, the feature automatically backs up files located in the profile folders, such as Documents, Music, Pictures, Videos, Desktop, Contacts, Favorites, and OneDrive (as long as the files are available offline).
Also, File History requires a separate storage location for your backups, meaning you must connect an external hard drive with enough storage to your computer to set up the feature.
In this how-to guide, I’ll outline the steps to set up and recover files using File History on Windows 11.
How to backup and restore files using File History
Once you connect the external storage, you can proceed with the setup process. Here’s how.
File History setup
To set up File History, connect a USB hard drive and use these steps:
- Open Start.
- Search Control Panel and select the top result to open the app.
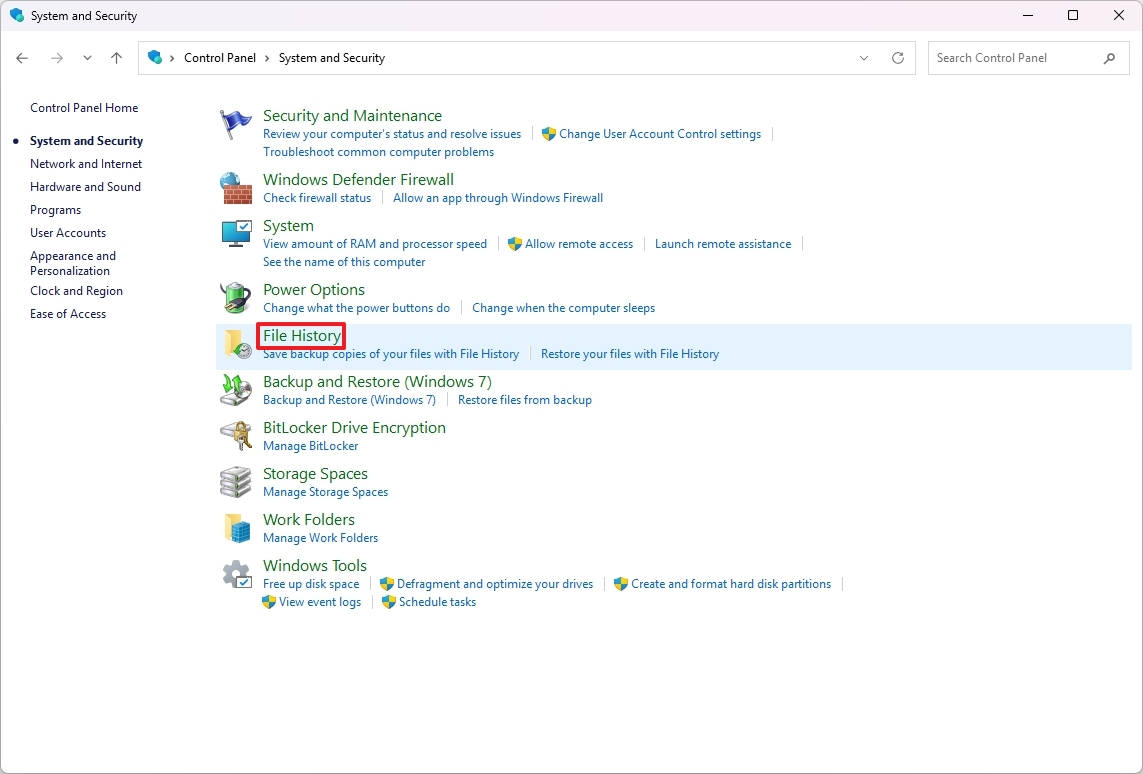
- Click on System and Security.
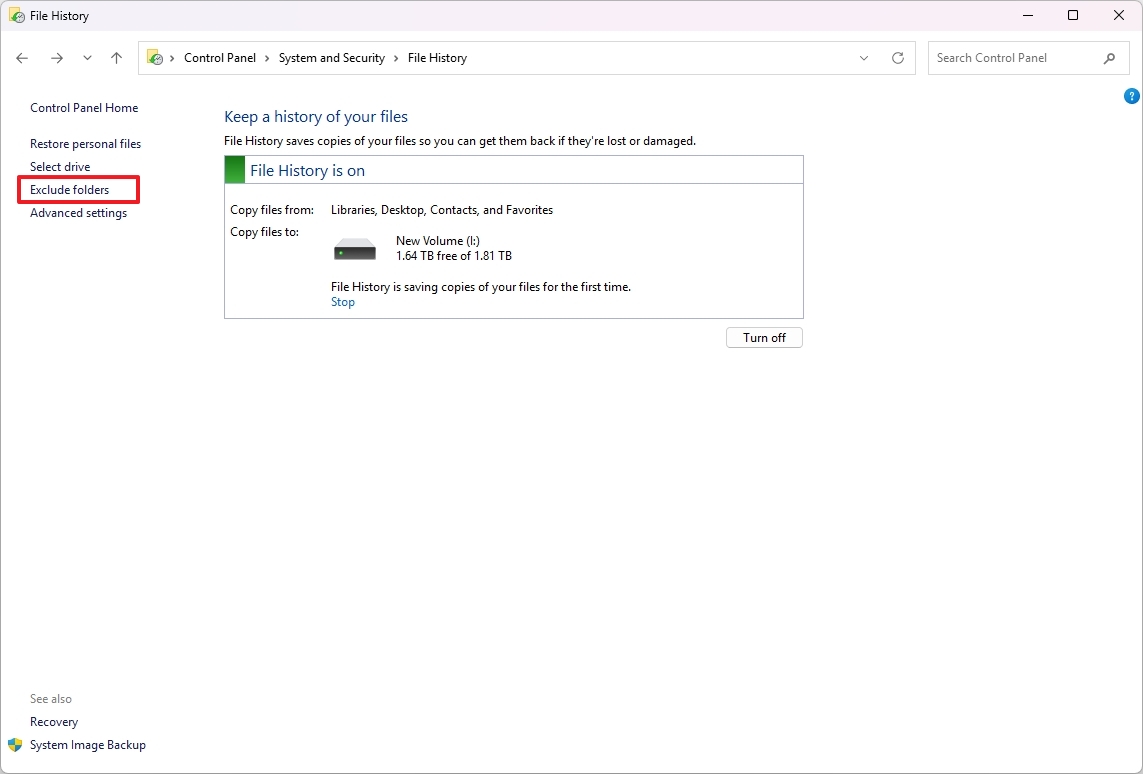
- Click on File History.
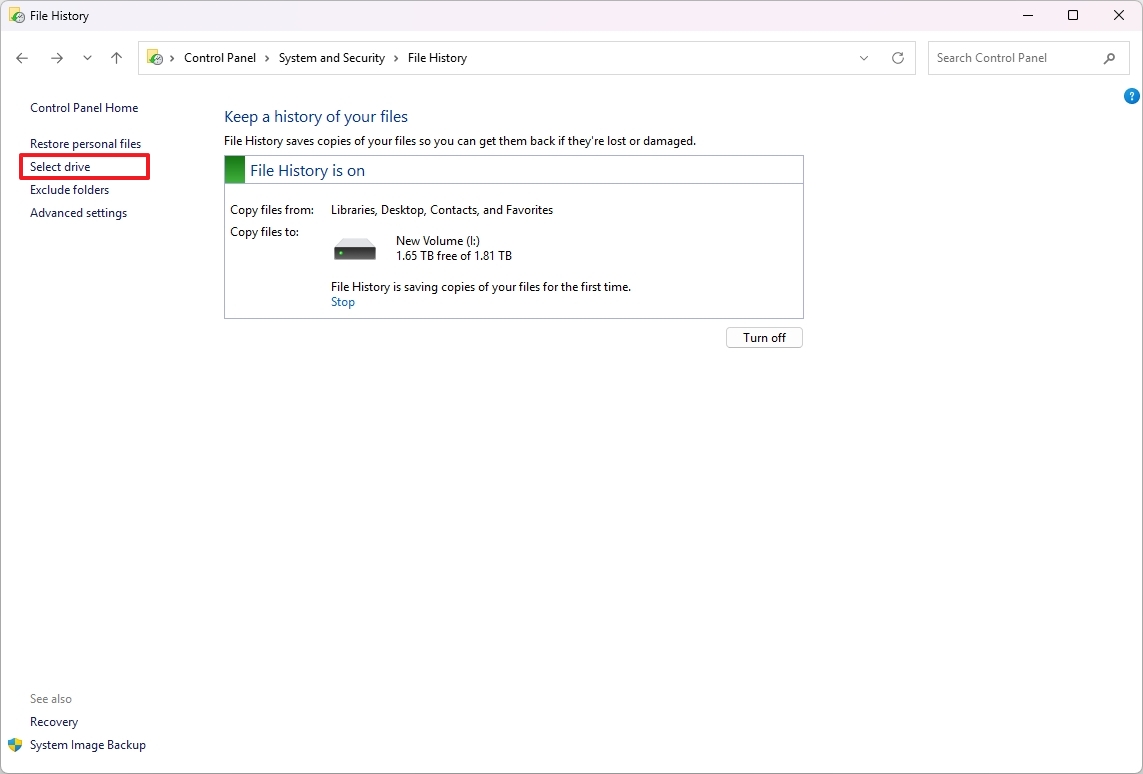
- (Option 1) Click the Turn on button to enable the feature with the default drive selection.

- (Option 2) Click the Select drive option from the left pane.
- Choose another drive to store the backups.
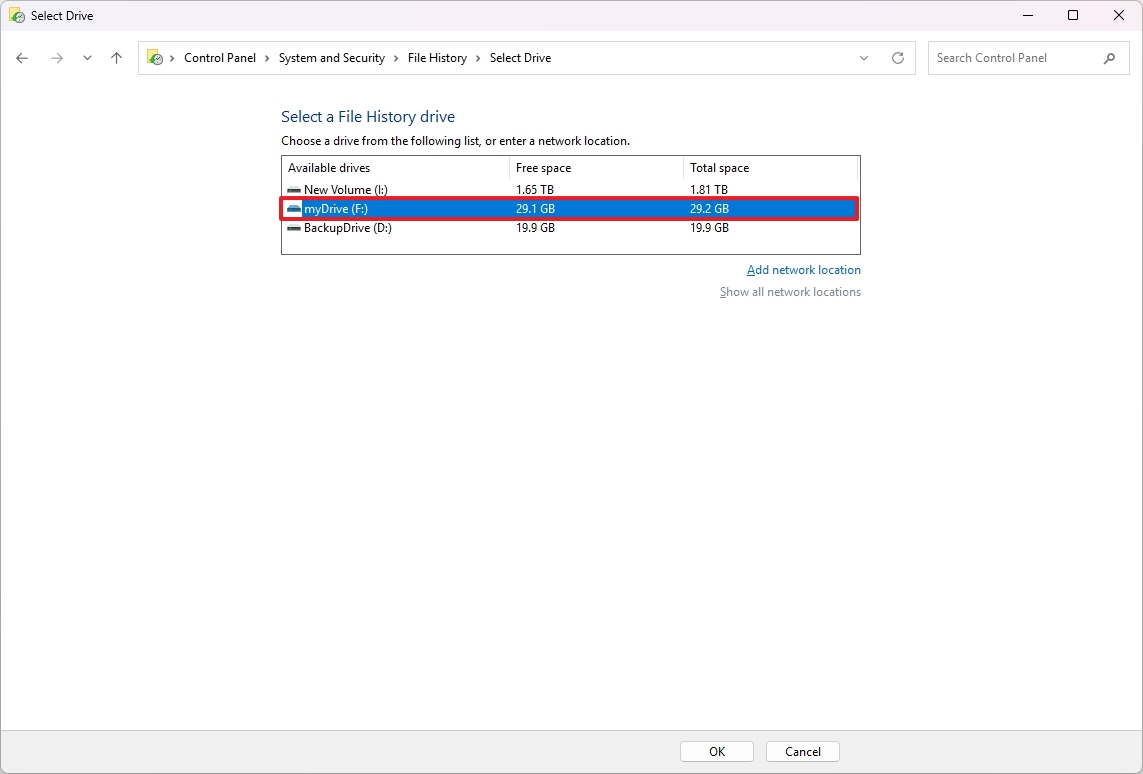
- Click the OK button.
- (Optional) Click the Advanced settings option from the left pane.
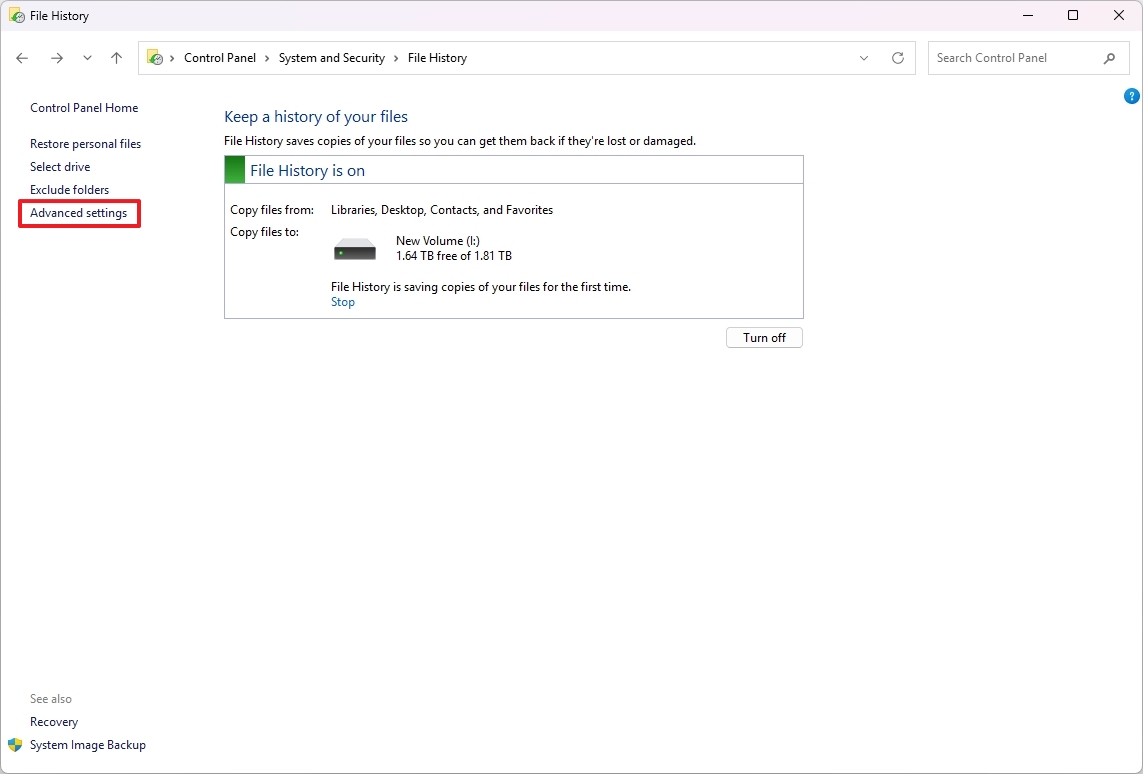
- Choose how often File History saves copies of your files.
- Choose how long to keep saved copies of your files.
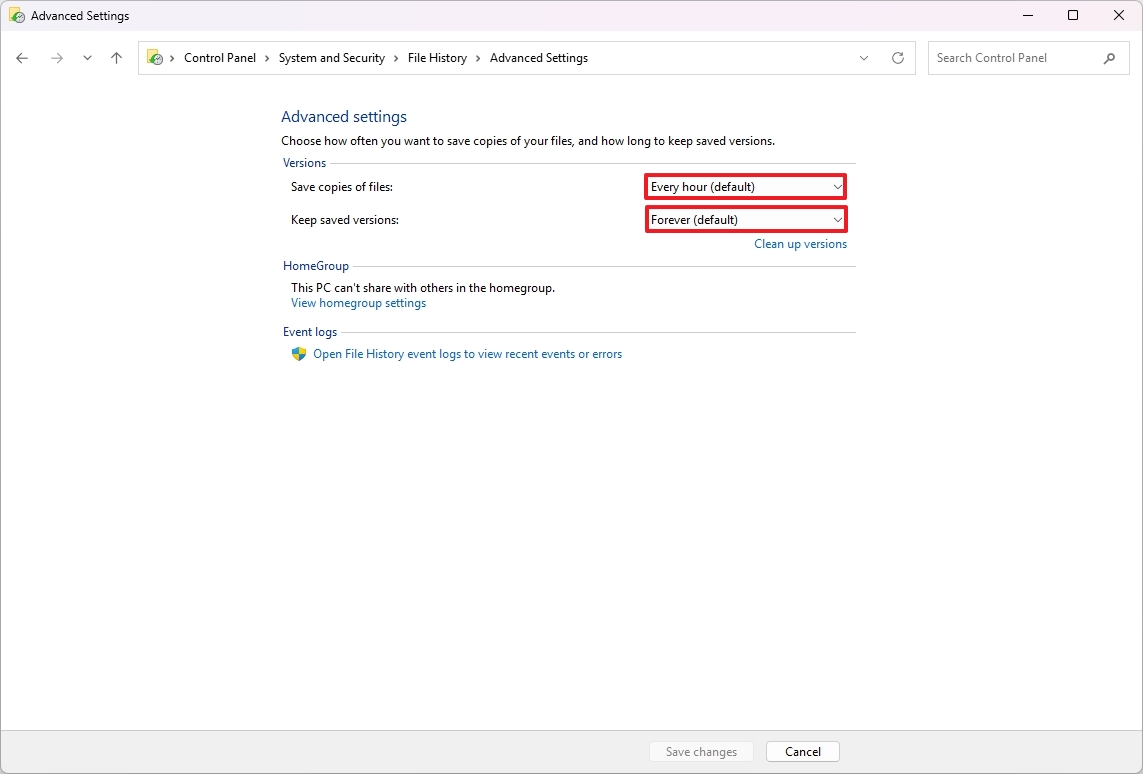
- Click the Save changes button.
- (Optional) Click the Exclude Folders option from the left pane.
- Click the Add button.
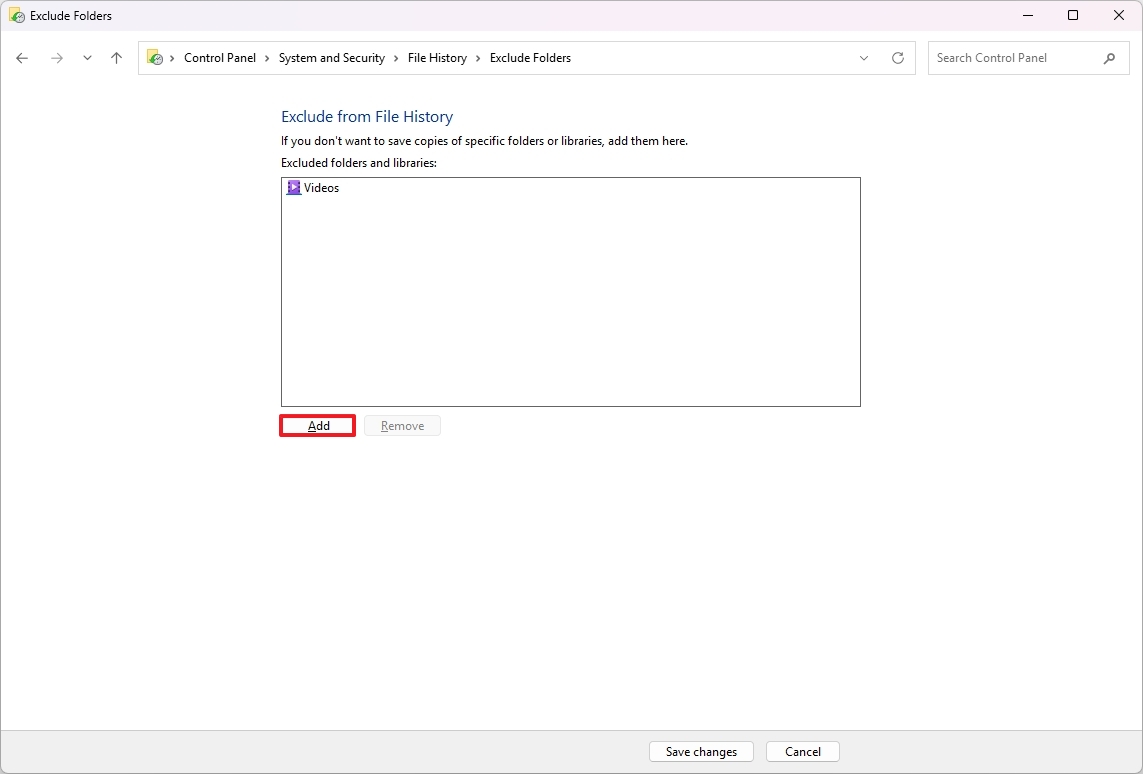
- Choose the folders to exclude from File History.
- Click the Select Folder button.
- Click the Save changes button.
After you complete the steps, the feature will start backing up your files at the intervals you defined.
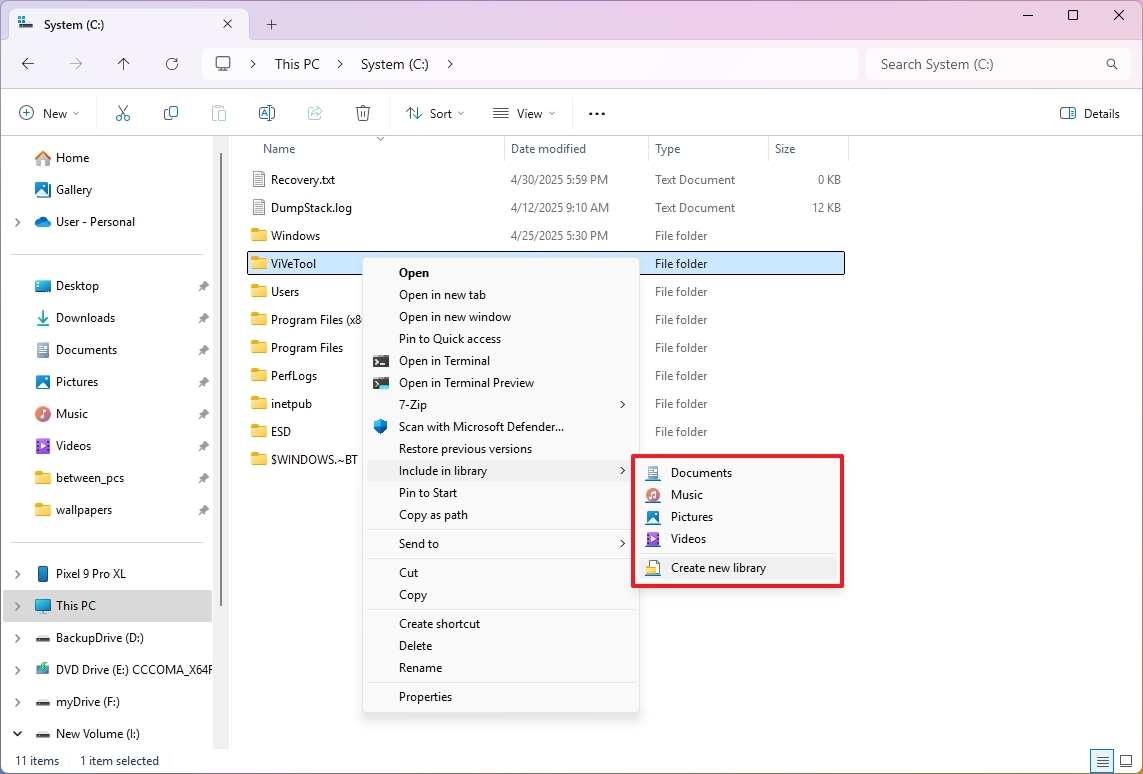
Since File History only backs up files in specific locations, if you have files and folders stored in other places that you want to back up, you need to add them to one of the “Libraries” manually. You can do this by right-clicking on the folder, selecting “Show more options,” then “Include in library,” and choosing an existing library or creating a new one.
File History restoration
To restore documents, pictures, videos, and other file types using File History, use these steps:
- Open Start.
- Search Control Panel and select the top result to open the app.
- Click on System and Security.
- Click on File History.
- Click the “Restore personal files” option from the left pane.
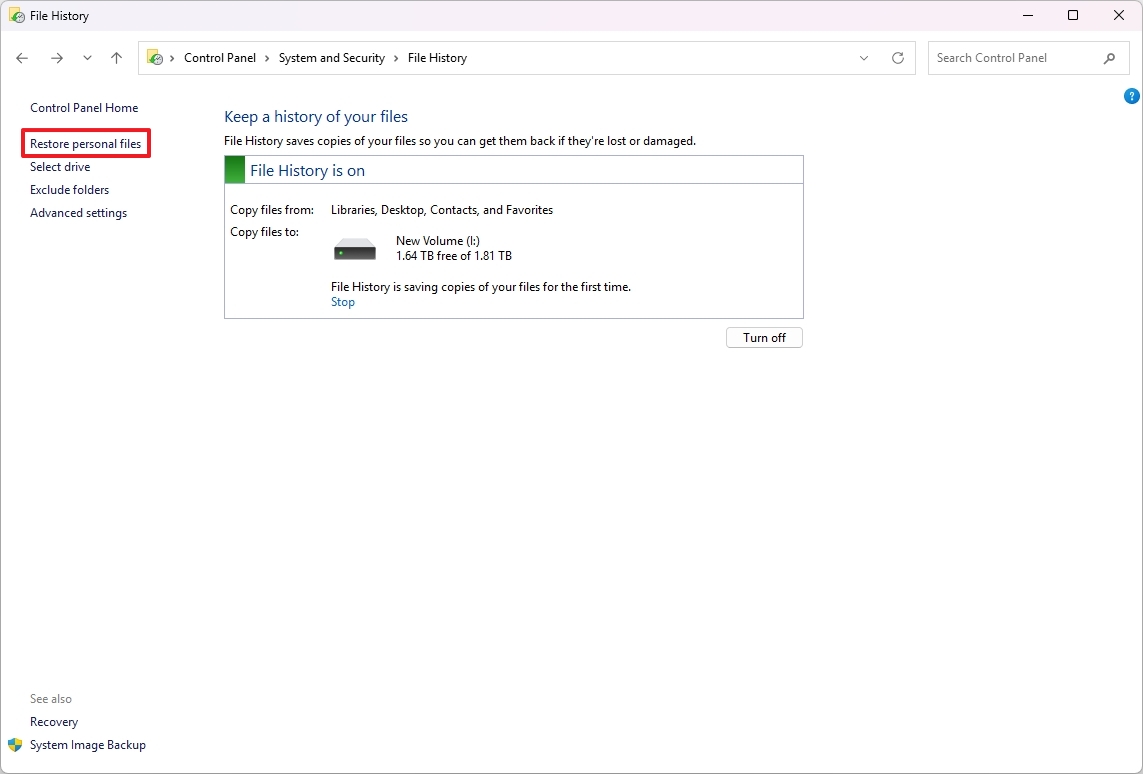
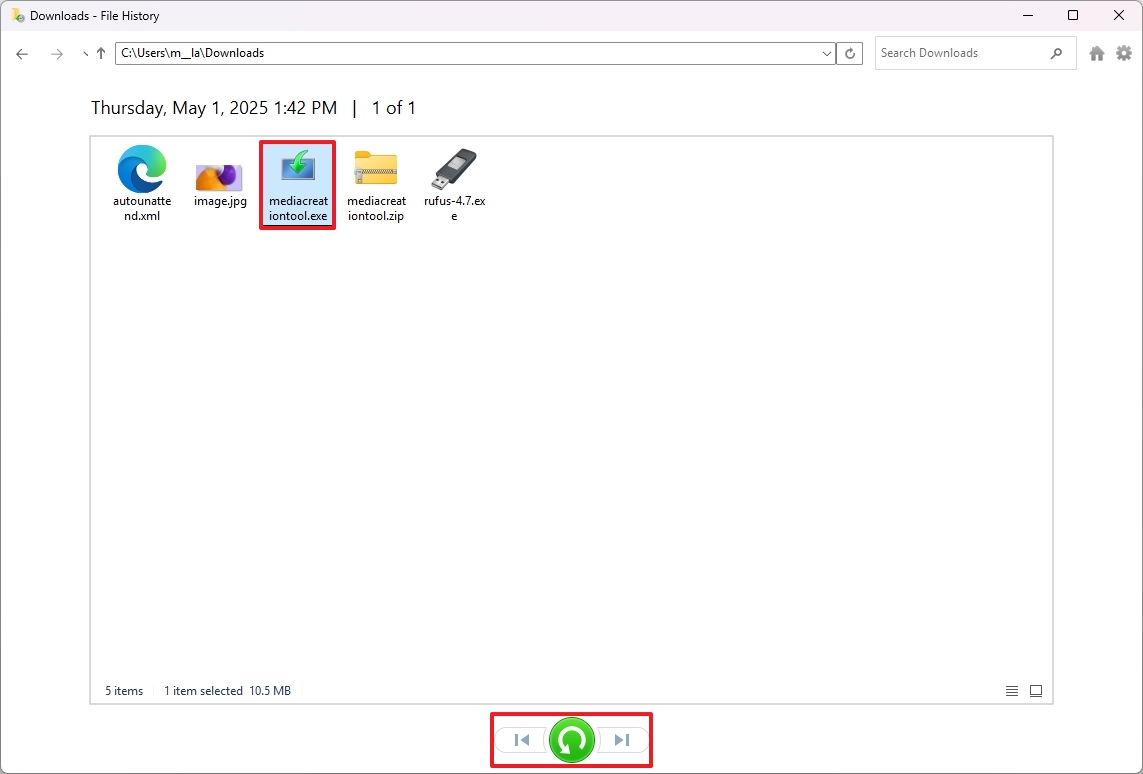
- Click the left and right buttons at the bottom to navigate the File History timeline.
- Choose the files you want to recover.
- Click the Restore button.
Once you complete the steps, the file will be restored to the same or an alternative location, depending on your restoration option.
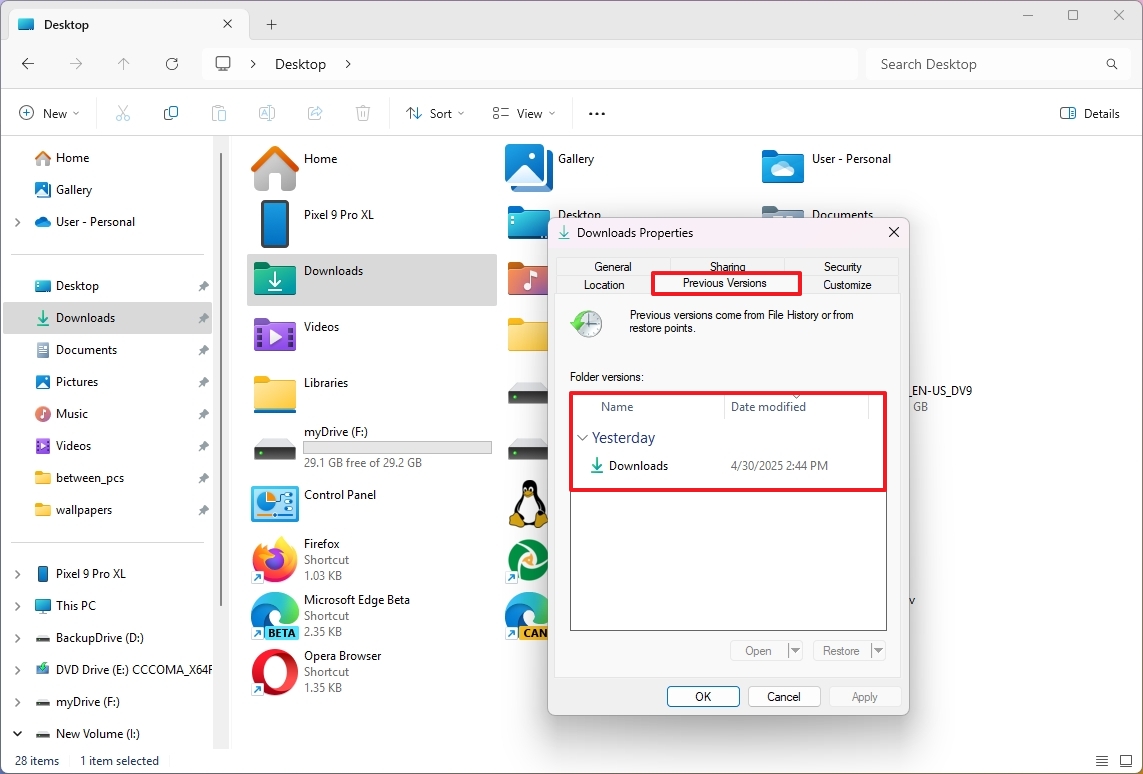
Alternatively, you can also right-click a folder and choose the “Properties” option, and then from the “Previous Versions” tab, you can select the version of the file you want to restore.
File History storage cleanup
If you notice that the drive is filling up quickly, you can delete previous versions of the backup. Also, you can change the retention setting to a shorter schedule to minimize the impact of storage usage.
To free up space used by File History, use these steps:
- Open Start.
- Search Control Panel and select the top result to open the app.
- Click on System and Security.
- Click on File History.
- Click the Advanced settings option from the left pane.
- Change the backup frequency to fewer times a day, depending on your current configuration.
- Change the backup retention to, for example, six months instead of forever.
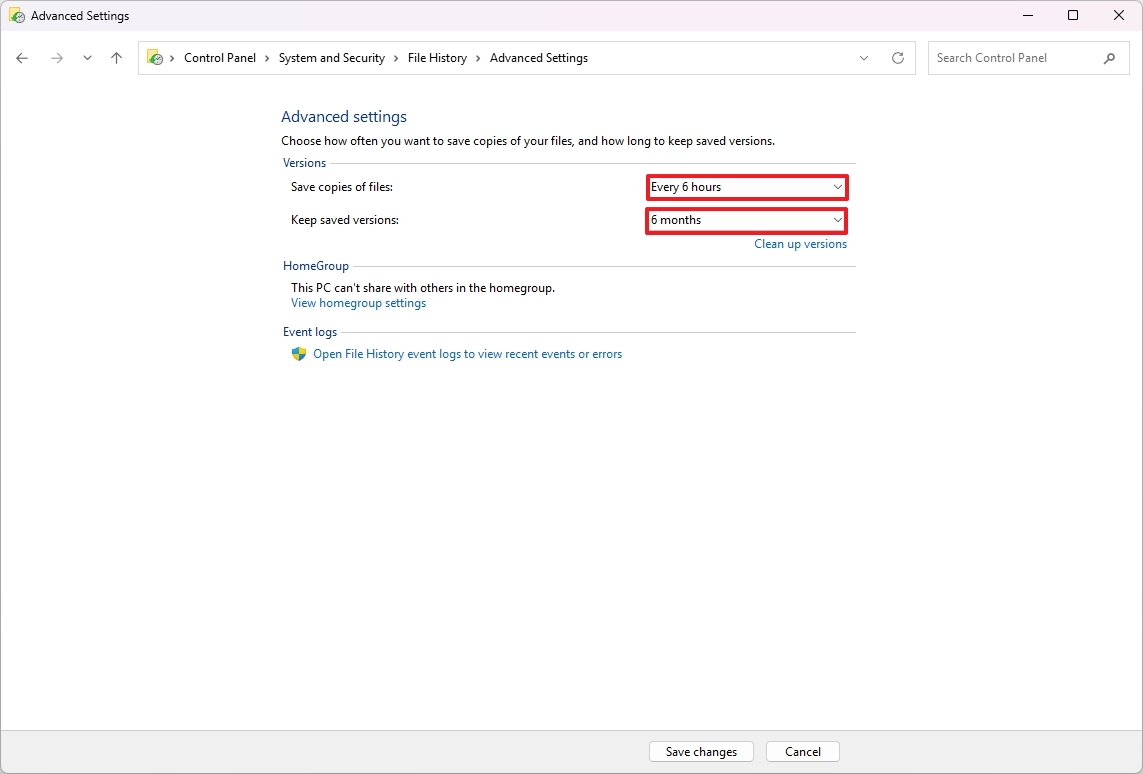
- Click the “Clean up versions” option.
- Choose the files to delete according to their age.
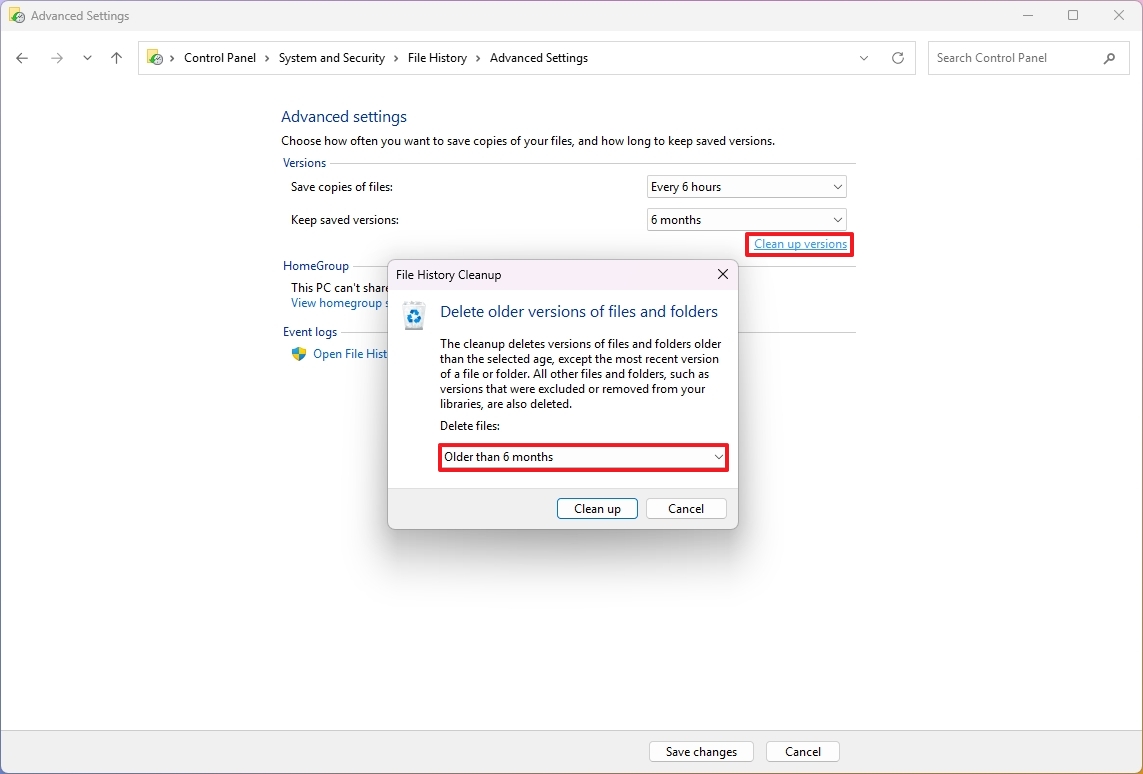
- Quick tip: The action can take a long time, depending on your selection.
- Click the Clean up button.
After you complete the steps, File History will reduce the storage usage in the backup drive.
Although File Explorer can help you protect your files, it’s not recommended as a primary backup solution since you cannot restore all your files in a new installation of the operating system on the same or a different computer.
Nowadays, Microsoft leans towards OneDrive for cloud-based backups, but File History remains a functional tool for local backups of your files.
As part of your backup strategy, regularly create a full system backup in case you need to recover from a critical failure.
More resources
Find in-depth guides, troubleshooting tips, and the latest updates on Windows 11 and 10 here:


