If you create a Word document where you want to include page numbers, the author’s name, the document title, or similar details without distracting from the content, you can use headers and footers.
As the names imply, headers appear at the top of the document and footers appear at the bottom. The items that you include in the header or footer are dimmed in appearance. By default, headers and footers display on every page of your document. However, you can alternate by even and odd pages or have the first page of your document different than the rest.
Let’s look at how to add headers and footers in Word as well as customize them to fit your needs.
Add a premade header or footer in Word
Because the process is the same for both headers and footers, you can follow these same steps to add either one or both to your document.
Word provides premade headers and footers that give you a layout such as columns or a banded strip. You can then use the suggested details or add your own.
Step 1: Go to the Insert tab and head to the Header and footer section of the ribbon.
Step 2: Open the Header or Footer drop-down menu and pick the layout you want. You’ll notice some layouts have preset details like document title or page number.
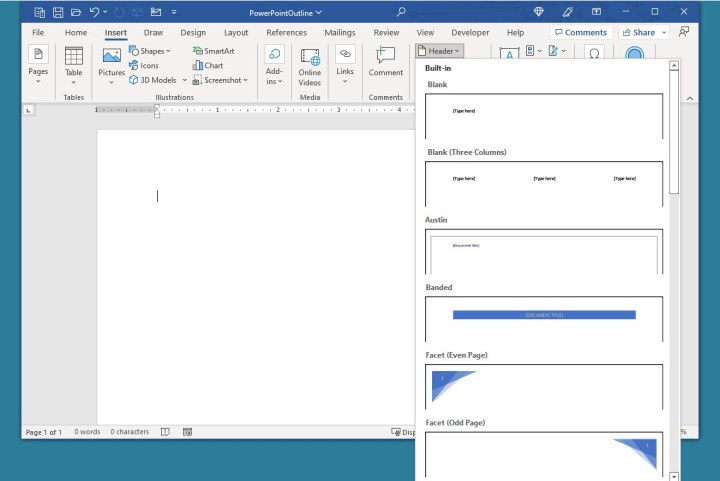
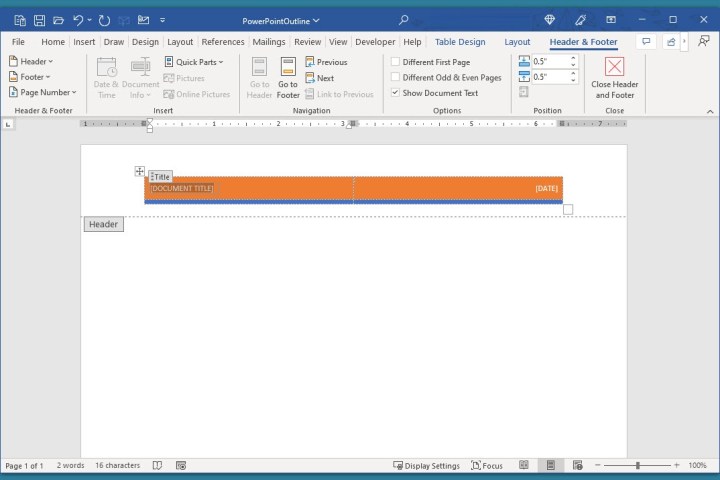
Step 3: After you select the layout, you’ll see the header or footer open automatically. Enter the details into the highlighted text area.
Step 4: When you finish customizing one or both locations, pick Close header and footer in the ribbon or double-click a spot outside of the header or footer area in your document.
Add a blank header or footer
You don’t have to start with a premade layout for your header or footer. You can simply open one or the other and enter the details you want.
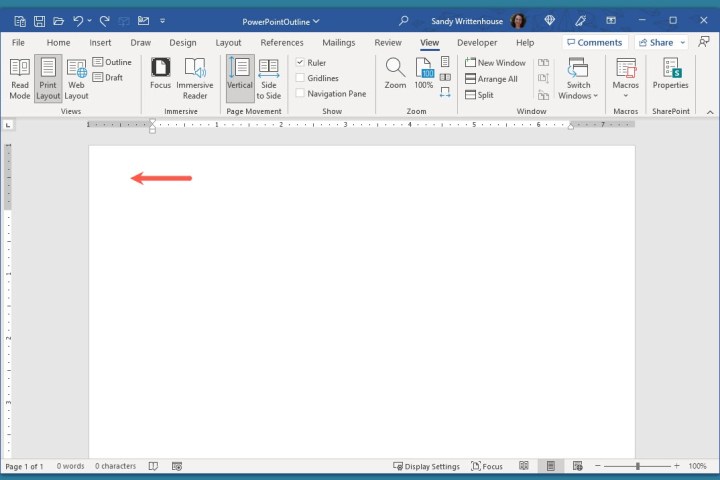
Step 1: Go to the very top of your document for a header or very bottom for a footer.
Step 2: Double-click inside the area of the top or bottom margin.
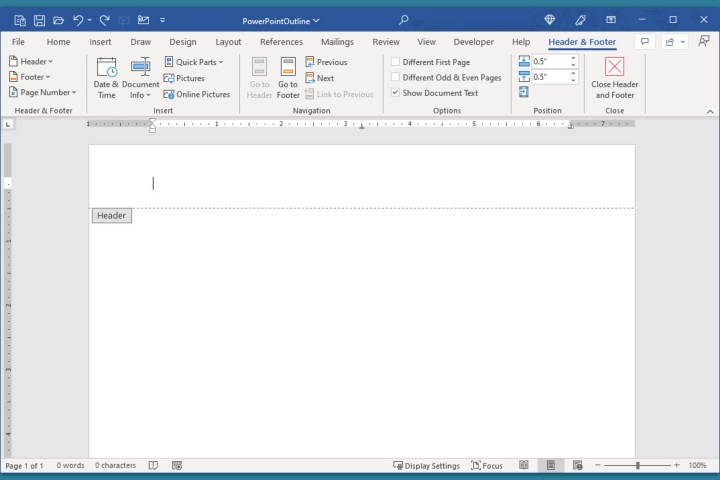
Step 3: When the header or footer area opens, place your cursor inside and enter the details you want.
Step 4: After you finish, pick Close header and footer in the ribbon or select a spot in your document.
Customize a header or footer
You can insert fields for document details, change the pages you want to display a header or footer, and adjust the size of the header or footer area.
Step 1: Open the header or footer area by double-clicking the spot inside the top or bottom margin. This displays the Header and footer tab with tools in the ribbon.
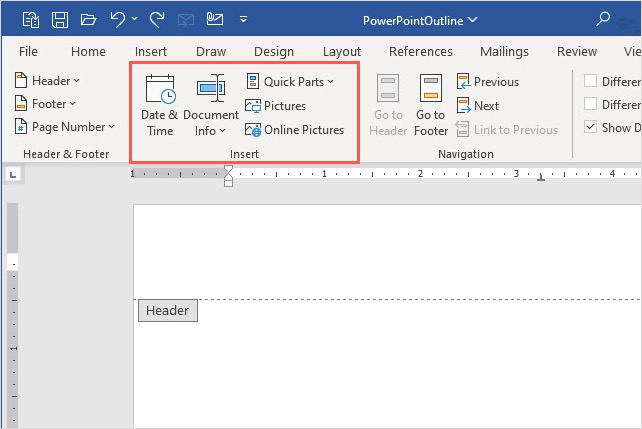
Step 2: To add the date and time, a document field, or an image, select one of these options from the Insert section of the ribbon.
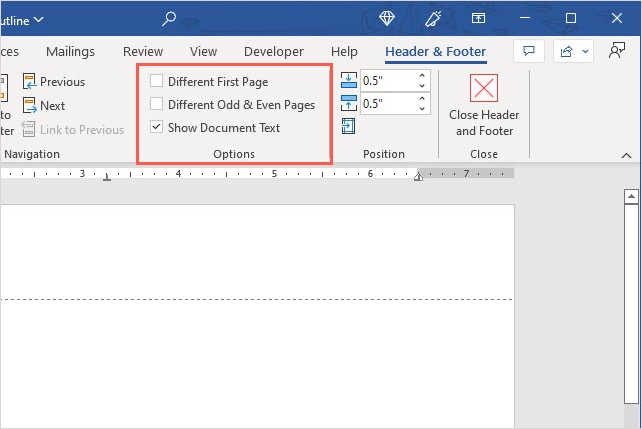
Step 3: To change the pages where you want the header or footer to appear, go to the Options section of the ribbon. Check the box for Different first page to use a specific header or footer on the first page only. Or, check the box for Different odd and even pages to use certain headers on every other page.
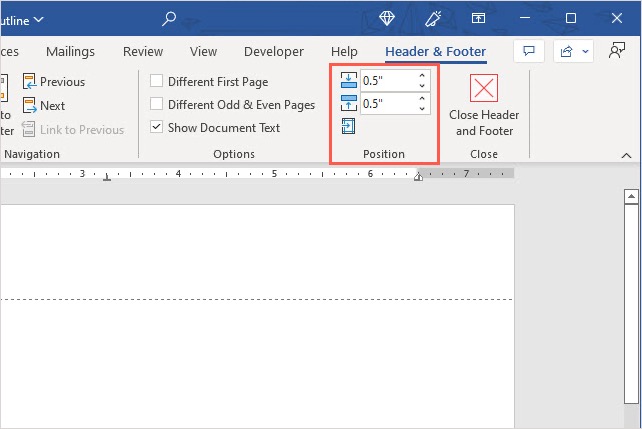
Step 4: To adjust the size of the header or footer, use the boxes in the Position section of the ribbon. You can enter a measurement into the top or bottom box or use the arrows to increase or decrease the size in small increments.
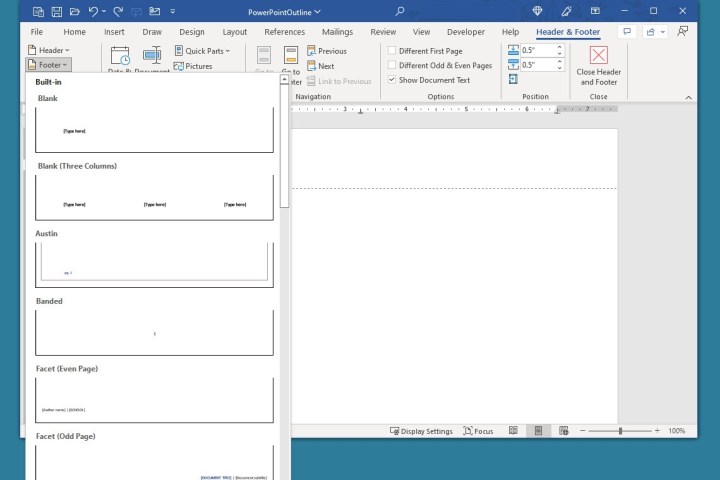
Step 5: To use a layout or include page numbers with a certain layout, use the drop-down menus on the left side of the ribbon in the Header and footer section. You’ll see the same options as the first set of steps here for using a premade header or footer as well as page numbers.
Remove a header or footer
If after you add a header or footer to your document, you want to remove it, you can do so easily.
Step 1: Go to the Insert tab and head to the Header and footer section of the ribbon.
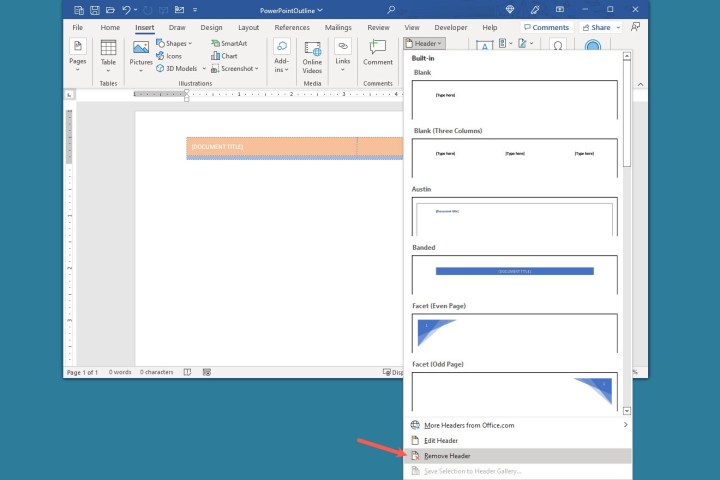
Step 2: Open the Header or Footer drop-down menu for whichever area you want to remove.
Step 3: Select Remove header or Remove footer.
Headers and footers in Word give you the ideal spots for document details you want to display. Whether page numbers, the date, title, or even a company logo, take advantage of those spaces in your next document.
For more, look at ways to improve your workflow in Word or some things you might not know you can do in Word.
Editors’ Recommendations


