Spotlight is Apple’s smart search indexer for macOS. Here’s how to use its metadata utilities to get more information about your documents.
Spotlight runs in the background on your Mac or iOS device and silently indexes and scans the contents of your documents, so when you search for something, it can find results quickly.
The main background daemon in Spotlight is called corespotlightd, and it can consume up to 8-10% of CPU time when running at full-throttle.
On Apple Silicon Macs, corespotlightd can run up to four threads at once during peak background indexing.
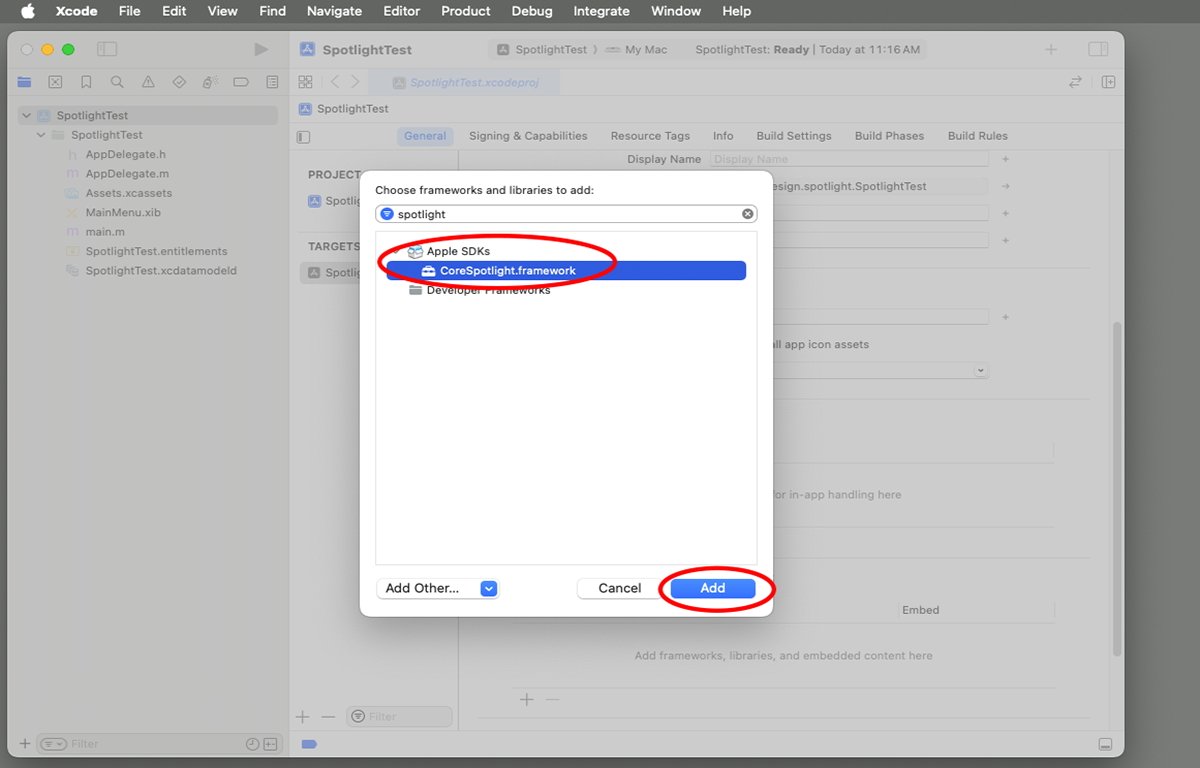
If you are an Apple developer, you can add the Core Spotlight framework to your app and have it index your app’s content internally, so that content is made available automatically to app users.
There are additional Spotlight APIs in the Foundation framework that allow you to perform local searches on Spotlight data from within your app.
You’ll want to add the Core Services.framework to your Xcode project too, since it is where the File Metadata APIs reside.
There are also iCloud Spotlight features that we won’t cover here.
Setting which volumes get indexed
On macOS, you can indicate which volumes you want Spotlight to index and which ones you don’t. By default if you don’t exclude volumes from Spotlight, they will be indexed.
If you exclude volumes from the Spotlight index, their contents won’t be displayed in Spotlight searches.
If you have more than one volume on your Mac’s drive, or if you have external drives attached, you can enable or disable Spotlight (and Siri) on each.
To do so, first open System Settings in macOS by selecting System Settings from the Apple menu in the Finder’s menu bar.
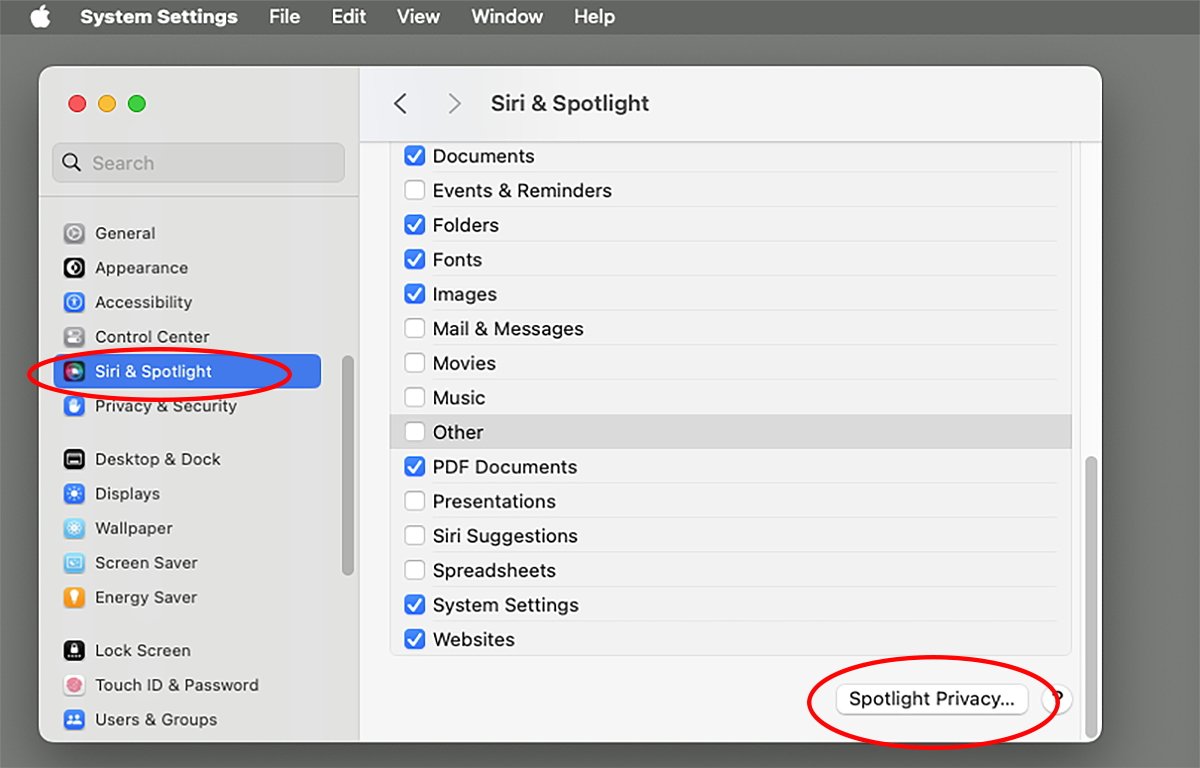
On the left side in System Settings, scroll down to and click Siri & Spotlight. In the Siri & Spotlight pane, you can turn Siri on and off, set a keyboard shortcut, set the language, and how Siri handles history.
Below that is a Spotlight section. Here you can set which kinds of documents you want Spotlight to index.
If you turn a particular type of document or data off in this section, Spotlight will ignore all documents or data of those types during indexing.
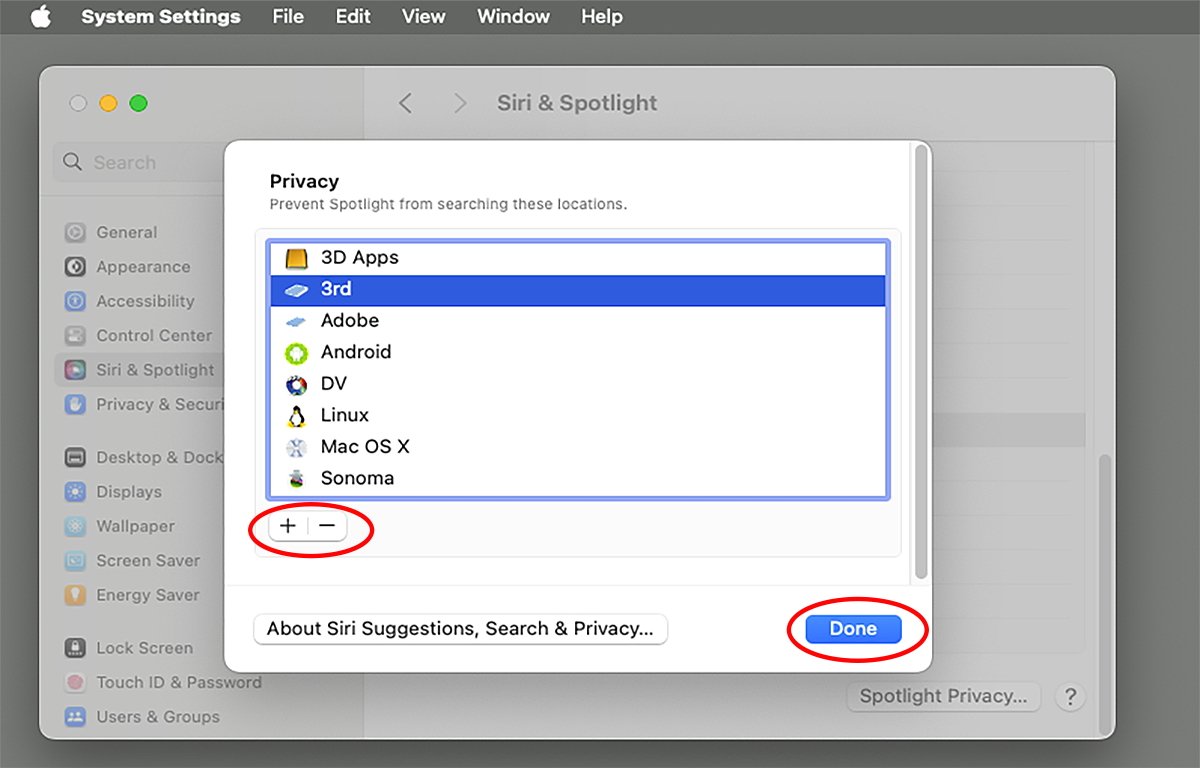
If you scroll all the way to the bottom of the pane, you’ll see a button labeled Spotlight Privacy. Click it to open the Privacy sheet.
The Privacy sheet contains a list of all storage volumes Spotlight is currently excluding from indexing – which in most cases by default is either no volumes or only the Startup Disk.
To add or remove volumes to the Privacy sheet, you can drag them into or out of it, or you can click the + or – buttons below the list.
Once a volume is added to the list, Spotlight stops indexing it.
When you’re happy with the Privacy exclusion list, click Done to dismiss the sheet. Close System Settings.
When corespotlightd indexes your volumes’ data it searches the contents of files, but it also searches and indexes the metadata. Metadata can be defined as informational data associated with files, but not contained within the files themselves.
Metadata includes (but is not limited to) things such as file creation and last modification date, size, version, kind, name, and Finder comments displayed in Get Info windows.
Spotlight uses the File Metadata API in Apple’s Core Services framework to find and read metadata.
There are four main data types in the File Metadata API:
- MDSchema
- MDItem
- MDLabelDomain
- MDQuerySortOptionFlags
We won’t get into all the details of the data types, but the main type that stores a reference to a file system item and its metadata is the MDItem type.
Using an MDItem and Core Services APIs, you can retrieve, sort, and store metadata for items in local filesystems.
Spotlight importers
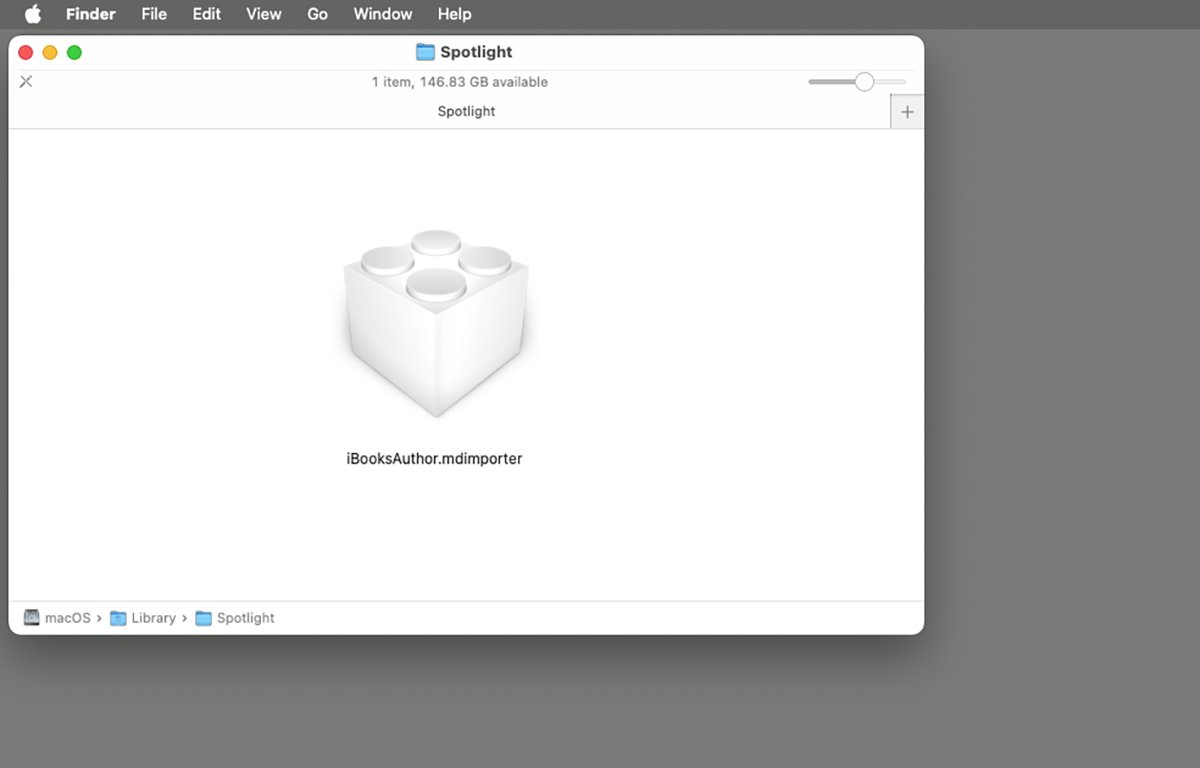
If you open the /Library/Spotlight folder on your Mac’s Startup Disk, you may notice one or more files with an .mdimporter extension. These are Spotlight metadata importer plugins.
For example, Apple’s Pages and original iBooks Author apps have .mdimporter plugins. So do some of Microsoft’s 365 apps. Other apps provide them as well.
You can write custom .mdimporter plugins in Apple’s Xcode, place them in the /Library folder, and Spotlight will use them to import metadata from files supported by your apps.
The .mdimporter plugins are essentially bundles of code and info which tell Spotlight what kinds of metadata can be imported, and how to access that data. Using a custom .mdimporter you can allow your app to store additional metadata and provide it to Spotlight for indexing.
Apple also has a (somewhat older) developer document titled Spotlight Importer Programming Guide which shows you how to write an .mdimporter.
Apple and third parties also provide several command-line (CLI) tools you can use in macOS’s Terminal app to access Spotlight metadata in filesystem objects stored on your devices.
Spotlight stores its indexed metadata in a local database on each mounted disk volume. Spotlight metadata databases are called stores.
Each store contains the indexed metadata on each filesystem object along with some additional data that makes Spotlight searches fast. By storing and updating file metadata in a separate database, Spotlight can search and retrieve data much faster since it doesn’t have to traverse the filesystem hierarchy each time.
On APFS volumes Spotlight also uses some of the internal volume metadata combined with store metadata for faster and more accurate search.
There are many Spotlight CLI utility commands available, but the four key ones you’ll most likely want to use are:
- mdutil
- mdimport
- mdls
- mdfind
You can get usage info about any of these in Terminal by opening Terminal, then typing man followed by a space, the name of the utility, then pressing Return on your keyboard.
Note that some of the commands require a filesystem parameter after the command name and some don’t. For example mdutil doesn’t, but mdattributes does.
To exit the man (manual) system in Terminal press Control-Z on your keyboard.
mdutil
The mdutil command is a simple utility that helps manage the Spotlight metadata stores on your Mac. Note a volume must be mounted on the Desktop in Finder for mdutil to work on it.
For example, using mdutil you can turn Spotlight stores for specific volumes on and off, disable searches on that one volume, erase the store for a volume, display the Spotlight indexing status for a volume, and more.
You can also apply specific commands to Spotlight stores on each indexed volume, and flush Spotlight store caches to force direct use of the store itself.
Type man mdutil and press Return on your keyboard in Terminal for full mdutil usage.
mdimport
mdimport is a Spotlight CLI utility that allows you to manually import all the searchable metadata from a filesystem hierarchy into a Spotlight metadata store. It uses the .mdimporter plugins mentioned above to import and search data.
You can use mdimport to print all metadata items stored for each indexed item in a filesystem hierarchy – except for items stored with the kMDItemTextContent key since those items contain the actual text content of filesystem items.
You can also use mdimport to test .mdimporter plugins you or your team write.
Type man mdimport and press Return on your keyboard in Terminal for full mdimport usage.
mdls
mdls is a utility that lists metadata attributes for a single file on disk using a predefined metadata key (or ‘tag’). Apple defines most metadata keys used by Spotlight but if you write your own .mdimporter you can define your own keys.
Type man mdls and press Return on your keyboard in Terminal for mdls usage.
mdfind
mdfind is a flexible and powerful utility which allows you to find all objects in a filesystem hierarchy that match specific metadata you specify – by searching the Spotlight store(s) on a particular volume.
Using various options to mdfind you can start a search at a specific place in a filesystem hierarchy, specify which metadata items to match, and specify specific filenames to match.
mdfind will return only the results of files that match the search criteria you specified.
You can cancel an mdfind search while it is running by typing Control-C on your keyboard.
There is also an -interpret flag to mdfind which allows you to specify a natural language string just as if you had typed it into Spotlight in the Finder. mdfind will interpret the string and adjust its search accordingly.
You can also combine mdfind with other standard UNIX utilities such as grep to perform complex searches and pipe the results to standard output including to a file.
Type man mdfind and press Return on your keyboard in Terminal for mdfind usage.
There are several additional Spotlight utilities not mentioned here which we’ll cover in a future article.
Attribute keys
Spotlight and the Core Services File Metadata work by storing each metadata item in a store using a unique key or string. Each key tells Spotlight and the API which metadata item you are interested in.
Apple defines the metadata keys as Core Foundation strings of type CFString – a common Core Foundation string type used in nearly all Apple-related software. Using the Core Foundation API you can also manipulate CFStrings directly from code.
Apple lists most of the metadata attribute keys in the File Metadata API documentation mentioned above. Most of the keys begin with the prefix kMD (short for ‘constant’ – ‘metaData’).
To use the File Metadata API, you usually use one of its functions or one of Spotlight’s and specify a metadata key to indicate which piece of metadata info you want to use. Keys can be used both when retrieving and writing metadata.
For example, in Swift, the metadata API key for the ‘date added’ metadata item for any given filesystem object is defined as:
let kMDItemDateAdded: CFString!
const CFStringRef kMDItemDateAdded;
(In Objective-C CFStringRef is the opaque Core Foundation type for a CFString).
If you’re an Apple developer and use the File Metadata API, you’ll find yourself using the metadata keys often.
For audio/video media files, Apple provides one additional API in the AVFoundation framework.
This is for several reasons, such as how media metadata usually has to be loaded asynchronously at runtime in order to prevent latency during media playback, while some metadata is required by industry media standards. Some laws in various regions also require owner and author metadata to be embedded in media files in certain ways.
The central Apple metadata item data type in AVFoundation is called an AVMetadataItem. AVFoundation provides various APIs for accessing and writing an AVMetadataItem.
There is also a corresponding set of AVMetadataItem attributes (keys) used to access an AVMetadataItem.
Each AVFoundation media asset is defined by a data type of AVAsset.
Tracks within each asset are defined by Apple as an AVAssetTrack.
Each AVAsset or track can have one or more AVMetadataItem attached to it.
You can create AVAsset objects in code using various AVFoundation APIs which can load them from file (for example, a QuickTime or .mp3 file), or even from an Apple HLS live stream.
You should also check out the asynchronous media loading API implemented as the AVFoundation protocol AVAsynchronousKeyValueLoading.
Once you have an AVAsset or AVAssetTrack object in code, you can manipulate its metadata attributes at will and write them back to their source.
AVFoundation is a complex framework and there are hundreds of keys for its API.
Spotlight metadata seems like a complex topic at first, but its API is fairly straightforward to use. The CLI utilities are also simple and easy to understand after a little practice.
Using these tools you can customize and search your Spotlight data across all indexed volumes without too much effort.


![9to5Rewards: MacBook Pro giveaway + Chargeasap Connect Pro 100W cable [Giveaway]](https://techtelegraph.co.uk/wp-content/uploads/2024/06/Jeffs-Studio-Setup-14-inch-MacBook-Pro-03-218x150.jpg)