If your Mac is having problems, macOS has multiple keyboard combinations that you can hold to recover your system, start in safe mode, run diagnostics, and more. Here’s how to use them.
Apple’s macOS has long provided many key combinations you can hold down when your Mac starts. When starting up your Mac, you might want to choose a different Startup Disk, boot into Recovery mode, into a Boot Camp Windows volume, or use one of Apple’s built-in Mac utilities. Startup key combinations allow you to choose what runs when your Mac boots.
For all startup key combinations, the exact keys to press may be different depending on whether you’re using an Apple Silicon-based Mac or an Intel Mac.
Startup Disk Selection
Startup Disk selection is different depending on whether you’re using an Intel-based Mac, or an Apple Silicon Mac.
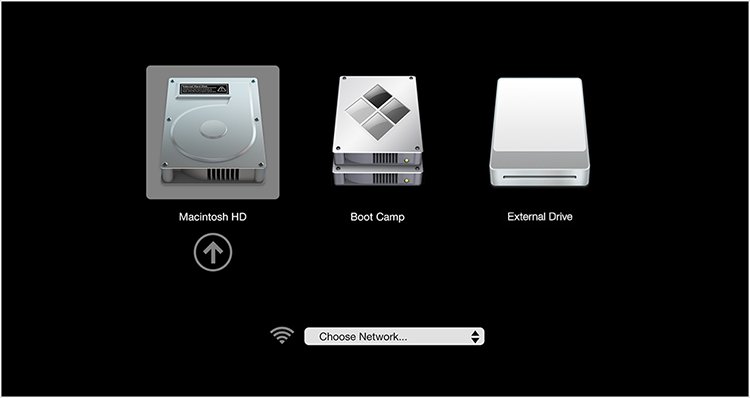
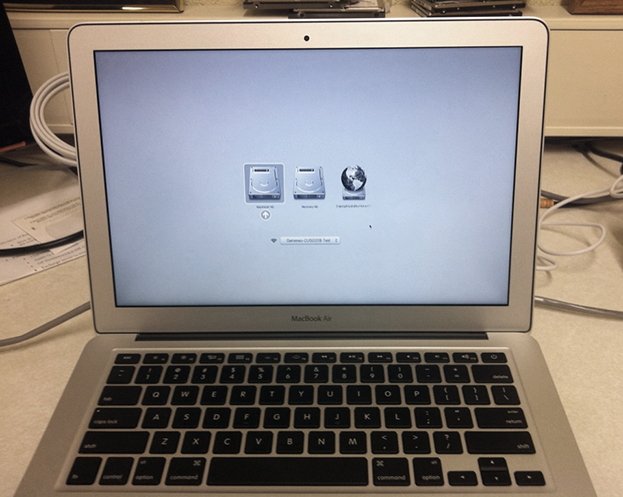
On Intel Macs, if you hold down the Option key before your Mac boots but after you power it on, you’ll get a graphical startup disk menu selection which allows you to interrupt startup to select which volume to start up from. This menu lives in your Mac’s firmware and allows you to change Startup Disks in case your normal Startup Disk becomes unbootable for some reason:
Internal drives are listed first, then USB, Thunderbolt, FireWire, and other external drives. If any network-bootable drives are available, they are listed last.
On Apple Silicon Macs, the process is similar, but instead of holding down the Option key, press and hold the power button until the volume list appears.
If you have an Intel Mac with an Apple T2 Security Chip, you may need to set security options using Startup Security Utility first before you can use the boot Startup Disk feature. This app allows you to set a firmware password, and designate if you can boot external drives.
The list of bootable Startup Disks in the Startup Disk selection firmware menu is the same as the drive list that appears in Startup Disk control panel in Settings.
If you hold down the Shift key after selecting a Startup Disk, but while pressing the Continue or up-arrow button, your Mac will startup in Safe Mode.
Start Up in Apple Diagnostics
To start up into Apple Diagnostics on Apple Silicon Macs, which also lives in your Mac’s firmware, follow the same procedure as Startup Disk Selection above, but instead of continuing to a selected Startup Disk, press Command D to enter Diagnostics.
On Intel Macs, instead of the previous procedure, simply hold down the D key on startup. This page describes the diag procedure and some result codes.
Firmware Recovery Mode
If for some reason your Mac becomes unbootable, there’s also a built-in firmware Recovery Utility. To boot into Recovery Utility, on Intel Macs hold down the Command R keys on startup until you see the Apple logo.
On Apple Silicon Macs, follow the same procedure as in Startup Disk Selection, but instead of selecting a drive to boot from, select the Options gear icon. You’ll proceed to Recovery.
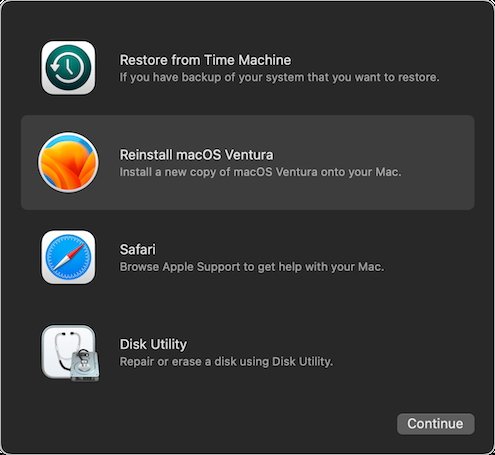
Once in Recovery, you have four options:
Most of these are self-explanatory except for Reinstall macOS. In that case, the typical workflow is to select the Disk Utility option, erase a drive to reinstall macOS onto, then Quit Disk Utility, which takes you back to the Recovery menu.
Then select Reinstall macOS to do a clean install onto the drive you just erased. Note however that erasing a drive destroys all existing data on it and there’s no recovering the data. Be careful when using this option.
It is possible to run Reinstall macOS directly onto a previously used drive containing data or a copy of macOS. The installer is smart enough to not destroy any data Apple previously created, and it’s also smart enough to preserve any third party software that may have been previously installed on a drive containing a copy of macOS.
But this doesn’t guarantee you can recover the drive, only that you can install a new copy of macOS onto it to make it bootable.
To use one of the Recovery options, select it from the menu and click Continue. Apple has a full article on how to startup into and use Recovery.
On Apple Silicon-based Macs, a few other Recovery options are available:
- Startup Security Utilty
- Terminal
- Share Disk
- Startup Disk
For full Recovery options on Apple Silicon-based Macs, see this article.
Internet Recovery Mode
If you have an internet connection, you can start up in Internet Recovery Mode, which is the same as Firmware Recovery Mode, except that it loads the Recovery app from Apple’s servers over the internet. This option may take longer to start, for obvious reasons. To startup in Internet Recovery Mode, hold down Command+Option+R or Command+Option+Shift+R on startup.
Safe Mode
To start up in Safe Mode, simply hold down the Shift key on start up. Safe Mode boots macOS but disables most extensions, drivers, and other third party boot-time software. This feature is useful if a particular piece of software got installed that hangs on startup.
This keystroke is only available on Intel-based Macs.
Safe Mode can be induced on Apple Silicon by pressing and holding the power button until “Loading startup options” appears. After you select a volume, press and hold the shift key, then click Continue in Safe Mode.
Reset PRAM
This is the oldest of all Mac startup options, going all the way back to the Mac Plus. Better known as “zapping-PRAM”, if you hold down Command Option P R on startup, all the settings in the General, Mouse, and Keyboard System Settings are reset to their defaults.
This also resets things such as key repeat rate, mouse speed, acceleration, and secondary mouse options. Trackpad settings are also reset to their defaults. Some Sound settings may also be reset.
This option is only available on Intel-based Macs. Apple has much more information on the topic.
Reset SMC
Use this option with caution. Some Macs can get into a state in which a special chip on the motherboard called the System Management Controller (SMC) gets confused and refuses to allow start up. Internal fans are also controlled by the SMC.
On some Macs, strange fan speed behavior may appear when SMC needs resetting. In such cases, reset the SMC by holding down Shift-Control-Option on startup.
Usually a SMC reset is enough to get the Mac booting again, assuming the Startup Disk hasn’t been corrupted. On some Macs to reset the SMC, you may have to first unplug, then re-plug the power cord before using the key combo on startup.
Single User Mode
On macOS versions earlier than Mojave, you can hold down Command S on startup and only the default Administrator user account will be available. This was mainly a security feature and is no longer available on macOS versions Mojave or later.
Target Disk Mode
On Intel-based Macs, if you hold down the T key on startup, your Mac will boot into a special mode called Target Disk Mode (TDM). This mode allows a Mac to be used as if it was an external disk by another Mac connected via a USB, USB-C, or Thunderbolt cable.
This feature was originally developed on older Macs which had FireWire ports, but it still works today. To use it, connect two Macs via one of the mentioned cables, restart the Mac you want to use as a disk while holding down T, then open System Settings->Startup Disk on the other Mac and select the Mac running in TDM as the Startup Disk.
When you restart, the non-TDM Mac will boot over the cable into the TDM Mac’s drive. A special disk icon will appear on the display of the TDM Mac. Apple has an article on how to transfer files between two Macs using Target Disk Mode. TDM is only available on Intel-based Macs.
For a similar process on Apple Silicon-based Macs, see this article.
Verbose Mode
Normally, while your Mac is booting and the Apple logo is being displayed, the FreeBSD-based Darwin core system is starting up a host of system services, hardware, drivers, extensions, and loading the core OS.
There’s a hidden way to see exactly what Darwin is doing while booting. Hold down Command V while starting up. Instead of the Apple logo, you’ll see all the Darwin startup system messages scroll by as each step is completed. Verbose Mode is only available on Intel-based Macs.
Startup from Optical Drive
On Macs with an optical drive such as an internal DVD-R/ROM drive, hold down the C button to startup from the optical disk. The disk must be bootable and have a working operating system on it in order to boot from it.
Eject Optical Drive
If you can’t start up your Mac and have an non-bootable optical disk stuck in the Mac’s internal optical drive, you can eject the disk prior to startup by holding down the mouse/trackpad button, or the Eject or F12 key on the keyboard when powering on. This option allows you to insert a different optical disk and try booting again.
Force Restart
If, for any reason you need to force-restart your Mac, you can do so by pressing the power button twice: if your Mac is already on, hold down the power button until it turns off.
Once off, press the power button again normally to restart. Hard-restarting your Mac may result in increased boot time the next time you restart as macOS will run some disk check or repair apps behind the scenes to make sure the OS is reset to a stable, bootable state.
Force macOS-Only Startup
If you had previously set a non-macOS volume such as a Windows volume to be your Startup Disk, you can instead force a macOS volume to be selected by holding down the X key when starting up. If your Mac finds a bootable macOS volume in the volumes list, it will start up from the first bootable macOS volume it finds.
Prevent Login Items from Running
You can stop all Login Items from running on login, but only if you hold down the Shift key after clicking the Login arrow button on the Mac’s login screen. Note that this is different from Safe Mode above because you hold down the Shift key immediately after clicking the Login button as opposed to holding down Shift while powering on your Mac.
Startup/Install from a NetBoot Server
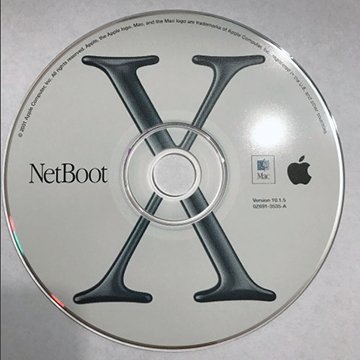
Early versions of Mac OS X Server included a networking technology called NetBoot and NetInstall. The server shipped with a separate NetBoot install CD for adding bootable features to a Mac OS X Server. The idea was to store common install and boot images of Mac OS X on a server, and users could install from and boot from those images over a network.
It was a brilliant idea, although it was a little slow.
Later, Mac OS X Server became a standalone app for macOS which added all the server features simply by downloading and running a single Server app from the Mac App Store. Apple discontinued Server and NetBoot support in 2021. To start up from a NetBoot Server on Macs which still support it, hold down the N key while starting up.
On older Macs, to make a server-hosted NetBoot disk image your Startup Disk, go to System Settings->Startup Disk and look for any disk icon with a globe on it:
NetBoot has largely been replaced by a more modern universal net boot technology called PXE which works on most platforms. Oddly, 3rd party developers have kept NetBoot alive by recreating its features in some versions of PXE.
There is also a modern NetBoot-like project called netboot.xyz which is based on iPXE for net booting. There is also an older article from University of Utah written in 2007 on how to install and setup a NetBoot server.
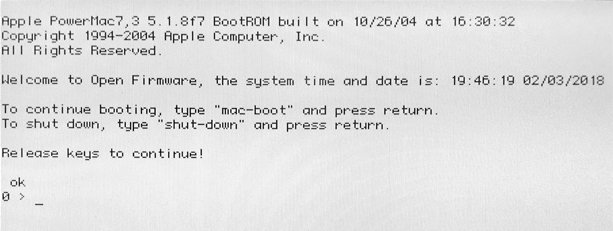
If you happen to be around an old “NewWorld” ROM-based Mac from the late 1990’s, you can amaze your friends by showing them how to boot into Open Firmware. Starting with the first iMac and Power Macintosh G3 computers in 1998, and until the transition to Intel CPUs, Macs used Open Firmware and newer, modern ROMs called NewWorld ROMs.
NewWorld contained most of the old Mac OS 9 OS in the ROMs on the motherboard, but used Open Firmware for the pre-OS boot sequence.
To boot a NewWorld ROM Mac into Open Firmware while powering on, hold down Command+Option+O+F. You will be left at the Open Firmware command prompt, but must know Open Firmware commands in order to proceed.


