


Geralt / Pixabay
Need to create a mass mailing or bulk email message? In Microsoft Word, you can set up a mail merge that inserts your recipients and their details automatically.
You have two ways to create a mail merge in Microsoft Word. You can use the Mail Merge Wizard, which is great if you’ve never set one up before, or the Mailings tab, which might take a bit more time but allows for additional options.
Use the Mail Merge Wizard in Word
As mentioned, the Mail Merge Wizard is a good way to go if you’re unfamiliar with the process because the tool walks you through each step. It’s important to note that this option is not available in Word on Mac. But on MacOS you can use the Mailings tab described below.
Step 1: Open Word and go to the Mailings tab.
Step 2: Select the Start Mail Merge menu and pick Step-by-Step Mail Merge Wizard.

Digital Trends
Step 3: When the Mail Merge panel displays, choose the document type at the top. You’ll likely pick Letters or Email messages but you’ll see you can create envelopes, labels, or a directory.
Click Next at the bottom.

Digital Trends
Step 4: Choose if you want to use the current document, a template, or an existing document. Then, follow the prompt for the option you select. For our example, we’ll use the current document.
Click Next.

Digital Trends
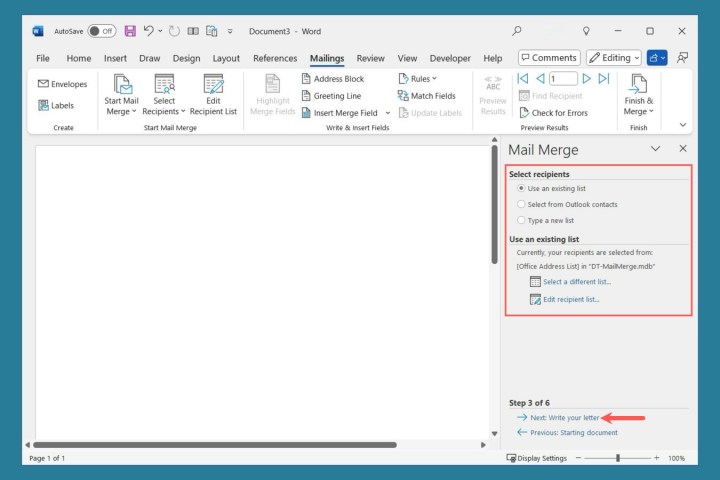
Step 5: Select the recipients from the following:
- Use an existing list: Pick Browse beneath to locate the file. If you’ve used a previous list, you’ll see Select a different list and Edit recipient list.
- Select from Outlook contacts: Pick Choose Contact Folder beneath to open the contact.
- Type a new list: Pick Create beneath to enter the recipients.
Click Next.
Digital Trends
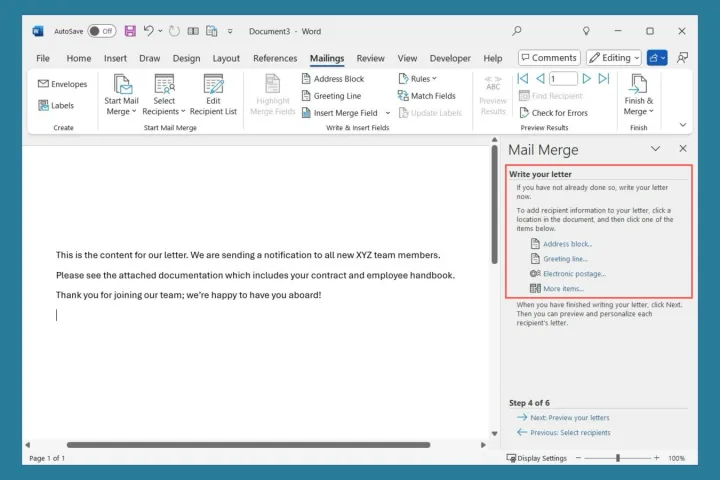
Step 6: If you haven’t done so already, type your message.
Use the blocks in the sidebar to add them to your letter or email. Place your cursor where you want a field and then select it.
Digital Trends
Step 7: As you choose each field, you’ll see a pop-up message with formatting options.

Digital Trends
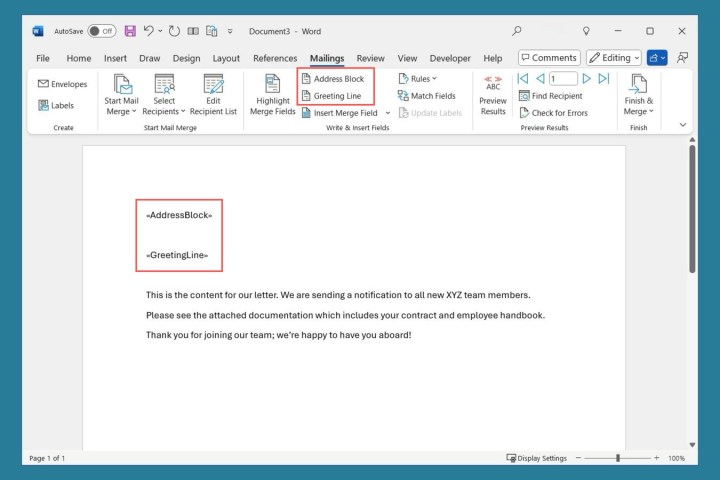
Step 8: Once you add the fields, they’ll display in your document within angle brackets.
Click Next.

Digital Trends
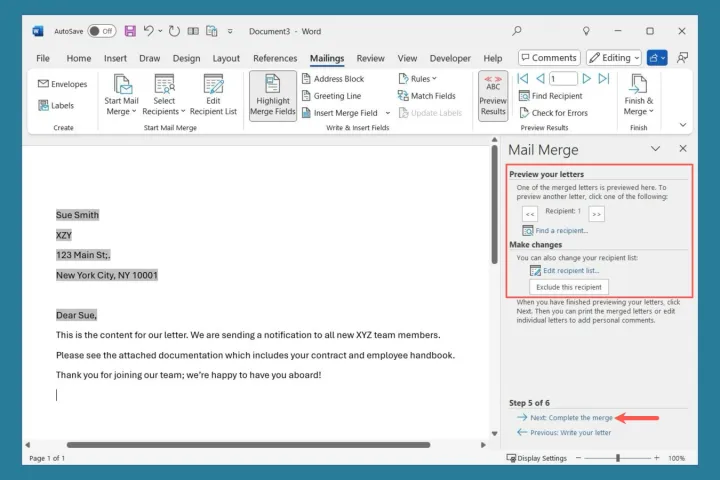
Step 9: Now you can preview each message. Use the arrows at the top of the sidebar to move through each one. You can also use the Exclude this recipient button if necessary.
Click Next.
Digital Trends
Step 10: This completes the Mail Merge Wizard. Depending on whether you chose Letters or Email Messages in the first step, you then have options to print or edit the individual letters or email the messages.

Digital Trends
Use the Mailings tab in Word
Another way to create a mail merge in Word is using the tools on the Mailings tab. With this method, you’ll select the recipients and add the fields to your letter or email like with the Wizard. But you have a few extra options for setting up rules, matching fields, and checking for errors.
Step 1: Open Word and add your message content.
Step 2: Go to the Mailings tab, open the Start Mail Merge menu, and pick Letters or Email messages. Note that you can choose envelopes, labels, or a directory here as well.

Digital Trends
Step 3: Open the Select Recipients menu and pick from the following:
- Type a New List: Opens a New Address List to enter the recipients.
- Use an Existing List: Opens a Browse window to locate the file.
- Choose from Outlook contacts: Opens a Contact list.
After you select your recipients, you can use Edit Recipient List to make changes if necessary.

Digital Trends
Step 4: You’ll then insert the fields you want to use to pull in the recipient details. You can use the standard Address Block and Greeting Line buttons to select the formats and insert those fields.
Digital Trends
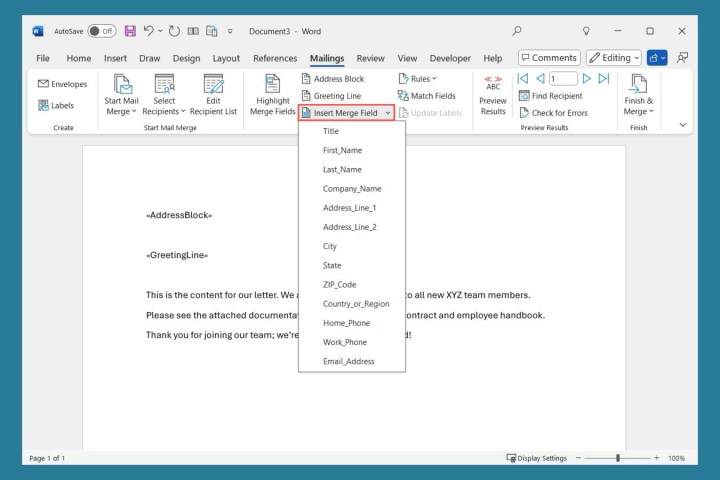
Step 5: You can also use the Insert Merge Field menu to add more details if you like. This allows you to insert information like country, region, home phone, or work phone. Along with basic fields, Word reads the recipient file you use in order to display additional fields for you to choose.
For instance, if you have a field for “Product” in your file that contains the item a customer bought, then you should see Product as an available option in the Insert Merge Field menu.
Digital Trends
Step 6: If you’d like to set up Rules, you can choose that button next. This gives you a way to handle those one-off situations when creating the merge.
As an example, you can skip a recipient if a field is missing in their record.

Digital Trends
Step 7: Maybe your recipient list doesn’t match up perfectly with the mail merge fields. You can use the Match Fields option to fix that. You’ll see a list of the fields with drop-down boxes to the right for you to pick what you’d like to use.
For instance, if you’re inserting Nickname and a recipient doesn’t have one in their record, you can choose to use First Name.

Digital Trends
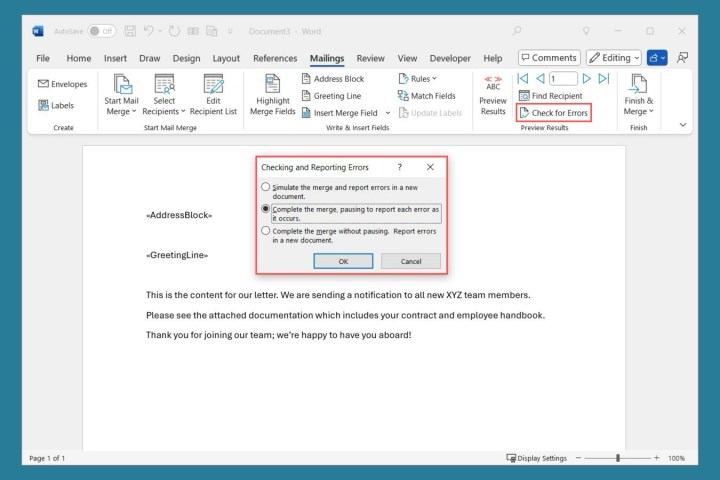
Step 8: Another great feature on the Mailings tab is the ability to Check for Errors. Select that button and you’ll see three options.
You can simulate the merge and receive results in a new document, complete the merge and pause as errors are found, or complete the merge without pausing and report errors in a new document.
Digital Trends
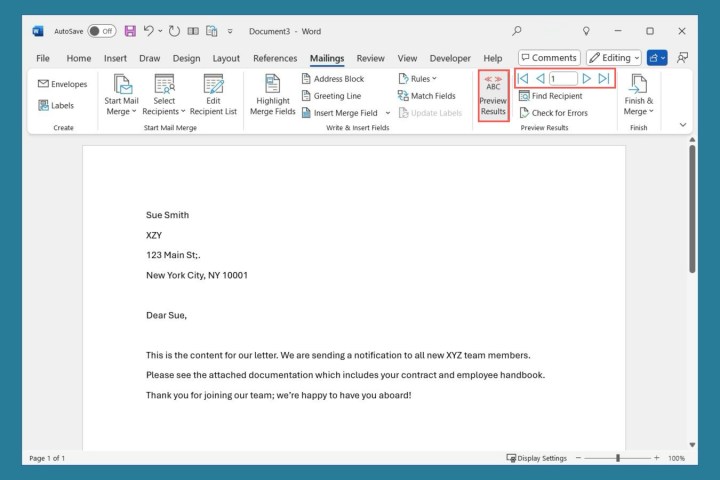
Step 9: At any point, you can preview the mailings just like with the Wizard. Select Preview Results and then use the arrows to the right to move through each record.
It’s important to note that you cannot change individual letters in the Preview; however, you can do this in the next step by choosing Edit Individual Documents.
Digital Trends
Step 10: When you finish, open the Finish & Merge menu. Depending on the document type you use, you’ll see options to edit the individual documents, print the messages, or send the emails.

Digital Trends
FAQs
How to do a mail merge from Excel to Word for letters?
Because you can use an existing list with both mail merge tools in Word, you can simply select the Excel file. Create your Excel sheet with all details for the recipients and save it. Begin the mail merge process in Word, choose to use an existing list for the recipients, then browse for and select the Excel file.
How do I format a mail merge field?
You can format the fields as you add them to your mail merge document. But you can also change the format after you add them. Right-click the field you want to reformat and choose Edit [Field name]. You’ll then see a pop-up window with the formatting options.
How do I customize a mail merge?
The intent of a mail merge is to personalize the communications using the fields that are variables that pull in the recipient details. You can set up fields for things like Position, Manager, Employment Years, Certifications, and so on. Be sure to enter these details in the recipients’ records with those field names, and then add the corresponding fields to the message where you want them.

