Watermarks are faded background text or images that sit behind the text in a document. You can use them to indicate a document’s status (such as confidential or draft), add a subtle company logo, or even introduce some artistic flair. Here’s how to add and manipulate watermarks in Microsoft Word.
How to Insert a Built-In Watermark
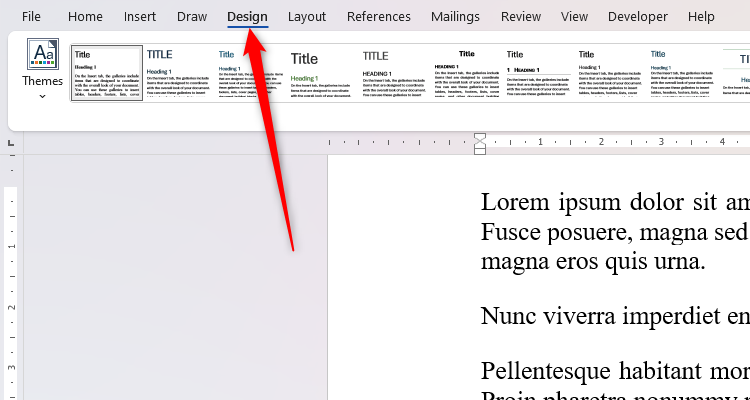
With your document open, select the “Design” tab.
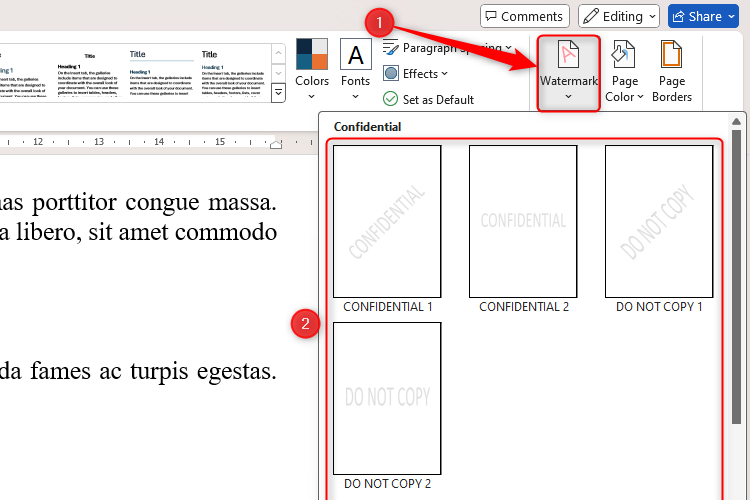
Then, click the “Watermark” button in the Page Background group of that tab, and choose one of the built-in watermarks in the resultant drop-down menu to insert it into your document.
Word will then place the faint watermark behind the text (or where the text will go if you don’t yet have any in your document). In my case, I’ve gone for the Confidential watermark.
If you want the built-in text watermark to only appear on certain pages (for example, the first page only), with your cursor on the relevant page, right-click the appropriate watermark in the Watermark drop-down menu, and click “Insert At Current Document Position.”
How to Insert a Custom Watermark
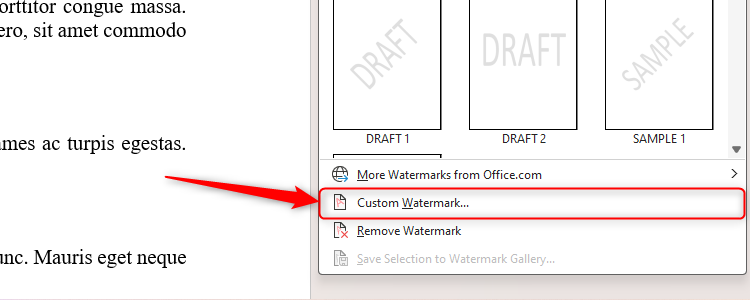
You can also create personalized watermarks using text or images that align more closely with your intent. To do this, select the “Custom Watermark” from the Watermark drop-down menu.
Using Custom Text Watermarks
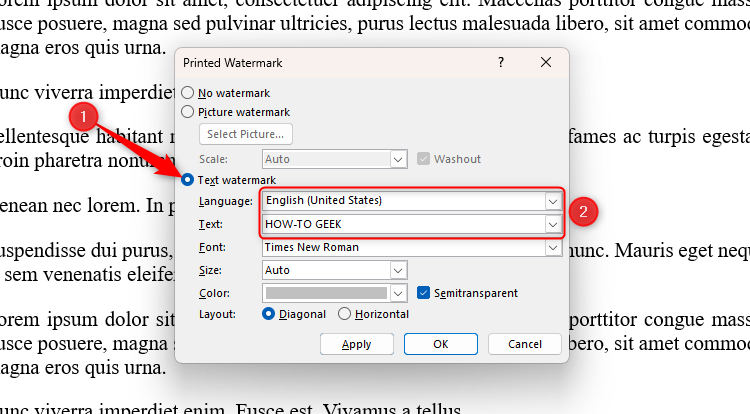
In the Printed Watermark window that opens, select the “Text Watermark” option. First, choose your language, and then type the text you want to use as your customized watermark into the “Text” field.
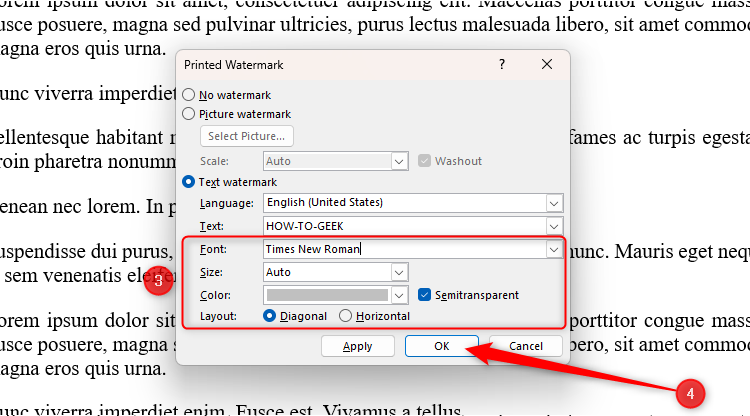
Now, configure the font, size, and color options, and define the transparency and text direction settings. When you’re done, click “OK.”
Checking the “Semitransparent” option will make the watermark fainter, meaning the document’s main text will be more readable.
Word will then insert your custom text watermark behind the text.
Using Custom Picture Watermarks
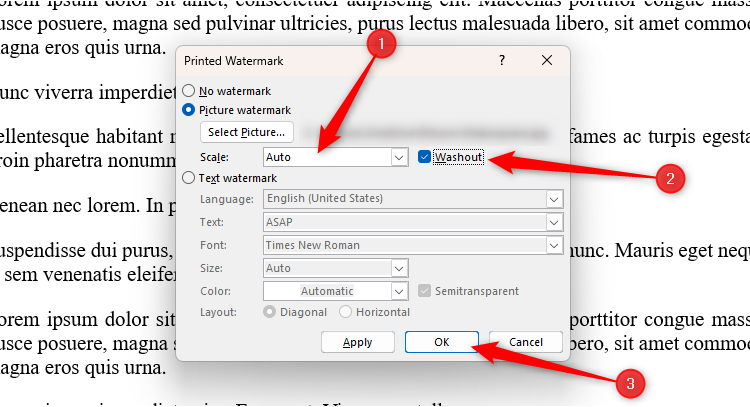
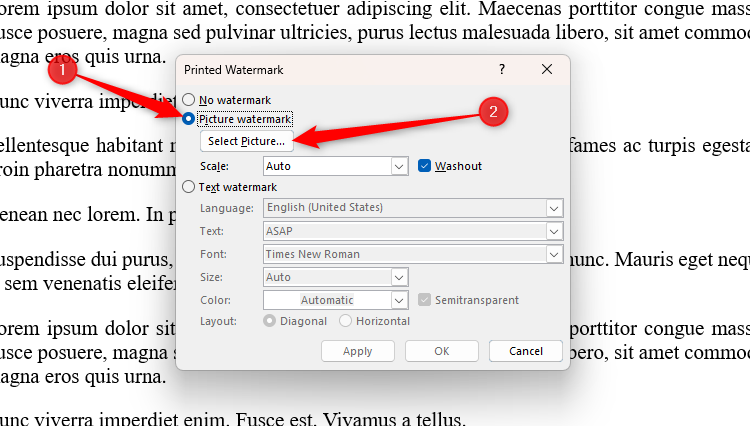
If you want to use a picture as a watermark instead, select the “Picture Watermark” radio button in the Printed Watermark dialog box, and click “Select Picture.”
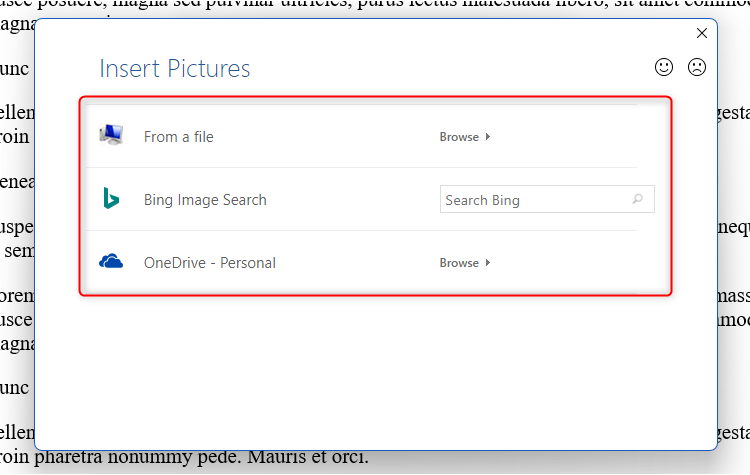
In the Insert Pictures dialog box, choose whether you want to use a picture saved on your computer, search for an image on Bing, or select an image from your OneDrive storage.
Once you’ve chosen an image and clicked “Insert,” you’ll be returned to the Printed Watermark dialog box. There, you have a couple of options for how your picture appears:
- The Scale is set to “Auto” by default, but you can change this to one of the scaling options from the drop-down menu (500%, 200%, 150%, 100%, or 50%), or type a different percentage manually if that works better for you.
- The Washout option inserts the image with pale colors, similar to a semitransparent text watermark. You can uncheck this option to have the image presented in its full glory, but this may make the document’s main text more difficult to read.
Once you’ve adjusted these options, click “OK.”
Word will then insert the image behind the text in your document. In my case, I’ve used a 25%-scale washout picture of William Shakespeare.
How to Move or Resize a Watermark
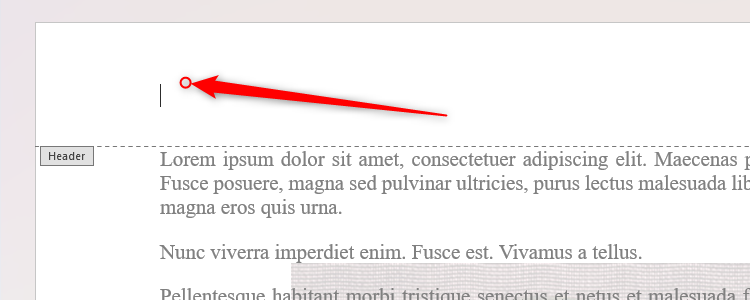
To adjust a text or picture watermark after inserting it, double-click the Header or Footer area of your document.
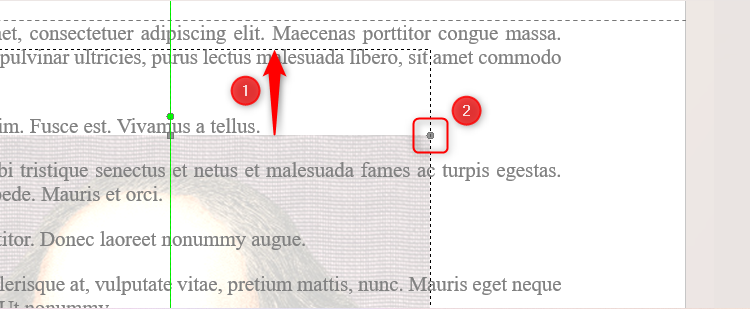
You can then click and drag the watermark to move it, or you can use the handles to resize it. In my case, I’m moving the watermark nearer to the top of the page, and I will then resize it using the top-right image handle. Notice, also, how Microsoft Word is helping me to keep the image central by placing a green gridline down the center of the document. The same would also happen on the left and right margins if I were to move the image near the left or right edges of the document.
Since the same watermark appears on all pages by default, resizing or moving it on one page means those same changes are made everywhere else.
How to Remove a Watermark
There are two ways to remove a watermark. The first is by reopening the document’s Header or Footer area (so that the image becomes editable, as described in the section above), selecting the image, and pressing Delete.
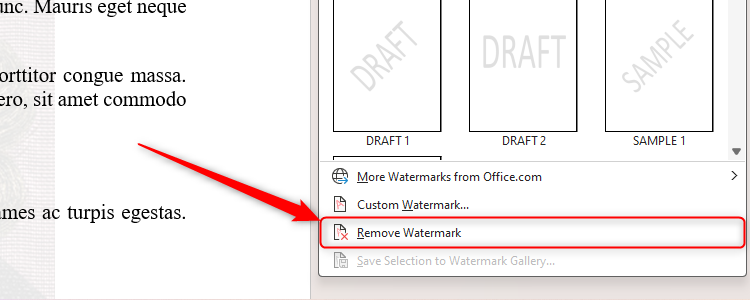
Alternatively, click the “Watermark” icon in the Design tab on the ribbon, and select “Remove Watermark.”
Just like moving or resizing a watermark, deleting one removes it from every page of your document.
Using the Draft text watermark is handy if you want to send your work to other people, so they can read it and give you some feedback. In this case, you might also consider protecting your document from editing—a simple step that changes it to a Read Only file and requires a password to re-enable editing.


