1. Get an energy audit
The best way to find out where your home is leaking air—and thus, energy and money—is to get an energy audit: a professional assessment of your home’s energy losses to the environment with recommendations for steps to reduce them. Many utility companies will pay for the audit, and most maintain lists of approved contractors. It’s important to use a contractor approved by the utility, because that makes you eligible for any rebates or other assistance programs that they provide.
A typical energy audit consists of two separate measurements. Your contractor will use a thermal imaging camera to identify hot and cool spots in your home’s roof, exterior and interior walls, and ceilings. These indicate places that could benefit from better insulation or that allow outside air to penetrate. Minefee shared an example of a customer with a poorly sealed skylight. “That thing was letting the outside environment in like it was a funnel,” she said.
The next step is a blower door test. Your contractor will temporarily fit a special door to your home, usually in the front doorframe, and use an attached fan to deliver a constant flow of air into the living space. “You’re able to pinpoint how much air the home is losing through leaks,” said Haydin Hartle of Elevation. “We have customers with 1,500-square-foot houses that are leaking as much as a 3,000-square-foot house does.”
Your contractor will provide suggested improvements and help file paperwork with your utility company to make you eligible for any of its relevant energy-efficiency programs.
2. Insulate and seal attic spaces
According to almost everyone we spoke with, attics are the number-one source of energy losses in American homes. Particularly in older buildings—many are uninsulated or insufficiently insulated. On hot summer days, they force your air conditioning to work harder because solar energy warms up the ceilings beneath the attic. In winter, they absorb heat from below, making your boiler or electric heater work harder. Attics also often contain HVAC ductwork and wiring for ceiling lights and fans. Indoor air can leak directly through your ceiling into the attic if the HVAC registers, light fixtures, and fans are poorly sealed.
Installing new or additional insulation to an attic is relatively inexpensive and requires no special tools (but do use a respirator, as fiberglass dust is dangerous). If you plan to install it on your attic floor, the least expensive kind, called unfaced insulation, is a fine choice. Slightly more expensive faced insulation, which has a paper or foil layer on one side, is easier to install on the underside of the attic’s roof because the facing material can be stapled through to attach the insulation to the rafters. Bob Vila explains both types and their benefits clearly and concisely.
Minefee recommends that you add insulation to both the attic floor and the roof, “and install a solar fan to pull that heat out of the attic” in the summer. She added that her customers in Georgia typically see about a 25% reduction in cooling costs after fully insulating a formerly uninsulated attic.
Insulation is measured in terms of its R-value; the higher the number, the better its insulating properties. R-values are cumulative, as well, so two layers of R30 insulation (a common choice) is equivalent to R60. And even if your attic is already insulated, it may not be insulated enough. “Check how much insulation you have in your attic, and then see how that compares to the recommended thickness,” said Matt Bramson of Elevation. If you need more, “spray in or lay in the latest and greatest—that will make a big difference.” The Department of Energy has recommendations for how much insulation attic spaces need based on location.
Cheryn Metzger, residential program manager at PNNL, also recommends using spray-can foam to seal around HVAC registers, light fixtures, and other places where you have a penetration into the attic from the living spaces below. That will keep air from passing between them.
3. Weather-seal leaky doors and windows
You probably already know if you have a particularly leaky window or door (or several of them). Cold winter air and muggy summer heat unmistakably pass through, making nearby areas uncomfortable and forcing your HVAC system to work a bit harder. The savings on your energy bill from weather-sealing will be minor compared with some other weatherizing upgrades, but you’ll notice the physical benefits. Butzbaugh told us he weather-sealed three drafty doors in the winter of 2021. “I don’t know what the energy impact was, but the comfort impact was very noticeable,” he said. I can relate: Before my co-op’s windows got re-caulked a few years ago, the window in my bedroom was so bad that the breeze coming through could practically snuff a candle on windy days.
Thankfully, weather-sealing is an easy DIY project: You simply apply adhesive barrier tape around window and door frames to fill the gaps that are letting outside air through. The doors and windows can still be freely opened and shut, but the leakage is reduced or eliminated.
We bought a bunch of weather-sealing items and tried them out, and we came to favor the silicone (versus felt or foam) gear from Frost King. It’s not that Frost King has reinvented the wheel with its stuff—this is not a category prone to disruption—but weatherizing is the company’s sole focus, its designs are diverse and made for different budgets and needs, and Frost King is widely available online and at hardware stores. It’s a company that does one thing well. Its silicone tapes are more expensive but also far more likely to last than its other tapes made of cheaper materials; they come with a 10-year guarantee.
Top pick
Every leaky window and door is different, but Frost King’s 0.25-inch Silicone Weatherseal is a good general-purpose seal that addresses most problems. It can fill gaps as small as 0.125 of an inch and up to 0.25 of an inch on each side of a door or window—its hollow teardrop profile lets it compress and expand as needed. We recommend doing a little surface preparation to get the tape to adhere well. At the least, wipe down the door or window frame with a bit of rubbing alcohol to remove dirt and any grease or oil, and if the paint on the frame is glossy, scuff it with some 120-grit sandpaper to give the tape something to grab onto.
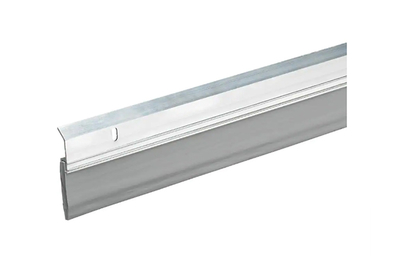
If you have a large gap under a leaky door, a door sweep is a better option than weatherizing tape. Sweeps screw to the door, which helps them withstand the repeated push-pull dragging that happens when the door is opened and closed. Frost King’s Extra Wide Heavy Duty Door Sweep is inexpensive and fits doors up to 36 inches wide; if your door is narrower, you’ll need a hacksaw or tin snips to trim it down to size.
4. Seal your HVAC ducts
Over time, the ducts that deliver heated and cooled air to your indoor spaces can develop leaks, resulting in lower efficiency and higher utility bills. Older-style metal ducting, in particular, is prone to popping open at the crimped seams. And home renovations can also lead to damage. “Oftentimes we’ll find ductwork that has been trampled, or moved so that it has an elbow in it,” said Hartle. That can result in both leaks and a loss of airflow.
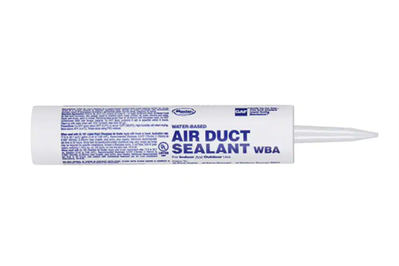
If you have easy access to your ductwork and are willing to get your hands dirty, you can check for leaks and seal them yourself. Hartle recommends using duct mastic, a putty-like sealant, rather than foil HVAC tape. He said tape “can get pretty pricey, and if you don’t apply it the right way, there’s a lot more room for error than with mastic.”
Most HVAC contractors also provide sealing services; paying them to do it may be a better use of your time and money. If you’re on the fence, call your contractor and ask for a quote.
5. Install external storm windows or solar screens
If you have single-pane windows, installing low-E storm windows can provide enormous energy savings at a fraction of the cost of replacing the single panes with modern double- or triple-pane windows. “I’ve never seen a better bang for your buck,” said Metzger.
As explained in this excellent video from PNNL, low-E windows have special coatings that let visible light pass through but reflect most ultraviolet and infrared wavelengths, the latter of which we perceive as heat. As a result, they have extremely low emissivity (the “E” in low-E), meaning they transfer very little heat energy from the outside into your home compared with uncoated glass. That helps your home stay cooler in the summer. During winter, the coatings also reflect indoor heat back into the home, which lowers heating costs.
Most low-E storm windows are installed externally, mounting to the frame outside the existing window. They can be raised and lowered like regular windows, so you can let fresh air in on nice days. And they provide nearly as much insulating performance as double-pane low-E windows for a far lower investment of time, money, and labor. According to Metzger, “they only cost about a hundred dollars for a typical-size window, and they save about as much money” on your utility bills as installing all new windows, “which can be thousands of dollars each.” Metzger said that PNNL’s testing (PDF) found an average of 10% to 15% energy savings when low-E storm windows are applied over uninsulated single- and double-pane glass; elsewhere, the Department of Energy says the savings can be as high as 30%. And Metzger noted that, anecdotally, many people think storm windows improve the look of their home, too.
Internally mounted storm windows are also available (and are sometimes generically referred to as “indows,” from the name of one of the technology’s pioneering firms). Senior editor Kalee Thompson installs them in her Portland, Maine home in the winter and said they make a positive difference to her family’s comfort and home’s energy efficiency. (She takes them down in the warmer months—not a big job, and it makes opening the external windows easier.)
In extremely sunny regions with mild winters, such as Florida and the Southwest, a sort of sister technology may be a better option. Solar screens look like, and are installed like bug screens; you can even buy the solar screen material in rolls and replace existing bug screens with it, if you’re feeling handy, said Elevation’s Hartle. However, in addition to blocking bugs, they also block a significant percentage of incoming infrared and ultraviolet sunlight before it enters a home while still allowing good visibility. According to Efficient Window Coverings (a partnership between the Department of Energy and other research groups), solar screens can reduce solar heat gain in a home by nearly 85%. That helps the indoor spaces stay cooler and also reduces the fading of fabrics and furniture. Hartle said it costs about $2,000 to have a set fabricated for a typical single-family home in Arizona, where Elevation is based.


