Key Takeaways
- The ZIP file format compresses files to save disk space and reduce transfer times, making it easy to share multiple files.
- Creating a ZIP file on Windows 10 is simple – just right-click on the files or folders you want to compress and select “Compressed (Zipped) Folder.”
- To view and add files to a ZIP file, double-click it in File Explorer. You can also drag-and-drop files into the ZIP file window to add or delete files from it.
The ZIP file format reduces the size of files by compressing them, saving disk space, and reducing network transfer times. It also allows you to combine several files into a single one that’s easy to share with others. Here’s how to zip and unzip files on Windows 10.
How to Create a Zip File (Compressed Folder)
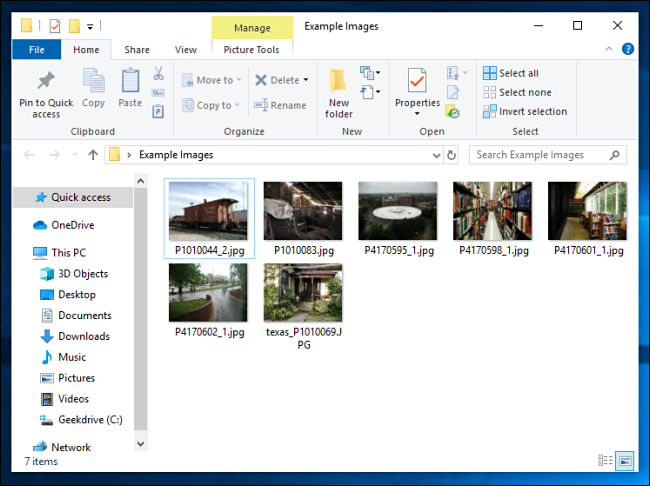
First, open File Explorer and locate the files or folders you’d like to compress and combine into a Zip file. Windows refers to a Zip file as a “compressed folder,” so the terms are interchangeable in this case.
We’ll be using a group of image files as an example, but you can zip any type of file.
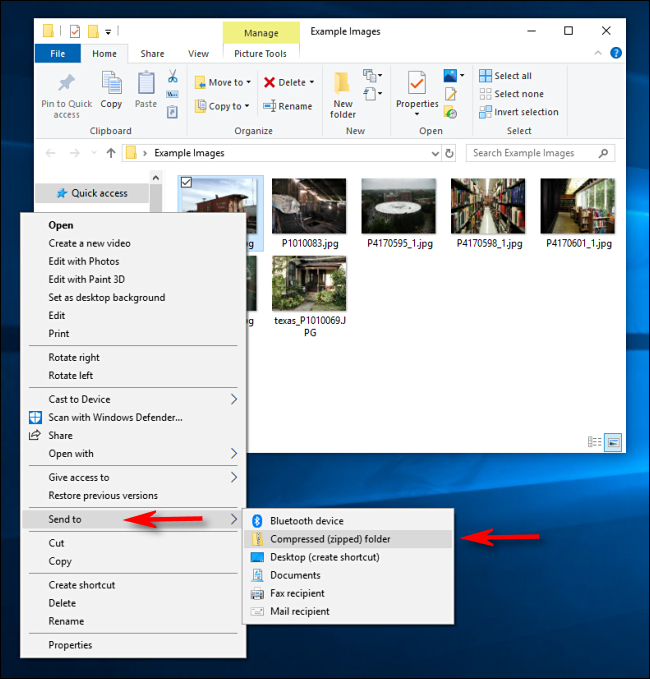
If it’s a single file or folder you’d like to compress, right-click it and a menu will pop up. Click “Send to,” and then click “Compressed (Zipped) Folder.”
You can also select multiple files or folders in Explorer, and then follow the same steps above to compress them simultaneously.
Windows compresses the files or folders, and a new ZIP file appears in the same location as the files you’re working with. The ZIP file icon looks like a standard Windows folder with a zipper on it.
Windows then allows you to name the ZIP file whatever you want. Type a name, and then press Enter.
How to View a ZIP File’s Contents and Add Files
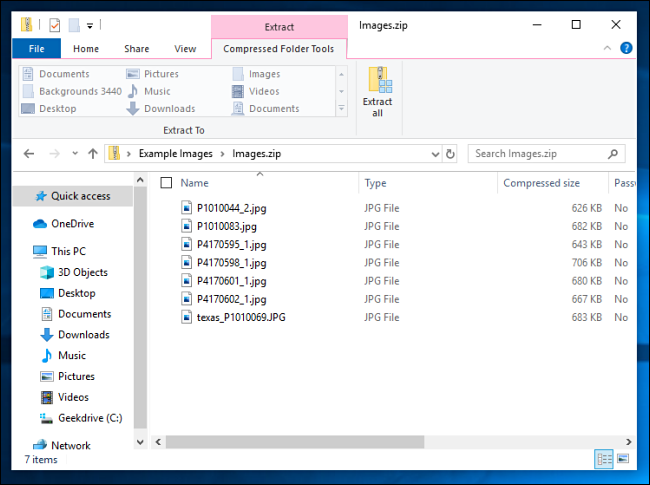
If you’d like to check the ZIP file’s contents, double-click it in File Explorer. The ZIP file will open much like a regular folder, and you’ll see the files inside.
You can also copy-and-paste or drag-and-drop files into this window to add them to the ZIP file. To remove individual files from the ZIP file, delete them from here. Any changes you make inside the folder will be applied to the ZIP file.
If you’re satisfied, close the ZIP file windows, and you’re set. You can copy the ZIP file to wherever you want.
It’s also possible to add more files to an existing ZIP file by opening it in explorer, and then dragging the files you want to add into the window.
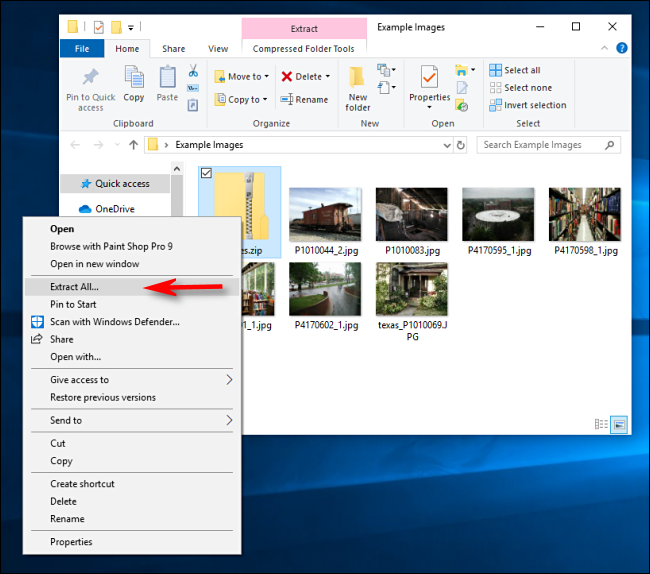
If your compressed folder (ZIP file) contains many files, it’s often easiest to extract them simultaneously into a new folder. To do so, locate the Zip file you’d like to unzip/extract in Explorer. Right-click the file, and then select “Extract All” from the pop-up menu.
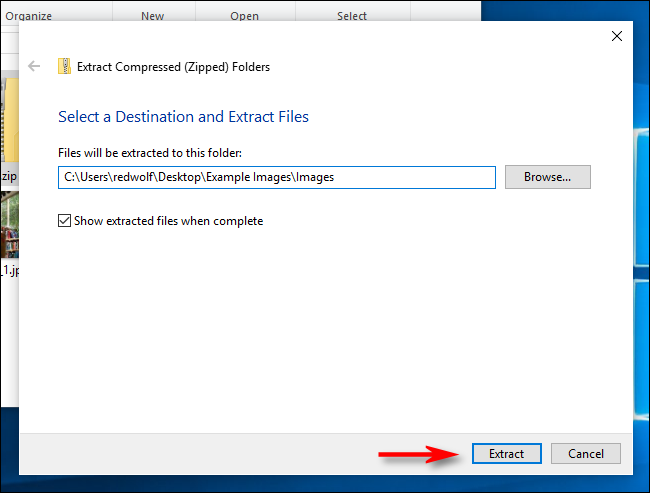
A dialog box appears asking where you’d like to put the files you’re extracting. If you’d like to change the location, click “Browse,” and then select a path. When you’re done, click “Extract.”
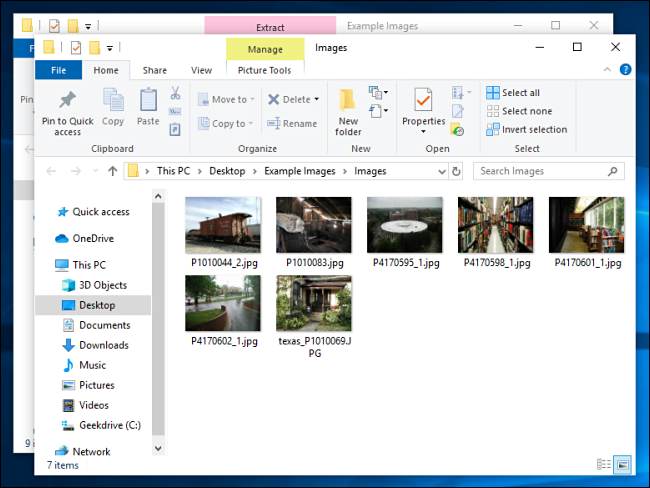
The files will extract themselves to the destination you selected, and you’ll see them in a new window.
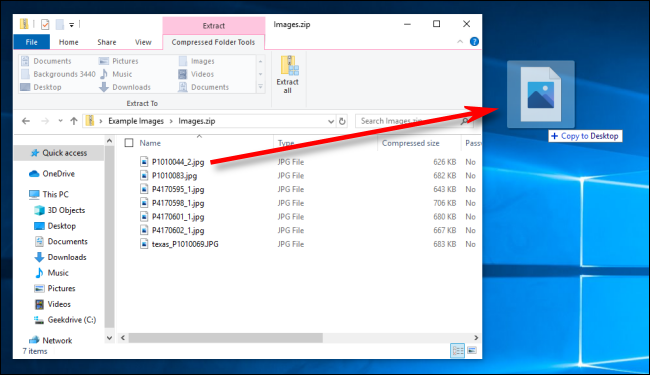
Using Explorer, locate the compressed folder (Zip file) from which you want to extract a file. Double-click it, and it opens like a regular folder. You’ll see either a list of files or group of icons representing the compressed files.
Locate the file you want to extract, and then drag it out of the compressed folder window to another location, such as another folder or your Desktop.
The extracted file is copied to the new location, and it will also remain in the Zip file. You can repeat this process as many times you’d like. When you’re done, just close the compressed folder window.
More Ways to Zip and Unzip
There are other ways to zip and unzip files in Windows using third-party tools, such as 7-Zip, which is one of our favorites. You can also password-protect and encrypt your Zip files while compressing them for security.


