Key Takeaways
- Remap mouse buttons for quick screenshot capture using Logitech G Hub or similar apps.
- Taking screenshots with your gaming mouse is faster and more elegant than using keyboard shortcuts, but it forces you to sacrifice a mouse button.
- Gaming mice with dedicated screenshot buttons would simplify in-game screenshot capture.
I’ve always wanted a dedicated screenshot button on my gaming mouse. Now that I’m rocking a dual mouse setup, I finally turned my dream into reality. Here’s how I did it and why I waited so long to finally take the plunge.
How to Remap Your Mouse Button to Capture Screenshots With It
This procedure should be simple and painless if your mouse comes with a dedicated app that supports remapping mouse buttons.
I’m using Logitech G Hub here as an example, but you should find the option to remap your mouse buttons relatively easily in most peripheral control apps, such as Razer Synapse, Pulsar Fusion, ASUS Armoury Crate, Corsair iCUE, Glorious Core 2.0, Cooler Master MASTERPLUS+, and others.
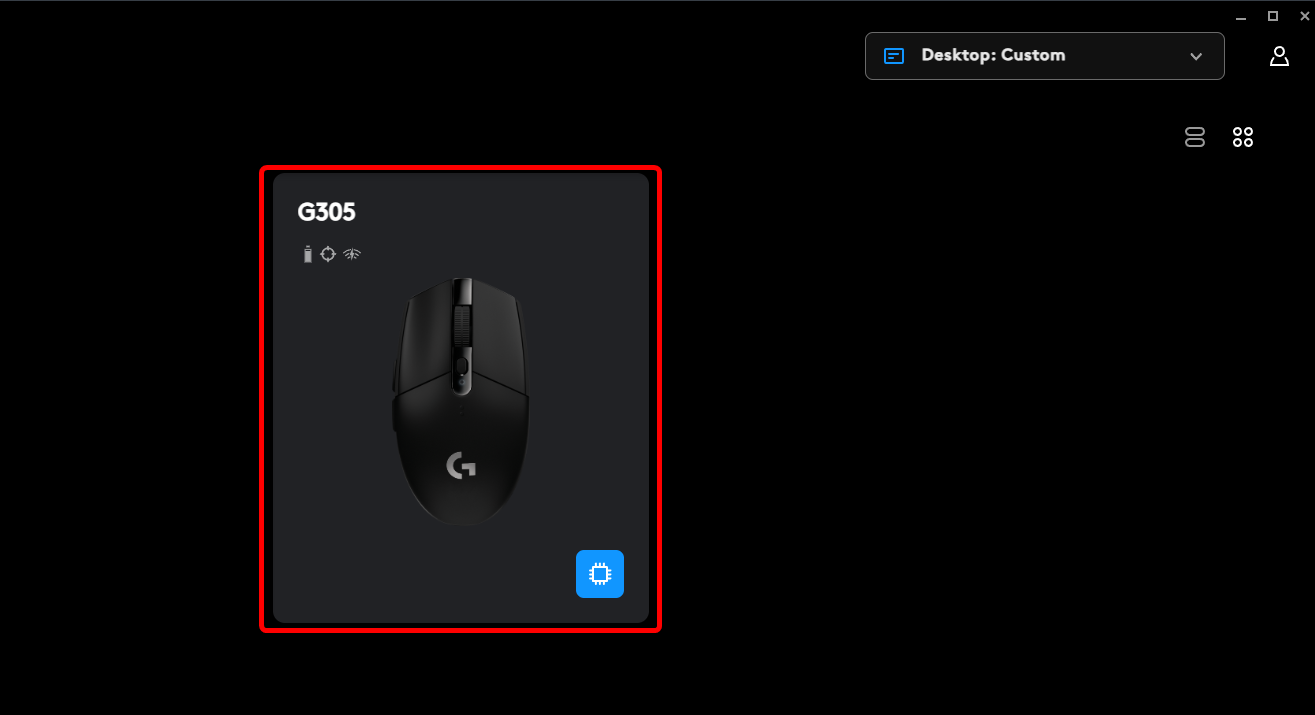
First, open Logitech G Hub and click your mouse icon.
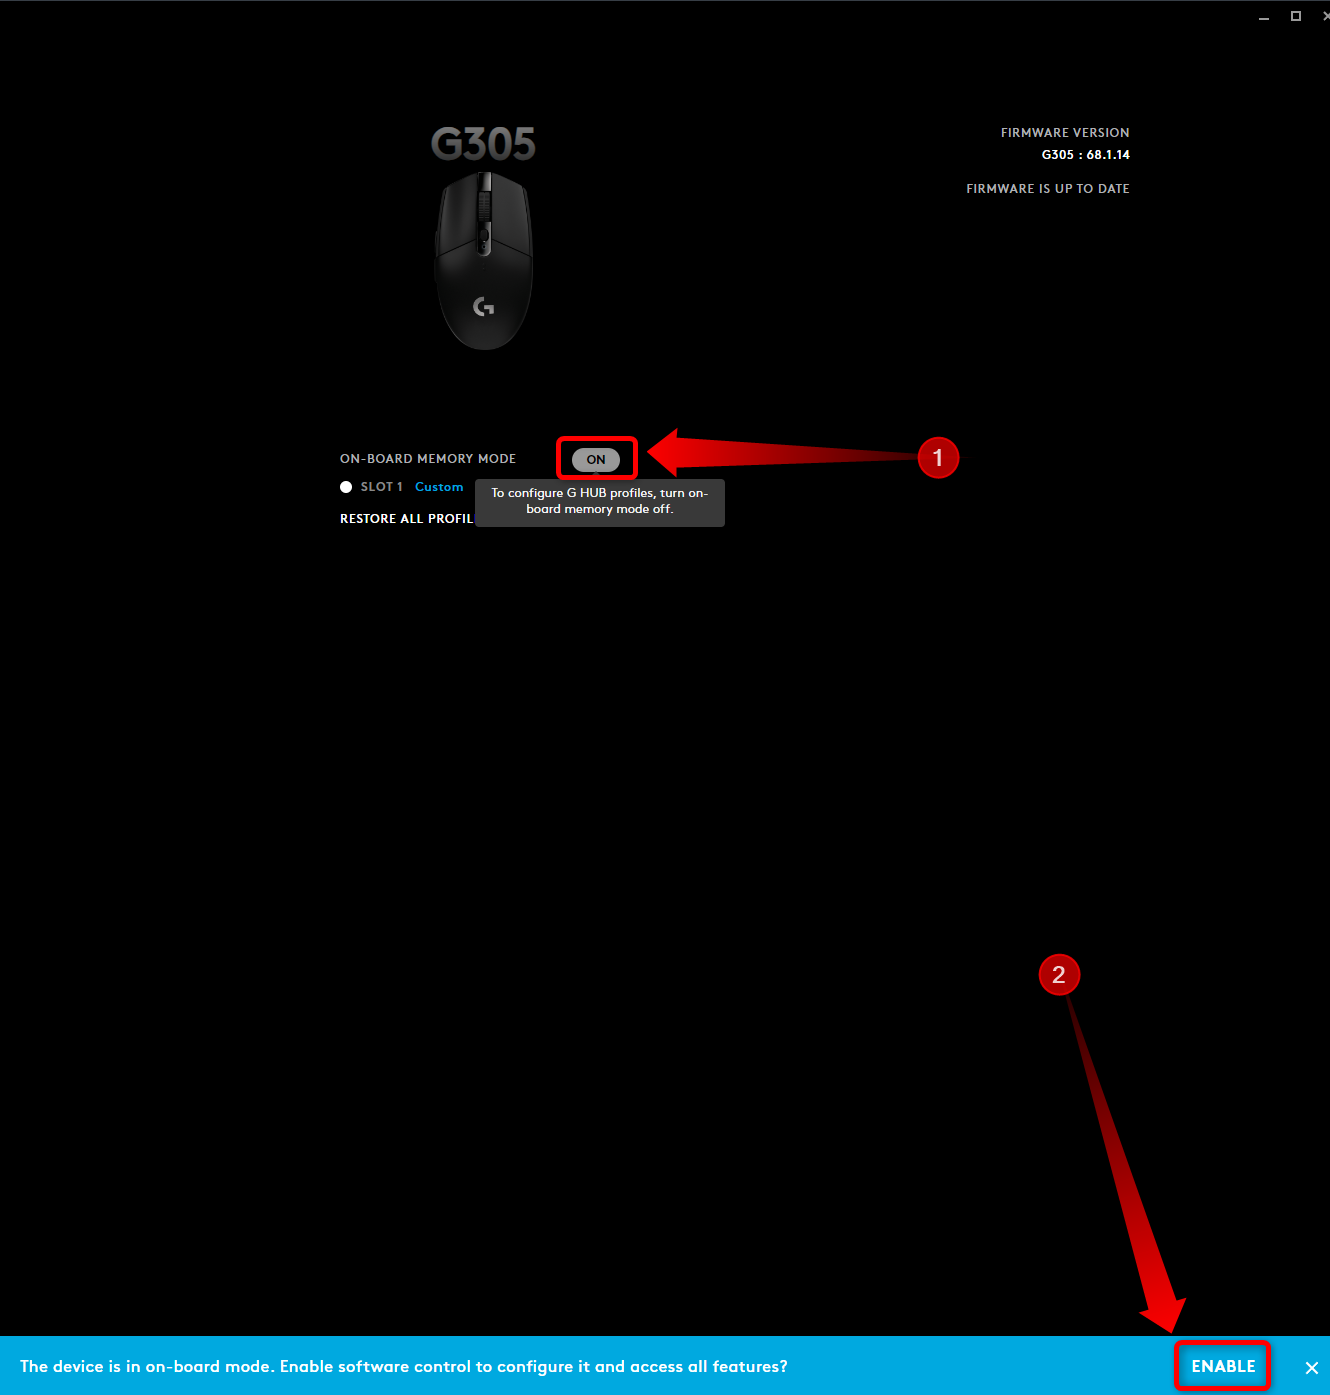
If you’re using On-board Memory Mode, turn it off by clicking the appropriate button.
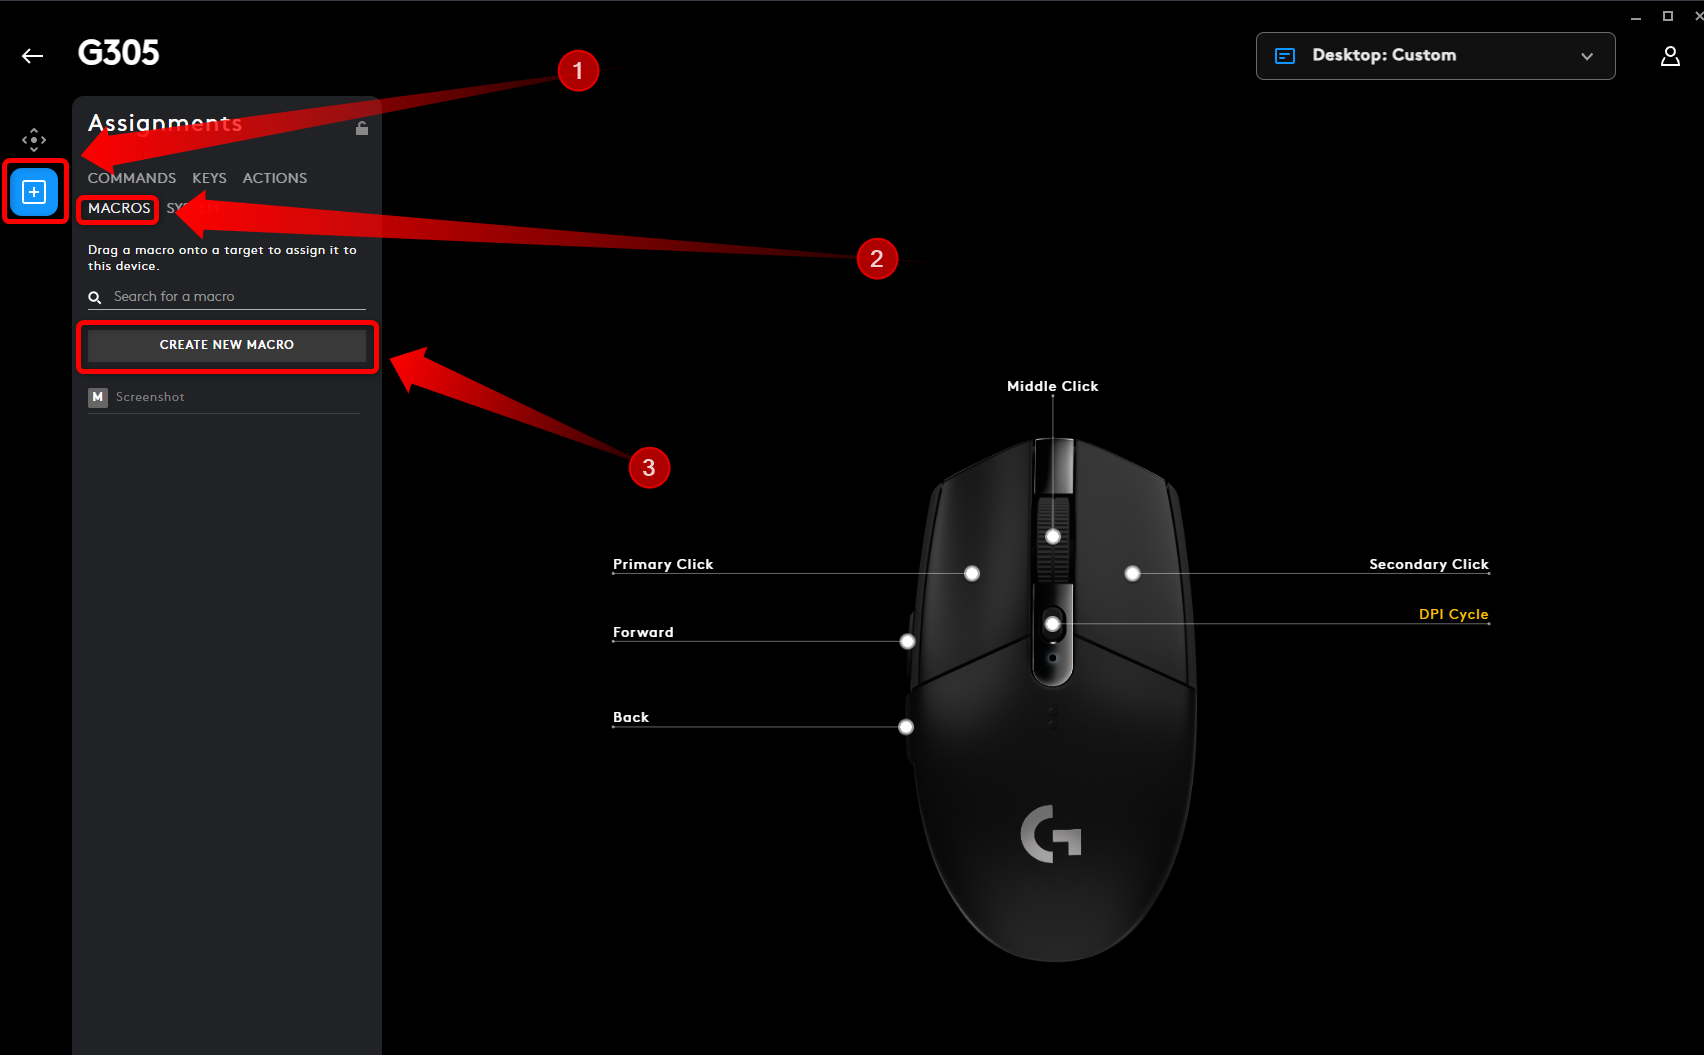
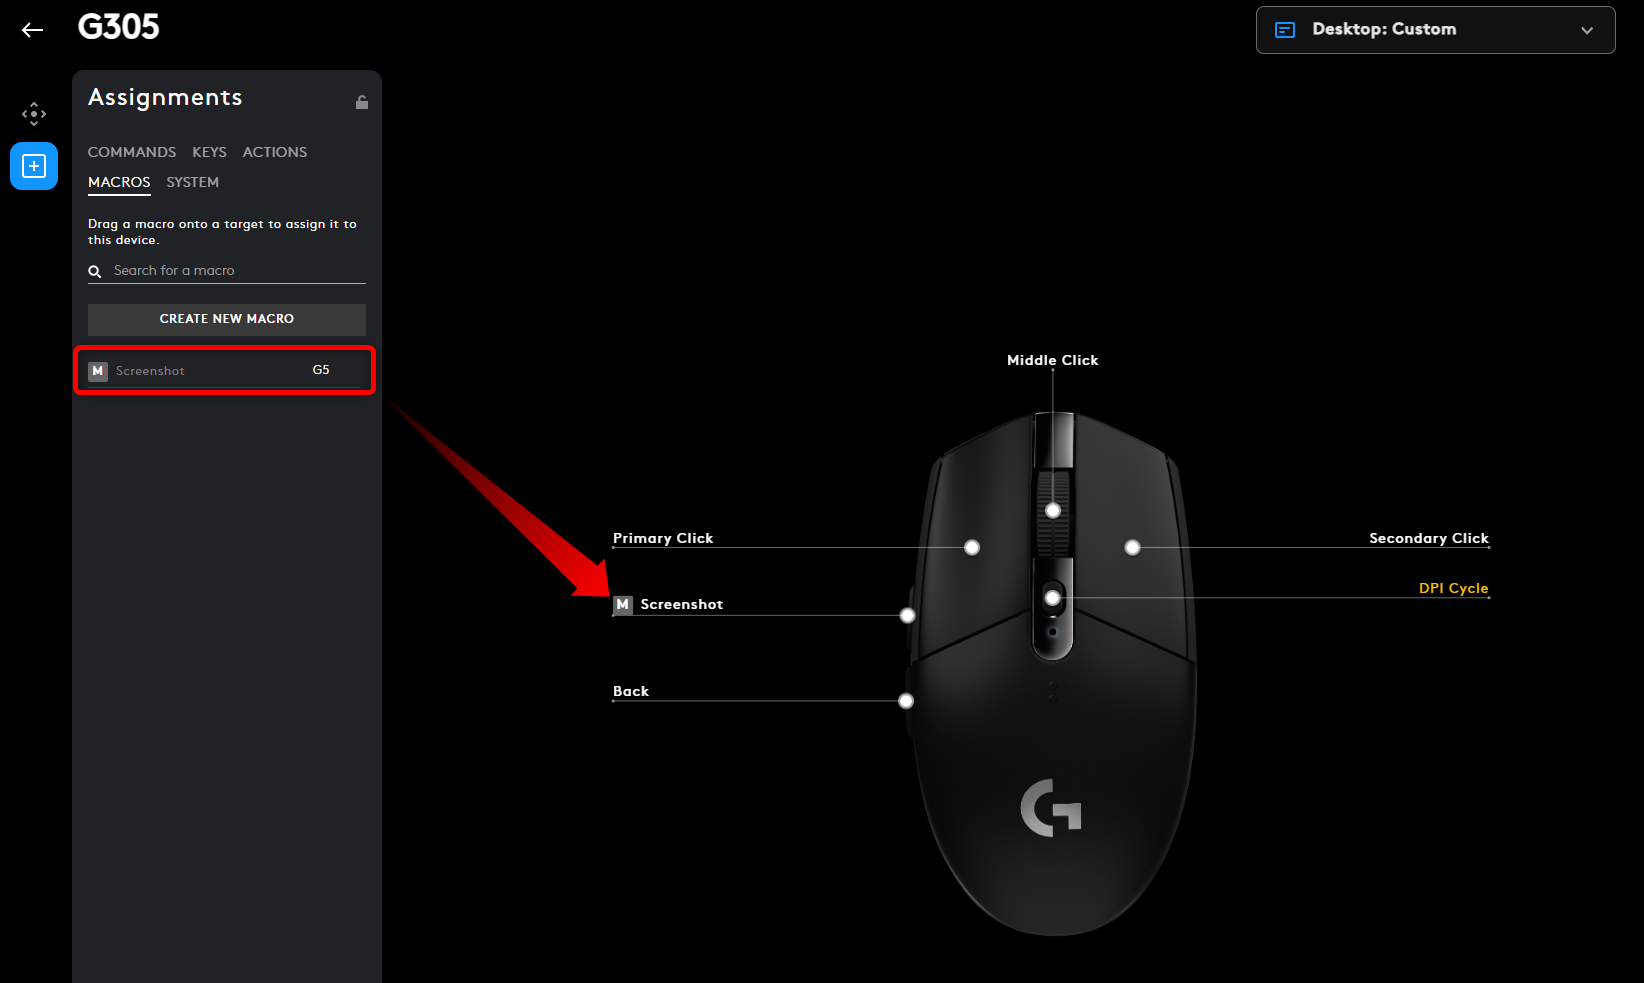
Now, click the “Assignments,” then the “Macros” menu, and finally the “Create New Macro” button.
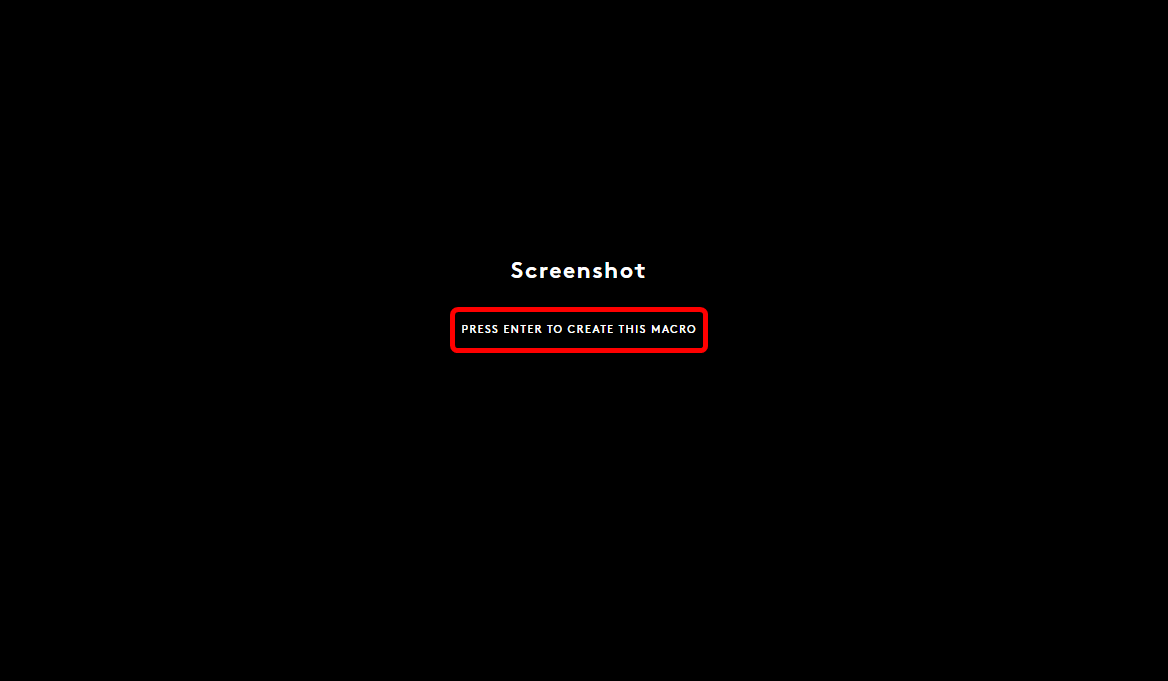
You’ll need to name the new macro. In my case, I named it “Screenshot.” Press Enter to move to the next step.
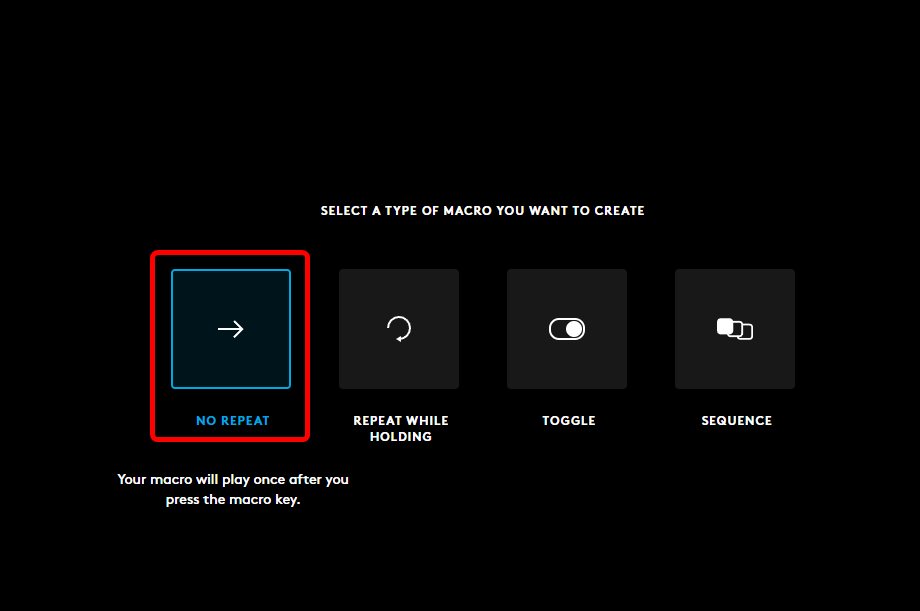
The type of macro you want is “No Repeat” since you want to take a single screenshot with a single button press.
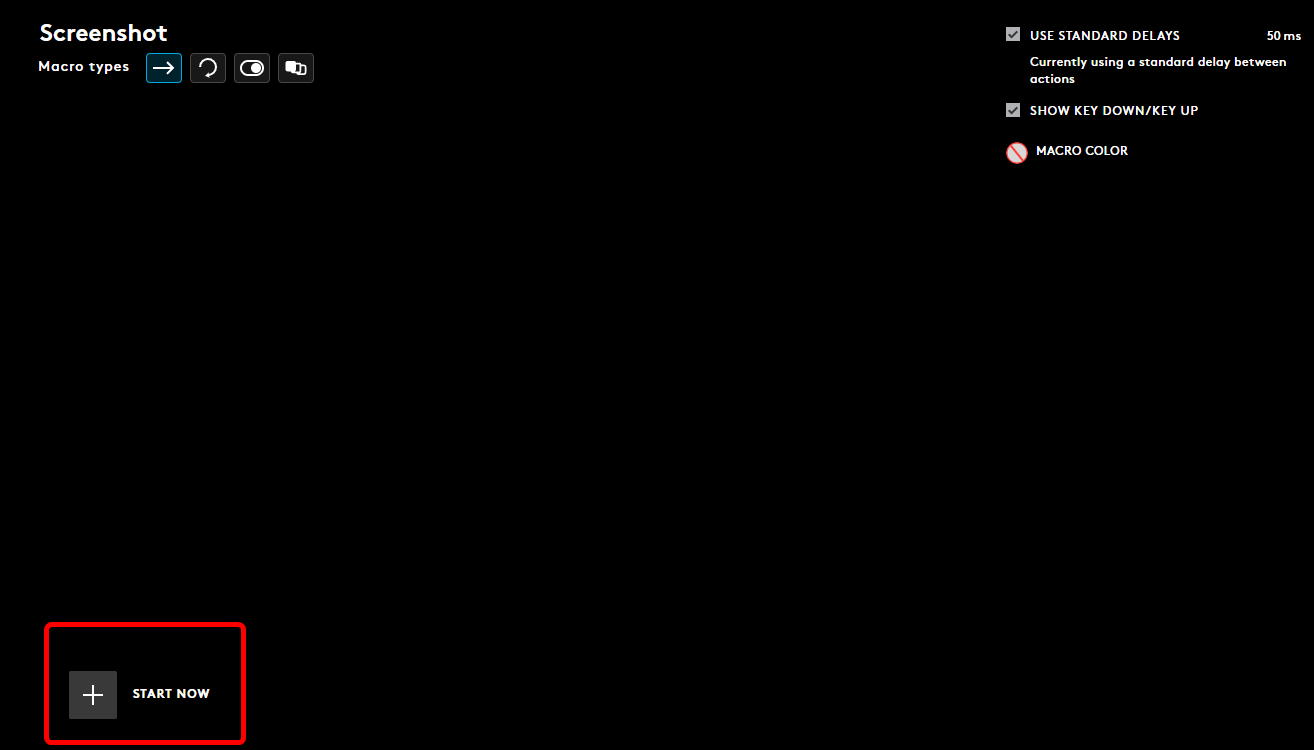
Next, click the “Start Now” button.
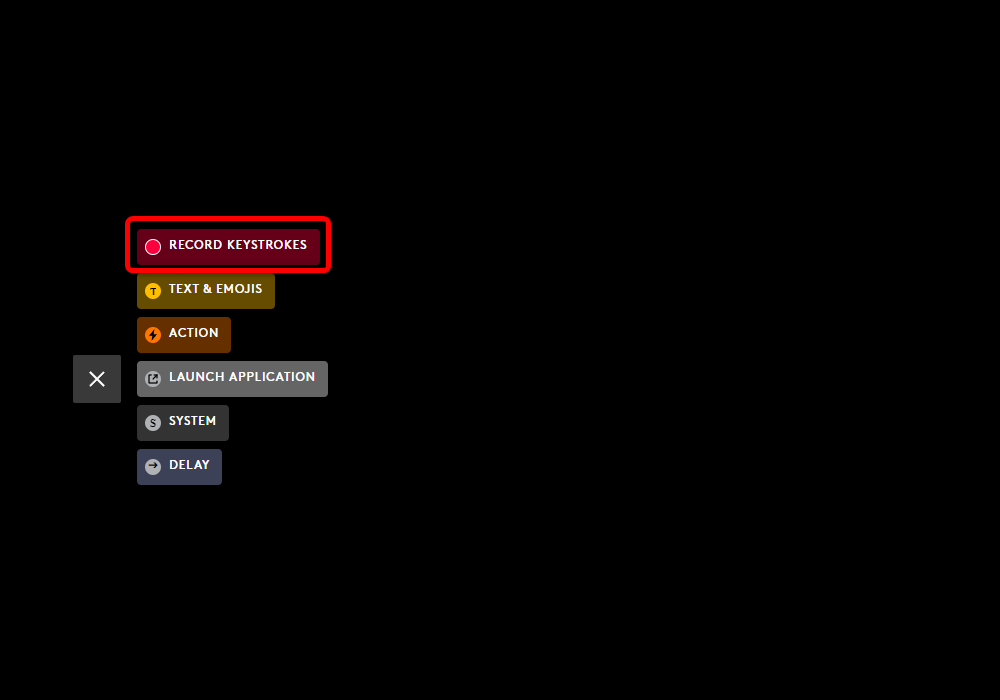
Since we’re going to record the Win+PrtSc combo that captures screenshots and automatically saves them in the Screenshots folder, select the “Record Keystrokes” option on the following screen.
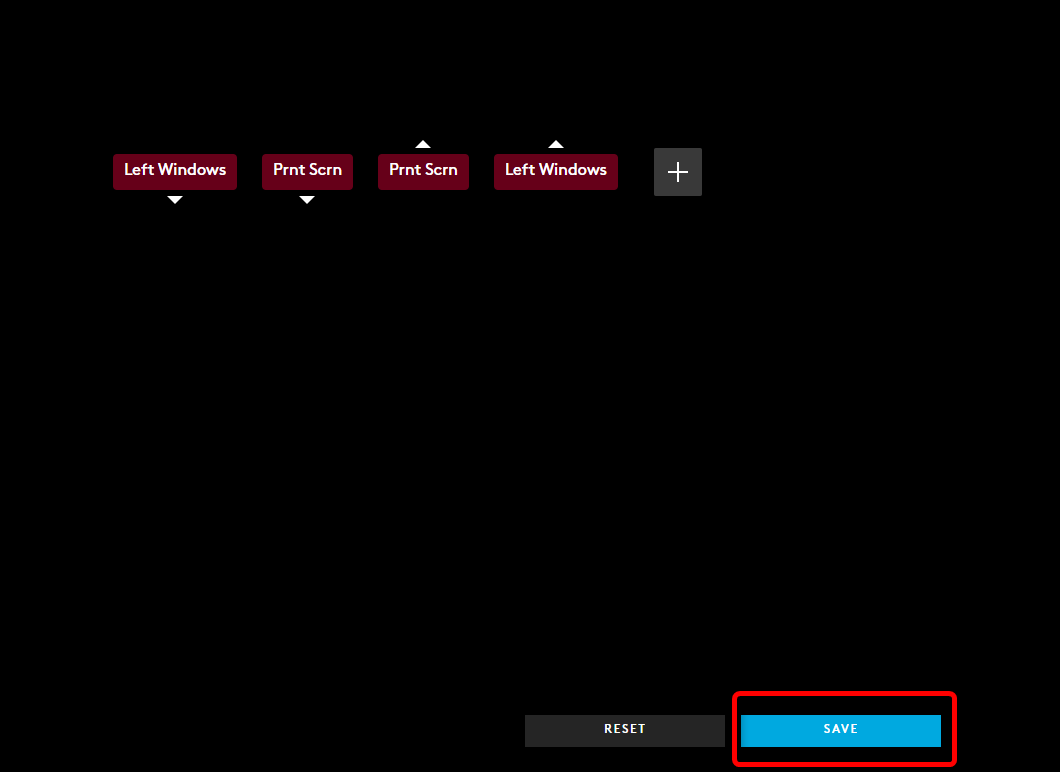
Next, press Win+PrtSc, click the “Stop Recording” button, and click Save.
Next, just click and drag the macro you just recorded to the button you want to take screenshots with. In my case, it was the “Forward” button.
Now, you can take screenshots with a mouse button instead of pressing multiple buttons on your keyboard or hitting PrtSc, opening Paint, and pasting the screenshot there.
If you don’t have a Logitech mouse, the steps you’ll need to take will be different but ultimately the process should be similar: create a new macro, record keystrokes, then save and assign it to a button.
Sacrificing a Button to Take Screenshots Is Far From Ideal
Taking screenshots with a single mouse button is a much better and more elegant solution than using your keyboard. For example, you can grab screenshots during intense in-game moments quickly, even when you’re shooting or aiming down sights instead of taking your hand off the mouse to hit the Win+PrtSc combo.
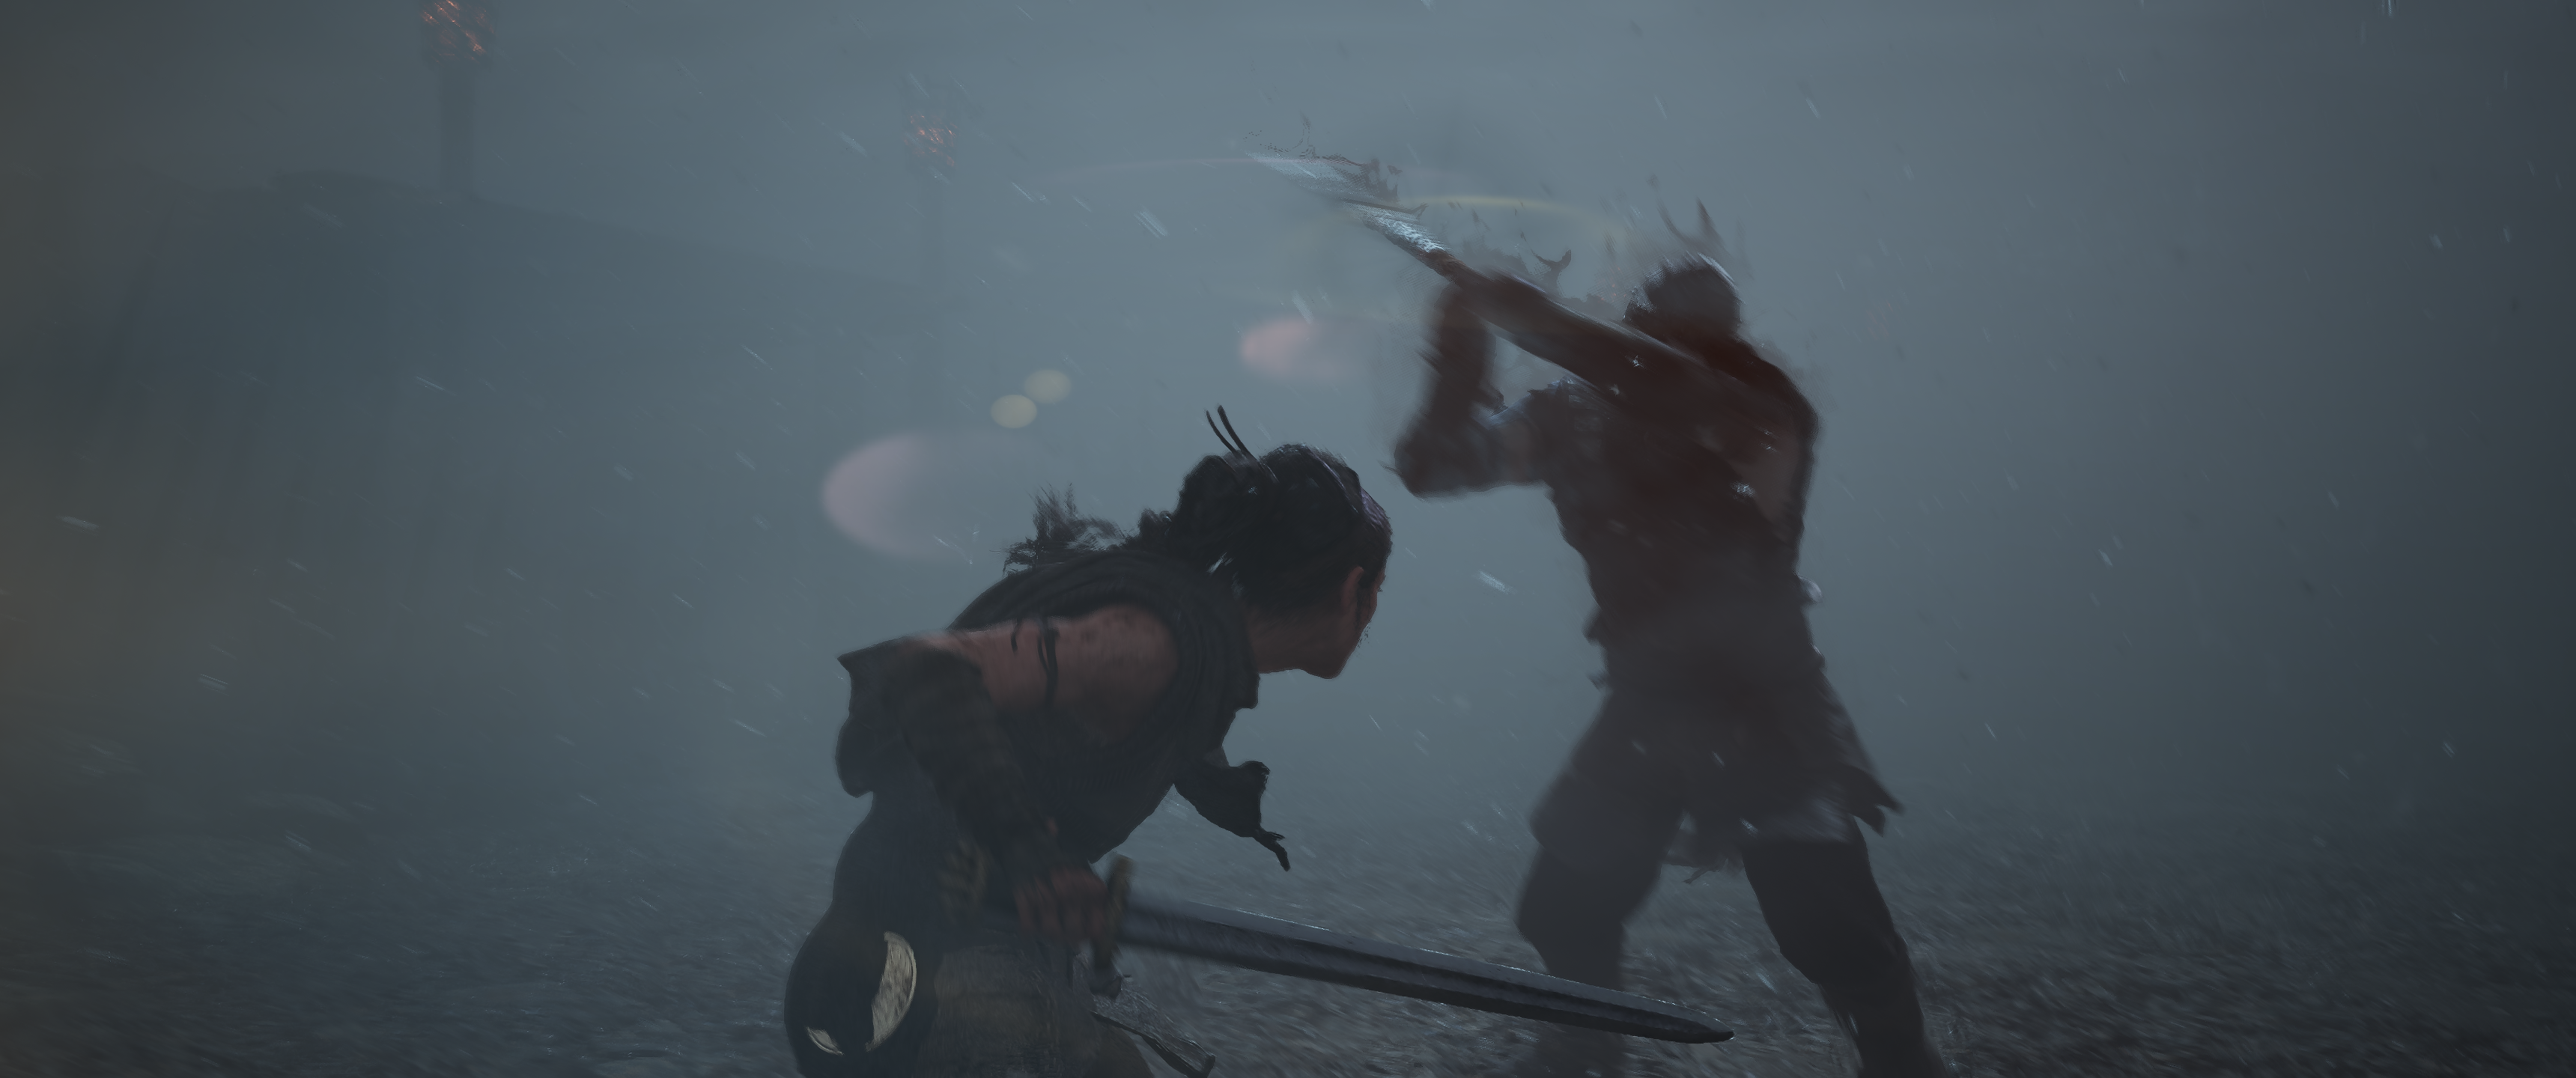
This allows you to grab some cool, action-heavy screen grabs. Just look at this awesome screenshot I took in Hellblade II. I managed to snag the screenshot while avoiding the enemy’s attack, which I couldn’t pull off if I had used the keyboard:
The ability to grab screenshots at the exact moment you want is also handy for games like GTA V, where you accidentally stumble upon breathtaking vistas all the time while driving or flying and looking at the sights.
But reaching for the keyboard means taking your hands off the mouse and also losing control of the vehicle you’re in, which recenters the camera or leads to the vehicle crashing and ruining that perfect screenshot moment. I’ve probably had hundreds of such moments ruined by taking my hands off the mouse and WASD keys while trying to snag a screenshot.
However, sacrificing a mouse button to be able to quickly take screenshots is far from ideal, especially since a large majority of modern gaming mice have only a couple of extra buttons. The only reason I have done it now is because I switched to a dual mouse setup so I don’t need the “Forward” button on my gaming mouse anymore since I only use it when gaming.
That said, there’s a chance you own a mouse with lots of extra buttons, such as an MMO mouse like the Razer Naga, or a rodent with a bunch of extra buttons, such as the Logitech G502, Logitech G903, or the Razer Basilisk V3 Pro. In that case, reserving one of the buttons for taking screenshots shouldn’t be a big deal.
We Need Mice with Dedicated Screenshot Buttons
Personally, I love ultralight gaming mice. Some of the best gaming mice feature an ultralight design. But I don’t like the fact that most of them come with only three extra buttons: Back, Forward, and the DPI switching button.
I use the Back and Forward buttons all the time while browsing the web, and the DPI button is also quite important because I like to have two different DPI settings for regular usage and gaming (or aiming and fine-aiming). I couldn’t sacrifice any of my extra buttons for a screenshot button back when I used a single mouse.
Adding a fourth extra button, be it a dedicated screenshot or a fully programmable button, would be awesome because it would allow everyone to take cool, center-of-the-action screenshots with ease instead of pulling off kung fu moves to grab a perfect screenshot with a keyboard, which often ends in missing the moment and ending with a dud.
There’s another solution, but it involves giving up on the mouse completely. Every modern controller has a dedicated screenshot (or “Share”) button that’s perfect for this. It’s one reason that every PC gamer should have a controller.


